www.it-ebooks.info
www.it-ebooks.info
Early Praise for Cucumber Recipes
With Cucumber Recipes you feel like the authors are right there with you, offering
you advice, showing you hidden gems, or gently chastising you for things you
know you shouldn’t be doing. From general advice about taming unruly test suites
or scaling out across multiple servers, to craziness like testing embedded Arduino
hardware projects, they manage to cover an enormous amount of ground in a
small space. Prepare for a fun and informative ride.
вћ¤ Dan North
Originator of BDD and author of the RSpec story runner (Cucumber’s
predecessor)
There are many cookbooks but very few “chef books.” Cucumber Recipes is inspiring
enough to qualify as a chef book. If there’s a will and a desire to use Cucumber
in the process, Cucumber Recipes will more than likely show you a way...or many
ways! From the basic to the esoteric, there’s something for everyone in Cucumber
Recipes.
вћ¤ Michael Larsen
Senior quality assurance engineer, SocialText
It is good to see that a free tool like Cucumber has been able to build up a community that treats BDD as its own child and carries it to nearly every possible
platform and technology. This book provides a closer look at the details.
вћ¤ GГЎspГЎr Nagy
Developer coach at TechTalk, creator of SpecFlow
www.it-ebooks.info
If you’re automating tests of any kind using Cucumber, in any language, against
any type of software, you need this cookbook. Its recipes will help you write useful,
easily maintained tests for even the most puzzling scenarios. Like all good cookbooks, it teaches good techniques and principles that will help you improve all
your tests. Best of all, you can actually code the examples yourself, and learn by
doing.
вћ¤ Lisa Crispin
Co-author, Agile Testing: A Practical Guide for Testers and Agile Teams
Cucumber Recipes has testing solutions for a variety of platforms. It is a powerful
book that gives us useful tips to use BDD in our chosen environment. To realize
the power of BDD, Cucumber Recipes is a must on every software test engineer’s
table.
вћ¤ Kavitha Naveen
Senior lead—quality engineering
www.it-ebooks.info
Cucumber Recipes
Automate Anything with BDD Tools and Techniques
Ian Dees
Matt Wynne
Aslak HellesГёy
The Pragmatic Bookshelf
Dallas, Texas • Raleigh, North Carolina
www.it-ebooks.info
Many of the designations used by manufacturers and sellers to distinguish their products
are claimed as trademarks. Where those designations appear in this book, and The Pragmatic
Programmers, LLC was aware of a trademark claim, the designations have been printed in
initial capital letters or in all capitals. The Pragmatic Starter Kit, The Pragmatic Programmer,
Pragmatic Programming, Pragmatic Bookshelf, PragProg and the linking g device are trademarks of The Pragmatic Programmers, LLC.
Every precaution was taken in the preparation of this book. However, the publisher assumes
no responsibility for errors or omissions, or for damages that may result from the use of
information (including program listings) contained herein.
Our Pragmatic courses, workshops, and other products can help you and your team create
better software and have more fun. For more information, as well as the latest Pragmatic
titles, please visit us at http://pragprog.com.
The team that produced this book includes:
Jackie Carter (editor)
Potomac Indexing, LLC (indexer)
Kim Wimpsett (copyeditor)
David J Kelly (typesetter)
Janet Furlow (producer)
Juliet Benda (rights)
Ellie Callahan (support)
Copyright В© 2013 The Pragmatic Programmers, LLC.
All rights reserved.
No part of this publication may be reproduced, stored in a retrieval system, or
transmitted, in any form, or by any means, electronic, mechanical, photocopying,
recording, or otherwise, without the prior consent of the publisher.
Printed in the United States of America.
ISBN-13: 978-1-937785-01-7
Encoded using the finest acid-free high-entropy binary digits.
Book version: P1.0—February 2013
www.it-ebooks.info
Contents
Foreword
.
.
.
.
.
.
.
.
.
.
.
.
.
vii
Acknowledgments
.
.
.
.
.
.
.
.
.
.
.
xi
Introduction
1.
.
.
.
.
.
.
.
.
.
.
.
xiii
Cucumber
Recipe 1.
Recipe 2.
Recipe 3.
Recipe
Recipe
Recipe
Recipe
Recipe
Techniques
.
.
.
.
.
.
.
.
.
.
Compare and Transform Tables of Data
Generate an RTF Report with a Custom Formatter
Run Slow Setup/Teardown Code with Global
Hooks
4.
Refactor to Extract Your Own Application Driver
DSL
5.
Define Steps as Regular Ruby Methods
6.
Compare Images
7.
Test Across Multiple Cores
8.
Test Across Multiple Machines with SSH
9.
Run Your Features Automatically with Guard and
Growl
10. Add Cucumber to Your Continuous Integration
Server
11. Publish Your Documentation on Relish
12. Test Through Multiple Interfaces Using Worlds
13. Manipulate Time
14. Drive Cucumber’s Wire Protocol
15. Implement a Wire Protocol Listener
Java .
Recipe
Recipe
Recipe
Recipe
.
16.
17.
18.
19.
Recipe
Recipe
Recipe
Recipe
Recipe
Recipe
Recipe
2.
.
.
.
.
.
.
.
.
.
.
.
.
.
Use Cucumber Directly with JRuby
Use Cucumber with Java via Cucumber-JVM
Drive a Spring + Hibernate Project
Test a Grails App Using grails-cucumber
www.it-ebooks.info
.
1
2
7
13
18
22
27
33
36
41
47
55
61
67
72
75
83
84
87
92
99
Contents
Recipe 20. Test Scala Code
Recipe 21. Test Clojure Code
Recipe 22. Drive a Swing Interface with FEST
104
109
111
3.
.NET and Windows .
.
.
.
.
.
.
.
Recipe 23. Get Good Text Output on Windows
Recipe 24. Test .NET Code with SpecFlow
Recipe 25. Drive a Windows App Using White
Recipe 26. Test Windows GUIs with AutoIt
Recipe 27. Test on Windows Phone
4.
Mobile
Recipe
Recipe
Recipe
Recipe
and
28.
29.
30.
31.
Recipe
Recipe
Recipe
Recipe
Recipe
32.
33.
34.
35.
36.
5.
• vi
.
.
.
117
118
124
130
135
139
Web
.
.
.
.
.
.
.
.
.
.
Test on iOS Using Frank
Test Android Apps with Calabash
Parse HTML Tables
Drive JavaScript/CoffeeScript Using
Cucumber-JS
Test a Web App Using Watir
Test a PHP App with cuke4php
Play Back Canned Network Data Using VCR
Drive a Flash App Using Cuke4AS3
Monitor a Web Service Using Nagios and
Cucumber
.
147
148
153
160
164
168
173
181
185
195
Other Languages and Platforms .
.
.
.
.
.
.
.
Recipe 37. Drive a Mac GUI Using AppleScript and System
Events
Recipe 38. Drive a Mac GUI Using MacRuby and AXElements
Recipe 39. Test Python Code Using Lettuce
Recipe 40. Test Erlang Code
Recipe 41. Test Lua Code Using cucumber-lua
Recipe 42. Test a GUI on Linux, Mac, or Windows with Sikuli
Recipe 43. Test an Arduino Project Using Serial
A1. RSpec Expectations
.
A1.1 Basics
A1.2 Custom Matchers
A1.3 Alternatives
201
202
209
214
217
221
225
230
.
.
.
.
.
.
.
.
.
237
237
238
239
Bibliography
.
.
.
.
.
.
.
.
.
.
.
.
241
Index
.
.
.
.
.
.
.
.
.
.
.
.
243
.
.
www.it-ebooks.info
Foreword
There was a time when one could analyze all that a program needed to do
and then write the program that met that need. This stopped being a winning
strategy when computers got big enough and fast enough to hold a description
of the problem, not just the solution.
I embraced this change that went by the name of object-oriented programming.
The advice was to divide large programs into parts that captured natural
diversity. Then we were to program the parts to ask other parts for results
without saying exactly how these results were to be achieved. This sounded
simple. We no longer had to think everything through all of the time. Then,
when we discovered one more case late in development, we were thankful we
kept that complexity at a distance.
It was a good plan, but it turned out to be not quite that simple. Not only was
there more than one way to chop up a program into parts, there was no easy
way to tell which approach was going to prove to be leveraged when unforeseen
needs surfaced, as they always do.
Agile
We forged ahead. We found dozens of techniques that helped keep track of
what we had done, where we were going, and, especially, how to say “yes, we
can” when asked to do something never once mentioned until our programs
were used. When we say Agile today, we’re distinguishing ourselves from the
days when we would resist change even if it meant finishing a program that
wouldn’t be used.
We asked our pioneers to experiment. We asked that they try new things and
share with each other how they worked out. We asked our best developers to
think about these new problems: where have we been, where are we going,
and how will we know when we get there?
This book carries that tradition forward. Let me explain how.
www.it-ebooks.info
report erratum • discuss
Foreword
• viii
Patterns
A program is a mathematical object that follows precise rules. This stops
being important when we can no longer fully analyze our problems as we
might a proof. Our progress toward Agile accelerated when we started cataloging solutions rather than deriving new ones from scratch each time they
occurred.
A recurring pattern became an object of interest. A recurring problem in a
context and a solution known to work—this is something worth sharing.
When we started naming and documenting these patterns, we created a literature that had not yet existed. Practical problem solving was respected.
Well-worn solutions were judged valuable...more valuable even than the most
innovative ideas.
Although Cucumber offers a new and innovative way of pushing Agile forward,
there is no reason for every Cucumber user to rediscover the contents of this
book. The solutions come from many, for sure. But the simple existence of
this catalog will raise our collective competence as we come to know of solutions whether we need them right now or not.
This book covers lots of ground. Some of it you will use immediately; other
parts you will later. However, you will be served well to know the range of
problems already solved.
Platforms
We appreciate how computers become more powerful each year. We hardly
think of them as computers anymore. But they still need to be programmed.
When we say Agile means “yes, we can,” we make a promise that becomes
more difficult as capabilities proliferate. And each capability has its own
constituents that want our attention.
Cucumber makes much of artifacts that can be shared across disciplines. A
developer and a business analyst will bring different skills to a project. But
if they are to coordinate their work, there must be some things they share.
Cucumber meets that need.
This same distance from implementation allows Cucumber to straddle today’s
diverse implementation technologies. As our customers come to know many
platforms, they expect us to know them too. As developers we begin to feel
new pressure. Each platform has its quirks. That is where this book excels.
As you are pressed into delivery on new platforms, you can bring Cucumber
with you. But how do you hook it up? Read how here.
www.it-ebooks.info
report erratum • discuss
Progress
• ix
Progress
Remember that object-oriented programming promised that we would say
what we want done, not how to do it. This works for objects because the how
changes faster than the what. Our objects have some new longevity.
An only occasionally realized benefit of my own Framework for Integrated
Test (FIT) was to create domain-based artifacts that could outlive the turnover
of technology. Cucumber steps up to deliver broadly (based mostly on words)
where my solution (based mostly on numbers) has been focused.
It’s hard for any development team to think about the next technology when
delivery on the current technology is so in demand. This book will help.
Although you can jump to the solution you need today (and by all means do
this!) and get today’s work done, I ask that you familiarize yourself with all
that is here so that you can understand the relentless pressure that innovation
places on your work.
I’ve had the pleasure of following object technology out of the research laboratories and into the larger world. I’ve faced problems, many unanticipated,
and found their solutions as interesting as they are useful. The recipes here
are as interesting as they are useful. Enjoy.
Ward Cunningham
Inventor of FIT (inspiration to Cucumber)
Portland, Oregon, 2013
www.it-ebooks.info
report erratum • discuss
Acknowledgments
We are grateful to the many people who made this book possible. Thanks to
our beta readers, who helped us catch bugs and steer the direction of the
book. These include Chuck van der Linden, Massimo Manca, Bob Allen, gb,
Dean Cornish, Pete Hodgson, Paul Harris, Wari Wahab, Ivan Ryan, Vijay
Khurana, and Brett Giles. We would also like to thank our alert technical
reviewers, including GГЎspГЎr Nagy, Luis Lavena, Josh Chisholm, Tom Coxen,
Jeremy Crosen, Andrew Havens, Andy Lindeman, Kavitha Naveen, Perry
Hunter, and Seth Craighead.
Special thanks to Ward Cunningham for his inspirational work in bringing
software and people closer together and for the lovely foreword.
Thanks to our tireless editor, Jackie Carter, and to everyone else at the
Pragmatic Programmers who helped shepherd this book from idea to release:
Susannah Pfalzer, Janet Furlow, Dave Thomas, and Andy Hunt, to name a
few.
Ian would like to thank his fellow authors, Matt and Aslak, for their guidance
in the early days of the project and for the words and code they crafted for
our readers. He’d also like to thank his wife, Lynn, and children, Avalon and
Robin, for prying him away from the keyboard once in a while. Matt would
like to thank Anna and Ian.
www.it-ebooks.info
report erratum • discuss
Introduction
You can use Cucumber to test anything. Websites, desktop programs, mobile
applications, networked services, embedded devices—you name it.
Although it came to prominence in the Rails testing world, Cucumber is first
and foremost a communication tool. It helps you express in clear terms what
your software is supposed to do and why.
Cucumber is also a polyglot tool. It was designed from the beginning to be
easily portable to different languages and platforms. The result is that you
can enjoy the benefits of living documentation, no matter the software
environment.
Who This Book Is For
This book isn’t an introduction to Cucumber. If you’re looking for a beginner’s
guide, you might want to start with The Cucumber Book [WH11] by Matt Wynne
and Aslak Hellesøy (two of the contributors to the book you’re reading now).
There’s also quite a bit of getting-started information on the official Cucumber
site.1
Cucumber Recipes assumes you’ve grasped the basics of Cucumber and you
understand the benefits of the outside-in development process.2 Our book
builds on the experience you’ve gained while using Cucumber on your team.
We give you techniques to apply Cucumber in the various situations you’ll
encounter in the wild.
How to Use This Book
Each recipe in this book stands alone. In a few pages, we seek to show just
enough information to get you started with each technique. We can’t cover
every nuance of the tool in this space, but we can get you over the most
common hurdles and show you where to look next.
1.
2.
http://cukes.info
http://agilecoach.typepad.com/agile-coaching/2012/03/bdd-in-a-nutshell.html
www.it-ebooks.info
report erratum • discuss
Introduction
• xiv
You can read the recipes in any order. If you’re a web developer, you may
want to start with the block of recipes beginning with Recipe 30, Parse HTML
Tables, on page 160. If Windows is your primary platform, see Chapter 3, .NET
and Windows, on page 117. Java developers should start in Chapter 2, Java,
on page 83.
To learn techniques for testing iOS and Android apps, visit Chapter 4, Mobile
and Web, on page 147. For other languages and platforms such as Erlang,
Python, Mac OS X, and Linux, see Chapter 5, Other Languages and Platforms,
on page 201.
Throughout your exploration, you may want to refer to Chapter 1, Cucumber
Techniques, on page 1 for general tips that will serve you well, no matter
what platform you’re on.
Getting the Tools You’ll Need
This book contains recipes for Ruby, Java, C#, PHP, Scala, Clojure, Erlang,
and more. Cucumber-Ruby is the original and most popular flavor of
Cucumber, so several of our recipes use Ruby. Most of these will run across
a variety of Ruby implementations, but we recommend version 1.9 unless
otherwise noted in the ingredients.
On Mac and Linux systems, we recommend a managed Ruby environment
such as RVM3 or rbenv.4 These tools make it easy to install Ruby and its
dependencies. Both of these tools require a C compiler. Mac users will need
to install the Xcode Command-Line Tools;5 Ubuntu users should run sudo aptget install build-essential.
For Windows, we suggest the RubyInstaller project6 and its DevKit add-on,7
paired with a Ruby switching tool such as Pik.8
Once you have Ruby, installing Cucumber is easy.
$ gem install cucumber
You’ll also need an assertion library to mark whether each step is passing or
failing. Cucumber doesn’t care which one you use; for this book, we use the
expectations system from RSpec.
3.
4.
5.
6.
7.
8.
http://rvm.beginrescueend.com
https://github.com/sstephenson/rbenv
https://developer.apple.com/xcode
http://rubyinstaller.org
http://rubyinstaller.org/add-ons/devkit
https://github.com/vertiginous/pik
www.it-ebooks.info
report erratum • discuss
Online Resources
• xv
$ gem install rspec-expectations
We like RSpec expectations for their ease of reading. If this is your first time
writing this style of assertion, you might want to take a quick peek at our
refresher course in Appendix 1, RSpec Expectations, on page 237.
Online Resources
This book has its own web page9 where you can download the code for all the
examples. In the electronic versions of this book, you can click the filename
above any code example to download the source file directly. As we make
changes to the code, we’ll post them to the book’s GitHub repository10 as well.
The book’s web page also has a discussion forum where you can connect to
other readers and to us. If you find bugs, typos, or other annoyances, please
let us and the world know about them on our errata page.
Last but not least, we’re also running a blog11 where we’ll post bonus recipes
on the topics we just didn’t have room for in the book. We welcome guest
recipe posts from anyone who’d like to fork the blog on GitHub.12
Now, let’s jump into those recipes!
9.
10.
11.
12.
http://pragprog.com/titles/dhwcr
https://github.com/cucumber/cucumber-recipes-book-code
http://cukerecip.es
https://github.com/cucumber/cukerecip.es
www.it-ebooks.info
report erratum • discuss
CHAPTER 1
Cucumber Techniques
This chapter contains general Cucumber tips that aren’t related to any particular platform. We’ll look at ways to tame the complexity of a large test suite,
produce custom-formatted reports, and test code that’s running on a remote
server or embedded device.
www.it-ebooks.info
report erratum • discuss
Chapter 1. Cucumber Techniques
•2
Recipe 1
Compare and Transform Tables of Data
Problem
Your tests are in English, but your data is in HTML. What you and your stakeholders call a last name, your app calls customer_name_last. What you call February
24, your app calls 2012-02-24T10:24:57-08:00. You need to translate between the two.
Ingredients
• Ast::Table,1 Cucumber’s table-crunching workhorse
• Ruby’s built-in BigDecimal for representing currencies2
Solution
In this recipe, we’ll assume we’re getting data from our app using a GUI
automation library or web scraping framework. The data will be in whatever
format the behind-the-scenes API provides. This format may be grisly, so we
don’t want it in our human-readable Cucumber tests.
How do we address this mismatch between our top-level tests and the
underlying API? We’ll use Cucumber to transform the table in our .feature file
to whatever the API needs. We can change columns, convert data inside cells,
or perform tricky custom transformations.
This recipe comes in several flavors so that you can practice applying all these
techniques.
Renaming Headers
Imagine you have the following test steps:
tables/tables.feature
Scenario: Renaming headers
Given I am logged in as a buyer
When I search for available cars
Then I should see the following cars:
| color | model
|
| rust | Camaro |
| blue | Gremlin |
1.
2.
http://rdoc.info/github/cucumber/cucumber/Cucumber/Ast/Table
http://www.ruby-doc.org/stdlib-1.9.3/libdoc/bigdecimal/rdoc/index.html
www.it-ebooks.info
report erratum • discuss
Compare and Transform Tables of Data
•3
Your team has standardized on the U.S. spelling of color, but the API you’re
calling to scrape the data from your app happens to use the U.K. spelling.
tables/step_definitions/table_steps.rb
When /^I search for available cars$/ do
@cars = [{'colour' => 'rust', 'model' => 'Camaro'},
{'colour' => 'blue', 'model' => 'Gremlin'}]
end
If you compare these tables directly in Cucumber, you’ll get a test failure,
because the color column name in your examples doesn’t match the colour key
returned by the API.
Cucumber’s map_headers!() method lets you transform the table in your examples
into the format expected by your underlying API.
tables/step_definitions/table_steps.rb
Then /^I should see the following cars:$/ do |table|
table.map_headers! 'color' => 'colour'
table.diff! @cars
end
If your team members have written several scenarios and have been alternating
between spellings…well, you really should pick one and standardize. But in
the meantime, you can pass a regular expression or a block to map_headers!()
for more control over the column renaming.
table.map_headers! /colou?r/ => 'colour'
table.map_headers! { |name| name.sub('color', 'colour') }
What if you need to change the values inside the table, not just the headers?
Converting Data Inside Cells
Ast::Table can do more than just rename columns. It can manipulate the data
inside cells too. Imagine you have the following scenario:
tables/tables.feature
Scenario: Converting cells
Given I am logged in as a buyer
When I view warranty options
Then I should see the following options:
| name
| price |
| Platinum | $1000 |
| Gold
| $500 |
| Silver
| $200 |
Cucumber reads every table cell as a string. So, it will see the price of the
platinum plan, for instance, as the string '$1000'.
www.it-ebooks.info
report erratum • discuss
Chapter 1. Cucumber Techniques
•4
Ian says:
Not a Moment Too Soon
One of our older projects used the RSpec Story Runner, Cucumber’s predecessor. At
the time, the Story Runner didn’t support tables or tags. For one particularly repetitive
test, we implemented our own ad hoc version.
# Modes: Regular, Analysis, Time
Scenario: Rounding
When I enter 1.000001
Then the value should be 1
We would preprocess the scenario in Ruby and generate three scenarios that would
put the hardware into Regular, Analysis, or Time mode before running the test.
Thank goodness Cucumber came along!
But this hypothetical used-car API returns the prices as BigDecimal values like
1000.0. It also furnishes some extra information you’re not using for this test:
an administrative code for each plan.
tables/step_definitions/table_steps.rb
require 'bigdecimal'
When /^I view warranty options$/ do
_1000 = BigDecimal.new '1000'
_500 = BigDecimal.new '500'
_200 = BigDecimal.new '200'
@warranties = [{'name' => 'Platinum', 'price' => _1000, 'code' => 'P'},
{'name' => 'Gold',
'price' => _500, 'code' => 'G'},
{'name' => 'Silver',
'price' => _200, 'code' => 'S'}]
end
You need to convert the strings from your scenario into numbers to compare
against your API. You can do this with Cucumber’s map_column!() method. It
takes a column name and a Ruby block to run on every cell in that column.
tables/step_definitions/table_steps.rb
Then /^I should see the following options:$/ do |table|
table.map_column!(:price) { |cell| BigDecimal.new(cell.sub('$', '')) }
table.diff! @warranties
end
Notice that Cucumber didn’t complain that the API had an extra code column
that’s not used in the scenario. In the next section, we’ll talk about these
kinds of table structure differences.
www.it-ebooks.info
report erratum • discuss
Compare and Transform Tables of Data
•5
Comparing Tables Flexibly
By default, Cucumber ignores surplus columns, that is, columns that are
present in your internal data but not in your scenario. Any other difference
in table structure—missing columns, surplus rows, or missing rows—will
show up as a test failure.
You can change this default by passing an options hash to diff!() containing
3
:missing_col or :surplus_col keys with true or false. (true means “be strict.”) For
instance, if you want Cucumber to report the extra code column as a failure,
you could use the following call:
table.diff! @warranties, :surplus_col => true
The three table operations you’ve seen so far—renaming headers, converting
cells, and comparing structure—will get you through most of the situations
where you need to map your Cucumber table to your underlying data. For
those last few edge cases, you have one more trick up your sleeve.
Passing Cucumber Tables into Your Code
If your needs are really complex, you can always extract the data from where
it’s bottled up in the Ast::Table object and do whatever crunching you need on
plain Ruby objects.
There are several ways to get the raw data out of a table. You can call rows()
or hashes() to get the cells (minus the headers) as an array of arrays or an array
of hashes. Here’s what the output looks like with the table from the car scenario from the beginning of this recipe:
basic.rb(main):001:0> table.rows
=> [["rust", "Camaro"], ["blue", "Gremlin"]]
basic.rb(main):002:0> table.hashes
=> [{"color"=>"rust", "model"=>"Camaro"}, {"color"=>"blue", "model"=>"Gremlin"}]
basic.rb(main):003:0>
If you need the header row as well, you can call raw().
raw.rb(main):001:0> table.raw
=> [["color", "model"], ["rust", "Camaro"], ["blue", "Gremlin"]]
raw.rb(main):002:0>
If your headers are in the first column (rather than the first row), you can
transpose() the table or call rows_hash().
3.
Cucumber also allows you to ignore surplus or missing rows, but that use is rarer.
www.it-ebooks.info
report erratum • discuss
Chapter 1. Cucumber Techniques
•6
transpose.rb(main):001:0> table.transpose
=>
|
color |
rust
|
blue
|
|
model |
Camaro |
Gremlin |
transpose.rb(main):002:0> table.rows_hash
=> {"color"=>"model", "rust"=>"Camaro", "blue"=>"Gremlin"}
transpose.rb(main):003:0>
Using the techniques in this recipe, you can keep your Cucumber features
in the language of the problem domain. The mundane details of data formats
and APIs will be confined to your Ruby step definitions, where they belong.
Further Exploration
This recipe assumes you’re calling some underlying library, such as a GUI
automation framework or a web scraping API, to get the values you’re comparing against your scenarios. To see an example of how to parse HTML into
a Cucumber-compatible table, see Recipe 30, Parse HTML Tables, on page
160.
www.it-ebooks.info
report erratum • discuss
Generate an RTF Report with a Custom Formatter
•7
Recipe 2
Generate an RTF Report with a Custom Formatter
Problem
You need the results of your tests to be in a specific format that’s not one of
the ones built into Cucumber. For instance, you might need everything
typeset in a word processing document or sent to a network service.
Ingredients
• A Ruby 1.9–compatible update to an old RTF generation library, called
clbustos-rtf4
• A word processor for viewing your report
Solution
In situations where you need a specific kind of output, you can write a custom
formatter,5 which is a simple Ruby class that generates the output format you
need. All of Cucumber’s built-in formatters—such as HTML and PDF—use
the same technique.
This recipe will show you how to write a formatter to generate a minimal Rich
Text Format (RTF) file, which can be read by most word processors.6
Our custom formatter will be just a plain Ruby class that follows a few simple
conventions. Before we get into the specifics, let’s talk about how formatters
work.
Start with Callbacks
If you’ve ever parsed XML using a stream-based parser like Nokogiri::SAX, you’ve
seen this flow before. You provide a Ruby class with a number of callback
methods with names prescribed by the standard. The parser invokes one of
your callbacks whenever it sees the start of an XML tag, the end of a document, and so on.
4.
5.
6.
https://github.com/clbustos/rtf
https://github.com/cucumber/cucumber/wiki/Custom-Formatters
http://en.wikipedia.org/wiki/Rich_Text_Format
www.it-ebooks.info
report erratum • discuss
Chapter 1. Cucumber Techniques
•8
Cucumber provides a similar mechanism called events. While Cucumber
runs, it will see various events: the beginning of a scenario, a passed or failed
step, and others. For each event, it looks for a specific method in your formatter. The method names are self-descriptive: before_scenario(), after_step_result(), and
so on.
You don’t have to define a method for every possible event Cucumber might
call; in fact, you don’t have to define any of them. If your class is missing a
particular event, Cucumber just moves on to the next one. So, you can
actually start with an empty Ruby class and gradually add methods to it as
you need.
Let’s see that in action. Create a new project directory, and save the following
text in humpty.feature:
formatters/humpty.feature
Feature: Humpty Dumpty
Scenario: Fall
Given I am on a wall
When I lose my balance
Then I should have a great fall
Scenario: Reassembly
Given all the king's horses
And all the king's men
When they attempt to put me back together again
Then I should be in one piece
Make a support subdirectory; then add the following outline to support/rtf_formatter.rb:
formatters/support/rtf_formatter.rb
require 'rtf'
class RtfFormatter
end
Since this file is in the support directory, Cucumber will load it automatically.
All you need to do to use your new formatter is pass the -f flag on the command
line. Go ahead and try your new formatter.
$ cucumber -f RtfFormatter humpty.feature
Your formatter doesn’t have any events yet, so the output isn’t very interesting.
It’s time to change that.
www.it-ebooks.info
report erratum • discuss
Generate an RTF Report with a Custom Formatter
•9
Generate a Simple Document
When Cucumber starts a test run, it will create an instance of your RtfFormatter
class. So, the initializer is a good place to create a new RTF document.
formatters/support/rtf_formatter.rb
Line 1 def initialize(step_mother, io, options)
2
@io
= io
3
font = RTF::Font.new(RTF::Font::SWISS, 'Verdana')
@rtf = RTF::Document.new font
6 end
4
5
Cucumber will always pass three arguments to your initializer, but you need
to keep a reference only to the middle one, an IO object where you’ll write the
report.
On line 5, you create a new Document instance and hang onto it so your events
can add text to it.
Now you’re ready for your first event: after_step_result().
formatters/support/rtf_formatter.rb
def after_step_result(keyword, match, multiline, status,
exception, indent, background,
file_colon_line)
@rtf.paragraph do |para|
para << (status.to_s + ': ' + keyword + match.format_args)
end
end
That’s a lot of parameters! Fortunately, you need to worry only about three
of them for now. keyword will be Given, When, or Then. match is a Ruby object
containing information about the text and arguments of the step; you call its
format_args() method to generate a simple string, such as “ I am on a wall.” status
is a Symbol that indicates whether the step :passed, :failed, was :pending, and so
on.
After all the features run, you’ll generate the RTF output and send it to the
IO object Cucumber handed to you. This behavior goes in the aptly named
after_features() event.
formatters/support/rtf_formatter.rb
def after_features(features)
@io.puts @rtf.to_rtf
end
Rerun your Cucumber script and direct output to a file.
$ cucumber -f RtfFormatter humpty.feature > report.rtf
www.it-ebooks.info
report erratum • discuss
Chapter 1. Cucumber Techniques
• 10
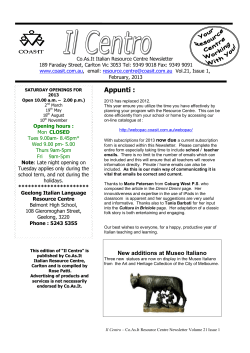
When you open the report in a word processor, you should see something
like Figure 1, Basic RTF report.
Figure 1—Basic RTF report
Add Formatting
So far, this RTF document looks like plain text. Let’s add a little formatting.
Since the goal here is to learn Cucumber rather than the full RTF standard,
there’s no need to get too crazy with the output. For now, a couple of changes
of color and weight will be fine.
This RTF library uses the CharacterStyle class to represent properties such as
color, bold, and italics. You’ll store a few of these in a hash inside your RtfFormatter class so that you can look them up quickly when your event gets called
with a status of :passed, :failed, and so on.
formatters/support/rtf_formatter.rb
Styles = {}
Styles.default = RTF::CharacterStyle.new
Styles[:passed] = RTF::CharacterStyle.new
Styles[:passed].foreground = RTF::Colour.new 0, 127, 0 # green
Styles[:failed] = RTF::CharacterStyle.new
Styles[:failed].foreground = RTF::Colour.new 127, 0, 0 # red
Styles[:failed].bold = true
www.it-ebooks.info
report erratum • discuss
Generate an RTF Report with a Custom Formatter
• 11
Next, modify your after_step_result() method to apply a passing or failing style to
each paragraph.
formatters/support/rtf_formatter.rb
def after_step_result(keyword, match, multiline, status,
exception, indent, background,
file_colon_line)
@rtf.paragraph do |para|
para.apply(Styles[status]) do |text|
text << (status.to_s + ': ' + keyword + match.format_args)
end
end
end
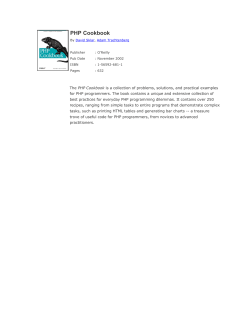
To see what this looks like, write a couple of empty or failing step definitions
for your Cucumber feature. Then, rerun Cucumber with your formatter. You
should see something like Figure 2, RTF report with formatting.
Figure 2—RTF report with formatting
www.it-ebooks.info
report erratum • discuss
Chapter 1. Cucumber Techniques
• 12
Further Exploration
In this recipe, you’ve seen how to write a custom formatter and which methods
are the most important ones for you to provide. Several other events are
available to you, should you need to do something special with tags or tables.
The formatter page on the Cucumber wiki has a complete list.7 You can also
pass the -f debug option when you run your tests to get a list of events as they
occur.
Reading the source code for Cucumber’s built-in formatters is a great way to
learn events by example. In particular, the HTML formatter shows off a lot of
the functionality available.8 Third-party formatters like fuubar are another
helpful learning resource.9
7.
8.
9.
https://github.com/cucumber/cucumber/wiki/Custom-Formatters
https://github.com/cucumber/cucumber/tree/master/lib/cucumber/formatter/html.rb
https://github.com/jeffkreeftmeijer/fuubar
www.it-ebooks.info
report erratum • discuss
Run Slow Setup/Teardown Code with Global Hooks
• 13
Recipe 3
Run Slow Setup/Teardown Code with Global Hooks
Problem
You need to do something that takes a while before your first test, such as
launching a browser or waiting for a desktop application to load. You’re
familiar with Cucumber’s Before hook, which runs once per scenario. But you
want something that runs just once overall so that your setup code doesn’t
slow down your test too much.
Ingredients
•
•
•
•
Cucumber’s built-in env.rb file for setup code
Ruby’s built-in at_exit() hook for teardown code10
The Selenium WebDriver browser automation library11
The Firefox web browser12
Solution
This recipe starts with a simple web testing project. Before we make our
improvements, the code to start and stop the web browser executes inside
regular Cucumber scenario hooks—and so the tests run more slowly than
they should. We’re going to see how to migrate that slow code to global hooks
so it runs only once.
You don’t have to use any special hooks to run setup code when Cucumber
starts. Just put your one-time start-up code in env.rb, and Cucumber will run
it before the first test.
That just leaves one question. With the Before hook, there was a corresponding
After hook where you could shut down whatever application or browser you
were using. Where do you put global teardown code that needs to run only
once?
The answer is to use Ruby’s built-in at_exit() method, which allows you to
register a hook that runs just as Cucumber is exiting.
10. http://www.ruby-doc.org/core-1.9.2/Kernel.html#method-i-at_exit
11. http://seleniumhq.org/docs/03_webdriver.html#ruby
12. http://www.firefox.com
www.it-ebooks.info
report erratum • discuss
Chapter 1. Cucumber Techniques
• 14
Let’s look at a test that suffers from repeated setup code and how you might
convert it to use global hooks.
Setup
First, install Selenium WebDriver.
$ gem install selenium-webdriver
Now, create a simple test that has multiple scenarios.
global_hooks/bank.feature
Feature: Banking
Scenario: Deposit
Given I have $0 in my account
# ...
Scenario: Withdrawal
Given I have $100 in my account
# ...
Fill in a step definition that requires a web browser.
global_hooks/step_definitions/bank_steps.rb
Given /^I have \$(\d+) in my account$/ do |balance|
@browser.navigate.to 'http://example.com/banking'
end
This code presumes you’ve launched a browser and stored a reference to it
in the @browser variable. The traditional approach to managing that variable
is to use Before and After hooks. Let’s look at that technique first and then
migrate to global hooks.
Scenario Hooks
Here’s how you might have added per-scenario setup and teardown code
without this recipe:
global_hooks/support/hooks.rb
require 'selenium-webdriver'
Before do
@browser = Selenium::WebDriver.for :firefox
end
After do
@browser.quit
end
www.it-ebooks.info
report erratum • discuss
Run Slow Setup/Teardown Code with Global Hooks
• 15
Go ahead and run your feature, taking care to time the results. On Mac and
Linux, you’d type the following:
$ time cucumber bank.feature
On Windows with PowerShell installed, you’d type this instead:13
C:\Hooks> Measure-Command {cucumber bank.feature}
You should see Firefox launch and exit before and after every step, and the
total execution time will show it. It’s time to migrate your start-up code to
global hooks.
Global Hooks
You’re going to move your browser-launching code out of the Before hook. But
where to? You may recall that Cucumber is guaranteed to run code in env.rb
before any of your other support code. That makes this file a good place for
one-time setup.
The simplest approach is to run the setup code at file scope and store any
state you need in a global.
global_hooks/support/env.rb
require 'selenium-webdriver'
$browser = Selenium::WebDriver.for :firefox
at_exit { $browser.quit }
Notice the symmetry between the creation of the $browser object and the registering of an at_exit() hook to tear it down when Ruby exits.
Before you run off and change your step definition to use the $browser global
variable, it’s worth considering the maintenance problems that globals can
cause down the road. Take a moment to package up this code into a module
and change the global variable to a class-level attribute instead.
global_hooks/support/env.rb
require 'selenium-webdriver'
module HasBrowser
@@browser = Selenium::WebDriver.for :firefox
at_exit { @@browser.quit }
end
13. PowerShell comes with Windows 7 and can also be downloaded from
http://www.microsoft.com/powershell.
www.it-ebooks.info
report erratum • discuss
Chapter 1. Cucumber Techniques
• 16
Ian says:
To Restart or Not to Restart?
Keeping a long-running program alive works really well for web testing. Since the app
you’re testing is running on a server you control, it’s easy to get it into a known state
before each scenario.
If you’re testing a desktop GUI app, you’ll have to consider the trade-offs. You’ll save
time by launching the app only once. But if it gets into a bizarre state during one
scenario, all the subsequent tests could fail.
One approach is to add a “reset” command to your app so that you can quickly get
it back to a default mode at the beginning of each scenario, without suffering the
overhead of quitting and relaunching it.
Notice that you’re now storing the browser in a class-level attribute @@browser
so that its value will be available across scenarios. In a minute, we’ll add an
accessor function for your step definitions to call.
First, though, take a look at the at_exit() hook. You’re probably used to seeing
these at file scope, so it may seem a little weird to use it inside a module
definition. It will work just fine here.
Now, about that accessor function. Add the following code inside your module
definition:
def browser
@@browser
end
One last thing: how do you make the browser() method available to your step
definitions? You add it to the world,14 a container provided by Cucumber to
store state between steps. You can do this by calling World() at file scope and
passing it the name of your module.
World(HasBrowser)
Don’t forget to change your step definition to use the new browser() method.
global_hooks/step_definitions/bank_steps.rb
Given /^I have \$(\d+) in my account$/ do |balance|
browser.navigate.to 'http://example.com/banking'
end
14. https://github.com/cucumber/cucumber/wiki/A-Whole-New-World
www.it-ebooks.info
report erratum • discuss
Run Slow Setup/Teardown Code with Global Hooks
• 17
Now if you rerun your test, you should see that Firefox starts only once at
the beginning of the run and exits only once at the end. The total execution
time will be cut almost in half.
Further Exploration
This recipe covered attaching hooks to the World object, which the Cucumber
runtime creates for each scenario. For more on how you can customize this
object’s behavior, see Chapter 7 of The Cucumber Book [WH11].
Most of the time, env.rb is the best place for global setup code. But if your hook
must run specifically after configuration is complete, while still finishing
before the first scenario runs, you can use the AfterConfiguration hook instead.15
15. https://github.com/cucumber/cucumber/wiki/Hooks
www.it-ebooks.info
report erratum • discuss
Chapter 1. Cucumber Techniques
• 18
Recipe 4
Refactor to Extract Your Own Application Driver DSL
Problem
Your step definition code is growing out of control. When you jump down the
stack from your nice, readable Cucumber scenarios into the step definitions
behind them, you’re suddenly besieged by masses of Ruby code. You have a
nagging feeling that there are little bits of duplication all over the place, but you
just can’t see it. You need to clean things up.
Ingredients
•
•
•
•
Ruby’s built-in module16 mixins
Cucumber’s built-in World() method17 for registering extension modules
The capybara gem18 for automating browsers
The Firefox web browser19
Solution
In this recipe, we’ll start with an existing Cucumber scenario for testing a
website. The step definitions are difficult to read and maintain, because they’re
full of irrelevant details about which buttons to click.
You’ll soon fix these problems. Through a series of refactorings—small
transformations that improve the maintainability of the code without changing
its behavior—you’ll move the low-level details into their own Ruby module.
The new step definitions will drive the application through easy-to-read method
names like log_in_as(). This technique of wrapping your application’s user
interface in an easy-to-use API is called an application driver domain-specific
language (DSL).
Let’s consider a simple scenario that tests the behavior of Squeaker,20 an
up-and-coming micro-blogging platform.
16.
17.
18.
19.
20.
http://ruby-doc.org/core-1.9.2/Module.html
http://rdoc.info/github/cucumber/cucumber/Cucumber/RbSupport/RbDsl:World
http://rubygems.org/gems/capybara
http://www.firefox.com
http://squeaker.heroku.com
www.it-ebooks.info
report erratum • discuss
Refactor to Extract Your Own Application Driver DSL
• 19
Matt says:
Swap in Drivers to Connect to Your Application
at Different Levels
One interesting possibility once you’ve introduced this extra layer into your test suite
is that you can swap in a different driver module without the step definitions knowing
anything about it. I’ve used this on projects that use a hexagonal architecturea to
run a set of very fast Cucumber tests using a driver that connected directly to my
domain model. I use an environment variable to choose which driver to plug in.
if ENV['SLOW']
World(EndToEndDriver)
else
World(FastDriver)
end
The cost of this is that I have to maintain two driver DSL modules: one that connects
to my domain model and another that hits the user interface and database. The
payback is that this allows me to still have the confidence of running a full (but slow)
suite of end-to-end tests when I want. The rest of the time I can run the same features
and step definitions against my domain model instead and get lightning-quick
feedback.
a.
http://alistair.cockburn.us/Hexagonal+architecture
dsl/before/features/greet_user.feature
Feature: Greet user
Scenario: Greet users who are logged in
Given I am logged in as "matt"
When I visit the homepage
Then I should see "Hello matt"
To drive the Squeaker web interface, we’ll install Capybara into our Cucumber
suite.
dsl/before/features/support/env.rb
require 'capybara/cucumber'
Capybara.default_driver = :selenium
Capybara.app_host = 'http://squeaker.heroku.com'
Right now the step definitions to drive this scenario look like this:
dsl/before/features/step_definitions/steps.rb
Before { visit '/reset' }
When /^I visit the homepage$/ do
visit '/'
end
www.it-ebooks.info
report erratum • discuss
Chapter 1. Cucumber Techniques
• 20
Given /^I am logged in as "(.*?)"$/ do |username|
# create account
visit '/'
click_link 'create an account'
fill_in 'Username', with: username
click_button 'Create My Account'
click_button 'Log Out'
# log in
click_link 'log in'
fill_in 'Username', with: username
click_button 'Log in'
end
Then /^I should see "(.*?)"$/ do |expected_text|
page.should have_content(expected_text)
end
The problem here is in the step that logs you in. It’s really long and contains
a lot of detail that makes it hard to follow. Let’s refactor it to extract a couple
of helper methods.
dsl/after/features/step_definitions/steps.rb
Before { visit '/reset' }
When /^I visit the homepage$/ do
visit '/'
end
Given /^I am logged in as "(.*?)"$/ do |username|
create_user_named username
log_in_as username
end
Then /^I should see "(.*?)"$/ do |expected_text|
page.should have_content(expected_text)
end
This step definition is much easier to read. Now, when you move from the
Gherkin feature into this file, the jump in abstraction is much gentler and
less jarring. We’re also starting to build up our own DSL for driving our
application. As we go on, we can add more helper methods to carry out common tasks such as posting messages and following users.
You might be wondering where we define these methods. We’re going to define
them on a module and use Cucumber’s World() method to register them with
Cucumber as an extension. Create features/support/squeaker_driver.rb with the
following content:
www.it-ebooks.info
report erratum • discuss
Refactor to Extract Your Own Application Driver DSL
• 21
dsl/after/features/support/squeaker_driver.rb
module SqueakerDriver
def create_user_named(username)
visit '/'
click_link 'create an account'
fill_in 'Username', with: username
click_button 'Create My Account'
click_button 'Log Out'
end
def log_in_as(username)
visit '/'
click_link 'log in'
fill_in 'Username', with: username
click_button 'Log in'
end
end
World(SqueakerDriver)
Cucumber will automatically load this file (it loads everything in features/support
automatically) on start-up, which registers the methods defined in SqueakerDriver
as being available to your step definitions.
Further Exploration
For a deep dive into the different types of DSLs and how they’re implemented,
see Martin Fowler’s Domain-Specific Languages [Fow10].
www.it-ebooks.info
report erratum • discuss
Chapter 1. Cucumber Techniques
• 22
Recipe 5
Define Steps as Regular Ruby Methods
Problem
You’d like your step definitions to be plain Ruby methods so that they’re
easier to edit, test, and maintain.
Ingredients
• Cucumber’s built-in support for invoking Ruby methods directly21
• (Optional) Mechanize22 to run the examples with live data
Solution
Cucumber step definitions are pretty easy to put together. You just tie
together a regular expression with a block of code. Ideally, these blocks of
code should be really short—perhaps a method invocation or two and some
data massaging.
Over time, it can be tempting to let more and more code creep into your step
definitions. They can become harder to read and maintain.
Regular Ruby methods don’t have this problem. They’re easy to refactor when
they get complex. They’re easy to test with any one of the great frameworks
written for Ruby.
With step methods, you can bring the maintainability benefits of plain Ruby
into your step definition code. In this recipe, we’re going to start with a traditional Cucumber test and then move the step definitions into an easy-to-test
Ruby module.
The techniques we show here will work for any kind of Cucumber test: desktop,
mobile, web, and so on. We’ll show a web app for the purposes of the example.
Traditional Test
Consider the following Cucumber test to look for a book’s related titles on the
Pragmatic Programmers website:
21. https://github.com/cucumber/cucumber/blob/master/features/step_definitions.feature#L21
22. http://mechanize.rubyforge.org
www.it-ebooks.info
report erratum • discuss
Define Steps as Regular Ruby Methods
• 23
methods/before/features/book.feature
Feature: Book landing page
Scenario: Related titles
Given I am on the page for "Cucumber Recipes"
When I look for related titles
Then I should see "The Cucumber Book"
A quick-and-dirty implementation of the Given step might look something like
this:
methods/before/features/step_definitions/book_steps.rb
Given /^I am on the page for "(.*?)"$/ do |title|
urls
= {'Cucumber Recipes' => 'http://pragprog.com/titles/dhwcr'}
url
= urls[title] || raise("Unknown title #{title}")
browser = Mechanize.new
@page
= browser.get url
end
Here, we’re using Mechanize to fetch and scrape the page. To run this example
with a live page, you’ll need to install the mechanize gem.
$ gem install mechanize
Then load the library in features/support/env.rb.
methods/before/features/support/env.rb
require 'mechanize'
Now, you can define the Then step.
methods/before/features/step_definitions/book_steps.rb
When /^I look for related titles$/ do
css = 'table#related-books td.description a'
@related = @page.search(css).map &:content
end
Mechanize uses Nokogiri23 for HTML parsing, so we can just locate the
Related Titles section by CSS descriptors and then extract the text. Once we
have that, the Then step is simple.
methods/before/features/step_definitions/book_steps.rb
Then /^I should see "(.*?)"$/ do |title|
@related.should include(title)
end
Go ahead and run the test now; you should get a passing result. Then, look
back at the step definitions. We have low-level CSS selectors tangled up with
high-level concepts like book titles. How can we tease these apart?
23. http://nokogiri.org
www.it-ebooks.info
report erratum • discuss
Chapter 1. Cucumber Techniques
• 24
Method Steps
The first thing you might do is apply the concepts of Recipe 4, Refactor to
Extract Your Own Application Driver DSL, on page 18 and extract that lowlevel HTML scraping code into a Ruby module.
methods/dsl/lib/knows_book_page.rb
module KnowsBookPage
def visit_book_page(title)
urls
= {'Cucumber Recipes' => 'http://pragprog.com/titles/dhwcr'}
url
= urls[title] || raise("Unknown title #{title}")
browser = Mechanize.new
@page
= browser.get url
end
def find_related_titles
css = 'table#related-books td.description a'
@related = @page.search(css).map &:content
end
def verify_related_title(title)
@related.should include(title)
end
end
You can then include this module in the World, as in Recipe 12, Test Through
Multiple Interfaces Using Worlds, on page 61.
methods/dsl/features/support/env.rb
require 'mechanize'
require './lib/knows_book_page'
World(KnowsBookPage)
Now, the step definitions become simple wrappers around the methods in
KnowsBookPage.
methods/dsl/features/step_definitions/book_steps.rb
Given /^I am on the page for "(.*?)"$/ do |title|
visit_book_page title
end
When /^I look for related titles$/ do
find_related_titles
end
Then /^I should see "(.*?)"$/ do |title|
verify_related_title title
end
www.it-ebooks.info
report erratum • discuss
Define Steps as Regular Ruby Methods
• 25
Once that’s done, you may wonder why we need even this thin layer. That’s
where step methods come in. If the entire contents of your step definition
would be a method call on World, you can replace the step definition body with
the method name.
methods/steps/features/step_definitions/book_steps.rb
Given /^I am on the page for "(.*?)"$/, :visit_book_page
When /^I look for related titles$/,
:find_related_titles
Then /^I should see "(.*?)"$/,
:verify_related_title
Notice that this technique even works with step definitions that take parameters, like our Given and Then steps. Any capture groups in the regular expression—in this case, the book titles—get passed into the method as parameters.
Plain Ol’ Ruby Objects
Implementing step definitions in a module has a couple of advantages. It
forces us to keep our step definition code in a conventional Ruby module,
where we can more easily “test the tests.’’ It also makes it easier to apply
typical Ruby refactorings when our code starts to get complex.
You’ll notice that we used a Ruby module to group our step definition methods
and make them callable from the Cucumber World. Often, a class is a better
way to organize code. For these cases, you can specify what object Cucumber
should call your step definition methods on.
If we have a BookPage class in lib/book_page.rb,
methods/object/lib/book_page.rb
class BookPage
include RSpec::Matchers
def visit_book_page(title)
urls
= {'Cucumber Recipes' => 'http://pragprog.com/titles/dhwcr'}
url
= urls[title] || raise("Unknown title #{title}")
browser = Mechanize.new
@page
= browser.get url
end
def find_related_titles
css = 'table#related-books td.description a'
@related = @page.search(css).map &:content
end
def verify_related_title(title)
@related.should include(title)
end
end
then we can create a single instance and use it from our World.
www.it-ebooks.info
report erratum • discuss
Chapter 1. Cucumber Techniques
• 26
methods/object/features/support/env.rb
require 'mechanize'
require './lib/book_page'
module KnowsBookPage
def page
@page ||= BookPage.new
end
end
World(KnowsBookPage)
Now, all we need to do is tell our step definitions to call methods on the page
object instead of the World.
methods/object/features/step_definitions/book_steps.rb
Given /^I am on the page for "(.*?)"$/, :visit_book_page, :on => lambda { page }
When /^I look for related titles$/, :find_related_titles, :on => lambda { page }
Then /^I should see "(.*?)"$/,
:verify_related_title, :on => lambda { page }
With these techniques, you can lavish the same attention on your Cucumber
step definitions that you do on the rest of your Ruby code.
www.it-ebooks.info
report erratum • discuss
Compare Images
• 27
Recipe 6
Compare Images
Problem
You’re using Cucumber to test an app that generates or manipulates images.
You want to compare the result to a reference picture—with a little wiggle
room for minor differences.
Ingredients
• pdiff (short for “perceptual diff”),24 a command-line image comparison tool
that accounts for the way people perceive images
• chunky_png25 for generating PNG files in the example code
Solution
It sounds so simple, doesn’t it? “Compare these two pictures and tell me
whether they match.” But the devil is in the details. What does it mean for
two images to match?
Do they need to be pixel-for-pixel identical? If not, what percentage difference
is acceptable? What about images that are slightly rotated or scaled? Or discolored by a tiny amount? Your answers to these questions will determine
how you compare the images. Here are a few approaches you might take:
• Compare the pixels one by one and count how many are different.
• For each pixel, compute the delta between the reference image and your
app’s image. For example, a pixel that is only a slightly different shade of
red would result in a smaller difference than one that’s a completely different color or brightness.
• Reduce, or downsample, the number of colors or pixels in the images
before comparing them. This will build in a little tolerance for differences.
• Compute a hash of the image’s contents, giving it a fingerprint you can
use for comparison.
24. http://pdiff.sf.net
25. https://github.com/wvanbergen/chunky_png/wiki
www.it-ebooks.info
report erratum • discuss
Chapter 1. Cucumber Techniques
• 28
• Use a heavyweight algorithm like SURF26 to look for common features
between the two pictures, accounting for rotation and scale.
For this recipe, we’re going to use a tool called pdiff, or “perceptual diff.” It
compares pixels directly but gives more weight to differences that are likely
to stand out to the human eye. This kind of comparison is suitable when you
want to build in a little tolerance for differences but don’t care about matching
rotated or scaled images.
The app we’re writing will draw a simple image, which we will compare to a
reference image using pdiff.
Setup
First, let’s get the software installed. pdiff is pretty easy to build from source,
but the project also posts binaries for Windows, Mac, and Linux.27 Grab the
perceptualdiff executable for your platform and save it somewhere on your PATH.
To generate the image from our app, we’re going to use chunky_png, a pureRuby library for generating PNG files. Go ahead and install the gem.
$ gem install chunky_png
We’ll need a little setup code as well. Create a file called support/env.rb, where
we can bring in the libraries we’ll be using. This is also where we’ll add a
Cucumber hook to remove the generated image before each test.
compare_images/support/env.rb
require 'fileutils'
require 'chunky_png'
include ChunkyPNG
Before do
FileUtils.rm_f 'generated.png'
end
Now that setup is complete, we can move on to the feature.
Feature
Let’s write a feature defining the behavior for a simple automated drawing
program.
26. http://www.vision.ee.ethz.ch/~surf
27. http://sourceforge.net/projects/pdiff/files/pdiff/
www.it-ebooks.info
report erratum • discuss
Compare Images
• 29
compare_images/drawing.feature
Feature: Drawing
Scenario: Green circle
Given a white background
When I draw a green circle
Then the result should resemble "circle.png"
The chunky_png API is pretty simple. We create a new Canvas object and then
call the circle() method to draw into it.
compare_images/step_definitions/drawing_steps.rb
Given /^a white background$/ do
@canvas = Canvas.new 300, 200, Color::WHITE
end
When /^I draw a green circle$/ do
green = Color.rgb 0, 255, 0
@canvas.circle 150, 100, 50, green, green
end
In the final step definition, we’ll save the file and see how closely it resembles
the picture we expect. Before we do that, we need to talk a little about the
mechanics of comparing images.
Comparing Images
Our expected image is 300x200 pixels, with a lime green circle in the middle
that has a radius of 50. You can create this image manually in a graphics
editor, or you can download the one we drew for this book.28 Either way, save
the file as reference.png.
Before we add pdiff to our Cucumber feature, let’s try using it from the
command line. Run your feature once to create generated.png. Then, execute
perceptualdiff with the -verbose option.
$ perceptualdiff -verbose reference.png generated.png
Field of view is 45.000000 degrees
Threshold pixels is 100 pixels
The Gamma is 2.200000
The Display's luminance is 100.000000 candela per meter squared
Converting RGB to XYZ
Constructing Laplacian Pyramids
Performing test
FAIL: Images are visibly different
229 pixels are different
28. http://media.pragprog.com/titles/dhwcr/code/compare_images/reference.png
www.it-ebooks.info
report erratum • discuss
Chapter 1. Cucumber Techniques
• 30
Even though 229 pixels sounds like it’s a lot, in a 60,000-pixel image it’s not
that big a difference. See for yourself: the following image contains both the
reference image and the generated image.
pdiff can actually show you exactly which pixels are different; just pass the
-output flag.
$ perceptualdiff -output diff.png reference.png generated.png
This will produce a file showing the difference between the two images. As
you can see in the close-up below, the only difference is around the border
of the circle. This is likely because of a slight difference in the way my
graphics editor and chunky_png render circles.
Either way, our end user is unlikely to care about the difference. For this
project, we’re assuming pixel-exact matching is not required.
Ian says:
A Picture Is Worth...
Think image comparison sounds like a big hack? Sometimes it’s all you have. A friend
of mine tests on an OS where there are no developer hooks into the GUI. The only
testing activity it supports is taking a full screenshot.
He’s able to test with the same sophistication as the rest of us, thanks to his suite
of computer vision algorithms. He can even detect subtle differences in readouts that
human testers missed.
www.it-ebooks.info
report erratum • discuss
Compare Images
• 31
There are a couple of ways to relax our criteria a bit so that pdiff will consider
our images as being similar enough. We could pass the -tolerance option to
increase the number of pixels that pdiff allows to be different. Or we could
reduce the size of the image before comparing, by passing the -downsample
option. We have a slight preference for the latter because it relies less on
discovering a magic threshold number that’s neither too strict nor too forgiving.
Here’s how to downsample the image by a factor of two:
$ perceptualdiff -downsample 2 -verbose reference.png generated.png
Downsampling by 2
Downsampling by 4
Field of view is 45.000000 degrees
Threshold pixels is 100 pixels
The Gamma is 2.200000
The Display's luminance is 100.000000 candela per meter squared
Converting RGB to XYZ
Constructing Laplacian Pyramids
Performing test
PASS: Images are perceptually indistinguishable
68 pixels are different
Now that we have a handle on using pdiff manually, let’s call it from our
Cucumber feature.
Results
In the previous section, we saw how to run pdiff from the command line. How
do we incorporate the tool into our step definition?
Like any good command-line tool, pdiff uses an exit code to signal whether
the comparison succeeded. We can use Ruby’s $? variable to retrieve the exit
code; this object has a success?() method we can call from our Then step.
compare_images/step_definitions/drawing_steps.rb
Then /^the result should resemble "([^"]*)"$/ do |filename|
@canvas.save 'generated.png'
`perceptualdiff -downsample 2 #{filename} generated.png`
$?.should be_success
end
Now, if you run your feature again, you should see a passing result.
Further Exploration
As we’ve said, there are a lot of different ways to compare images, depending
on what your needs are. Jeff Kreeftmeijer has written a tutorial on simple
www.it-ebooks.info
report erratum • discuss
Chapter 1. Cucumber Techniques
• 32
color differences using chunky_png.29 Mike Perham’s phashion library30 calculates a single fingerprint for each image and then compares the fingerprints.
For really heavy-duty stuff such as detecting scaling and rotation, you may
need to bring out the power tools like OpenCV,31 the open source computer
vision library. This software is not for the faint of heart, but sometimes a
powerful algorithm like SURF is what fits your application best.
29. http://jeffkreeftmeijer.com/2011/comparing-images-and-creating-image-diffs
30. http://www.mikeperham.com/2010/05/21/detecting-duplicate-images-with-phashion/
31. http://opencv.willowgarage.com/wiki
www.it-ebooks.info
report erratum • discuss
Test Across Multiple Cores
• 33
Recipe 7
Test Across Multiple Cores
Problem
You want to give your tests a quick speed boost by distributing them across
all the cores on your development machine.
Ingredients
• The parallel gem32 for distributing tasks within a single test
• The parallel_tests gem33 for distributing entire features across multiple
cores
Solution
Unless you tell it otherwise, Cucumber typically runs your features in a single
process containing a single thread. Modern desktop machines often have
multiple cores; even my little travel computer has two. By breaking work into
pieces and farming them out to all the cores on your machine, you can run
your tests faster.
Parallel Tasks
Imagine you have the following scenario in features/shipping.feature:
multiple_cores/parallel/features/shipping.feature
Feature: Shipping
Scenario: Packing the containers
Given an order for 20 tons of material
When I pack 4 shipping containers
Then the order should be complete
Here’s the definition of the When step (you can leave the other two definitions
empty):
multiple_cores/parallel/features/step_definitions/shipping_steps.rb
When /^I pack (\d+) shipping containers$/ do |count|
last = count.to_i
32. https://github.com/grosser/parallel
33. https://github.com/grosser/parallel_tests
www.it-ebooks.info
report erratum • discuss
Chapter 1. Cucumber Techniques
• 34
(1..last).each do |i|
Shipping.pack_container i
end
end
The definition of the Shipping class goes in features/support/env.rb.
multiple_cores/parallel/features/support/env.rb
class Shipping
@@logger = Logger.new 'shipping.log'
def self.pack_container(container)
@@logger.info "Container ##{container} - START"
sleep 2
@@logger.info "Container ##{container} - DONE"
end
end
We’ve added a call to sleep() to simulate the lengthy calculation of how best to
fill the shipping container (a problem known to be computationally difficult).
When you run this feature, you should see something like this at the end of
Cucumber’s output:
0m8.007s
Each of the four containers took two seconds to fill; the overall test time was
about eight seconds.
Calculating properties of shipping containers is pure math. It doesn’t hit a
database, the file system, or any other global state. It’s safe to run the calculation in parallel across all your cores. To do so, we’re going to install the
parallel gem.
$ gem install parallel
Then, replace the call to each() in your step definition with Parallel.each().
multiple_cores/parallel/features/step_definitions/shipping_steps.rb
When /^I pack (\d+) shipping containers$/ do |count|
last = count.to_i
вћ¤
Parallel.each(1..last) do |i|
Shipping.pack_container i
end
end
Notice that we didn’t need to make any changes to our code under test—just
the Cucumber step definition. Now, if you run your test again, the overall
time should drop based on the number of cores you have. On my two-core
laptop, the time dropped almost in half, to 4.102 seconds.
www.it-ebooks.info
report erratum • discuss
Test Across Multiple Cores
• 35
Parallel Features
Parallel.each is fine for breaking a single task into pieces you can run on all your
machine’s cores. But what about spreading your entire Cucumber suite across
cores?
The parallel_tests gem, built on the parallel gem we’ve just discussed, will
spawn one Cucumber process per core on your machine and then run a different subset of your features on each core.
Let’s see what that looks like. Remove the call to Parallel.each() from your previous step definition, and just go back to Ruby’s regular each() method. Add a
new Cucumber file called receiving.feature with the following contents:
multiple_cores/parallel_tests/features/receiving.feature
Feature: Receiving
Scenario: Filling the warehouse
Given I have received 20 tons of raw material
When I unload the order into the warehouse
Then I should have 15% space remaining
Fill in empty definitions for these steps, and throw a fixed sleep() inside the When
step. I used four seconds on mine. So, the eight-second shipping test plus the
four-second receiving test take a total of twelve seconds on a single core.
Go ahead and install parallel_tests so that you can run your features in
parallel.
$ gem install parallel_tests
The only thing you have to do differently to run your Cucumber tests on multiple
cores is to run the parallel_cucumber command instead of just plain cucumber.
$ parallel_cucumber features
Now, the total test time should be close to the length of the longest test,
around eight seconds.
Further Exploration
This recipe deals with speeding up tests on your own development machine
by using all your cores. The next logical step is to farm your tests out to
multiple machines; Recipe 8, Test Across Multiple Machines with SSH, on page
36 will show you how to do that.
www.it-ebooks.info
report erratum • discuss
Chapter 1. Cucumber Techniques
• 36
Recipe 8
Test Across Multiple Machines with SSH
Problem
You’re testing a complex application, and your tests take a while to complete.
You’d like to run your tests in parallel across multiple machines to save
overall execution time.
Ingredients
• Cucumber tags34 for sorting your features into groups that can be run
across multiple machines
• An SSH client35 for connecting to the remote machines
• rsync36 for copying your Cucumber features to each computer
Solution
We strive to make our Cucumber tests run as fast as possible. But let’s say
you’ve optimized everything you can, and your tests still take an hour to run.
What can you do?
One approach is to run only a subset of the tests, at least while you’re
actively developing a specific feature. Another is to break your tests into
groups and run each group on its own dedicated machine.
There are libraries that can help with this process, but they tend to stay tied
to a particular workflow or Cucumber version. For this recipe, we’re going to
use something much simpler and future-proof: good ol’ SSH. We’ll use a single
development computer and two remote test machines.
We’ll start with some long-running features, manually assign them to groups,
copy the code to each remote machine, and use SSH to run the tests there.
Long-Running Features
Imagine you’re writing some acceptance tests for a flight reservation system. These
take quite a while, because at this level you’re exercising the entire stack.
34. https://github.com/cucumber/cucumber/wiki/tags
35. https://en.wikipedia.org/wiki/Secure_Shell
36. http://rsync.samba.org
www.it-ebooks.info
report erratum • discuss
Test Across Multiple Machines with SSH
• 37
Here are a couple of scenarios for flight.feature:
multiple_machines/flight.feature
Feature: Flights
@group1
Scenario: Route exists
Given a nonstop flight exists
When I plan my trip
Then I should see the nonstop options first
@group2
Scenario: No route exists
Given no nonstop flight exists
When I plan my trip
Then I should be shown connecting flights
You’ll notice we’ve added @group1 and @group2 tags to the scenarios. This will
make it easy to split this scenario across multiple machines later.
Create a new file called step_definitions/flight_steps.rb and add empty step definitions
to it. Then, add a delay to the middle step to simulate this long-running action.
multiple_machines/step_definitions/flight_steps.rb
When /^I plan my trip$/ do
sleep 10
end
If you run these scenarios, you’ll see that they take a while to complete. Once
we get SSH set up, we’ll be able to reduce overall test time by distributing the
workload.
Remote Machine Setup
Let’s say you have two Linux machines, remote1 and remote2. At the simplest
level, you could run a test script on remote1 by passing the appropriate command directly to ssh.
$ ssh user@remote1 'cd /path/to/tests && run_some_tests'
This would work, but you’d have to enter your password every time. Instead,
let’s use public key authentication, the standard SSH replacement for passwords. This typically involves the following steps:
1. Generate a public/private key pair on your development machine.
2. Paste the newly generated public key into the authorized_keys file in the
$HOME/.ssh directory on each remote machine.
First, run the following command on your development computer:
$ ssh-keygen
www.it-ebooks.info
report erratum • discuss
Chapter 1. Cucumber Techniques
• 38
Now, copy ~/.ssh/id_rsa.pub to your home directory on remote1. Log into remote1
and run the following commands:
$ echo ~/id_rsa.pub >> ~/.ssh/authorized_keys
$ rm ~/id_rsa.pub
As an alternative to manual copying, you can use a tool like ssh-copy-id37 or
38
ssh-forever.
Copy the same key to remote2 and add it to the authorized_keys file the way you did
for remote1. This will enable you to log in to either machine without a password.
$ ssh remote1
Now that you can connect easily to both remote machines from your development machine, it’s time to transfer your Cucumber tests to them.
Copying Your Tests
There are a myriad of ways to copy your Cucumber features to your remote
machines. You could use FTP, the scp command, your revision control system,
or even sneakernet (physically carrying a USB thumb drive to each machine).
One of the most low-maintenance methods is rsync. This tool can synchronize
a local directory with a remote one in an efficient way—and it doesn’t require
you to commit your tests to revision control before trying them remotely.
rsync comes with a baffling array of options. The only flags you need for this
exercise are -a (a set of common options for archiving), -v (to show all the file
names being transferred), and --delete (to delete remote files that you’ve removed
locally). Run the following commands on your development machine:
$ rsync -av --delete . remote1:flight
$ rsync -av --delete . remote2:flight
Log into your remote machines and look in the flight directory on each. All
your tests should be there.
Running Your Tests
Now that your tests are copied to the remote machines, make sure to install
Cucumber and any dependencies. The easiest way to do this is to use Bundler.
Create a Gemfile in your project directory on your development machine with
the following contents:
37. http://linux.die.net/man/1/ssh-copy-id
38. https://github.com/mattwynne/ssh-forever
www.it-ebooks.info
report erratum • discuss
Test Across Multiple Machines with SSH
• 39
multiple_machines/Gemfile
source :rubygems
gem 'cucumber'
Re-rsync your project so that both remote machines have the new file. Then,
ssh from your development box into each remote to run the bundle command
and install your dependencies.
$ ssh remote1 'cd flight && bundle'
$ ssh remote2 'cd flight && bundle'
When you’re ready to run your tests, just pass the -t option to cucumber to
specify that the scenarios tagged @group1 should run on remote1 and those
tagged @group2 should run on remote2. From your development computer, run
these commands:
$ ssh remote1 'cd flight && cucumber -t@group1 flight.feature' &
$ ssh remote2 'cd flight && cucumber -t@group2 flight.feature' &
The two machines will run these steps in parallel, reporting their results on
the local console. This approach takes a bit of manual work but scales easily
and isn’t dependent on any specific Cucumber version (or even on Cucumber
itself).
Further Exploration
In this recipe, we kept both the scenarios in a single .feature file and used tags
to separate them into groups. On a real project, you’re likely to have multiple
.feature files, perhaps spread across several different directories. You may be
able to use the file system instead of Cucumber tags to split your scenarios
across multiple machines, like so:
$ ssh remote1 'cd proj && cucumber login/*.feature' &
$ ssh remote2 'cd proj && cucumber admin/*.feature' &
If all your machines are on the same network, you might try a tool like
Specjour,39 which coordinates the machines using the Bonjour network configuration technology.40
In Recipe 10, Add Cucumber to Your Continuous Integration Server, on page
47, we show how to run Cucumber tests from the Jenkins continuous integration server. Jenkins has its own distributed build tool41 that you can use
with the remote testing techniques we’ve discussed here.
39. https://github.com/sandro/specjour
40. http://www.apple.com/support/bonjour
41. https://wiki.jenkins-ci.org/display/JENKINS/Distributed+builds
www.it-ebooks.info
report erratum • discuss
Chapter 1. Cucumber Techniques
• 40
One last note: there’s nothing special about the number of test machines we
used for this recipe. You can get some of the advantages of remote testing—
such as testing on a fast server that closely resembles your production
environment—with just one remote machine.
www.it-ebooks.info
report erratum • discuss
Run Your Features Automatically with Guard and Growl
• 41
Recipe 9
Run Your Features Automatically with Guard and Growl
Problem
You’re in the zone, jumping back and forth between adding new scenarios and
filling in step definitions. Every time you have to switch to the command line and
rerun Cucumber, it disrupts your train of thought. You want Cucumber to run
your tests automatically whenever you save a change to one of your project files.
Ingredients
• Guard,42 a Ruby library for watching project files
• Guard::Cucumber,43 a Cucumber-aware plug-in for Guard
• A desktop notification system such as Growl for Mac,44 Growl for
Windows,45 or Snarl for Linux46 to tell you when the tests are done
• ruby_gntp,47 a Ruby library for sending desktop notifications
Solution
Guard is an open source library that watches your project files and performs
tasks automatically for you. What sort of tasks? Generating documentation,
running tests, reporting results, whatever you want! (We’re using it to regenerate this chapter’s PDF every time we save changes to the document.) Each
type of task is supported by a specific Guard plug-in. In this recipe, we’ll use
the Cucumber::Guard plug-in to run Cucumber tests whenever the source
code or tests change.
We’ll start with a Cucumber project that has a couple of features and scenarios
but no automation yet. We’ll see how to connect Guard::Cucumber to an
existing project and verify that it’s running the features at the right time.
Finally, we’ll add desktop notifications to the mix so that you don’t have to
keep checking your console logs to find out whether the tests passed.
42.
43.
44.
45.
46.
47.
https://github.com/guard/guard
https://github.com/guard/guard-cucumber
http://growl.info
http://www.growlforwindows.com
https://sites.google.com/site/snarlapp/home
http://snaka.info/ruby_gntp
www.it-ebooks.info
report erratum • discuss
Chapter 1. Cucumber Techniques
• 42
Setup
Let’s imagine you’re using Cucumber to test an event logging library. Presumably, the individual classes have unit tests, and you’re using Cucumber for
something a little higher-level. You have one .feature file for writing to the log…
guard/features/appending.feature
Feature: Appending to a log
Scenario: Initially empty log
Given a log containing:
"""
"""
When I append the warning "Disk space low"
Then the log should read:
"""
W Disk space low
"""
and one for reading from it.
guard/features/parsing.feature
Feature: Parsing a log
Scenario: Multiple lines
Given a log containing:
"""
W Disk space low
I Backup complete
"""
When I parse the log
Then the entries should be:
| priority
| message
|
| warning
| Disk space low |
| information | Backup complete |
Go ahead and run Cucumber on what you have so far, and verify that you
get a bunch of pending steps.
Now, install Guard::Cucumber.
$ gem install guard-cucumber
You may see a few warnings about Guard being used outside the Bundler
packaging tool. That’s just Guard kvetching and can be safely ignored for this
recipe.
Guard needs a list of files it should watch, plus instructions on what commands to run when those files change. Just as the Rake build tool uses a
Rakefile, Guard uses a Guardfile. You can create this file by hand, but it’s easier
to have Guard::Cucumber do it.
$ guard init cucumber
www.it-ebooks.info
report erratum • discuss
Run Your Features Automatically with Guard and Growl
• 43
Take a look at your initial Guardfile (we’ve made a couple alignment tweaks
here but no major changes).
guard/Guardfile
Line 1 # A sample Guardfile
2 # More info at https://github.com/guard/guard#readme
3 guard 'cucumber' do
4
5
6
7
8
9
watch(%r{^features/.+\.feature$})
watch(%r{^features/support/.+$}) { 'features' }
watch(%r{^features/step_definitions/(.+)_steps\.rb$}) { |m|
Dir[File.join("**/#{m[1]}.feature")][0] || 'features'
}
end
Each line inside the block contains a regular expression describing which
files to watch. Note that these are not the same as the filename wildcards
you’d use at the command line. For instance, to pick up C source files, you’d
use \.c$ rather than *.c.
Line 4 tells Watchr to run just a single .feature file if that’s all that changes.
Line 5 runs all the features if anything in the support directory changes.
Line 6 watches the step definitions. If a file named xyz _steps.rb changes,
Cucumber::Guard will rerun just xyz .feature. If it can’t find a match, it reruns
everything.
Matt says:
A Better Guard Rule
The third rule in the default Guardfile assumes you’ll have one step definition file per
feature, which is an antipattern. Instead, you should have one step file per domain
model, as we’ve done in this recipe.
The default behavior isn’t hurting us here. But in your own projects, you might want
to replace the third rule with the following line:
watch(%r{^features/step_definitions/.+_steps\.rb$}) { 'features' }
That will just rerun all the features when you update any step definition; it’s much
safer.
If you had any files outside the usual Cucumber layout, such as a lib directory,
you’d add them here. But this default configuration is all you’ll need for this
project.
Now that Guard is installed and configured, it’s time to run it.
www.it-ebooks.info
report erratum • discuss
Chapter 1. Cucumber Techniques
• 44
Using Guard
From your project directory, launch Guard on the command line and leave
it running.
$ guard
Guard will report your pending steps and will then appear to freeze. It’s
watching your project for changes; let’s give it something to see. First, here
are the steps for appending to the log:
guard/features/step_definitions/log_steps.rb
When /^I append the ([a-z]+) "([^"]*)"$/ do
| priority, message |
@log.append priority, message
end
Then /^the log should read:$/ do |expected|
@log.contents.should == expected
end
As soon as you save this file, Guard will rerun the steps. Take a peek at your
command prompt and verify that you now have a step failure (because the
@log variable is still undefined).
Now, add the step definitions for reading the log.
guard/features/step_definitions/log_steps.rb
When /^I parse the log$/ do
@entries = @log.parse
end
Then /^the entries should be:$/ do |table|
table.diff! @entries
end
The step for creating a new log is shared by both your features.
guard/features/step_definitions/log_steps.rb
Given /^a log containing:$/ do |contents|
@log = Log.new contents
end
Now, it’s time to add the implementation of the Log class. Add the following
code to features/support/log.rb:
guard/features/support/log.rb
class Log
attr_reader :contents
def initialize(contents)
@contents = contents
end
www.it-ebooks.info
report erratum • discuss
Run Your Features Automatically with Guard and Growl
• 45
def append(priority, message)
@contents << priority[0].upcase << ' ' << message
end
def parse
@contents.split("\n").map do |line|
initial, message = line.split(" ", 2)
priorities = { 'I' => 'information', 'W' => 'warning' }
{ 'priority' => priorities[initial], 'message' => message }
end
end
end
Guard has been rerunning your features with each change you’ve made. With
this one last change, all your steps should be green now.
It’s definitely saved a few keystrokes not having to keep tabbing over to your
shell to type Up Enter and rerun the tests every time you make a change. But
it’s still inconvenient to have to leave your text editor and watch the tests to
see whether they passed or failed. Wouldn’t it be nice to be able to see what
happened with your steps without leaving your text editor?
Displaying Notifications
How do you find out what happened with your tests without having to babysit
the output constantly? You find out the same way as with any other background operation such as a backup or file download: by using notifications.
The granddaddy of desktop notification systems on the Mac is Growl. Rather
than your web browser and your backup software having to ship their own
custom notification systems (each with its own jarringly different look and
feel), both can just plug into Growl.
Developers have written systems similar to Growl on other platforms. Windows
users have the aptly named Growl for Windows, while Linux users have Snarl.
Guard has the ability to detect several different desktop notification systems.
If you’re using one of the ones it knows about, there’s no configuration
needed.
First, download and install the appropriate notification framework for your
platform. For a list of links, see Ingredients, on page 41.
All three of these tools speak the same protocol, Growl Network Transport
Protocol (GNTP). That means they’re all supported by a single library, ruby_
gntp. Go ahead and install that now.
$ gem install ruby_gntp
www.it-ebooks.info
report erratum • discuss
Chapter 1. Cucumber Techniques
• 46
Now make a change to one of your step definitions and save the file. A few
seconds later, you should see a temporary pop-up window like Figure 3, Guard
notifications in Growl.
Figure 3—Guard notifications in Growl
Further Exploration
Why use Guard over some of the other Ruby libraries that start tests automatically,
like autotest48 or Watchr?49 These will also work fine with Cucumber; we chose
Guard for this recipe for its seamless Cucumber and Growl integration.
Since Guard does not exit immediately but instead continues to run and
monitor your tests, you may wonder whether it is compatible with global
teardown code you might put in an at_exit() hook, as in Recipe 3, Run Slow
Setup/Teardown Code with Global Hooks, on page 13. Indeed, this still works;
Guard spins up a separate Ruby instance to run your features.
Unlike most of the recipes in this book, this recipe uses Cucumber to test a
library, rather than an application. For more on using Cucumber in this
capacity, see Dr Nic Williams’ presentation Integration Testing with Cucumber:
How to Test Anything.50
48. https://github.com/seattlerb/zentest
49. https://github.com/mynyml/watchr
50. http://www.slideshare.net/drnic/integration-testing-with-cucumber-how-to-test-anything-j-a-o-o-2009
www.it-ebooks.info
report erratum • discuss
Add Cucumber to Your Continuous Integration Server
• 47
Recipe 10
Add Cucumber to Your Continuous Integration Server
Problem
You want to run your Cucumber tests automatically on a shared machine every
time someone on your team checks in a change.
Ingredients
•
•
•
•
•
Jenkins, the open source continuous integration server51
The Git version control system52
Jenkins plug-ins for Git and Rake (installed using the admin tools)
A post-commit hook53 for notifying Jenkins that your source code has changed
cURL54 for interacting with Jenkins from command-line scripts
Solution
In Recipe 9, Run Your Features Automatically with Guard and Growl, on page 41,
we saw how the Guard library can watch the files on an individual developer’s
machine and rerun Cucumber tests whenever the source code changes. A continuous integration (CI) server performs a similar service for your entire team,
watching the common code base and triggering a build/test cycle when anyone
pushes new code to the server.
In this recipe, we’re going to connect Cucumber to Jenkins, an open source CI
server that enjoys a broad base of community support. We’ll start by checking a
simple Cucumber project into revision control using Git. We’ll use a local installation of Jenkins just to get a feel for it (rather than the more typical use with a
dedicated server). We’ll see a couple of different ways for Jenkins to run your
tests.
• Polling the source code at regular intervals, which is easier to set up
• Installing a post-commit hook into Git so that you notify Jenkins immediately when you make a change
Ready to get started?
51.
52.
53.
54.
http://jenkins-ci.org
http://git-scm.com
http://progit.org/book/ch7-3.html
http://curl.haxx.se
www.it-ebooks.info
report erratum • discuss
Chapter 1. Cucumber Techniques
• 48
Project Setup
If you don’t already have Git on your machine, go ahead and install it.55 Create
a repository called cone_of_silence.
$ git init cone_of_silence
Add the following to cone_of_silence/cone.feature:
continuous_integration/cone.feature
Feature: Cone of silence
Scenario: Activation
Given I am writing a book
When I activate the cone of silence
Then I should not hear my children for the next hour
Jenkins understands Rake, so give your project a Rakefile to kick off the tests.
continuous_integration/Rakefile
require 'cucumber/rake/task'
Cucumber::Rake::Task.new :features do |t|
t.cucumber_opts = '*.feature'
end
Make sure your Rakefile is correctly set up by triggering a test run.
$ rake features
Go ahead and copy the boilerplate step definitions Cucumber gives you into
step_definitions/cone_steps.rb, and remove the calls to pending().
Once your tests are passing, check everything into Git.
$ git add .
$ git commit -m "Initial commit"
Now that you have a Git repository, you can install Jenkins and point it at
your code.
Install Jenkins
You can try Jenkins right from your web browser without installing anything.56
Or you can download the .war file57 and run it from the command line.
$ java -jar jenkins.war
55. http://git-scm.com/download
56. https://wiki.jenkins-ci.org/display/JENKINS/Meet+Jenkins
57. http://mirrors.jenkins-ci.org/war/latest/jenkins.war
www.it-ebooks.info
report erratum • discuss
Add Cucumber to Your Continuous Integration Server
• 49
Once Jenkins is running, you should be able to point your browser at
http://localhost:8080 and see something like Figure 4, The main Jenkins screen.
Figure 4—The main Jenkins screen
Some features of Jenkins (such as triggering a build automatically) require
you to turn on password protection. Click Manage Jenkins in the list of links
on the left. Then click Configure System. Select the “Enable security” checkbox.
Under Access Control / Security Realm, choose Jenkins’ own user database,
and select the “Allow users to sign up” checkbox. In the Authorization section
just below it, choose “Logged-in users can do anything.”
When you’re done, your security settings should look like Figure 5, Jenkins
security settings.58 Click Save to go back to the main screen. Follow the signup link in the upper-right corner and create an account for yourself.
There’s one last configuration step: installing the two plug-ins you need for
this recipe. Follow the Manage Jenkins link again, but this time, choose
Manage Plugins. On the Available tab, fill in the checkboxes next to the Git
plug-in (under Source Code Management) and the Rake plug-in (under Build
Tools). Click “Download now and install after restart,” and follow the
instructions to restart Jenkins.
58. You’d want to do considerably more than this to lock down a production server, of
course.
www.it-ebooks.info
report erratum • discuss
Chapter 1. Cucumber Techniques
• 50
Figure 5—Jenkins security settings
Timed Builds
On the left side of the page, click New Job. Give Cone of Silence for the job
name, and choose “Build a free-style software project.” Click OK.
Under Source Code Management, choose Git. For the repository URL, type
file:///path/to/cone_of_silence, substituting the full path of the directory you created
at the beginning of this recipe.
In the Build Triggers section, choose Poll SCM. In the “Schedule text” field,
enter five asterisks separated by spaces: * * * * * . This will poll every minute
of every hour of every day. The syntax is similar to that used by the cron
command on UNIX systems.59
59. http://pubs.opengroup.org/onlinepubs/9699919799/utilities/crontab.html
www.it-ebooks.info
report erratum • discuss
Add Cucumber to Your Continuous Integration Server
• 51
Under Build, click “Add build step,” and choose Invoke Rake from the dropdown. In the Tasks text field, type features, the name you gave the Cucumber
tests in your Rakefile.
When your project is correctly configured, the screen will look like Figure 6,
Jenkins project settings, on page 52. Click Save, and then follow the Back to
Dashboard link. You should see something like Figure 7, The project dashboard, on page 53.
If you wait a minute or so and then reload the page, Jenkins will change the
project status to Success. Click build #1 in the Last Success column, and
follow the Console Output link on the left to verify that your Cucumber steps
ran. Then head back to the dashboard.
Let’s see whether Jenkins is really checking the result of each test. Introduce
a deliberate test failure in your step definitions.
continuous_integration/step_definitions/cone_steps.rb
Then /^I should not hear my children for the next hour$/ do
raise 'a ruckus'
end
Wait another minute, and verify that Jenkins has marked the build as failed;
it should look like Figure 8, A failing project, on page 53.
Now you have a fully functional continuous integration server. But wouldn’t
it be nice not to have to wait after every change for the build to kick in?
Triggered Build
The finishing touch for this recipe will be to trigger a build immediately when
your source code changes. Click the Cone of Silence project in Jenkins, and
follow the Configure link on the left. Deselect the Build Periodically checkbox,
and instead choose “Trigger builds remotely.” (If you don’t see this option, it’s
because Jenkins’s security settings are too lax; go back to Install Jenkins, on
page 48, and make sure you have security enabled.)
You need to come up with some kind of unique, secret key to protect your
build server from accidental or malicious triggers. You can use the commandline uuidgen utility60 or just make up something.
From the command line, verify that you can trigger a build (substitute your
token at the end of the URL).
$ curl http://localhost:8080/job/Cone%20of%20Silence/build?token=BackToBrooklyn
60. http://linux.about.com/library/cmd/blcmdl1_uuidgen.htm
www.it-ebooks.info
report erratum • discuss
Chapter 1. Cucumber Techniques
• 52
Figure 6—Jenkins project settings
www.it-ebooks.info
report erratum • discuss
Add Cucumber to Your Continuous Integration Server
• 53
Figure 7—The project dashboard
Figure 8—A failing project
Back in your web browser, verify that Jenkins started a build when you hit
the URL. Now, it’s time to wire up Git to hit the same URL.
Post-commit Hook
Save your settings and go back to the dashboard. Now Jenkins is waiting
patiently for notification that the source code has changed.
www.it-ebooks.info
report erratum • discuss
Chapter 1. Cucumber Techniques
• 54
In your project directory, create a file called .git/hooks/post-commit with the following contents:
#!/bin/sh
exec curl http://localhost:8080/job/Cone%20of%20Silence/build?token=BackToBrooklyn
As the name implies, this script will run after every commit. Go ahead and
try it by fixing the deliberate test failure you introduced earlier and committing
your fix. Jenkins should immediately rerun your Cucumber tests and report
success.
Further Exploration
This recipe assumes you want to run all of your Cucumber tests on the continuous integration server. However, if you need to skip certain scenarios
(because they’re still in progress or meant to be used only as benchmarks),
you can tag specific scenarios for exclusion from the build. Joseph Wilk has
written a description of this technique.61
61. http://blog.josephwilk.net/ruby/cucumber-tags-and-continuous-integration-oh-my.html
www.it-ebooks.info
report erratum • discuss
Publish Your Documentation on Relish
• 55
Recipe 11
Publish Your Documentation on Relish
Problem
You want to organize and share your .feature files in a readable format that
allows navigation and screenshots.
Ingredients
• Relish,62 a website where you can display your Cucumber files in an easyto-navigate format
• Markdown63 for displaying formatted text in your scenario descriptions
Solution
Cucumber files are designed to be read by everyone who has a say in your
project: designers, developers, testers, planners, and so on. That’s probably
a big part of why you’re using it.
But how do you actually share those files with your stakeholders? Do you
email them a bunch of .feature files or have them check out your source
repository? How do they know at a glance which files to read first? Sure,
they’ll probably know to find relevant information about your music recommendation engine in recommendation.feature, but there may also be related
examples in sharing.feature.
Relish is a website that formats your Cucumber features nicely for your
stakeholders to read and also provides additional navigation and documentation features.
In this recipe, we’re going to write a couple of Cucumber scenarios and then
upload them to a new project on Relish.
Writing the Features
Consider how you might write the specs for this book as a series of Cucumber
examples (leaving aside how you’d actually implement the steps). You might
62. http://relishapp.com
63. http://daringfireball.net/projects/markdown
www.it-ebooks.info
report erratum • discuss
Chapter 1. Cucumber Techniques
• 56
Disclosure
Relish is maintained by Matt Wynne, one of the contributors to this book. We chose
to include this content because we genuinely feel that Relish is a useful tool for
Cucumber users. To avoid giving you a sales pitch, we had Ian write this recipe in
isolation.
The service charges a monthly fee for private projects but is free for public ones.
put summaries of the recipes in the first part of this book—the one on general
tips—in features/tips.feature.
relish/simple/features/tips.feature
Feature: Tips and tricks
This section contains general Cucumber techniques not tied to
specific technologies or platforms.
Scenario: Continuous integration
A continuous integration server helps you catch regressions in
your code by re-running your Cucumber examples whenever you push a
new code change to the server.
Given a continuous integration server
When I push my code changes
Then all my Cucumber features should run
Next, you might describe the web-related chapters of the book in features/web.feature.
relish/simple/features/web.feature
Feature: Testing web applications
This section contains several tips for connecting to servers and
processing HTML.
Scenario: Parsing HTML tables
Given an HTML table
When I read the table recipe
Then I should be able to parse my table easily
Now that you have some sample content, let’s post it to Relish.
www.it-ebooks.info
report erratum • discuss
Publish Your Documentation on Relish
• 57
Starting with Relish
First, you’ll need to get a Relish account by visiting the sign-up page.64 Next,
install the Relish gem, which contains the command-line program for posting
documentation to the site.
$ gem install relish
Now, you can create a new Relish project using the account name you chose
when you signed up. I used cuke-recipes as both the username and the project
name.
$ relish projects:add cuke-recipes/cuke-recipes
If I had wanted this to be hidden from the public, I would have added :private
to the end of the project name.
Make sure you’re following the Cucumber convention of putting all your features in the features subdirectory so that Relish can find them. Publish your
project to Relish by running the push command from your project directory.
$ relish push cuke-recipes/cuke-recipes
When that step finishes, your project will be visible at a dedicated URL based
on your username and project name.65 It should look something like Figure
9, Relish without customizations.
Figure 9—Relish without customizations
Notice that the project is somewhat disorganized so far. The web testing link
comes before the general tips, and everything is just kind of dumped in our
laps with no explanation. In the next section, we’ll fix that by adding an
overview as well as navigation information.
64. https://www.relishapp.com/users/sign_up
65. http://relishapp.com/cuke-recipes/cuke-recipes
www.it-ebooks.info
report erratum • discuss
Chapter 1. Cucumber Techniques
• 58
Organization
First, let’s add an overview telling the reader what the project is about. Create
a file called features/README.md with the following contents:
relish/full/features/README.md
This book will show you how to get the most out of [Cucumber][1], from
specific situations to advanced test-writing advice.
[1]: http://cukes.info
I’ve thrown in a hyperlink in Markdown style, just so we can see how Relish
renders formatted text.
When you push your directory to Relish again and hit Reload in your browser,
you should see an introductory section about the project. Next, let’s put the
sections in a more logical order: general tips first, then web techniques. Create
a file called features/.nav with the following list:
relish/full/features/.nav
- README.md (Overview)
- tips.feature
- web.feature
This file is a YAML-formatted66 list of .feature files in the order you want them to
appear in the nav bar on the left of your project’s Relish page. A flat structure is
fine for a project this simple, but you can nest lists if you need to do so.
Relish will use the names embedded in your .feature files as navigation links.
If you want to use a different name for a link, just put the new name in
parentheses after the filename in the .nav file.
Now that we have a better sequence for our files, let’s add a little more context
and formatting.
Formatting
As we saw with the README file, Relish understands Markdown. You can put
any .md file in your features directory, and Relish will include it as another page
in your project.
You can also embed Markdown directly in feature and scenario descriptions.
To see how this works, add the following text to web.feature, just before the
Scenario (the screenshot text should all go on one line):
66. http://yaml.org
www.it-ebooks.info
report erratum • discuss
Publish Your Documentation on Relish
• 59
Here's an example of [Jenkins][1], a popular CI server, in action:

[1]: http://jenkins-ci.org
Now, when you repost your project and click the “Tips and tricks” link, you
should see something like Figure 10, Relish with navigation and formatting,
on page 59.
Figure 10—Relish with navigation and formatting
Further Exploration
Relish helps you publish your Cucumber examples as living documentation
—in other words, as a spec that stays up-to-date as you work on your project.
www.it-ebooks.info
report erratum • discuss
Chapter 1. Cucumber Techniques
• 60
The user manual is itself a Relish project,67 which means that each aspect of
the site’s behavior you read about is backed up somewhere by a running
Cucumber test. Take a look at the docs to learn about some of the advanced
Relish features we haven’t covered here, such as versioning your spec.
Note that Relish doesn’t run your features for you; it’s strictly for publishing
your documentation in a readable, navigable format. To run your examples
automatically on a server, see Recipe 10, Add Cucumber to Your Continuous
Integration Server, on page 47.
67. https://www.relishapp.com/relish/relish/docs
www.it-ebooks.info
report erratum • discuss
Test Through Multiple Interfaces Using Worlds
• 61
Recipe 12
Test Through Multiple Interfaces Using Worlds
Problem
Your application has multiple public-facing interfaces, such as a graphical
user interface (GUI) and an application programming interface (API). You’d
like to test your code through both interfaces using the same set of Cucumber
features.
Ingredients
• Multiple implementations of the World,68 an object that Cucumber creates
and passes into each test
• Selenium WebDriver69 for testing a web app through the browser
• HTTParty70 for testing an HTTP API
• The Sinatra web framework71 to implement the example app
Solution
Many applications support more than one interface for controlling the
underlying business logic. Your app might have a desktop GUI, a web interface,
a REST API, some custom debugging hooks, or perhaps even all of these.
Wouldn’t it be nice to write one set of Cucumber features that describe your
application’s behavior and then run those features against the GUI, the web
interface, the API, and so on? That’s exactly what Cucumber’s World object
enables you to do.
In this recipe, we’re going to use the Sinatra web framework to build an
application that has two interfaces: a web interface for humans and an HTTP
API for machines. We’ll write one World object to test each interface. The WebWorld
object will use Selenium WebDriver to fire up a live browser and interact with
68.
69.
70.
71.
https://github.com/cucumber/cucumber/wiki/A-Whole-New-World
https://github.com/vertis/selenium-webdriver
https://github.com/jnunemaker/httparty
http://www.sinatrarb.com
www.it-ebooks.info
report erratum • discuss
Chapter 1. Cucumber Techniques
• 62
the user-visible web page. The ApiWorld object will instead connect directly to
the API using the HTTParty library.
Feature
This web app will be a simple one-function calculator. It will take the square root
of whatever number we type into it. Here’s the start of a feature describing the
happy path, in features/square_root.feature:
world/features/square_root.feature
Feature: Square root
Scenario: Positive number
When I take the square root of 4.0
Then I should get 2.0
The step definitions are going to be shared between both implementations of the
tests. Only the World will change.
Before you write your first step definition, you might take a step back and see
that both definitions will deal with floating-point numbers. The regular expressions
for numbers can get kind of ugly. Let’s use Cucumber’s transforms72 to put this
processing in one place. Put the following code in features/step_definitions/square_
root_steps.rb:
world/features/step_definitions/square_root_steps.rb
A_FLOAT = Transform(/(-?\d+(?:\.\d+)?)/) do |number|
number.to_f
end
Now, you can use that transformation to implement the When step.
world/features/step_definitions/square_root_steps.rb
When /^I take the square root of (#{A_FLOAT})$/ do |number|
take_square_root(number)
end
The Then step will compare the actual results to the expected ones. Because
we’re dealing with floating-point numbers, we’ll use RSpec’s ability to make
approximate comparisons.
world/features/step_definitions/square_root_steps.rb
Then /^I should get (#{A_FLOAT})$/ do |expected|
tolerance = expected.abs * 0.001
square_root_result.should be_within(tolerance).of(expected)
end
72. https://www.relishapp.com/cucumber/cucumber/docs/transforms
www.it-ebooks.info
report erratum • discuss
Test Through Multiple Interfaces Using Worlds
• 63
Ian says:
Testing Our Hardware
One of my co-workers used a technique like this one to test a piece of laboratory
hardware he was working on. The device has two customer-visible interfaces: an
embedded GUI and a text-based network API.
He began by writing step definitions specifically for the API and then adapted them
to a second version that uses the GUI instead. By launching the test with different
parameters, he could test the application logic through the GUI or the API.
He found it handy to have these features as a quick smoke test to make sure that
both interfaces were returning the same data.
Where do those take_square_root() and square_root_result() methods come from?
You’ll implement those in the World objects.
Testing Through the API
For no particular reason, let’s implement the API version of the test first.
You’ll need to install HTTParty.
$ gem install httparty
Now, put the following code in features/support/env.rb:
world/features/support/env.rb
require 'httparty'
class ApiWorld
def take_square_root(number)
response = HTTParty.get "http://localhost:4567/api/square_root/#{number}"
@result = response.body.to_f
end
def square_root_result
@result
end
def close
end
end
After { close }
The step definitions require you to write two functions, take_square_root() and
square_root_result(). With an HTTP API, the implementation is easy; we just hit
the API endpoint and store the result.
www.it-ebooks.info
report erratum • discuss
Chapter 1. Cucumber Techniques
• 64
We’ve added one more method, close(), and set up an After hook to call it automatically after each scenario. It doesn’t need to do anything during API testing,
but it will be handy for closing the browser when we’re testing the user
interface.
You’ll notice this is not a RESTful API because we’re using a dedicated /api
URL that’s separate from the web app. In an example this trivial, that’s OK—it
saves us a few lines of code. For a real web app, you get a lot of maintainability benefits from using one common set of URLs.
Testing Through the User Interface
All you need to do to test through the same user interface is reimplement the
same set of methods from the ApiWorld object. Rather than hitting the API
endpoint, you’ll launch a browser and navigate to the page as a live user
would. To do that, you’ll need to install Selenium WebDriver.
$ gem install selenium-webdriver
Now, add the following code to env.rb:
world/features/support/env.rb
require 'selenium-webdriver'
class WebWorld
def initialize
@browser = Selenium::WebDriver.for :firefox
end
def take_square_root(number)
@browser.navigate.to "http://localhost:4567"
@browser.find_element(:name => 'number').send_keys number.to_s
@browser.find_element(:name => 'submit').click
end
def square_root_result
@browser.find_element(:id => 'result').text.to_f
end
def close
@browser.quit
end
end
We’re assuming the main page will have a form with a number field and a submit
button. The results page will need to have an element with an ID of result.
How do we choose which World to use? The simplest way is an environment
variable.
www.it-ebooks.info
report erratum • discuss
Test Through Multiple Interfaces Using Worlds
• 65
world/features/support/env.rb
if ENV['USE_GUI']
World { WebWorld.new }
else
World { ApiWorld.new }
end
Now that we have an idea of the URLs we want to use and the names of the
form elements, we can build the web app.
Web App
For an app this simple, we’ll build both the user interface and the API in the
Sinatra web framework. Go ahead and install Sinatra.
$ gem install sinatra
Now, create a file called square_root.rb with the following contents:
world/square_root.rb
require 'sinatra'
get '/' do
<<HERE
<!DOCTYPE html>
<html>
<head>
<title>Square root</title>
</head>
<body>
Enter a number to take the square root:
<form action="/square_root">
<input name="number" type="text">
<input name="submit" type="submit">
</form>
</body>
</html>
HERE
end
This displays a simple HTML form when someone visits the root of the web
app. Clicking Submit will take the user to a path like /square_root?number=4. We
need to implement that part of the web app as well.
world/square_root.rb
get '/square_root' do
number = params[:number].to_f
result = Math.sqrt(number)
<<HERE
<!DOCTYPE html>
www.it-ebooks.info
report erratum • discuss
Chapter 1. Cucumber Techniques
• 66
<html>
<head>
<title>Result</title>
</head>
<body>
The square root of <span id="number">#{number}</span>
is <span id="result">#{result}</span>.
</body>
</html>
HERE
end
Finally, we can define the API endpoint.
world/square_root.rb
get '/api/square_root/:n' do |n|
Math.sqrt(n.to_f).to_s
end
Notice that both the user interface and the API are calling the same implementation function: Math.sqrt(). Both interfaces are thin wrappers around the
underlying logic.
You now have all you need to get the web app running. Launch the app like
this:
$ ruby square_root.rb
Then, navigate to http://localhost:4567 and interact with the web form. If you’re
feeling adventurous, try using a command-line tool like cURL73 to drive the
API.
When you’re ready to take your Cucumber tests for a spin, try testing through
the API.
$ cucumber features
That should return fairly quickly, since you’re not waiting for a browser to
spin up. Now, to test through the user interface, all you need to do is set the
USE_GUI environment variable.
$ USE_GUI=1 cucumber features
One final question: did you notice the parallels between our tests and our
implementation? The tests express the same behavior (in the .feature file) and
bring in two different World objects. The application uses the same business
logic and wraps two different interfaces around it.
73. http://curl.haxx.se
www.it-ebooks.info
report erratum • discuss
Manipulate Time
• 67
Recipe 13
Manipulate Time
Problem
You want to test a long-running process, but you don’t want your tests to be slow.
Ingredients
• Capybara74 for testing web apps in multiple ways, both headless and inbrowser
• Timecop75 for faking the time of day in Ruby
• Sinatra76 for building the sample app
Solution
One of the biggest time sinks in testing is waiting on your app. Whenever a
program has to connect to a slow network, make a lengthy calculation, or
wait for a specific time of day, you can speed up your tests dramatically by
finding a way around the delay.
In this recipe, we’re going to write a simple web app that has a fixed delay
built in. We’ll start with a slow test that waits for the app to finish its task.
We’ll then look at a couple of ways to speed up the clock, depending on how
much of the app’s logic is in JavaScript.
Traditional Web App
The app we’re building will inflate and pop an imaginary balloon—something
that takes several seconds. Here’s the spec for the app; it goes in features/ balloon.feature:
time/web/features/balloon.feature
Feature: Balloon
Scenario: Pop
Given a balloon
When I inflate it for 5 seconds
Then it should pop
74. https://github.com/jnicklas/capybara
75. https://github.com/travisjeffery/timecop
76. http://www.sinatrarb.com
www.it-ebooks.info
report erratum • discuss
Chapter 1. Cucumber Techniques
• 68
Assuming the web app has links called /inflate and /status and returns the text
Inflating or Popped!, here’s how we might implement those step definitions in
features/step_definitions/balloon_steps.rb:
time/web/features/step_definitions/balloon_steps.rb
Given /^a balloon$/ do
visit 'http://localhost:4567/inflate'
end
When /^I inflate it for (\d+) seconds$/ do |seconds|
sleep seconds.to_f
visit 'http://localhost:4567/status'
end
Then /^it should pop$/ do
page.should have_content 'Popped!'
end
The visit and page methods are part of Capybara’s API for web testing. To use
them, you’ll need to install Capybara.
$ gem install capybara
Now, configure Cucumber to use Capybara by adding the following setup to
features/support/env.rb:
time/web/features/support/env.rb
require 'capybara/cucumber'
require 'timecop'
require './balloon'
Capybara.app = Sinatra::Application
All that’s left is the app. Create a file called balloon.rb with the following contents:
time/web/balloon.rb
require 'sinatra'
enable :sessions
get '/inflate' do
session[:start] = Time.now
redirect to('/status')
end
get '/status' do
now = Time.now
elapsed = now - (session[:start] || now)
elapsed >= 5 ? 'Popped!' : 'Inflating'
end
www.it-ebooks.info
report erratum • discuss
Manipulate Time
• 69
Now, when you run the test, it should pass. But it takes too long to complete
because we have to wait for the app to get ready. How can we get around
this?
We’re testing this app in-process by calling its code directly through Ruby’s
Rack interface.77 That means if we change the way Ruby handles time, the
app will see it.
There are several ways to manipulate timestamps in Ruby. The one that fits our
purposes best is a library called Timecop. Go ahead and install Timecop now.
$ gem install timecop
Now, replace the body of your When step with the following code:
time/web/features/step_definitions/balloon_steps.rb
Timecop.freeze(seconds.to_i) do
visit 'http://localhost:4567/status'
end
Timecop’s freeze() method causes Ruby’s Time.now() to return a fixed, static
value—in this case, a number of seconds into the future. The manipulation
happens only during the execution of the block; afterward, Time.now() will
behave normally. Now, when you rerun the tests, they should finish almost
instantly.
Single-Page App
Solutions like Timecop work when our tests are running the same Ruby process as the app under test. But what about browser-based testing? And what
about single-page, JavaScript-heavy web apps?
In this section, we’ll convert our program to a single-page JavaScript application and then adapt the tests to the new architecture. First, replace the contents of balloon.rb with the following:
time/single_page/balloon.rb
require 'sinatra'
get '/inflate' do
IO.read 'inflate.html'
end
Now, add a file called inflate.html with the following contents:
77. http://rack.github.com
www.it-ebooks.info
report erratum • discuss
Chapter 1. Cucumber Techniques
• 70
time/single_page/inflate.html
<!DOCTYPE html>
<html>
<head>
<title>Balloon</title>
<script
type="text/javascript"
src="https://ajax.googleapis.com/ajax/libs/jquery/1.8.2/jquery.min.js">
</script>
<script type="text/javascript">
pop = function() {
$('#status').text('Popped!');
};
popLater = function(ms) {
setTimeout(pop, ms);
};
$(document).ready(function() {
$('#go').click(function(e) {
popLater(5000);
});
});
</script>
</head>
<body>
<p id="status">Ready</p>
<input id="go" type="button" value="Go"></input>
</body>
</html>
To test this app, we need to use a JavaScript-aware approach. Capybara
supports a couple of different ways to drive JavaScript; the simplest to get
started with is in-browser testing. Change your env.rb file to the following:
time/single_page/features/support/env.rb
require 'uri'
require 'capybara/cucumber'
Capybara.default_driver = :selenium
With this change, methods like visit() or page() will now go through a live
browser instead of calling directly into Ruby code. Since we’re controlling a
browser now, we have access to a full JavaScript runtime. The only step you
need to change in your step definitions is the When step.
time/single_page/features/step_definitions/balloon_steps.rb
When /^I inflate it for (\d+) seconds$/ do |seconds|
page.execute_script <<HERE
popLater = function(ms) {
pop();
};
HERE
www.it-ebooks.info
report erratum • discuss
Manipulate Time
• 71
Matt says:
Doing the Right Thing with Time
One of my clients was writing a mobile game in JavaScript for fans of a TV show to
play while watching. On the show, people would bring in antiques from their basements for experts to evaluate. The surprise factor of the show stems from guessing
and then finding out what an item is worth. The team wanted to build this excitement
into the game.
When a person brings in, say, a vase from their attic, the game asks you how much
you think it’s worth and presents you with three choices. Later in the show, they
reveal the actual value, and you get points for guessing correctly. You play a fresh
round for each contestant on the show.
The game synchronizes itself to the show using an audio watermark plus specific
timing information. During testing, the team used sample questions with ten-second
spacing. They had been testing this manually, meaning they had to wait ten seconds
each time they wanted to test a change.
We started by adding a single Cucumber scenario to automate a correct answer for
the first question. Once we had the first passing automated test, we looked for a way
to remove the delays. Ten seconds was long enough to wait for a single scenario, but
multiplied up over a whole suite of features, it would have been ridiculous.
The app was event-based; after each question, it would set a timeout for the next
event and then sleep. We extracted that tiny bit of logic into a function. For the tests,
we overrode that function to move on to the next event immediately. It was a minor
change, but now the test ran instantly.
As a happy side effect, the team realized they could put a secret button into the debug
version of the app that allowed them to do the same thing. Now the manual tests
could simulate going right through the whole 30-minute episode in just a few seconds.
Capybara’s execute_script() function lets us run our own JavaScript code on the
page. We can use this to override the popLater() function on the page and pop
the balloon immediately.
To run the tests now, you’ll need to launch the web server first. Run the following command and leave that terminal window open while you’re testing:
$ ruby balloon.rb
Now, when you run your Cucumber tests, you should see Firefox launch and
pop the balloon without a delay.
www.it-ebooks.info
report erratum • discuss
Chapter 1. Cucumber Techniques
• 72
Recipe 14
Drive Cucumber’s Wire Protocol
Problem
You’re writing Cucumber tests to drive an application that doesn’t provide
an easy way to integrate Ruby, such as PHP, ActionScript, or C++.
Ingredients
• A .wire file for driving Cucumber’s wire protocol78
Solution
In 2009, the Cucumber team was looking for a way to connect Cucumber to
environments that don’t have direct Ruby integration. They came up with the
wire protocol, a simple text format through which Cucumber can talk to an
external process over TCP and ask it things like, “Do you have any step definitions matching When I withdraw $100?”
Ian says:
Remote Testing
At work, some of our products have a user interface that happens to boot and run
just fine on a regular Windows PC. This is great for testing, since we can install
whatever test software we want without worrying about the resource constraints of
embedded hardware.
But it would be nice to be able to test on the real hardware at some point. Thanks to
the wire protocol, we were able to do so. A small “listener” program with very few
dependencies ran on the device and drove the GUI. The Cucumber test suite ran on
a PC and conducted the tests over the wire protocol.
The first customers of the protocol were developers using the Java and .NET
runtimes. Although these environments now have more direct Cucumber
support, the wire protocol is still useful for testing C++, PHP, and Flash
applications.
78. https://github.com/cucumber/cucumber/wiki/wire-protocol
www.it-ebooks.info
report erratum • discuss
Drive Cucumber’s Wire Protocol
• 73
Each environment has its own installation and step definition techniques;
you’ll find a few of them in this book. But they all share one common way to
connect from Cucumber. Create a file in your step_definitions folder with a .wire
extension, and put the following text in it:
wire_client/step_definitions/cucumber.wire
host: localhost
port: 3901
Now, in addition to looking in the step_definitions directory to find implementations of your test steps, Cucumber will also send a query over the TCP port
you designated.
If you want, you can also specify how long Cucumber will wait for the server
to carry out each step.
wire_client/step_definitions/cucumber.wire
timeout:
invoke: 1.0
The fact that Cucumber looks in two places (the local step_definitions directory
and the wire protocol) comes with a warning and a benefit. First, the warning:
if a step in your scenario happens to match both a local definition and a definition fetched from the wire protocol, Cucumber will bail out and warn you
of the ambiguous match.
Now, the benefit: you can write compound steps locally that call multiple
steps on the wire protocol server. This is particularly handy when the environment you’re testing makes it difficult to add new step definitions (for example,
if it requires a lengthy compile and link every time you tweak a definition).
For instance, imagine the remote server defines just a few generic, low-level
steps like this one:
When I click the "([^"]+)" button
Your local step_definitions directory can then contain more application-specific
step definitions like this one:
wire_client/step_definitions/publish_steps.rb
When /^I publish an article$/ do
steps %{
When I set the title to "First post!"
When I set the body to "Hello world!"
When I click the "Done" button
}
end
www.it-ebooks.info
report erratum • discuss
Chapter 1. Cucumber Techniques
• 74
Here, a single step calls out to a number of lower-level ones implemented on
the server.
Further Exploration
In Recipe 33, Test a PHP App with cuke4php, on page 173, we use the wire
protocol to drive a PHP application.
www.it-ebooks.info
report erratum • discuss
Implement a Wire Protocol Listener
• 75
Recipe 15
Implement a Wire Protocol Listener
Problem
You want to test software running in an environment that doesn’t have
explicit Cucumber support, such as an embedded system.
Ingredients
• Cucumber’s wire protocol,79 which specifies how Cucumber can drive
software tests over a network
Solution
The Cucumber project supports many programming languages—such as Ruby,
Java, and JavaScript—directly. There are no special steps needed to get Cucumber
to drive test code written in these languages. Without this support, you’d need
to implement your own communication path between Cucumber and your software.
That’s exactly what the wire protocol does. When you start a Cucumber test using
the wire protocol, Cucumber connects to your app over TCP and sends it a series
of messages: begin_scenario first, invoke to run a particular test step, and so on. All
you have to do to have Cucumber drive your code is open up a network socket
and listen for these incoming messages.
In this recipe, we’re going to test a simple C-based embedded device—a thermostat—by teaching it the wire protocol.
Feature
Here’s a simple test to see whether the air conditioning turns on when we
first set the temperature. Place the following code in features/thermostat.feature:
wire_server/features/thermostat.feature
Feature: Thermostat
Scenario: Air conditioning
Given the room is at 80 F
When I set the thermostat to 75 F
Then the A/C should be on
79. https://github.com/cucumber/cucumber/wiki/wire-protocol
www.it-ebooks.info
report erratum • discuss
Chapter 1. Cucumber Techniques
• 76
Normally, when you run this feature, Cucumber would look in the local
step_definitions directory for Ruby code. Instead, we need to tell it to connect to
the network. Create a file called step_definitions/cucumber.wire with the following
contents:
wire_server/features/step_definitions/cucumber.wire
host: localhost
port: 3901
Now, when you run Cucumber, it will connect to localhost over port 3901 instead
of looking for Ruby code.
Messages
The wire protocol will send several different kinds of messages to your test
code.80 The two most interesting ones are step_matches and invoke.
Let’s look at step_matches first. When Cucumber sees the text Given the room is at
80 F, it needs to know two things.
• Are there any step definitions that match this line of text?
• Does this step definition take any arguments?
Cucumber will send a request to your app that looks like this:
["step_matches",{"name_to_match":"the room is at 80 F"}]
This data is in JavaScript Object Notation (JSON) format.81 We need to construct a JSON reply in our thermostat code and send it back to Cucumber.
If we have a definition that matches the step, we reply with a unique ID for
that step definition, plus the names and positions of any arguments. This
step has one argument: the temperature, starting at the 15th position
(counting from zero).
["success", [{"id"=>"0", "args"=>[{"val"=>"80", "pos"=>15}]}]]
The previous JSON says, “Yes, definition #0 matches this step. The text �80’
starting at position 15 is the only argument.” The ID can be anything unique;
we’ll use integers for this recipe.
For a step that has no arguments, you’d leave the args array empty. For a step
that doesn’t have a matching definition, you’d return the following message
instead:
["success", []]
80. https://github.com/cucumber/cucumber/blob/master/legacy_features/wire_protocol.feature
81. http://json.org
www.it-ebooks.info
report erratum • discuss
Implement a Wire Protocol Listener
• 77
Next, Cucumber will send your app the invoke message when it’s time to
actually run the step.
["invoke",{"id":"0","args":["80"]}]
This tells our code, “Run step definition #0 with a value of 80 for the argument.” Based on whether the step passes or fails, we’d return a message like
one of the following two:
["success"]
["fail",{"message":"Could not set temperature"}]
How might we implement this protocol? We could use a full-fledged solution
like cucumber-cpp,82 which takes care of the TCP server, JSON parsing, and
regular-expression step matching.
If, however, we’re running in a constrained environment with only C support,
we might prefer to implement our own network listener. We’d like to show
you just how easy it is to handle the wire protocol, so we’re going to go with
the roll-your-own approach here.
Network Server
A classic network server loop using the standard networking APIs looks
pretty much the same everywhere: open up a connection using socket(), prepare
it for listening with bind(), wait for incoming connections with accept(), and read
data with recv().
Rather than reproducing all that boilerplate here, we’re just going to adapt a
stock implementation from the Web.83 Download listener.c and save it in your
project directory. Look for the text NOTE TO READERS; that’s the marker for where
we can inject the Cucumber code. Replace the body of the while loop just
underneath that comment with the following code:
respond_to_cucumber(wStream, buf);
You’ll need to declare this function near the top of listener.c, right after the last
#include directive.
extern void respond_to_cucumber(FILE* stream, const char* message);
In a moment, we’ll fill in this function. First, though, let’s write our step
definitions.
82. https://github.com/cucumber/cucumber-cpp
83. http://www.2600.com/code/212/listener.c
www.it-ebooks.info
report erratum • discuss
Chapter 1. Cucumber Techniques
• 78
Step Definitions
Like any Ruby step definitions, our C definitions will connect a series of step
names to chunks of code that implement those steps. We need some way to
take arguments and some way to report passing or failing steps. We also need
an API for our thermostat so that our test code can drive the hardware.
Let’s start with the API. Create a new file called thermostat.h with the following
declarations:
wire_server/thermostat.h
extern int ac_is_on();
extern void set_room_temp(int temperature);
extern void set_thermostat(int temperature);
Now, we can implement the three step definitions that call the API. Let’s adopt
the UNIX convention of returning 0 for a normal result and a nonzero value
for a failure. Place the following code in a new file, cucumber.c:
wire_server/cucumber.c
#include <stdio.h>
#include <string.h>
#include "thermostat.h"
int the_room_is_at_f(const char* arg) {
set_room_temp(atoi(arg));
return 0;
}
int i_set_the_thermostat_to_f(const char* arg) {
set_thermostat(atoi(arg));
return 0;
}
int the_ac_should_be(const char* arg) {
int want_ac_on = (0 == strcmp("on", arg));
return ac_is_on() == want_ac_on ?
0 :
-1 ;
}
How do we map step names to their implementations? Regular Cucumber
uses regular expressions; for simplicity’s sake, we’ll use C’s scanf() format
instead. The following code defines a couple of data types for matching steps
to implementations:
wire_server/cucumber.c
typedef int (*callback_t)(const char* arg);
typedef struct stepdef {
const char* pattern;
callback_t callback;
} stepdef_t;
www.it-ebooks.info
report erratum • discuss
Implement a Wire Protocol Listener
• 79
#define NUMDEFS 3
stepdef_t stepdefs[NUMDEFS] = {
{ "the room is at %31[^\"] F",
the_room_is_at_f
},
{ "I set the thermostat to %31[^\"] F", i_set_the_thermostat_to_f },
{ "the A/C should be %31[^\"]",
the_ac_should_be
},
};
The %31[^\"] markers mean, “Match any sequence of nonquote marks up to
31 characters long.” This is a cheap way of extracting just the characters we
need from a JSON string without actually parsing the JSON. For this simple
project, that’s good enough to meet our needs.
Message Handler
We could drop a simple JSON-handling library into our project. In fact, for
an early version of this chapter’s code, we used jsmn,84 a minimalistic C JSON
parser. However, if we’re really strapped for computing resources, we can
take advantage of the fact that Cucumber’s JSON messages follow a strict
convention.
So, instead of looking for the text step_matches as a string inside a JSON array,
we could just look for it as a sequence of bytes starting at position 2 (skipping
over the square bracket and opening quotation mark).
Add the following function definition to cucumber.c:
wire_server/cucumber.c
#define MSG_TYPE_IS(msg, type) \
(0 == strncmp(msg + 2, type, sizeof(type) - 1))
void respond_to_cucumber(FILE* stream, const char* msg) {
if (MSG_TYPE_IS(msg, "step_matches")) {
respond_to_step_matches(stream, msg);
} else if (MSG_TYPE_IS(msg, "invoke")) {
respond_to_invoke(stream, msg);
} else {
respond_success(stream);
}
}
For most wire protocol messages, we can blindly reply with a success response.
We only need to specifically handle the steps_match and invoke messages.
To respond to the steps_match query, we just loop through the array of step
definitions we built a moment ago until we find the one that matches.
84. http://zserge.bitbucket.org/jsmn.html
www.it-ebooks.info
report erratum • discuss
Chapter 1. Cucumber Techniques
• 80
wire_server/cucumber.c
void respond_to_step_matches(FILE* stream, const char* msg) {
int i;
for (i = 0; i < NUMDEFS; ++i) {
const char* step
= msg + 34;
const char* pattern = stepdefs[i].pattern;
char arg_val[32] = {0};
if (sscanf(step, pattern, arg_val) > 0) {
int arg_pos = strchr(pattern, '%') - pattern;
respond_with_match(stream, i, arg_val, arg_pos);
return;
}
}
respond_success(stream); // no matches
}
We can only get away with blindly reading at fixed character offsets like this
because we have complete control over the code sending the requests. Because
we’ve omitted length checks for brevity, a malformed request could crash our
server.
The implementation of respond_with_match() merely has to plug the various values
into the JSON format expected by Cucumber.
wire_server/cucumber.c
void respond_with_match(FILE* stream, int id, const char* arg_val, int arg_pos) {
fprintf(stream,
"[\"success\","
"[{\"id\":\"%d\", "
"\"args\":[{\"val\":\"%s\", \"pos\":%d}]}]]\n",
id,
arg_val,
arg_pos);
}
The other message we need to respond to is the invoke message. Cucumber
hands us the step ID we need to run; all we need to do is find the argument,
run the step, and send back a passing or failing answer.
wire_server/cucumber.c
void respond_to_invoke(FILE* stream, const char* msg) {
const char* id_text = msg + 17;
const char* arg_text = msg + 29;
int id = atoi(id_text);
char arg_val[32] = {0};
sscanf(arg_text, "%31[^\"]", arg_val);
www.it-ebooks.info
report erratum • discuss
Implement a Wire Protocol Listener
• 81
if (0 == stepdefs[id].callback(arg_val)) {
respond_success(stream);
} else {
respond_failure(stream);
}
}
Here are the definitions of respond_success() and respond_failure():
wire_server/cucumber.c
void respond_success(FILE* stream) {
fputs("[\"success\",[]]\n", stream);
}
void respond_failure(FILE* stream) {
fputs("[\"fail\",{\"message\":\"Step failed\"}]\n", stream);
}
With all the infrastructure in place, we can finally write our application code.
Application
First, let’s create a few private definitions used only inside the thermostat
code. Create a new file called thermostat.c with the following code:
wire_server/thermostat.c
#define INVALID 999999
static
static
static
static
if
int room_temp
= INVALID;
int desired_temp = INVALID;
int ac_on
= 0;
void update_ac() {
(room_temp
!= INVALID &&
desired_temp != INVALID) {
ac_on = (room_temp > desired_temp);
}
}
Once you’ve finished the private section, the public API—used by our step
definitions and presumably the main thermostat control loop—is easy.
wire_server/thermostat.c
int ac_is_on() {
return ac_on;
}
void set_room_temp(int temperature) {
room_temp = temperature;
update_ac();
}
void set_thermostat(int temperature) {
desired_temp = temperature;
update_ac();
}
www.it-ebooks.info
report erratum • discuss
Chapter 1. Cucumber Techniques
• 82
Now that all the pieces are in place, we can finally build the software. Create
a Makefile with the following contents:
wire_server/Makefile
default: thermostat
OBJS := thermostat.o cucumber.o listener.o
thermostat: $(OBJS)
gcc -o thermostat $(OBJS)
%.o: %.c
gcc -c $<
Build and run the server, passing it the same port number you used in your
cucumber.wire file.
$ make
$ thermostat 3901
Leave the server running, and open a new terminal to run Cucumber.
$ cucumber features
You should see a report of passing tests. Try changing the logic of the thermostat code and see whether you can get a failing result.
Further Exploration
With a bit of work, you could make the code in this recipe flexible enough to
allow multiple step arguments or robust enough to handle arbitrary JSON
input. If you’re coding on a system where C++ and the Boost library are an
option, you might try cucucmber-cpp.85 It’s a bit of work to build but takes
care of a lot of the parsing details for you.
85. http://spin.atomicobject.com/2012/05/23/acceptance-testing-c-with-cucumber-and-the-wire-protocol
www.it-ebooks.info
report erratum • discuss
CHAPTER 2
Java
In this chapter, we’ll look at several techniques that are specific to the Java
platform. We’ll see how to test apps written in popular JVM languages, such
as Clojure and Scala. We’ll also discuss commonly used Java frameworks,
such as Spring, Hibernate, and Swing.
www.it-ebooks.info
report erratum • discuss
Chapter 2. Java
• 84
Recipe 16
Use Cucumber Directly with JRuby
Problem
You want to test a project written in Java, Clojure, Scala, or another JVM
language (or perhaps a mix of these languages). You want to keep your step
definitions in Ruby for simplicity reasons.
Ingredients
• JRuby,1 a pure-Java implementation of Ruby
Solution
Using JRuby is the simplest way to get started with Cucumber on the Java
platform. There are no classes to write and no Maven artifacts to download.
You just use Cucumber on JRuby the same way you’d use it on any other
Ruby version.
Why write Ruby to test JVM code, instead of using Java or Scala or whatever
the project is written in? There are a few reasons.
• You might be more productive writing step definitions in Ruby, particularly if the application you’re testing was written in Java.
• Your application might be written in a mix of JVM languages. For these
cases, you might choose Ruby as a common test language.
• You might actually be testing a Ruby program written for the JVM, such
as the Redcar text editor.2
In this recipe, we’re going to test Java’s BigInteger data type just to get a feel
for driving Java libraries from Cucumber. First, download and run the JRuby
installer for your platform.3 Then, as we discussed in Section 3, Getting the
Tools You'll Need, on page xiv, you’ll need to install the common Cucumber
libraries into your new JRuby installation. To do this, preface the normal gem
command with jruby -S.
1.
2.
3.
http://jruby.org
http://redcareditor.com
http://jruby.org/download
www.it-ebooks.info
report erratum • discuss
Use Cucumber Directly with JRuby
• 85
$ jruby -S gem install cucumber rspec-expectations
We’ll do a simple calculation just to exercise big integers. Let’s add 1 to a row
of a hundred 9s to see whether we get a 1 followed by a hundred 0s—also
known as a googol (you have no idea how hard it is to type it that way now!).
Put the following code in bigcalc.feature:
jruby/bigcalc.feature
Feature: Big calculations
Scenario: Googol
Given 100 "9"s
When I add "1"
Then I should see "1" with 100 "0"s
Let’s bring Java’s BigInteger class into the JRuby namespace so that we can
access it easily. While this step isn’t required, it makes access much more
convenient—we can just refer to it as BigInteger rather than Java::JavaMath::BigInteger.
To do so, create support/env.rb with the following code:
jruby/support/env.rb
require 'java'
java_import java.math.BigInteger
Now we can treat BigIntegers just like any Ruby objects. We can create them
from strings, add them together, and compare the results. Here are the step
definitions to go in step_definitions/bigcalc_steps.rb:
jruby/step_definitions/bigcalc_steps.rb
Given /^(\d+) "(.*?)"s$/ do |count, digit|
@first = BigInteger.new(digit * count.to_i)
end
When /^I add "(.*?)"$/ do |digits|
@second
= BigInteger.new(digits)
@expected = @first.add @second
end
Then /^I should see "(.*?)" with (\d+) "(.*?)"s$/ do |lead, count, digit|
@actual = BigInteger.new(lead + digit * count.to_i)
@actual.should == @expected
end
Now, run the tests the usual way, using the cucumber command.
$ jruby -S cucumber bigcalc.feature
The test should pass. You’re successfully calling into Java code from your
Cucumber feature.
www.it-ebooks.info
report erratum • discuss
Chapter 2. Java
• 86
Further Exploration
JRuby is the easiest way to run Cucumber on the JVM. You use all the Ruby
deployment tools you’re used to, without needing any additional pieces. But
there are always trade-offs. Every time you invoke JRuby from the command
line, you pay a few extra seconds of test start-up time.
If you’re testing JVM code written in something other than Ruby, you may
not want to pay this start-up penalty. And you may not have any particular
attachment to the Ruby language. In Recipe 17, Use Cucumber with Java via
Cucumber-JVM, on page 87, we’ll see an alternative that has a faster start-up
time and lets you write glue code in any JVM language.
www.it-ebooks.info
report erratum • discuss
Use Cucumber with Java via Cucumber-JVM
• 87
Recipe 17
Use Cucumber with Java via Cucumber-JVM
Problem
You need to test Java code using Cucumber syntax. You’d like to write your
step definitions in pure Java, without bringing Ruby into the mix. And you
need to connect it to your existing set of Java IDE and build tools.
Ingredients
• Cucumber-JVM,4 a pure-Java (no Ruby) implementation of Cucumber
• IntelliJ IDEA Community Edition,5 the open source edition of the beloved
Java IDE
• JUnit6 to serve as the test harness
• Maven7 for dependency management
Solution
There are a few different ways to use Cucumber to test code written for the
Java platform. The simplest is to use JRuby, an implementation of Ruby
written in Java. But it’s not the best fit for every project; it has a long startup time, sparse tool support, and a single choice of step definition language
(Ruby). Fortunately, there are alternatives with different trade-offs.
If your project uses a particular JVM language, such as Clojure, Scala, or
Java, you’d probably prefer to write your Cucumber step definitions in that
language, rather than JRuby. It’s also nice to be able to plug Cucumber into
whatever IDE and build ecosystem you’re using.
Cucumber-JVM fills these needs. It’s written entirely in Java, so there’s no
need to bring in Ruby code if you’re not already writing Ruby. It’s provided
as a set of jars so that you can incorporate it into your workflow. It plugs into
the JUnit test harness so you can run your Cucumber tests from your IDE.
4.
5.
6.
7.
https://github.com/cucumber/cucumber-jvm
http://www.jetbrains.com/idea/download
http://www.junit.org
http://maven.apache.org
www.it-ebooks.info
report erratum • discuss
Chapter 2. Java
• 88
For this recipe, we’re going to write Cucumber features for a Java-powered
soda machine. Remember those? In the 1990s, we were promised a bright
future where all we’d have to do would be to wave a magic ring at a vending
machine, and it would dispense a soda.8 That bright future hasn’t quite come
to pass yet; we might as well build it ourselves.
We’ll start with an empty project in IntelliJ IDEA, add Cucumber support
using Maven, and then write and run a few features.
Setup
Download IntelliJ IDEA and install it onto your system. Install Maven, either
directly from its download page9 or by installing a Java implementation that
includes it.10
Launch the IDE, click Create New Project, and choose “Create project from
scratch.” Type SodaMachine for the project name, and select Maven Module as
the project type, as in Figure 11, New Cucumber-JVM project, on page 89.
When the wizard prompts you for an archetype, leave it set to none.
IntelliJ IDEA will open your project’s pom.xml file automatically.11 Fill in the
Cucumber-JVM and JUnit dependencies just before the closing </project> tag.
jvm/pom.xml
<dependencies>
<dependency>
<groupId>info.cukes</groupId>
<artifactId>cucumber-java</artifactId>
<version>1.0.11</version>
</dependency>
<dependency>
<groupId>info.cukes</groupId>
<artifactId>cucumber-junit</artifactId>
<version>1.0.11</version>
</dependency>
<dependency>
<groupId>junit</groupId>
<artifactId>junit</artifactId>
<version>4.10</version>
</dependency>
</dependencies>
8.
9.
10.
11.
http://en.wikipedia.org/wiki/Jini
http://maven.apache.org/download.html
http://support.apple.com/kb/DL1421
http://maven.apache.org/guides/introduction/introduction-to-the-pom.html
www.it-ebooks.info
report erratum • discuss
Use Cucumber with Java via Cucumber-JVM
• 89
Figure 11—New Cucumber-JVM project
Select the View в†’ Tool Windows в†’ Maven Projects menu item. You should
see your new Soda Machine 1.0 project. Click the Reimport All Maven Projects
button—the one with two arrows, as in Figure 12, Maven dependencies, on
page 90.
Now, you need to tell JUnit that it will be running Cucumber tests. Expand
the directory tree in the Project window on the left to show the src/test/java
folder. Right-click that folder, select New в†’ Java Class, and give RunCukesTest
for the class name. Replace the file’s contents with the following code:
jvm/src/test/java/RunCukesTest.java
import cucumber.junit.Cucumber;
import org.junit.runner.RunWith;
@RunWith(Cucumber.class)
public class RunCukesTest {
}
Now IntelliJ IDEA is ready to run Cucumber. It’s time to write some features.
Write Features
Create a directory in your project called src/test/resources, and create a plaintext file in it called SodaMachine.feature with the following contents:
www.it-ebooks.info
report erratum • discuss
Chapter 2. Java
• 90
Figure 12—Maven dependencies
jvm/src/test/resources/SodaMachine.feature
Feature: Soda machine
Scenario: Get soda
Given I have $2 in my account
When I wave my magic ring at the machine
Then I should get a soda
Now you’re ready to run your feature. Open the RunCukesTest file you were
working on a minute ago. From the Run menu, choose Run…. In the small
Run window that pops up, choose RunCukesTest. You should see the following
text in the output pane…
Test '.Scenario: Get soda.Given I have $2 in my account' ignored
Test '.Scenario: Get soda.When I wave my magic ring at the machine' ignored
Test '.Scenario: Get soda.Then I should get a soda' ignored
You can implement missing steps with the snippets below:
...
followed by the usual set of suggested step definitions. Go ahead and copy
those so you can use them in your step definitions.
Implement Step Definitions
In the src/test/java directory, create a new StepDefinitions class with the following
text copied and pasted from the output window:
jvm/src/test/java/StepDefinitions.java
Line 1 import cucumber.annotation.en.*;
- public class StepDefinitions {
5
-
@Given("^I have \\$(\\d+) in my account$")
public void I_have_$_in_my_account(int dollars) {
// Express the Regexp above with the code you wish you had
}
10
-
@When("^I wave my magic ring at the machine$")
public void I_wave_my_magic_ring_at_the_machine() {
// Express the Regexp above with the code you wish you had
}
www.it-ebooks.info
report erratum • discuss
Use Cucumber with Java via Cucumber-JVM
• 91
@Then("^I should get a soda$")
public void I_should_get_a_soda() {
// Express the Regexp above with the code you wish you had
}
15
- }
If you rerun your Cucumber tests, they should pass, and in the Run window
IntelliJ IDEA should show something like Figure 13, Completed test run. The
only thing left is to implement the soda machine. We’ll leave that step as an
exercise for the reader.
Figure 13—Completed test run
Further Exploration
In this recipe, we used IntelliJ IDEA to set up Cucumber-JVM. The approach
is similar for other IDEs. To read one developer’s experience in using Eclipse
with Cucumber-JVM, see Zsolt Fabók’s article called Cucumber-JVM:
Preparation.12
12. http://www.zsoltfabok.com/blog/2011/12/cucumber-jvm-preparation/
www.it-ebooks.info
report erratum • discuss
Chapter 2. Java
• 92
Recipe 18
Drive a Spring + Hibernate Project
Problem
You want use Cucumber to test a Java application using Spring and Hibernate
for persistence. You want your tests to be isolated by database transactions
so that your data doesn’t leak from test to test.
Ingredients
•
•
•
•
•
The Spring application development framework13
The Hibernate ORM library14
A database system such as HSQLDB15
Cucumber-JVM16 to drive your Java code from Cucumber
Maven17 to install the libraries you’ll need
Solution
Building an app with Spring can save you a lot of time, but you need to
coordinate several moving parts: object-relational mappings, database
transactions, and so on. In this recipe, we’re going to put together a Cucumber
test to drive just one aspect of a simple Spring model representing a book
collection.
We’re going to show all the Cucumber and Java code in this recipe, but for
brevity’s sake we’re just going to show the most important parts of the XML
configuration files.
The full configuration files are available online in the source code for this
book.18
Here’s the overall structure of the app we’re building. We’ll use the reverse
URL of this book’s blog,19 es.cukerecip, as the Java package name.
13.
14.
15.
16.
17.
18.
19.
http://www.springsource.org
http://www.hibernate.org
http://hsqldb.org
http://github.com/cucumber/cucumber-jvm
http://maven.apache.org
http://pragprog.com/titles/dhwcr/source_code
http://cukerecip.es
www.it-ebooks.info
report erratum • discuss
Drive a Spring + Hibernate Project
• 93
src/test/resources/es/cukerecip/book.feature Cucumber scenarios
src/test/resources Cucumber configuration files
src/test/java/es/cukerecip Cucumber step definitions in Java
src/main/java/es/cukerecip Java classes we’re testing
pom.xml Application dependencies
src/main/resources Spring configuration
Let’s visit these sections in greater detail.
Feature
Create a file called src/test/resources/es/cukerecip/books.feature with the following
contents:
spring/src/test/resources/es/cukerecip/books.feature
@txn
Feature: Books
Scenario: Save books
Given a writer has contributed to the following books:
| title
|
| The Cucumber Book |
| Cucumber Recipes |
The @txn tag indicates that we want this test to occur inside a database
transaction so that the test data gets cleaned up automatically after each
scenario.
In a real test, we’d do much more than just create a bunch of objects. Presumably, we’d want to do a query or edit and then make sure the results were
what we expected. However, just this one step is going to keep us plenty busy
for now.
Step Definitions
Now that the feature is written, it’s time to move on to the step definitions.
Create a file called src/test/java/es/cukerecip/Bookstepdefs.java with the following
contents:
spring/src/test/java/es/cukerecip/BookStepdefs.java
Line 1 package es.cukerecip;
- import cucumber.api.java.en.Given;
- import org.springframework.beans.factory.annotation.Autowired;
- import java.util.List;
5 public class BookStepdefs {
-
@Autowired
private BookRepository bookRepository;
www.it-ebooks.info
report erratum • discuss
Chapter 2. Java
• 94
@Given("^a writer has contributed to the following books:$")
public void a_writer_has_contributed_to_the_following_books(
List<Book> books) throws Throwable {
10
-
for (Book b : books) {
bookRepository.save(b);
}
-
}
15
- }
The Book and BookRepository classes are part of the Spring model we’ll define in
a moment. Notice the parameter type on line 9. Cucumber will transform the
list of book titles from our .feature file into a Book objects for us.
You’ll also need a class to kick off the tests. In the same directory, create
RunCukesTest.java with the following code:
spring/src/test/java/es/cukerecip/RunCukesTest.java
package es.cukerecip;
import cucumber.api.junit.Cucumber;
import org.junit.runner.RunWith;
@RunWith(Cucumber.class)
@Cucumber.Options(glue = {"es.cukerecip", "cucumber.runtime.java.spring.hooks"})
public class RunCukesTest {
}
With the test code in place, it’s time to turn to our models.
Models
The reason we’re using an application framework like Spring in the first place
is that we want to create simple Java classes and then decorate them with
annotations to indicate how they should be stored in the database.
Create a file called src/main/java/es/cukerecip/Book.java with the following contents:
spring/src/main/java/es/cukerecip/Book.java
package es.cukerecip;
import javax.persistence.Entity;
import javax.persistence.GeneratedValue;
import javax.persistence.GenerationType;
import javax.persistence.Id;
import javax.persistence.ManyToOne;
@Entity
public class Book {
@Id
@GeneratedValue(strategy = GenerationType.AUTO)
private Long id;
private String title;
}
www.it-ebooks.info
report erratum • discuss
Drive a Spring + Hibernate Project
• 95
This indicates that each Book has a title and an autogenerated integer ID.
Now, we need a representation of a collection of books so that we can save
new ones. We’ll use an interface to describe this abstraction so that our
Cucumber tests can save books without getting mired in persistence details.
spring/src/main/java/es/cukerecip/BookRepository.java
package es.cukerecip;
public interface BookRepository {
void save(Book book);
}
The details belong in JpaBookRepository, which implements the BookRepository
interface using the Java Persistence API (JPA).
spring/src/main/java/es/cukerecip/JpaBookRepository.java
package es.cukerecip;
import org.springframework.stereotype.Repository;
import org.springframework.transaction.annotation.Transactional;
import javax.persistence.EntityManager;
import javax.persistence.PersistenceContext;
import java.util.List;
@Repository
public class JpaBookRepository implements BookRepository {
@PersistenceContext
private EntityManager entityManager;
@Transactional
@Override
public void save(Book book) {
entityManager.persist(book);
}
}
That’s it for the code. Now, let’s move on to configuration.
Dependencies
A typical Cucumber + Spring project has several dependencies. Table 1, Project
dependencies, on page 96 lists the ones you’ll need to put in your pom.xml file
for Maven to install.
If you’ve never done this before, start with the minimal example20 on Maven’s
website and then add a <dependencies> tag with one <dependency> in it for each
row in the table.
20. http://maven.apache.org/guides/introduction/introduction-to-the-pom.html#Minimal_POM
www.it-ebooks.info
report erratum • discuss
Chapter 2. Java
groupId
artifactId
• 96
version
org.springframework
spring-tx
3.1.2.RELEASE
org.springframework
spring-orm
3.1.2.RELEASE
org.hibernate
hibernate-entitymanager
4.1.4.Final
org.hsqldb
hsqldb
2.2.8
info.cukes
cucumber-java
1.1.1
info.cukes
cucumber-spring
1.1.1
info.cukes
cucumber-junit
1.1.1
junit
junit
4.10
Table 1—Project dependencies
The next step is to configure Cucumber.
Configuration
We need to tell Cucumber where to look for our classes and other configuration
files. Create a file called src/test/resources/cucumber.xml with the following contents:
spring/src/test/resources/cucumber.xml
<?xml version="1.0" encoding="UTF-8"?>
<beans xmlns="http://www.springframework.org/schema/beans"
xmlns:xsi="http://www.w3.org/2001/XMLSchema-instance"
xmlns:context="http://www.springframework.org/schema/context"
xsi:schemaLocation="http://www.springframework.org/schema/beans
http://www.springframework.org/schema/beans/spring-beans-3.0.xsd
http://www.springframework.org/schema/context
http://www.springframework.org/schema/context/spring-context-3.0.xsd">
<context:component-scan base-package="es.cukerecip"/>
<context:annotation-config/>
<import resource="classpath*:/applicationContext.xml"/>
</beans>
This recipe uses the HSQLDB database, which supports both in-memory and
on-disk representations; we’ll use the in-memory option for speed and simplicity. Paste the following configuration into src/test/resources/jdbc.properties:
spring/src/test/resources/jdbc.properties
database.driver=org.hsqldb.jdbcDriver
database.url=jdbc:hsqldb:mem:user
database.user=sa
database.password=
hibernate.dialect=org.hibernate.dialect.HSQLDialect
hibernate.show_sql=true
www.it-ebooks.info
report erratum • discuss
Drive a Spring + Hibernate Project
• 97
The final configuration steps relate to application models you’ve written.
Create a file called src/main/resources/applicationContext.xml with the following
contents:
spring/src/main/resources/applicationContext.xml
<?xml version="1.0" encoding="UTF-8"?>
<beans xmlns="http://www.springframework.org/schema/beans"
xmlns:xsi="http://www.w3.org/2001/XMLSchema-instance"
xmlns:context="http://www.springframework.org/schema/context"
xsi:schemaLocation="http://www.springframework.org/schema/beans
http://www.springframework.org/schema/beans/spring-beans-3.0.xsd
http://www.springframework.org/schema/context
http://www.springframework.org/schema/context/spring-context-3.0.xsd">
<context:component-scan base-package="es.cukerecip"/>
<import resource="persistenceContext.xml"/>
</beans>
This will configure Spring to load our classes from the es.cukerecip package. It
will also load the persistence configuration from persistenceContext.xml. On a
typical project, this file can get quite involved. Let’s just look at the most
important part.
spring/src/main/resources/persistenceContext.xml
Line 1 <bean id="entityManagerFactory"
-
class="org.springframework.orm.jpa.LocalContainerEntityManagerFactoryBean">
-
<property name="packagesToScan" value="es.cukerecip"/>
5
-
<property name="dataSource" ref="dataSource"/>
<property name="jpaVendorAdapter">
-
<bean class="org.springframework.orm.jpa.vendor.HibernateJpaVendorAdapter">
<property name="showSql" value="${hibernate.show_sql}"/>
<property name="generateDdl" value="true"/>
<property name="databasePlatform" value="${hibernate.dialect}"/>
</bean>
10
15
</property>
- </bean>
On line 4, we direct Spring to look for model classes in the es.cukerecip package.
On line 9, we configure Hibernate as the ORM for this project.
Now that all the code is written and the project is configured, you should be
able to type mvn test into a terminal and watch the tests pass.
www.it-ebooks.info
report erratum • discuss
Chapter 2. Java
• 98
$ mvn test
...
------------------------------------------------------T E S T S
------------------------------------------------------Running es.cukerecip.RunCukesTest
...
Results :
Tests run: 2, Failures: 0, Errors: 0, Skipped: 0
...
www.it-ebooks.info
report erratum • discuss
Test a Grails App Using grails-cucumber
• 99
Recipe 19
Test a Grails App Using grails-cucumber
Problem
You’re writing a web app using the Grails framework, and you want to use
Cucumber to test it.
Ingredients
• Grails,21 a web framework written in the Groovy language for the JVM
• grails-cucumber,22 a testing plug-in that adds Cucumber support to Grails
• Cucumber-JVM,23 the pure-Java implementation of Cucumber that makes
grails-cucumber possible
Solution
Groovy is a programming language that aims to bring some of Ruby’s
expressiveness to the Java runtime. The syntax is quite flexible; you can often
paste Java code directly into a .groovy file and then gradually add Groovy features as you go along.
Grails is a Rails-like web framework written in Groovy. In this recipe, we’re
going to build the world’s least fun web game in Groovy and test it with
Cucumber. To do that, we’ll use the grails-cucumber plug-in. The project’s
wiki24 explains both in-browser testing and direct testing; we’ll use the latter
for speed reasons.
Setup
First, download and extract the latest .zip file25 from the Grails website. This
distribution includes Groovy, so you don’t need to add that separately. Now,
add the Grails bin directory to your PATH. On Mac and Linux, you’d type the
following:
$ export PATH=/path/to/grails/bin:$PATH
21.
22.
23.
24.
25.
http://grails.org
https://github.com/hauner/grails-cucumber
https://github.com/cucumber/cucumber-jvm
https://github.com/hauner/grails-cucumber/wiki
http://grails.org/Download
www.it-ebooks.info
report erratum • discuss
Chapter 2. Java
• 100
Here’s the Windows equivalent:
C:\> set PATH=C:\Path\To\Grails\bin;%PATH%
Next, create a Grails project for the game. Everything seems to be about Angry
Birds these days. Let’s make a copycat game called Furious Fowl.
$ grails new-app furious-fowl
To enable Cucumber support, add the following line to the plugins section of
grails-app/conf/BuildConfig.groovy:
grails/grails-app/conf/BuildConfig.groovy
plugins {
// ...
вћ¤
test ":cucumber:0.6.0"
}
There’s just one last piece of configuration. Grails’s built-in test environment
can set up fake HTTP requests and responses for you. All you need to do to
get that working with Cucumber is add a file called test/functional/hooks/env.groovy
with the following contents:
grails/test/functional/hooks/env.groovy
import static grails.plugin.cucumber.Hooks.hooks
hooks {
integration ("@integration")
}
This will allow our step definitions to simulate HTTP requests.
Feature
Now the system is ready for the first feature. Place the following code in
test/functional/Game.feature:
grails/test/functional/Game.feature
Feature: Furious Fowls game
@integration
Scenario: New game
Given I see 3 buildings
When I slingshot a bird
Then I should see 2 buildings
The @integration tag signifies that we want to use the integration testing environment we set up in the previous section.
www.it-ebooks.info
report erratum • discuss
Test a Grails App Using grails-cucumber
• 101
Go ahead and run your feature through grails-cucumber to make sure all the
pieces are in place.
$ grails test-app :cucumber
You should see a failing test report indicating undefined steps, plus three
snippets of Groovy code. These will become your step definitions. Copy them
onto your clipboard; in the next section, we’ll assemble them into working
test steps.
Step Definitions
grails-cucumber looks for step definitions in the same directory as the .feature
files. Create a new file called test/functional/GameSteps.groovy and paste your empty
step definitions into it. Add the following highlighted lines to the top of the
file:
grails/test/functional/GameSteps.groovy
вћ¤ import cucumber.runtime.PendingException
вћ¤
вћ¤ this.metaClass.mixin (cucumber.runtime.groovy.EN)
Given(~'^I see (\\d+) buildings\$') { int arg1 ->
// ...
}
When(~'^I slingshot a bird\$') { ->
// ...
}
Then(~'^I should see (\\d+) buildings\$') { int arg1 ->
// ...
}
Let’s take a moment to consider how the game will work in a browser. Players
will visit the /game/index URL to start a new game. They’ll be given a goal: knock
down a certain number of buildings by slingshotting birds at them. Hitting
the game/slinghot URL will launch a single bird and then redirect either to
game/index or to game/victory, depending on whether any buildings are still
standing.
We’ll build in a simple test hook; passing in a number of buildings, as in
game/index?buildings=3, will reset the game to a known state.
How do we hit a URL like game/index from our tests? Following the Grails
convention, we’ll look for a GameController class with an index method. We’ll
implement that class in a moment; for now, just code the tests as if it already
exists.
www.it-ebooks.info
report erratum • discuss
Chapter 2. Java
• 102
grails/test/functional/GameSteps.groovy
import furious.fowl.GameController
GameController gameController
Given(~'^I see (\\d+) buildings\$') { int buildings ->
gameController = new GameController ()
gameController.params.buildings = buildings
gameController.index ()
}
For the When step, all we have to do is visit the /game/slingshot URL.
grails/test/functional/GameSteps.groovy
When(~'^I slingshot a bird\$') { ->
gameController.slingshot ()
}
The Then step will hit the game/index URL and verify that the number of buildings
is right.
grails/test/functional/GameSteps.groovy
Then(~'^I should see (\\d+) buildings\$') { int buildings ->
вћ¤
gameController.params.buildings = null
вћ¤
gameController.response.reset ()
gameController.index ()
expected = "You see ${buildings} building(s)."
assert gameController.response.text.contains(expected)
}
We’ve also had to add a little state management. We don’t want to pass in
the buildings=3 parameters left over from the Given step, so we clear them out
at the top of the step definition.
Application Code
Now we’re ready to add some actual application code. Create a Grails controller
to hold the game code.
$ grails create-controller GameController
This will create a file called grails-app/controllers/furious/fowl/GameController.groovy. Open
that file in your text editor and fill in the index method. Grails will automatically call this code when the player hits the /game/index URL.
grails/grails-app/controllers/furious/fowl/GameController.groovy
package furious.fowl
class GameController {
def index() {
www.it-ebooks.info
report erratum • discuss
Test a Grails App Using grails-cucumber
• 103
if (params.buildings) {
session.buildings = params.buildings as int
}
if (session.buildings <= 0) {
session.buildings = 3
}
render "You see ${session.buildings} building(s)."
}
}
This is the main landing page for the app. We grab the buildings=3 parameter
from the URL (if it was passed in) and use session storage to keep track of
the game state.
For the slingshot method, we simply knock down one building and redirect to
game/victory or back to game/index.
grails/grails-app/controllers/furious/fowl/GameController.groovy
def slingshot() {
session.buildings-def result = session.buildings > 0 ? 'index' : 'victory'
redirect(action: result)
}
def victory() {
render "You win!"
}
That’s all you need to get the game running. When you retest the app, your
Cucumber feature should pass. If you’re curious to see what it’s like to play
Furious Fowl in your browser, type the following at the command line:
$ grails run-app
Now, you can visit the app’s main URL26 and knock down buildings to your
heart’s content.
26. http://localhost:8080/furious/fowl/game
www.it-ebooks.info
report erratum • discuss
Chapter 2. Java
• 104
Recipe 20
Test Scala Code
Problem
You want to test Scala code from Cucumber.
Ingredients
• Cucumber-JVM,27 a Cucumber implementation in Java that can test code
in any JVM language
• Cucumber-Scala, support for Scala that ships with Cucumber-JVM
• JUnit28 for running your tests
• Maven29 for installing these libraries
Solution
Cucumber-JVM is an implementation of the Cucumber test framework written
in Java. With it, you can test code written in Scala and other popular JVM
languages.
In this recipe, we’re going to create a simple stock broker class in Scala and
test it from Cucumber.
Setup
First, download and extract the latest Maven 3 .zip file for your platform.30
Next, create pom.xml, the build script for your project, with the following
structure:
<?xml version="1.0" encoding="UTF-8"?>
<project xmlns="http://maven.apache.org/POM/4.0.0"
xmlns:xsi="http://www.w3.org/2001/XMLSchema-instance"
xsi:schemaLocation="http://maven.apache.org/POM/4.0.0
http://maven.apache.org/xsd/maven-4.0.0.xsd">
<modelVersion>4.0.0</modelVersion>
27.
28.
29.
30.
https://github.com/cucumber/cucumber-jvm
http://maven.apache.org
http://www.junit.org
http://maven.apache.org/download.html
www.it-ebooks.info
report erratum • discuss
Test Scala Code
• 105
<groupId>StockBroker</groupId>
<artifactId>StockBroker</artifactId>
<version>1.0</version>
<!-- project settings here -->
</project>
Your project will need Cucumber-JVM and Cucumber-Scala to recognize your
test steps, JUnit to run them, and of course Scala itself. Add the following
markup inside the <project> tag in pom.xml:
scala/pom.xml
<dependencies>
<dependency>
<groupId>info.cukes</groupId>
<artifactId>cucumber-scala</artifactId>
<version>1.0.14</version>
</dependency>
<dependency>
<groupId>info.cukes</groupId>
<artifactId>cucumber-junit</artifactId>
<version>1.0.14</version>
</dependency>
<dependency>
<groupId>junit</groupId>
<artifactId>junit</artifactId>
<version>4.10</version>
</dependency>
<dependency>
<groupId>org.scala-lang</groupId>
<artifactId>scala-library</artifactId>
<version>2.10.0-M6</version>
<scope>test</scope>
</dependency>
<dependency>
<groupId>org.scala-lang</groupId>
<artifactId>scala-compiler</artifactId>
<version>2.10.0-M6</version>
<scope>test</scope>
</dependency>
</dependencies>
You’ll also need to configure your project to compile Scala projects.
www.it-ebooks.info
report erratum • discuss
Chapter 2. Java
• 106
scala/pom.xml
<build>
<plugins>
<plugin>
<groupId>org.scala-tools</groupId>
<artifactId>maven-scala-plugin</artifactId>
<version>2.15.2</version>
<configuration>
<!--encoding>UTF-8</encoding-->
<excludes>
<exclude>**/*.java</exclude>
</excludes>
</configuration>
<executions>
<execution>
<goals>
<goal>add-source</goal>
<goal>compile</goal>
<goal>testCompile</goal>
</goals>
</execution>
</executions>
</plugin>
</plugins>
</build>
Now, we’re ready to jump into writing features.
Feature
Place the following code in src/test/resources/StockBroker.feature:
scala/src/test/resources/StockBroker.feature
Feature: Stock broker
Scenario: Buy low, sell high
Given I have 100 shares of GOOG
When I sell all my GOOG shares for $800.00/share
Then I should have $80000.00
Before we can generate step definitions, we need to create a small class to
serve as a test harness. Create a file called src/test/scala/RunCukesTest.scala with
the following contents:
scala/src/test/scala/RunCukesTest.scala
import cucumber.junit.Cucumber
import org.junit.runner.RunWith
@RunWith(classOf[Cucumber])
class RunCukesTest
www.it-ebooks.info
report erratum • discuss
Test Scala Code
• 107
That’s all we need to get the tests to run for the first time. Type in the following
command:
$ mvn test
After a bunch of download and compilation messages whiz by, you should
see a failing test report and a list of sample step definitions. Let’s fill in those
missing steps now.
Step Definitions
Create a file called src/test/scala/StockBrokerStepDefinitions.scala, and add the following
text to it:
scala/src/test/scala/StockBrokerStepDefinitions.scala
import cucumber.runtime.{ScalaDsl, EN, PendingException}
import junit.framework.Assert._
import scala.collection.mutable.HashMap
class StockBrokerStepDefinitions extends ScalaDsl with EN {
// step definitions go here
This will define the structure into which you’ll fit your step definitions. Let’s
add the first of those now. Assuming our stock service will live inside a StockBroker class, here’s how the Given step would look:
scala/src/test/scala/StockBrokerStepDefinitions.scala
var broker:StockBroker = null
Given("""^I have (\d+) shares of ([A-Z]+)""""""){ (num:Double, name:String) =>
val shares = new HashMap[String, Double]
shares += name -> num
broker = new StockBroker(shares)
}
The When step should cause our StockBroker instance to trigger a sale.
scala/src/test/scala/StockBrokerStepDefinitions.scala
When("""^I sell all my ([A-Z]+) shares for \$([0-9.]+)/share$""""""){
(name:String, price:BigDecimal) =>
broker.sellAll(name, price)
}
Finally, we can compare the result with what we expected in the Then step.
scala/src/test/scala/StockBrokerStepDefinitions.scala
Then("""^I should have \$([0-9.]+)$""""""){ (expected:BigDecimal) =>
assertEquals(expected, broker.cash)
}
www.it-ebooks.info
report erratum • discuss
Chapter 2. Java
• 108
If you rerun the features now, you’ll get an error message indicating that the
StockBroker class doesn’t exist. Let’s fix that. Place the following code in
src/main/scala/StockBroker.scala:
scala/src/main/scala/StockBroker.scala
import scala.collection.mutable.HashMap
class StockBroker(val shares:HashMap[String, Double]) {
var cash:BigDecimal = 0.0
def sellAll(name:String, price:BigDecimal) {
cash = cash + shares(name) * price
shares -= name
}
}
Rerun your tests one last time; you should see a passing result.
Further Exploration
In this recipe, we tested a single, tiny Scala class from Cucumber. This is a
bit overkill for such a small class; in the real world, you might drive an
automation framework or an object that wrapped a network service.
For a test framework more suited to checking individual classes, see the
ScalaCheck project.31
31. https://github.com/rickynils/scalacheck
www.it-ebooks.info
report erratum • discuss
Test Clojure Code
• 109
Recipe 21
Test Clojure Code
Problem
You want to test your Clojure project using Cucumber. You have unit tests
in place for individual pieces of Clojure code but want to write your higherlevel integration tests in English.
Ingredients
• Leiningen32 for installing Clojure and dependencies
• lein-cucumber33 for connecting Cucumber to Clojure
Solution
Leiningen is a tool for automatically tracking and installing the dependencies
for your Clojure project—including Clojure itself. If you’re a Clojure developer,
you’re likely already using Leiningen. If you’re new to Leiningen, all you have
to do is download a single script34 or Windows batch file.35 For this recipe,
we’ll use Leiningen 2.0.
Once you’ve downloaded Leiningen and saved it somewhere that’s on your
PATH, create a new project for your Cucumber experimentation. I’m feeling
hungry, so let’s write a scenario describing a delicious pie.
$ lein new pie
$ cd pie
Open project.clj and add a reference to the lein-cucumber plug-in, as in the following
code:
clojure/project.clj
(defproject pie "1.0.0-SNAPSHOT"
:description "A delicious pie"
:dependencies [[org.clojure/clojure "1.3.0"]]
вћ¤ :plugins [[lein-cucumber "1.0.0"]])
32.
33.
34.
35.
http://leiningen.org
https://github.com/nilswloka/lein-cucumber
https://raw.github.com/technomancy/leiningen/preview/bin/lein
https://raw.github.com/technomancy/leiningen/preview/bin/lein.bat
www.it-ebooks.info
report erratum • discuss
Chapter 2. Java
• 110
Now, try running Cucumber with no steps defined, just to make sure all the
pieces are working together.
$ lein deps
$ lein cucumber
This should report no assertions, because we haven’t written any features.
Let’s do that now. Add the following text to features/pie.feature:
clojure/features/pie.feature
Feature: Pie
Scenario: Baking
Given the oven is preheated to 350
When I bake the pie for 15 minutes
Then it should taste delicious
Rerun lein cucumber, and Cucumber should inform you of the three undefined
steps. Paste the boilerplate step definitions into features/step_definitions/pie_steps.clj,
and modify them to look like the following:
clojure/features/step_definitions/pie_steps.clj
(use 'pie.core)
(Given #"^the oven is preheated to (\d+)$" [degrees]
(preheat-oven degrees))
(When #"^I bake the pie for (\d+) minutes$" [minutes]
(bake-for minutes))
(Then #"^it should taste delicious$" []
(assert (= (pie-taste) 'delicious)))
Notice that we’re using Clojure’s built-in assert36 to write our test expectations.
Now, open src/pie/core.clj, and add the Clojure code for the project.
clojure/src/pie/core.clj
(ns pie.core)
(defn preheat-oven [degrees]
;; activate Arduino-controlled thermostat
)
(defn bake-for [minutes]
;; set timer
)
(defn pie-taste []
'delicious
)
As a final step, rerun lein cucumber and verify that your tests are passing now.
36. http://clojure.github.com/clojure/clojure.core-api.html#clojure.core/assert
www.it-ebooks.info
report erratum • discuss
Drive a Swing Interface with FEST
• 111
Recipe 22
Drive a Swing Interface with FEST
Problem
You want to test a Java program with a user interface implemented in Swing.
Ingredients
• JRuby,37 a pure-Java implementation of Ruby
• FEST,38 a Java library for driving Swing GUIs
• PresentationClock,39 the example Java app we’ll be testing
Solution
The Java testing community has created an amazing number of GUI
automation libraries. They vary based on the type of user interfaces they can
automate—Swing, SWT, JavaFX, and so on.
For this recipe, you’ll be testing PresentationClock, a simple Swing app. The
FEST automation library is a good fit for driving this program: it’s actively
maintained, well-documented,40 and relatively easy to use.
You can operate FEST from Java using Cucumber-JVM or from JRuby using
plain Cucumber. Here, we’ve opted for the latter.
Setup
Because this recipe is JRuby-specific, you’ll need to download41 and install
the latest version.
You’ll also need to perform the standard Cucumber setup from Section 3,
Getting the Tools You'll Need, on page xiv.
$ jruby -S gem install cucumber rspec-expectations
37.
38.
39.
40.
41.
http://jruby.org
http://fest.easytesting.org
http://presentclock.sf.net
http://fest.easytesting.org/swing/apidocs
http://jruby.org/download
www.it-ebooks.info
report erratum • discuss
Chapter 2. Java
• 112
Now, it’s time to install FEST. Create a new folder for your project. Inside it,
create a jars subdirectory. Download fest-swing-1.2.zip from the official site.42 The
.zip file contains a single .jar for FEST Swing, plus a lib directory full of additional
.jar files. Copy the main .jar and the various lib dependencies into your jars
folder.
We’ll keep the PresentationClock .jar file in the same place. Download the
application’s .zip file from SourceForge43 and then extract PresentationClock.jar
into your existing jars directory.
Feature
Now that you have the tools installed, it’s time to write a feature. This presentation timer has several components we could test; let’s start with the reset
button. Place the following code in features/timer.feature:
swing/features/reset.feature
Feature: Reset button
Scenario: Reset while running
Given 3 seconds have elapsed
Then the clock should read "00:03"
When I reset the clock
Then the clock should read "00:00"
Run this test with the cucumber command, and then copy and paste the template step definitions into features/step_definitions/timer_steps.rb.
Given /^(\d+) seconds have elapsed$/ do |arg1|
pending # express the regexp above with the code you wish you had
end
Then /^the clock should read "(.*?)"$/ do |arg1|
pending # express the regexp above with the code you wish you had
end
When /^I reset the clock$/ do
pending # express the regexp above with the code you wish you had
end
Before we fill in the bodies of these test steps, we need to connect FEST to
the application’s main window. Let’s do that next.
42. http://code.google.com/p/fest/downloads/list
43. http://sourceforge.net/projects/presentclock/files/PresentationClock%202.0%20%282011-05-07%29
www.it-ebooks.info
report erratum • discuss
Drive a Swing Interface with FEST
• 113
Glue Code
The main FEST code runs in a separate thread from your application so that
your tests don’t crash if the app fails to respond. This setup involves a little
complexity at launch time, but it’s nothing that the global hooks technique
from Recipe 3, Run Slow Setup/Teardown Code with Global Hooks, on page
13 can’t handle.
We’ll follow the Cucumber custom of putting hooks in a file called features/support/env.rb. Create this file and add the following code at the top to bring in the
parts of FEST that we need:
swing/features/support/env.rb
require 'java'
Dir['jars/*.jar'].each { |jar| require jar }
java_import
java_import
java_import
java_import
java_import
java_import
org.freeshell.zs.presentationclock.PresentationClock
org.fest.swing.edt.GuiActionRunner
org.fest.swing.edt.GuiQuery
org.fest.swing.fixture.FrameFixture
org.fest.swing.core.matcher.JButtonMatcher
org.fest.swing.core.matcher.JLabelMatcher
Now, we can add a global hook to launch the app before each test. To do this,
we create a special class that launches the app in the correct thread and then
tell FEST to use that class for initialization.
swing/features/support/env.rb
class AppStarter < GuiQuery
# Launch the app in the Event Dispatch Thread (EDT),
# which is the thread reserved for user interfaces.
# FEST will call this method for us before the test.
#
def executeInEDT
PresentationClock.new []
end
end
module HasFrame
runner = GuiActionRunner.execute(AppStarter.new)
@@window = FrameFixture.new(runner)
# ... more methods go here ...
end
World(HasFrame)
The @@window variable is a fixture, which is FEST’s main entry point for
interacting with the app.
www.it-ebooks.info
report erratum • discuss
Chapter 2. Java
• 114
When the test is complete, you’ll need to close the app and answer Yes to the
confirmation dialog.
swing/features/support/env.rb
at_exit do
title = 'Confirm Exit - PresentationClock'
@@window.close
@@window.option_pane.require_title(title).yes_button.click
end
This code snippet gives a good first taste of how to use the JFrameFixture instance.
To look for a button, label, or option pane (i.e., confirmation dialog) belonging
to the main window, you call methods named button(), label(), or option_pane().
Step Definitions
Now that the infrastructure for the test is in place, you can write the step
definitions. These will go in features/step_definitions/timer_steps.rb. The Given and When
steps are easy; you simply have to reset the timer and wait.
swing/features/step_definitions/timer_steps.rb
Given /^(\d+) seconds have elapsed$/ do |seconds|
reset
sleep seconds.to_f
end
When /^I reset the clock$/ do
reset
end
The implementation of reset() goes in the same HasFrame module where you put
the setup code. All you need to do is find the Reset button and click it. The
easiest way to find a button is via its internal name property. Unfortunately,
this app didn’t assign names to its controls. You’ll need to search for the
button’s on-screen text instead.
swing/features/support/env.rb
def reset
button = @@window.button(JButtonMatcher.with_text 'Reset')
button.click
end
This approach isn’t ideal; if the button’s text changes (in a new version or
international translation of the app), you’ll need to modify the test. But it’s
the best we can do in this particular case.
The final step is to check the contents of the clock’s readout.
www.it-ebooks.info
report erratum • discuss
Drive a Swing Interface with FEST
• 115
swing/features/step_definitions/timer_steps.rb
Then /^the clock should read "(.*?)"$/ do |expected|
look_for_text expected
end
The app implements this display as a JLabel, and fortunately there are only
two labels in the interface. You can just search for the one showing the
expected time.
swing/features/support/env.rb
def look_for_text(expected)
@@window.label JLabelMatcher.with_text(expected)
end
If the label we’re searching for doesn’t exist, Cucumber will log a test failure,
and FEST will print a list of all the controls in the interface.
Further Exploration
This recipe searched for on-screen controls by their contents. A much more
stable method for identifying a Swing control is via its internal name. Since
PresentationClock’s source is available, you might experiment with modifying
its Java code to add name properties to the Reset button and time readout.
The step definitions become much simpler (e.g., @window.button('ResetButton').click).
You’ve also probably grown tired of waiting three seconds for the clock to
count up to 00:03 during the Cucumber run. Using the techniques in Recipe
13, Manipulate Time, on page 67, you can trim out this delay and speed up
the test.
www.it-ebooks.info
report erratum • discuss
CHAPTER 3
.NET and Windows
This chapter contains recipes related to testing C-based and .NET-based
Windows apps using Cucumber. It also covers a few tips for running
Cucumber on Windows, such as how to make sure that pass/fail colors show
up correctly in reports.
www.it-ebooks.info
report erratum • discuss
Chapter 3. .NET and Windows
• 118
Recipe 23
Get Good Text Output on Windows
Problem
You’re running Cucumber on Windows and want the console output to be
green or red based on the pass/fail status of the steps. You also want nonU.S. characters to show up correctly in the output.
Ingredients
• ANSICON, a Windows helper for ANSI colored output1
• Windows’s built-in chcp command for setting the code page2
• The Consolas3 or Lucida Console4 font (both of which ship with recent
Windows versions) for correctly displaying Unicode characters
• Ruby 1.9.x , which handles Unicode better than 1.8.x
Solution
Most command-line environments support cursor movement and text coloring
through ANSI escape codes,5 sequences of special characters that a program
can print as part of its output. DOS used to support these codes, but Windows
does not. Fortunately, the open source ANSICON program provides this
missing support.
Another area where Windows command-line programs take a bit of extra
configuration is the display of international text. To show these kinds of
characters directly, you need to make sure the Command Prompt app is using
a font that can render them and then select a code page that includes them.
Neither of these two configurations is particularly taxing to implement. Let’s
start with the pass/fail colors.
1.
2.
3.
4.
5.
https://github.com/adoxa/ansicon
http://technet.microsoft.com/en-us/library/bb490874.aspx
http://www.microsoft.com/typography/fonts/family.aspx?FID=300
http://www.microsoft.com/typography/fonts/family.aspx?FID=18
http://en.wikipedia.org/wiki/ANSI_escape_code
www.it-ebooks.info
report erratum • discuss
Get Good Text Output on Windows
• 119
Pass/Fail Colors
First, we’ll try running a simple scenario with passed, failed, and pending
steps. As we’ll see, Cucumber itself will provide guidance on how to customize
the output format. Save the following example in windows.feature:
windows_console/windows.feature
Feature: Windows console
Scenario: Pass/fail colors
Given I am on Windows
When I run Cucumber
Then I should see colors
Go ahead and run that once, and then paste the boilerplate step definitions
into step_definitions/windows_steps.rb. Make a couple of the steps pass or fail so that
we’ll get some variety in the output. I happened to make the first step pass,
the second one fail, and the third one stay pending.
Now, run your steps again. Notice that the output begins with the following
line:
*** WARNING: You must use ANSICON 1.31 or higher
(http://adoxa.110mb.com/ansicon) to get coloured output on
Windows
The sentiment is right, but the 110mb.com domain is blocked by a lot of corporate firewalls. Fortunately, the project’s download page on GitHub also has
the files.6 Download the latest .zip file from there, and extract it to somewhere
that’s on your PATH. (Or you can just put all the files in the current project
directory for this experiment.)
Now, type the following at the command prompt:
C:\MyProject> ansicon
The screen should clear and leave you back at the prompt. Now, rerun your
features. The result should look something like the output shown in Figure
14, Pass/fail coloring results, on page 120.
Now that we have pass/fail coloring working, let’s turn our attention to
international text.
International Text
Add the following scenario to your Cucumber file:
6.
https://github.com/adoxa/ansicon/downloads
www.it-ebooks.info
report erratum • discuss
Chapter 3. .NET and Windows
• 120
Figure 14—Pass/fail coloring results
windows_console/windows.feature
Scenario: European characters
Given I am on Windows
When my step contains an accented Г©
Then it should show up in the output
This time when you save the file, direct your text editor to use the UTF-8
encoding. This process is different for every editor. Yours may support an
option in the Save As dialog, as in Figure 15, Selecting an encoding. Or it may
take a special comment at the top of the file, like mine does.
windows_console/windows.feature
# -*- coding: utf-8 -*-
Figure 15—Selecting an encoding
When you rerun the test with a properly UTF-8 encoded file, you might see
corrupted characters in the When step, something like this:
When my step contains an accented в”њвЊђ
www.it-ebooks.info
report erratum • discuss
Get Good Text Output on Windows
• 121
Cucumber is trying to print UTF-8 characters, but the Command Prompt app
still expects characters encoded in the default code page for your computer.
You need to set the code page to 65001 (UTF-8) by using the chcp command
built into Windows.
C:\MyProject> chcp 65001
Now that Cucumber and the terminal are both speaking the same encoding,
there’s just one last step. The default font for the Command Prompt app is a
raster font that doesn’t have glyphs for many characters. If you click the icon
in the upper-left corner of the Command Prompt window and choose Properties, you should see something like Figure 16, Selecting a Unicode-capable
font. From here, you can change the font to one of the other built-in
monospace typefaces that has a wider character range, such as Consolas or
Lucida Console.
Figure 16—Selecting a Unicode-capable font
After you’ve changed the code page and the font, rerun your Cucumber feature.
You should now see the accented Г©.
www.it-ebooks.info
report erratum • discuss
Chapter 3. .NET and Windows
• 122
The ANSICON coloring and code page selection will last only until you close
the current Command Prompt window. Let’s make these settings the default
for future sessions.
Making It Permanent
To make your customizations permanent, add them to a batch file you can
call automatically. The exact path isn’t important; I’ve used C:\Tools\AutoRun.cmd
for this example.
windows_console/AutoRun.cmd
@if "%ANSICON_VER%"=="" (
C:\Path\To\ansicon.exe
)
@chcp 65001
Once your batch file is in place, you can configure Windows to run it automatically using an AutoRun key in the Registry.7 Launch regedit.exe from the
Start→Run... menu. Navigate to HKEY_CURRENT_USER\Software\Microsoft\Command
Processor. Create a new Expandable String (REG_SZ_EXPAND) value inside this key,
called AutoRun. Fill in the value with the full path to your batch file. If there’s
already a value there, place your addition at the end, separated by a double
ampersand.
Matt says:
Branching Out from Windows
The founders of several of the projects we’ve discussed, including Cucumber and
Ruby, use something other than Windows as their primary operating system. This
means that the experience of using these tools on a Windows machine tends to be
less polished than on Linux or OS X.
The situation is improving somewhat through the heroic efforts of people like Luis
Lavena. Still, after years working exclusively on the Microsoft platform, I found a
much smoother developer experience after switching away from it.
You don’t have to reconfigure your machine or turn your computing habits inside
out to get started with Cucumber on Linux. All you have to do is download a free
virtualization tool like VirtualBoxa and install a copy of Ubuntu.b
What’s the worst that could happen?
a.
b.
7.
https://www.virtualbox.org
http://www.ubuntu.com
http://superuser.com/questions/54919/how-do-i-run-a-command-when-opening-cmd-exe-with-shortcut
www.it-ebooks.info
report erratum • discuss
Get Good Text Output on Windows
• 123
Now, Cucumber will be set up correctly every time you open a Command
Prompt window.
Further Exploration
Luis Lavena wrote an excellent introduction to ANSI escape codes, how to
generate them directly in your output, and how to enable them in Windows.8
8.
http://blog.mmediasys.com/2010/11/24/we-all-love-colors
www.it-ebooks.info
report erratum • discuss
Chapter 3. .NET and Windows
• 124
Recipe 24
Test .NET Code with SpecFlow
Problem
You want to execute .NET code from a Cucumber test. For example, you might
be writing integration tests for an ASP.NET web application or GUI tests for
a desktop app. Because your GUI test framework or your web components
are written in C#, you need to be able to call them from the .NET universe.
Ingredients
• Microsoft Visual Studio Professional9 2010 or 2012 for building the
examples
• SpecFlow for parsing Cucumber syntax10
• A test runner such as NUnit,11 xUnit.net,12 or SpecRun13
• The NuGet package manager14 to install SpecFlow and the test runner
Solution
SpecFlow is an open source test framework that recognizes Cucumber’s
Gherkin syntax (in fact, it uses the same Gherkin parser) but connects to C#
behind the scenes instead of Ruby. With SpecFlow, you can continue to write
tests in plain English the way you’re used to with Cucumber, while taking
advantage of the world of .NET libraries.
This recipe shows the basics of getting up and running with SpecFlow. First,
we’ll go through the basics of installing SpecFlow and its dependencies. Then,
we’ll set up an empty C# project and configure it to work with SpecFlow.
The project workflow should feel familiar if you’ve used Cucumber before.
You’ll start by writing features in plain English and then add step definitions
to drive the app under test. The main difference is that the step definitions
will be in C# syntax instead of Ruby.
9.
10.
11.
12.
13.
14.
https://www.microsoft.com/visualstudio/eng/downloads
http://www.specflow.org
http://www.nunit.org
http://xunit.codeplex.com
http://www.specrun.com
http://nuget.org
www.it-ebooks.info
report erratum • discuss
Test .NET Code with SpecFlow
• 125
Setup
We’re assuming you have Visual Studio Professional installed. It’s possible
to use SpecFlow with the free Visual C# Express environment, but the process
is less automated.
To install NuGet into Visual Studio, choose Tools в†’ Extensions and Updates
в†’ Online Gallery. Use the search field to find NuGet Package Manager. Click
NuGet’s Download button.
Using the same process, find and install the SpecFlow extension. This will
add templates to Visual Studio for .feature files and step definitions.
Restart Visual Studio so that the extensions can finish installing. Now you’re
ready to create a SpecFlow project.
Create a Project
In Cucumber, we tend to keep your step definitions and glue code in directories
called step_definitions and support, respectively. With SpecFlow, we’ll put all that
code in a C# project instead.
Go ahead and create the structure for that project. Launch Visual Studio.
Choose File в†’ New Project в†’ Visual C# в†’ Class Library. Name your project
Calculator.Specs, as shown here:
www.it-ebooks.info
report erratum • discuss
Chapter 3. .NET and Windows
• 126
You can use any test runner for this project. We’ll use the evaluation version
of SpecRun here. Choose Project в†’ Manage NuGet Packages в†’ Online, and
then use the search field to find and install the SpecFlow.SpecRun package.
This will download both SpecRun and SpecFlow and add their references to
your project.
Save your solution file to disk. Now, it’s time to add some Cucumber tests.
Add a Feature
Choose Project в†’ Add New Item... в†’ Visual C# Items в†’ SpecFlow Feature
File. Name your new file Addition.feature. Fill it with the following text:
spec_flow/Addition.feature
Feature: Addition
In order to know my total grocery bill
As a shopper
I want to add numbers
Scenario: Add two numbers
Given I have cleared the calculator
When I enter 2
And I add 2
Then the result should be 4
Behind the scenes, SpecFlow will convert this file to C# so that Visual Studio
can compile it. You’ll never need to edit the autogenerated C# code; instead,
you’ll work in the .feature file or in step definition files.
Add Step Definitions
Right-click inside Addition.feature, and choose Generate Step Definitions. This
will bring up a dialog box like the one in Figure 17, Generating SpecFlow
definitions, on page 127. Leave all the checkboxes checked, and click Generate.
Visual Studio will prompt you for a filename; the default of AdditionSteps.cs is
fine.
You’ll need some way to write pass/fail assertions. Some test runners, such
as NUnit, come with their own. Here, we’ll use the ones built into Visual
Studio’s unit test framework. In the menu bar, select Project → Add
Reference... в†’ .NET, and choose Microsoft.VisualStudio.QualityTools.UnitTestFramework. Then, add the following line at the top of Addition.feature:
using Microsoft.VisualStudio.TestTools.UnitTesting;
This will enable you to write things like Assert.AreEqual() in your step definitions.
www.it-ebooks.info
report erratum • discuss
Test .NET Code with SpecFlow
• 127
Figure 17—Generating SpecFlow definitions
Now, the project is ready for us to fill in the step definitions. On a real project,
you’d be calling into other C# code here. Indeed, in Recipe 25, Drive a Windows
App Using White, on page 130, you’ll do exactly that. For now, though, you can
just add some placeholder C# to get the tests to pass.
spec_flow/AdditionSteps.cs
using System;
using TechTalk.SpecFlow;
using Microsoft.VisualStudio.TestTools.UnitTesting;
namespace Calculator.Specs
{
[Binding]
public class AdditionSteps
{
private int result;
[Given(@"I have cleared the calculator")]
public void GivenIHaveClearedTheCalculator()
{
www.it-ebooks.info
report erratum • discuss
Chapter 3. .NET and Windows
• 128
result = 0;
}
[When(@"I enter (.*)")]
public void WhenIEnter(int number)
{
result = number;
}
[When(@"I add (.*)")]
public void WhenIAdd(int number)
{
result += number;
}
[Then(@"the result should be (.*)")]
public void ThenTheResultShouldBe(int expected)
{
Assert.AreEqual(expected, result);
}
}
}
Notice that, just like their Cucumber counterparts, SpecFlow step definitions
use regular expressions to match lines in the .feature file. Items in parentheses
get converted into method parameters.
Run the Tests
The tests are ready to run now. Right-click Calculator.Specs in the Solution
Explorer, and choose Run SpecFlow Scenarios. You should see something
like the following:
Test run started
Scenario: Add two numbers (in Calculator.Specs, Addition)...
Done on thread #0: Succeeded.
Done.
Result: all tests passed
Total: 1
Succeeded: 1
Ignored: 0
Pending: 0
Skipped: 0
Failed: 0
Execution Time: 00:00:00.6960000
SpecRun also generates an HTML report, which you can view by Ctrl +clicking
its filename in the output window; see Figure 18, A SpecFlow report, on page
129.
www.it-ebooks.info
report erratum • discuss
Test .NET Code with SpecFlow
• 129
Figure 18—A SpecFlow report
Further Exploration
The example step definitions we saw here were just placeholder code. To see
what those definitions would look like driving a real GUI, see Recipe 25, Drive
a Windows App Using White, on page 130.
In this recipe, you used Visual Studio Professional to automate much of the
project setup process. If you’re using the free Visual C# Express build environment, you can still use SpecFlow; see Allister Scott’s article called C#
ATDD on a Shoestring.15
15. http://watirmelon.com/2011/02/18/c-sharp-atdd-on-a-shoestring
www.it-ebooks.info
report erratum • discuss
Chapter 3. .NET and Windows
• 130
Recipe 25
Drive a Windows App Using White
Problem
You want to drive a Windows application through its user interface. You have
a battery of integration-level tests that bypass the GUI (I hope!) but also want
a quick smoke test to exercise the entire program on your continuous integration server whenever someone makes a change.
Ingredients
• The White library for GUI testing16
• UIA Verify for exploring the structure of your GUI17
• The setup and code from Recipe 24, Test .NET Code with SpecFlow, on
page 124, including the following:
– Microsoft Visual Studio Professional
– SpecFlow
– SpecRun
Solution
In Recipe 24, Test .NET Code with SpecFlow, on page 124, we used the SpecFlow
test framework to write step definitions in C# and drive .NET code. By itself,
SpecFlow doesn’t care what kind of project you’re automating: a GUI, a web
app, a command-line app, or just an individual C# class. You’ll typically
combine SpecFlow with a specific library for the kind of app you’re testing,
such as a GUI automation library to test a regular Windows app.
This is where White comes in. The White library is a body of C# code that can
simulate user input to drive Windows applications. The app under test can
be a C program written to the classic Windows API or a C# program using
WinForms or WPF.
This recipe will add GUI test steps to the calculator example from Recipe 24,
Test .NET Code with SpecFlow, on page 124 to drive the Windows calculator.
16. http://teststack.github.com/White
17. http://uiautomationverify.codeplex.com
www.it-ebooks.info
report erratum • discuss
Drive a Windows App Using White
• 131
Setup
First, you’ll need to add White to your project. From the Project menu, choose
Manage NuGet Packages в†’ Online. Use the search field to find and install
TestStack.White.
Next, you’ll need to figure out the unique IDs of the various buttons you’ll be
clicking. You’ll need the UIA Verify tool for this. Download and extract the
official .zip file, but don’t start the tool yet.18
Launch the Calculator app from the Windows Start menu. Now, run VisualUIAVerify.exe from where you extracted it in the previous step. You should see
something like Figure 19, Identifying controls with UIA Verify.
Figure 19—Identifying controls with UIA Verify
The list on the left contains the top-level windows visible on your system’s
desktop. When you drill down into the list and click a control, UIA Verify
18. http://uiautomationverify.codeplex.com/releases
www.it-ebooks.info
report erratum • discuss
Chapter 3. .NET and Windows
• 132
highlights the control on the screen and shows its properties on the right side
of the window.
The easiest way to locate a control in White is by name (i.e., text caption). A
brief exploration around the controls reveals that the digit keys have captions
of 0 through 9, and the math keys you’re using are labeled Add and Equals.
The results readout is a bit different, though; its caption changes with each
computation. Instead of using a name that’s subject to change, you’ll use its
automation ID. For .NET apps, this string is a meaningful value assigned by
the developer. Since calc.exe is a C application, it uses numeric control IDs.
The readout has an ID of 158; make a note of that value for later.
Now that you have a feel for the app’s layout, it’s short work to connect the
calculator tests to the GUI.
Launch the Application
White provides simple objects like Application, Window, Button, and Label to represent
the components of the user interface. You’ll need to declare a few of those in
your step definitions, as well as bringing in the White.Core namespace at the
top of your step definitions file.
white_c/AdditionSteps.cs
using System;
using TechTalk.SpecFlow;
using Microsoft.VisualStudio.TestTools.UnitTesting;
using White.Core;
using White.Core.UIItems.WindowItems;
using White.Core.UIItems;
using White.Core.UIItems.Finders;
namespace Calculator.Specs
{
[Binding]
public class AdditionSteps
{
private static Application app;
private static Window window;
private static Label readout;
// ... hooks and steps go here ...
}
}
At the beginning of the test, you’ll launch the target program. It’d be nice to
have to do this relatively slow operation just once, before the first test runs.
SpecFlow’s hook mechanism, modeled after Cucumber’s, makes this easy.19
19. https://github.com/techtalk/SpecFlow/wiki/Hooks
www.it-ebooks.info
report erratum • discuss
Drive a Windows App Using White
• 133
white_c/AdditionSteps.cs
private const string IDC_READOUT = "158";
[BeforeTestRun]
public static void BeforeTestRun()
{
app = Application.Launch("calc");
window = app.GetWindow("Calculator");
readout = (Label)window.Get(SearchCriteria.ByAutomationId(IDC_READOUT));
}
[AfterTestRun]
public static void AfterTestRun()
{
window.Close();
}
Notice that this code also looks for the results readout by its automation ID
and keeps a reference to it for later. IDC_READOUT is just the control ID you
discovered earlier with the UIA Verify tool. (The IDC_... convention comes from
old-school Windows apps.)
Drive the GUI
Now, you’re ready to implement the step definitions. In your implementations,
you’ll find and click various buttons in the user interface. How? You’ll do it
by chaining together pieces of the White API to locate controls on the screen.
You’ve already seen two such pieces: the Get() function and the SearchCriteria
type. These operations can be chained together in endless combinations to
look for specific captions, automation IDs, parent windows, control types,
and so forth.
For the specific case of locating a control by type and name, White provides
a handy shortcut—a template version of Get().
white_c/AdditionSteps.cs
[Given(@"I have cleared the calculator")]
public void GivenIHaveClearedTheCalculator()
{
window.Get<Button>("Clear").Click();
}
You can use the same technique to find and press the buttons representing
numbers and math operations.
white_c/AdditionSteps.cs
[When(@"I enter (.*)")]
public void WhenIEnter(int number)
{
www.it-ebooks.info
report erratum • discuss
Chapter 3. .NET and Windows
• 134
foreach (char digit in number.ToString())
{
window.Get<Button>(digit.ToString()).Click();
}
}
[When(@"I add (.*)")]
public void WhenIAdd(int number)
{
window.Get<Button>("Add").Click();
WhenIEnter(number);
}
The final step is to compare the Text property of the readout and make sure
the computation is correct.
white_c/AdditionSteps.cs
[Then(@"the result should be (.*)")]
public void ThenTheResultShouldBe(int expected)
{
window.Get<Button>("Equals").Click();
var result = int.Parse(readout.Text);
Assert.AreEqual(expected, result);
}
Now, you should see a passing result when you right-click the solution and
choose Run SpecFlow Scenarios.
Further Exploration
White provides a library of specific actions you can simulate on each of the
common Windows controls: checkboxes, drop-downs, and so forth. Most of
these are fairly guessable from the type of control; for example, the CheckBox
class has a Checked property.
In cases where the method names aren’t quite as obvious for the control type,
you can glance through the project’s catalog of common actions.20 This list
isn’t exhaustive, and on real projects I’ve occasionally found myself needing
to look up the available methods myself in the White source code.21
20. http://white.codeplex.com/wikipage?title=UI%20Items
21. https://github.com/TestStack/White/tree/master/src/TestStack.White/UIItems
www.it-ebooks.info
report erratum • discuss
Test Windows GUIs with AutoIt
• 135
Recipe 26
Test Windows GUIs with AutoIt
Problem
You want to test a Windows user interface from pure Ruby, rather than using
a compiled .NET language.
Ingredients
• AutoIt,22 a freeware Windows automation suite
• Ruby’s built-in Win32OLE libary23 to control AutoIt
• Unit Converter,24 an example app to test
Solution
Windows power users have used AutoIt for years to perform little daily tasks
around their systems. Among other things, AutoIt can launch programs, find
windows, and click controls. In this recipe, we’ll write one test case for a
simple Windows unit conversion program.
Setup
First, you’ll need to install AutoIt. Download and run the latest AutoIt Full
Installation package from the official site.25 This will register AutoIt’s ActiveX
control with the system so that we can access it from Ruby. If you’re
prompted to choose between x86 and x64, select the former.
Now, download Unit Converter and extract the .exe somewhere on your system;
for this recipe, we’ve put it in C:\Converter.
That’s it for the setup; we can move on to writing the feature.
Feature and Step Definitions
Here’s one simple scenario for a unit converter; put it in features\units.feature:
22.
23.
24.
25.
http://www.autoitscript.com/site/autoit
http://www.ruby-doc.org/stdlib-1.9.3/libdoc/win32ole/rdoc/WIN32OLE.html
http://sourceforge.net/projects/unitconversion
http://www.autoitscript.com/site/autoit/downloads
www.it-ebooks.info
report erratum • discuss
Chapter 3. .NET and Windows
• 136
win_gui/features/units.feature
Feature: Unit conversion
Scenario: Miles to kilometers
When I convert 26.2 miles to kilometers
Then the result should be 42.1648 kilometers
Write the step definitions as if you have an API for the app with methods like
convert_mi_to_km() and result(). (You’ll create those in a later step.) Place the following code in features\step_definitions\unit_steps.rb:
win_gui/features/step_definitions/unit_steps.rb
Line 1 A_FLOAT = Transform(/(-?\d+(?:\.\d+)?)/) do |number|
-
number.to_f
- end
5 When /^I convert (#{A_FLOAT}) miles to kilometers$/ do |miles|
-
convert_miles_to_km miles
- end
- Then /^the result should be (#{A_FLOAT}) kilometers$/ do |expected|
10
result.should be_within(0.0001).of(expected)
- end
Notice that we’re leaning on Cucumber’s data-transformation capabilities26
in line 1 so that we can reuse the digit-matching regular expression across
the When and Then steps.
Controls
Before we get to the glue code that links the step definitions to the GUI controls, we need to know how to find the controls. The most reliable way is to
use their automation IDs. You can find these IDs using the Window Info tool
that ships with AutoIt.
Choose Start в†’ All Programs в†’ AutoIt v3 в†’ AutoIt Window Info (x86). Launch
the Unit Converter tool as well. Bring up the two windows side by side, as in
Figure 20, Finding controls in AutoIt, on page 137.
Drag the crosshair from the Window Info tool into the edit control in UnitConverter. Make a note of the Advanced Mode value in the Control tab; this string,
[NAME:txtbxA], is AutoIt’s name for the textbox (based on the automation ID).
After a little browsing, you should find the following values:
26. https://github.com/cucumber/cucumber/wiki/Step-Argument-Transforms
www.it-ebooks.info
report erratum • discuss
Test Windows GUIs with AutoIt
• 137
Figure 20—Finding controls in AutoIt
Control
AutoIt identifier
Unit textbox
[NAME:txtbxA]
Miles to Kilometers button [NAME:m2k]
Answer textbox
[NAME:txtbxAnsA]
Now, we’re ready to call into AutoIt to find those controls.
Glue Code
Create a file called features\support\env.rb with the following structure:
win_gui/features/support/env.rb
require 'win32ole'
class UnitWorld
# ... definitions will go here ...
end
World { UnitWorld.new }
After do
close
end
www.it-ebooks.info
report erratum • discuss
Chapter 3. .NET and Windows
• 138
Before each scenario, Cucumber will create a UnitWorld instance, which will
launch the app and look for the main window. The After hook will close the
window when the test completes.
All of the interaction with AutoIt happens through one COM object of type
AutoitX3.Control. So, in the UnitWorld initializer, you’ll need to create an instance
of this type and store it.
win_gui/features/support/env.rb
TITLE
= 'Unit Converter'
def initialize
@auto_it = WIN32OLE.new 'AutoitX3.Control'
@auto_it.Run 'C:\Converter\Unit Converter.exe'
@auto_it.WinWaitActive TITLE
end
def close
@auto_it.WinClose TITLE
end
Using the control names you discovered earlier, you can now fill in the last
portion of the API.
win_gui/features/support/env.rb
INPUT
= '[NAME:txtbxA]'
CONVERT = '[NAME:m2k]'
RESULT = '[NAME:txtbxAnsA]'
def convert_miles_to_km(miles)
@auto_it.ControlSetText TITLE, '', INPUT, miles.to_s
@auto_it.ControlClick
TITLE, '', CONVERT
end
def result
@auto_it.ControlGetText(TITLE, '', RESULT).to_f
end
Now, exit Unit Converter and run cucumber from the command line. You should
see the app launch, respond to the simulated user input, and exit again.
Further Exploration
AutoIt is the granddaddy of free-as-in-beer Windows GUI automation toolkits.
But if you’re looking for something a little more Ruby-oriented, you might
give win_gui27 or Win32-Autogui28 a try. These libraries aren’t as powerful out
of the box, but they’re more extensible.
27. https://github.com/arvicco/win_gui
28. https://github.com/robertwahler/win32-autogui
www.it-ebooks.info
report erratum • discuss
Test on Windows Phone
• 139
Recipe 27
Test on Windows Phone
Problem
You want to test a Windows Phone app using Cucumber syntax.
Ingredients
•
•
•
•
•
•
Visual Studio Professional 2010 Service Pack 129 or newer
The Windows Phone SDK 7.130
The Windows Phone Test Framework31 by Expensify
SpecFlow32 for parsing Cucumber syntax
NUnit33 to run the tests
The NuGet package manager34 to install the testing tools
Solution
Writing Cucumber-style tests for Windows Phone involves orchestrating a few
different pieces that work together. A test runner starts and stops the test.
SpecFlow parses your plain-English test steps and matches them to your C#
step definitions. A server embedded into your app listens for incoming commands and simulates screen taps.
The Windows Phone Test Framework by Expensify combines these various
tools into a couple of easy-to-install packages. In this recipe, we’ll use the
framework to test a simple Windows Phone app in the emulator.
Setup
Most of the setup in this recipe happens after you’ve created your project.
But there are two Visual Studio add-ons you’ll need to install globally first.
In Visual Studio, navigate to Tools в†’ Extensions and Updates в†’ Online
29.
30.
31.
32.
33.
34.
http://www.microsoft.com/en-us/download/details.aspx?id=23691
http://www.microsoft.com/en-us/download/details.aspx?id=27570
https://github.com/Expensify/WindowsPhoneTestFramework
http://www.specflow.org
http://www.nunit.org
http://www.nuget.org
www.it-ebooks.info
report erratum • discuss
Chapter 3. .NET and Windows
• 140
Gallery. Search for and install both the NuGet Package Manager and the
SpecFlow extension.
Now, you’ll need to make sure the test framework can connect to the application you’re testing. Type the following line into the Command Prompt window,
substituting your domain and username at the end:
C:\> netsh http add urlacl url=http://+:8085/ user=DOMAIN\username
Windows should display the message URL reservation successfully added and return
you to the command prompt. Once this step is complete, you can move on
to creating your project.
Create an Application
Let’s write a simple app that tells us whether a given word is a palindrome.
In Visual Studio, choose Choose File в†’ New Project в†’ Silverlight for Windows
Phone в†’ Windows Phone Application. Name the app Palindromer.
Using the menu, choose Project в†’ Manage NuGet Packages в†’ Online. Search
for wp7test. This will return two packages: the App component you embed
into your application and the BDD component you use inside your tests. We’ll
get to the BDD version later; here, install just the App package, as in Figure
21, Installing the Windows Phone test framework.
Figure 21—Installing the Windows Phone test framework
www.it-ebooks.info
report erratum • discuss
Test on Windows Phone
• 141
Now that the test framework is embedded into your app, you’ll need to add
code to start the server when the app launches. Open App.xaml.cs, and make
the following changes:
windows_phone/Palindromer/App.xaml.cs
вћ¤ using WindowsPhoneTestFramework.Client.AutomationClient;
namespace Palindromer
{
public partial class App : Application
{
public App()
{
// Make these the last lines of the App() constructor
вћ¤ #if DEBUG
вћ¤
Automation.Instance.Initialise();
вћ¤ #endif
}
}
}
Now, you’re ready to create the skeleton of your tests.
Create a Test Project
Right-click your solution and choose Add в†’ New Project. Choose Visual C#
в†’ Windows в†’ Class Library. Note that this is a regular desktop C# assembly,
not a mobile one. Name your project Palindromer.Spec.
Now, install the Windows Phone Test Framework into your test project. Navigate to Project → Manage NuGet Packages → Online. Search for “wp7test’’
like you did before, but this time install the BDD version of the package.
This framework uses a 32-bit COM extension to control the Windows Phone
emulator. To use it, mark your test project as a 32-bit assembly. Choose Build
в†’ Configuration Manager в†’ Palindromer.Spec в†’ Platform в†’ <New...>; then
select x86. See Figure 22, Selecting the processor type, on page 142.
The final step in creating the test project is to connect it to your phone project.
Open Palindromer\Properties\WMAppmanifest.xml, and look for the <App ProductID="...">
tag. Copy the product ID to the clipboard.
Now, open Palindromer.Spec\App.config. When you installed the Windows Phone
Test Framework, it automatically created four keys for you to fill out inside
the <appSettings> section. Paste the project ID into the ApplicationId key.
You’ll also need to fill in the paths to your application’s icon and .xap (build
archive) files, plus the app name. When you’re done, the section will look
something like the following:
www.it-ebooks.info
report erratum • discuss
Chapter 3. .NET and Windows
• 142
Figure 22—Selecting the processor type
<add key="EmuSteps.Application.WindowsPhone.ApplicationId"
value="{cc535914-aa51-459e-aa9b-0d7afc01afe0}" />
<add key="EmuSteps.Application.WindowsPhone.ApplicationIconPath"
value="C:\Palindromer\Palindromer\ApplicationIcon.png" />
<add key="EmuSteps.Application.WindowsPhone.ApplicationPackagePath"
value="C:\Palindromer\Palindromer\Bin\Debug\Palindromer.xap" />
<add key="EmuSteps.Application.WindowsPhone.ApplicationName"
value="Palindromer" />
Once the project is configured, you can create and run a simple test on it.
First Run
Before we get to the real tests, let’s drop in a tiny .feature file that will do
nothing but bring up the application. Right-click the Palindromer.Spec file, and
choose Add в†’ New Item в†’ Visual C# Items в†’ SpecFlow Feature File. Name
the file Palindromer.feature, and put the following text into it:
Feature: Palindromer
Scenario: Make a palindrome
Given my app is clean installed and running
The Windows Phone Test Framework includes several stock step definitions
for launching the app, tapping controls, and so on. For the most part, we’ll
www.it-ebooks.info
report erratum • discuss
Test on Windows Phone
• 143
be avoiding these and just writing our own—but the one for launching the
app comes in handy here.
If you’re using a test runner such as SpecRun or Resharper, you can run the
tests directly in Visual Studio by right-clicking your project and choosing Run
SpecFlow Scenarios. As of this writing, the NUnit support is less integrated.
For NUnit, you’ll need to start everything from the command line in your
project directory.
C:\Palindromer> packages\NUnit.2.5.10.11092\tools\nunit-console-x86.exe ^
Palindromer.Spec\bin\x86\Debug\Palindromer.Spec.dll
You should see the emulator launch and bring up the app.
Feature
Now that the app and the test framework are talking to each other, it’s time
to write a real feature. Add the following text inside your existing scenario,
right after the Given line:
When I enter the word "tattarrattat"
Then it should be recognized as a palindrome
If you rerun your tests, you should get a warning that there are two missing
step definitions. It’s time to fix that.
Step Definitions
Right-click the Palindromer.Spec project, and choose Add в†’ New Item в†’
SpecFlow Step Definition. Name the file PalindromerSteps.cs, and make the following changes to it:
windows_phone/Palindromer.Spec/PalindromerSteps.cs
вћ¤ using WindowsPhoneTestFramework.Test.EmuSteps;
namespace Palindromer.Spec
{
[Binding]
вћ¤
public class PalindromerSteps : EmuDefinitionBase
{
// ... step definitions go here ...
}
}
This will give us access to the API for driving the app. Now, we can use that
API to write our step definitions. Let’s assume the user will be typing into a
control called wordTextBox and reading the result in another one called resultTextBlock. Here’s how we’d express that using the Windows Phone Test
Framework:
www.it-ebooks.info
report erratum • discuss
Chapter 3. .NET and Windows
• 144
windows_phone/Palindromer.Spec/PalindromerSteps.cs
[When(@"I type the word ""([^""]*)""")]
public void WhenITypeTheWord(string word)
{
Assert.IsTrue(
Emu.ApplicationAutomationController.SetTextOnControl(
"wordTextBox", word));
}
[Then(@"it should be recognized as a palindrome")]
public void ThenItShouldBeRecognizedAsAPalindrome()
{
string result;
Assert.IsTrue(
Emu.ApplicationAutomationController.TryGetTextFromControl(
"resultTextBlock", out result));
Assert.AreEqual("... is a palindrome", result);
}
For more examples of how to use this API, see the source code to the framework’s prebuilt step definitions.35
Go ahead and rerun the tests. They should fail at this point, because the
app’s behavior isn’t implemented yet. Let’s move on to that step.
Modifying the App
In the Palindromer project, double-click MainPage.xaml. This will bring up the
GUI editor. Drag a TextBox and a TextBlock from the Toolbox into the main
window, and position them as in Figure 23, Laying out the app. Name them
wordTextBox and resultTextBlock, respectively. Fill the TextBlock with the text ... is
not a palindrome.
Figure 23—Laying out the app
35. https://github.com/Expensify/WindowsPhoneTestFramework/blob/master/Test/EmuSteps/StepDefinitions
www.it-ebooks.info
report erratum • discuss
Test on Windows Phone
• 145
We need to check the text for palindromes whenever the user changes it. Click
the wordTextBox control to select it. Next, in the Properties window, click the
Events tab, and then double-click the white space next to the TextChanged
event. See Figure 24, Creating an event handler.
Figure 24—Creating an event handler
This will bring up the code editor. Paste the following text into the body of
the function:
windows_phone/Palindromer/MainPage.xaml.cs
private void wordTextBox_TextChanged(object sender, TextChangedEventArgs e)
{
var word = wordTextBox.Text;
var reversed = new string(word.Reverse().ToArray());
var isPalindrome = (word.Length > 0 && word.Equals(reversed));
resultTextBlock.Text =
"... " +
(isPalindrome ? "is" : "is not") +
" a palindrome";
}
Rerun the tests one final time. They should now pass.
Further Exploration
In this recipe, we wrote and tested a simple app in the emulator. The Windows
Phone Test Framework supplies a handy program called EmuHost.exe for
launching the app and poking at controls while you’re still writing your step
definitions. Run packages\WP7Test.0.9.6\tools\EmuHost.exe, and type help to learn
more.
www.it-ebooks.info
report erratum • discuss
Chapter 3. .NET and Windows
• 146
Although we just tested on the emulator here, the Windows Phone Test
Framework contains some limited support for running on a live device. While
it can’t simulate gestures such as taps and flicks, it can set and get the values
of controls.
The SpecFlow project contains its own take on driving Windows Phone apps;
see their example project for details.36
36. https://github.com/techtalk/SpecFlow-Examples/tree/master/BowlingKata/BowlingKata-WindowsPhone7-MsTest
www.it-ebooks.info
report erratum • discuss
CHAPTER 4
Mobile and Web
In this chapter, we’ll see how to get started with Cucumber on mobile devices
running Android or iOS. We’ll also take a look at a few nuances of web testing,
including Flash, JavaScript, and PHP.
www.it-ebooks.info
report erratum • discuss
Chapter 4. Mobile and Web
• 148
Recipe 28
Test on iOS Using Frank
Problem
You want to test an iPhone or iPad app easily from Cucumber.
Ingredients
• Frank,1 an adapter that connects your iOS app to Cucumber
Solution
There are several GUI automation libraries for iPhone and iPad apps, each
with its trade-offs. Some are ready to use right away, with no modification to
your application code—but they work only with the iOS simulator. Others
can test real devices but require you to create a special debug build of your
app and add some automation hooks to it.
The approaches are not mutually exclusive. You can start with a simpler
library and then move to a more flexible one later. For this recipe, we’ll use
Frank, a library that automatically creates a testing build of your app.
Frank consists of two parts.
• A network server that you compile into your iOS app during testing (but
not for release)
• A Ruby library that translates your Cucumber test steps into commands
for the server to carry out GUI interactions
In this recipe, we’re going to retrofit Frank into an existing open source iOS app
and then write a Cucumber test for the app. Specifically, we’re going to test iOS
Calculator,2 an open source alternative to the calculator that ships with iOS.
Setup
The Frank project provides excellent installation instructions.3 Here’s how to
apply them to the calculator app. First, install the gem.
1.
2.
3.
http://www.testingwithfrank.com
https://github.com/mglagola/iOS-Calculator
http://www.testingwithfrank.com/installing.html
www.it-ebooks.info
report erratum • discuss
Test on iOS Using Frank
• 149
$ gem install frank-cucumber
Grab the source code to iOS Calculator.
$ git clone https://github.com/mglagola/iOS-Calculator.git
Next, run the following command inside the iOS-Calculator directory:
$ frank setup
This will add test hooks to the project. We want Frank’s network server to be
part of our iOS app, but only during testing—not during the final build. Fortunately, Frank confines its changes to a separate build.
We should be able to build the Frank-enabled app now. From the command
line, run the following command:
$ frank build
Once the build completes, let’s do a quick smoke check to make sure all the
parts are working. From the Frank subdirectory, run the cucumber command.
After a few seconds, the app should launch in the simulator and then rotate
through all the display orientations.
If the simulator launches but shows a blank screen instead of the app, you’ll
need to choose Reset Content and Settings... from the iOS Simulator menu
and try again (this will remove any other apps you’ve installed on the simulator
as well).
Once we’re confident we can connect to the app from Cucumber, we can delve
into finding and clicking controls.
Finding Controls
Frank embeds a nifty web server called Symbiote into your iOS app to display
information about the various on-screen controls. With the app running in
the simulator, type the following command into Terminal:
$ frank inspect
This will launch your browser and navigate to the simulator’s address.4 You
should see something like Figure 25, Inspecting the UI in Symbiote, on page 150.
On the left, Symbiote shows a nested list of all the controls in the app. If you
hover over one of these with the mouse cursor, the control will light up green
in the screenshot on the right. Clicking a control name on the left will bring
up several details about it, including accessibility information.
4.
http://localhost:37265/
www.it-ebooks.info
report erratum • discuss
Chapter 4. Mobile and Web
• 150
Figure 25—Inspecting the UI in Symbiote
Symbiote can also highlight controls directly in the simulator. Type button
marked:’C’ into the Selector search box in your browser and click the Highlight
button. The Clear button should turn green momentarily in the running
calculator app.
You can type the same kind of search terms into Ruby to fill in your Cucumber
step definitions. Before we get to the scenario and steps, let’s get some practice
locating controls in Ruby.
Frank is designed to work with Cucumber, but it also comes with a console
for stand-alone exploration. Let’s use it to click a button in the app.
$ frank console
connecting to app... connected
[1] pry(#<Frank::Console>)> touch "button marked:'8'"
=> nil
When you type the touch() command and press Enter , Frank will type an 8 into
the calculator.
The search syntax we’ve been using is called Shelley, and it’s modeled after the
UIQuery language used in an older project called UISpec. To learn more about
Shelley, see the syntax page on the Frank site.5
5.
http://testingwithfrank.com/selector_syntax.html
www.it-ebooks.info
report erratum • discuss
Test on iOS Using Frank
• 151
Go ahead and experiment with finding and clicking other controls. Since we’ll
be using the label (readout) and the various numeric buttons, you might start
with those controls.
Feature
Although Frank provided us with a lovely features directory with sample step
definitions, we’re going to start from scratch for this project. Create a new
directory, and put the following code in features/calculator.feature:
frank/features/calculator.feature
Feature: Calculator
Scenario: Square
Given I have cleared the calculator
When I press "8"
And I press "x="
Then the result should be "64"
Now, add the required Frank configuration to features/support/env.rb.
frank/features/support/env.rb
require 'frank-cucumber'
Frank::Cucumber::FrankHelper.use_shelley_from_now_on
We’re using an environment variable to find the compiled app, so you’ll need
to set that up at the command line. The binary lives in Frank/frankified_build inside
the calculator project directory.
$ export APP_BUNDLE_PATH=\
/path/to/iOS-Calculator/Frank/frankified_build/Frankified.app
On to the step definitions. For the Given step, we want to click the Clear button
on the calculator. Put the following code in features/step_definitions/calculator_steps.rb:
frank/features/step_definitions/calculator_steps.rb
Given /^I have cleared the calculator$/ do
touch "button marked:'C'"
end
This step takes the same search notation you used earlier with Symbiote and
passes it to the touch() method. The When step is similar, except that we’re
looping over several keystrokes instead of a single one.
frank/features/step_definitions/calculator_steps.rb
When /^I press "(.+)"$/ do |keys|
keys.each_char do |k|
touch "button marked:'#{k}"
end
end
www.it-ebooks.info
report erratum • discuss
Chapter 4. Mobile and Web
• 152
To check the calculator’s result, we call Frank’s check_element_exists() method
to find a text label with the value we expect.
frank/features/step_definitions/calculator_steps.rb
Then /^the result should be "(.+)"$/ do |expected|
check_element_exists "label marked:'#{expected}"
end
Now, when you rerun your Cucumber scenario from the command line, you
should see the app reacting.
Launching the App
So far, we’ve been interacting with an already-running app. How do we launch
the app before the test and shut it down afterward so that we’re always
starting in a known state?
Frank comes with a built-in API call named launch_app() to start the simulator
and a stock Cucumber step to exit. Place the following code in features/
support/env.rb:
frank/features/support/env.rb
Before do
app_path = ENV['APP_BUNDLE_PATH'] || raise('APP_BUNDLE_PATH undefined')
launch_app app_path
end
After do
step 'I quit the simulator'
end
Rerun your Cucumber scenario. The simulator should now launch and quit
on its own.
Further Exploration
In this recipe, we were able to drive the calculator app solely by tapping the
screen and searching for UI elements. For more advanced interactions, Frank
supplies a frankly_map() method that sends any Objective-C message directly
to a control.
selector = "view marked:'Some View Name'"
check_element_exists selector
frankly_map selector, 'someObjCMessage:', some_parameter
The quickest way to test an iOS app is to run it in the simulator on your development machine, as we’ve done here. Because Frank embeds a simple HTTP server
into your app, it’s also possible to test on a live device using the same techniques
—you’d just use the IP address of your device instead of localhost.
www.it-ebooks.info
report erratum • discuss
Test Android Apps with Calabash
• 153
Recipe 29
Test Android Apps with Calabash
Problem
You want to test an Android application using Cucumber.
Ingredients
• Calabash,6 an open source library for testing mobile apps
• The Android SDK7 for building and running the example application
• Eclipse8 for sketching the user interface
Solution
Calabash is a library that connects Cucumber to Android or iOS apps. The
Android flavor works by embedding a TCP server into your application and
then controlling it remotely from your computer using the Robotium GUI
automation tool.9
In this recipe, we’ll write a simple bookmarking application and test it with
Calabash. You can perform the tasks either in Eclipse or on the command
line; we’ll show Eclipse here.
Setup
To build and run the example code, you’ll need to install the Android SDK.
This process takes a couple of steps. First, extract the .zip file for your platform
and make a note of the directory. Then, launch the installer (called SDK Manager.exe on Windows and tools/android on other systems). Select the checkboxes
for the Tools group and the latest Android SDK, as in Figure 26, Installing
the Android SDK, on page 154. Click the install button, and wait for the process
to complete.
For the next step, configure the Eclipse IDE for Android development.
Download and install the Eclipse Classic package10 for your system. Launch
6.
7.
8.
9.
10.
http://calaba.sh
http://developer.android.com/sdk
http://eclipse.org
http://code.google.com/p/robotium
http://www.eclipse.org/downloads
www.it-ebooks.info
report erratum • discuss
Chapter 4. Mobile and Web
• 154
Figure 26—Installing the Android SDK
Eclipse, and choose the Help в†’ Install New Software menu item. Type https://dlssl.google.com/android/eclipse into the Work with: field, and press Enter .
The list of Eclipse add-ons should update with a couple of Android packages;
see Figure 27, Installing the Android Developer Tools, on page 155. Select the
Developer Tools package, and click your way through the rest of the wizard.
You’ll need to restart Eclipse. When you do, the IDE will prompt you to install
or use an SDK. Choose Use existing SDKs, and navigate to the location where you
extracted the zip file earlier.
The last step for setting up Eclipse is to prepare the Android simulator. Choose
Window в†’ AVD Manager from the menu. Create a new device targeted at the
ARM processor with the latest Android SDK; see Figure 28, Creating an
emulated device, on page 156.
Once you have Eclipse and the Android SDK set up, installing Calabash is easy.
$ gem install calabash-android
Now, you’re ready to write some features.
www.it-ebooks.info
report erratum • discuss
Test Android Apps with Calabash
• 155
Figure 27—Installing the Android Developer Tools
Feature
We’re going to build a simple app for bookmarking websites. The user interface
will have a text field, an Add button, and a list control. When you type a URL
and click Add, the new URL will show up on the list.
Here’s how you might describe this behavior using a Cucumber feature:
android/features/bookmark.feature
Feature: Bookmarks
Scenario: Bookmark a URL
When I bookmark "http://pragprog.com"
Then I should see the following bookmarks:
| url
|
| http://pragprog.com |
www.it-ebooks.info
report erratum • discuss
Chapter 4. Mobile and Web
• 156
Figure 28—Creating an emulated device
Before we run this through Cucumber, let’s create the empty skeleton of an
Android application.
App Skeleton
In Eclipse, choose File в†’ New Project from the menu. Select the Android
Application Project type. Type Bookmarkerist for the project name, and leave
the other options at their default values. Hit Next until the wizard prompts
you to create an activity. Choose the BlankActivity option. Click your way
through the rest of the wizard, leaving the settings at their defaults.
www.it-ebooks.info
report erratum • discuss
Test Android Apps with Calabash
• 157
For Calabash to connect to Bookmarkerist, we’ll need to add Internet access
to the requested permissions. Double-click AndroidManifest.xml, navigate to the
Permissions tab, click Add в†’ Uses Permission, and choose android.permission.INTERNET from the list.
We haven’t added any behavior yet, but this skeleton of an app should be
just enough to connect to from Calabash. Click the Run button in the toolbar,
and wait for the application to start in the simulator. This may take several
minutes.
Once the app is running, navigate to your project directory on the command
line, and type the following command:
$ calabash-android gen
This generates a features directory with some hooks and step definitions built
in. Delete features/my_first.feature, and add a new file called features/bookmark.feature
with the code from Feature, on page 155.
$ calabash-android run bin/Bookmarkerist.apk
Calabash will attach its TCP server to the app and then attempt to control it.
Of course, we don’t have any step definitions yet. Writing those will require
names for our GUI controls, so let’s do a little work on the app next.
App Behavior
In the file browser on the left, double-click res\layout\activity_main.xml.
This will launch a GUI editor. From the palette on the left, drag an EditText,
a Button, and a ListView into the layout area, as in Figure 29, Laying out the
controls, on page 158.
Name the controls url, addUrl, and bookmarks, respectively. Right-click ListView,
and choose Preview List Content в†’ Simple List Item.
Next, you’ll write code to implement the controls’ behavior. Open src/com/
example/bookmarkerist/MainActivity.java, and edit the beginning of the class to look
like the following:
android/src/com/example/bookmarkerist/MainActivity.java
public class MainActivity extends Activity {
ArrayAdapter<String> adapter;
ListView bookmarks;
EditText url;
@Override
public void onCreate(Bundle savedInstanceState) {
super.onCreate(savedInstanceState);
setContentView(R.layout.activity_main);
www.it-ebooks.info
report erratum • discuss
Chapter 4. Mobile and Web
• 158
Figure 29—Laying out the controls
url = (EditText)findViewById(R.id.url);
adapter = new ArrayAdapter<String>(
this, android.R.layout.simple_list_item_1);
bookmarks = (ListView)findViewById(R.id.bookmarks);
bookmarks.setAdapter(adapter);
}
public void addBookmark(View v) {
adapter.add(url.getText().toString());
adapter.notifyDataSetChanged();
url.setText("");
}
// ... rest of class ...
}
A couple of the declarations at the top of the class will have red exclamation
points next to them in Eclipse. Click each of these in turn, and choose Import
В«classВ» to generate import statements. Rerun the app in the simulator.
Step Definitions
Now, it’s time to implement the step definitions. Calabash comes with a library
of step definitions such as When I press the "Add" button. But we prefer not to have
the details of user interface elements in our top-level Cucumber features.
Instead, you can use the source code to these built-ins as a guide.11
Create a new file called features/step_definitions/bookmark_steps.rb with the following
code:
11. https://github.com/calabash/calabash-android/tree/master/ruby-gem/lib/calabash-android/steps
www.it-ebooks.info
report erratum • discuss
Test Android Apps with Calabash
• 159
android/features/step_definitions/bookmark_steps.rb
When /^I bookmark "(.*?)"$/ do |url|
performAction 'enter_text_into_numbered_field', url, 1
performAction 'click_on_view_by_id', 'addUrl'
end
The performAction calls use the Robotium API to interact with controls in the
app. You can reference controls by their order in the UI or by the ID you gave
them in Eclipse. Here, we click the first (and only) text field in the app and
then click the addUrl button.
The Then step just needs to fetch the list of bookmarks from the GUI.
android/features/step_definitions/bookmark_steps.rb
Then /^I should see the following bookmarks:$/ do |expected|
performAction 'wait_for_text', 'Enter a URL to bookmark', 5
result = performAction 'get_list_item_text'
actual = result['bonusInformation']
actual.each_with_index do | row_data, index |
row_data = JSON.parse row_data
actual[index] = row_data
end
expected.map_headers! 'url' => 'text1'
expected.diff! actual
end
The list contents come back to us as an array of JSON strings. Here, we
assemble them into a table that Cucumber can understand. Android calls
the list contents text1, but we’d rather use the more reader-friendly name of
url. The techniques in Recipe 1, Compare and Transform Tables of Data, on
page 2 allow us to map from one name to the other.
Try rerunning the Calabash steps again. You won’t see the app launch in the
simulator, but your Cucumber steps will connect to it behind the scenes. The
result should be a series of passing tests.
Further Exploration
Calabash also comes in an iOS flavor.12 While we prefer an iOS-specific
solution if you’re specifically targeting iOS, it may be worth giving calabashios a shot if you’re writing for both platforms.
While Calabash is an open source project, the company behind it also offers
a paid service where they run your tests on a variety of devices in their lab.13
12. https://github.com/calabash/calabash-ios
13. https://www.lesspainful.com
www.it-ebooks.info
report erratum • discuss
Chapter 4. Mobile and Web
• 160
Recipe 30
Parse HTML Tables
Problem
You’re testing a web page containing tabular data (or any repeating data,
really), and you need to compare the contents to a table in your Cucumber
scenario.
Ingredients
• Capybara14 for testing web applications
• Capybara’s arsenal of finders15 for traversing patterns in HTML
• XPath16 for describing the locations of objects on the page
Solution
Capybara is a Ruby web testing library. It provides a simple API for visiting
web pages and parsing the results. Behind the scenes, Capybara will either
launch a real browser (for non-Ruby web apps) or call directly into the server
code (for Ruby apps built on Rails, Sinatra, or any other Rack framework).
In this recipe, you’ll serve a simple static site using the Sinatra framework and
then use Capybara to find the right table on the page and extract the contents.
Imagine you have a web page containing team rankings for a lawn darts league,
something like this:
You’d like to match the results against the ones you expect your algorithm
to return. Any web testing library can scrape a bunch of raw HTML off the
page and hand it to you for processing. But then it’d be up to you to use a
DOM parsing library to loop through that HTML and extract the team names.
Capybara’s finders can spare you that agony. Let’s see how.
14. http://jnicklas.github.com/capybara
15. http://rubydoc.info/github/jnicklas/capybara/master/Capybara/Node/Finders:find
16. http://www.w3.org/TR/xpath
www.it-ebooks.info
report erratum • discuss
Parse HTML Tables
• 161
The Application
For this recipe, we’ll serve the data as a static HTML file. Put the following
markup in public/lawn_darts.html:
html_tables/public/lawn_darts.html
<!doctype html>
<title>Lawn Darts</title>
<table>
<tr>
<td><a href="#">Leagues</a></td>
<td><a href="#">Administration</a></td>
</tr>
</table>
<table>
<tr>
<th>Ranking</th>
<th>Team</th>
</tr>
<tr>
<td>1</td>
<td>Earache My Eye</td>
</tr>
<tr>
<td>2</td>
<td>Front Yardigans</td>
</tr>
</table>
Notice that this markup is devoid of id or name attributes, CSS classes, or
anything else that we could easily grab hold of from our tests. If we have
control over the HTML generation code, we should inject some kind of identifiers to make elements easy to find.
For this recipe, we’re going to assume (as is the case on some real-world
projects) that you’re stuck with the markup you get. As we’ll see, the tests
won’t be fiendishly complicated—the secret is to isolate the brittle parts (which
might break if the design changes) in a single part of the code.
You could use Capybara with this file right now by connecting it to the Selenium browser-based framework. But let’s wrap a trivial Ruby application
around it instead so that we can test through the much faster Rack interface.
First, install the Rack-based Sinatra web framework.
$ gem install sinatra
Now, create a file called lawn_darts_app.rb with the following contents:
www.it-ebooks.info
report erratum • discuss
Chapter 4. Mobile and Web
• 162
html_tables/lawn_darts_app.rb
require 'sinatra/base'
class LawnDartsApp < Sinatra::Base
end
Now that we have a Ruby web interface, we can drive this static site from
Cucumber.
Test Setup
Here’s a Cucumber scenario that will check the contents of the table containing
our teams. This code goes in features/league.feature.
html_tables/features/league.feature
Feature: Lawn darts league
Scenario: View teams
When I view the league page
Then I should see the following teams:
| Ranking | Team
|
|
1 | Earache My Eye |
|
2 | Front Yardigans |
Because this test uses Capybara, now is a good time to install it.
$ gem install capybara
You’ll need to connect Cucumber to Capybara by putting the following code
in features/support/env.rb:
html_tables/features/support/env.rb
require 'capybara/cucumber'
require './lawn_darts_app'
Capybara.app = LawnDartsApp
Now that Cucumber can drive the site, it’s time to add step definitions to
retrieve and process the HTML.
Scraping HTML
In the first step definition, Capybara needs visit the league page. Create a file
called features/step_definitions/league_steps.rb with the following contents:
html_tables/features/step_definitions/league_steps.rb
When /^I view the league page$/ do
visit '/lawn_darts.html'
end
Once we’ve hit the page, Capybara has the contents ready for us to slice and
dice. We’ll do that in the Then step.
www.it-ebooks.info
report erratum • discuss
Parse HTML Tables
• 163
html_tables/features/step_definitions/league_steps.rb
Line 1 Then /^I should see the following teams:$/ do |expected|
rows
= find('table:nth-of-type(2)').all('tr')
actual = rows.map { |r| r.all('th,td').map { |c| c.text } }
4
expected.diff! actual
5 end
2
3
Let’s walk through that step line by line. At line 2, Capybara’s find() method
retrieves the table element that contains the teams. This is actually the second
table on the page (the first one contains navigation links), so we need to use
XPath’s nth-of-type modifier.
Once we have the table, we call the all() method on it to retrieve all the <tr>
elements on the page.
Each <tr> element may contain multiple cells in the form of <th> or <td> elements. On line 3, we loop through each row’s cells and retrieve the contents.
Finally, on line 4, we use Cucumber’s diff!() method to compare the actual
table against the expected value and report a test failure if there are any
differences.
As we’ve seen, comparing HTML tables is just a matter of combining two
simple pieces. A web scraping library like Capybara does the initial work of
converting the HTML into a standard Ruby array. Cucumber takes over from
there and compares the native Ruby data to what’s in the scenario.
Further Exploration
In this recipe, we tested a Ruby-based web app through a Ruby-specific test
interface. For non-Ruby apps, you can use Capybara with a web browser
through the Selenium layer; see Recipe 3, Run Slow Setup/Teardown Code
with Global Hooks, on page 13 for an example that uses Selenium.
For more information about comparing tables in Cucumber, see Recipe 1,
Compare and Transform Tables of Data, on page 2.
www.it-ebooks.info
report erratum • discuss
Chapter 4. Mobile and Web
• 164
Recipe 31
Drive JavaScript/CoffeeScript Using Cucumber-JS
Problem
You’re testing JavaScript code that’s running either on the server side in a
framework like Node.js or in the browser. You’d like to use the familiar
Cucumber syntax to drive your JavaScript (or possibly CoffeeScript) code.
Ingredients
•
•
•
•
Cucumber-JS,17 an implementation of Cucumber written in JavaScript
Node.js (or just Node),18 a JavaScript application framework
Node Package Manager,19 the main way of installing libraries into Node
CoffeeScript,20 a more elegant syntax for JavaScript
Solution
JavaScript runs in a lot of environments, from GUI code in the browser to
back-end server frameworks like Node.js. In this recipe, we’re going to write
a simple Cucumber test for some JavaScript code (CoffeeScript, actually—more
on that in a moment).
You’ll run the test in Cucumber-JS, a pure-JavaScript implementation of
Cucumber. Cucumber-JS should run fine anywhere JavaScript runs, meaning
that you could run your tests in a browser or in a local copy of Node.js on
your development machine. For simplicity and rapid turnaround, we’ll choose
the latter.
Cucumber-JS works just fine with vanilla JavaScript. But it also has explicit
support for CoffeeScript, Jeremy Ashkenas’ delightful reimagining of
JavaScript. CoffeeScript provides a lightweight syntax optimized for maintainability but compiles down to simple JavaScript.
We’ll go ahead and use CoffeeScript for the code in this section, because it
really is that easy to plug it in.
17.
18.
19.
20.
https://github.com/cucumber/cucumber-js
http://nodejs.org
https://npmjs.org
http://www.coffeescript.org
www.it-ebooks.info
report erratum • discuss
Drive JavaScript/CoffeeScript Using Cucumber-JS
• 165
Feature
For this recipe, we’ll test a control panel that has a single button and a
readout. In a salute to The Hitchhiker’s Guide to the Galaxy [Ada95], the
control panel will chide anyone who clicks the button. First, though, we’ll
need to get our dependencies installed.
Setting up Cucumber-JS for feature development is really easy. First, download
and run the Node installer for your platform.21 This will also put NPM on your
system. You can then use NPM to install Cucumber-JS.
$ npm install -g cucumber
Now, put the following code in features/control_panel.feature:
javascript/features/control_panel.feature
Feature: Control panel
Scenario: Press a button
Given the sign is unlit
When I press the button
Then the sign should light up with
"""
Please do not press this button again
"""
If you try to run this feature from the command line…
$ cucumber.js
you’ll get the standard message about missing step definitions, but with the
sample code excerpts in JavaScript rather than Ruby. Let’s fill in those definitions now.
Step Definitions
Just as with regular Cucumber, you’ll typically keep step definitions in the
features/step_definitions directory. The only difference is that you’ll use .js or .coffee
files instead of .rb ones.
The general outline of a step definition would look like this in JavaScript:
var stepDefinitions = function() {
this.Given(/^the sign is unlit/, function(callback) {
this.controlPanel.deactivateSign();
callback();
});
};
module.exports = stepDefinitions;
21. http://nodejs.org/download
www.it-ebooks.info
report erratum • discuss
Chapter 4. Mobile and Web
• 166
To define a step, you call the Given(), When(), or Then() method and pass it a
function containing your step definition. Your function will get called whenever Cucumber-JS encounters a matching step in a feature file. If you need to
share something between steps—such as the controlPanel instance—you store
it as a property of the this object.
The main difference from regular Cucumber is that each step definition also
gets a callback parameter, which you must remember to call after your step
runs—this is Cucumber-JS’s cue to move on to the next test step.
Here’s the CoffeeScript equivalent of the previous code; from here on out, all
the examples will be in CoffeeScript.
javascript/features/step_definitions/control_panel_steps.coffee
stepDefinitions = () ->
@Given /^the sign is unlit/, (callback) ->
@controlPanel.deactivateSign()
callback()
module.exports = stepDefinitions
We’re using an object called @controlPanel. Where does that get created? It gets
created in the World, which we initialize in features/support/support/World.coffee.
javascript/features/support/World.coffee
{ControlPanel} = require './ControlPanel'
World = (callback) ->
@controlPanel = new ControlPanel
callback()
exports.World = World
We’ll define the ControlPanel in a moment. First, let’s round out the step definitions. Unlike classic Cucumber, you have to bring the World into your step
definitions explicitly. Add the following code just inside your stepDefinitions
function:
javascript/features/step_definitions/control_panel_steps.coffee
@World = require('../support/World').World
Now, we’re ready to move on to the When and Then steps.
javascript/features/step_definitions/control_panel_steps.coffee
@When /^I press the button$/, (callback) ->
@controlPanel.pressButton()
callback()
@Then /^the sign should light up with/, (expected, callback) ->
strictEqual @controlPanel.signMessage(), expected
callback()
www.it-ebooks.info
report erratum • discuss
Drive JavaScript/CoffeeScript Using Cucumber-JS
• 167
To check that the sign is displaying the correct text, we’re using the strictEqual
assertion from Node’s assert library. We need to bring that function into our
step definition file’s namespace before we can call it. This code goes at the
very top of your step definitions file:
javascript/features/step_definitions/control_panel_steps.coffee
{strictEqual} = require 'assert'
With the tests in place, we can move on to the actual project code.
Implementation
Here’s an implementation of the CoffeeScript object that will get your tests
passing. For this project, we’ll just keep this code in the support directory, in
a file called ControlPanel.coffee.
javascript/features/support/ControlPanel.coffee
class ControlPanel
constructor: ->
@message = ''
signMessage: ->
@message
deactivateSign: ->
@message = ''
pressButton: ->
@message = 'Please do not press this button again'
exports.ControlPanel = ControlPanel
Now, when you rerun your tests, they should pass.
Further Exploration
Once your tests are passing on your development machine, where do you go
from here? That depends on the environment your JavaScript code will
eventually be running in.
If you’re writing a pure-JavaScript app using a framework like Express,22 you
can use a headless (simulated) browser to test your app directly in Node.23 If
your app is a mix of JavaScript on the client side and something like Ruby
or PHP on the server, you can test your JavaScript features directly in a real
web browser.24
22. http://expressjs.com
23. https://github.com/olivoil/NodeBDD
24. https://github.com/jbpros/cukecipes
www.it-ebooks.info
report erratum • discuss
Chapter 4. Mobile and Web
• 168
Recipe 32
Test a Web App Using Watir
Problem
You want to test a web application across several browsers, including Chrome,
Firefox, Safari, Internet Explorer, and Opera.
Ingredients
• Watir (Web Application Testing in Ruby),25 a programmer-friendly inbrowser test library
• WebDriver,26 a cross-platform API for controlling web browsers
• Watir WebDriver,27 a Watir implementation that uses WebDriver under
the hood
• Nokogiri,28 a Ruby library for parsing HTML results
• (Mac users) SafariWatir29 for testing in Safari
• (Chrome users) ChromeDriver,30 a stand-alone program that helps Watir
control Google Chrome
Solution
Watir is a Ruby browser automation library focused on ease of use. Watir
started its life as a simple, Ruby-focused library—in contrast to Selenium,
which supported multiple programming languages but was harder to use
from Ruby. The main downside of Watir at the time was that you needed
additional tools to support browsers other than Internet Explorer.
The two toolkits have grown toward each other in recent years. Selenium has
adopted a new, easier-to-use API. Watir now supports multiple browsers much
25.
26.
27.
28.
29.
30.
http://www.watir.com
http://webdriver.googlecode.com
http://www.watirwebdriver.com
http://nokogiri.org
http://wiki.openqa.org/display/WTR/SafariWatir
http://chromedriver.googlecode.com
www.it-ebooks.info
report erratum • discuss
Test a Web App Using Watir
• 169
more seamlessly—in a delightful twist, it does so by using Selenium under
the hood.
In this recipe, we’re going to write a simple browser-based test using Watir.
Setup
First, let’s get Watir installed on your system. On Windows, you’d start with
the watir gem.
C:\> gem install watir
On any operating system (including Windows), you’ll need the watir-webdriver
gem if you want to test browsers other than Internet Explorer.
$ gem install watir-webdriver
Finally, on the Mac, you’ll likely want safariwatir.
$ gem install safariwatir
If you plan on testing with Chrome, you’ll need ChromeDriver31 as well. This
is just a stand-alone program that you copy into a directory on your PATH.
On its own, Watir does a great job of controlling the browser: following links,
filling in text fields, and so on. But it doesn’t have many tools for checking
results—for verifying that what’s on the page is what you expect to see.
For extracting specific HTML elements to check in our test, we’ll turn to
Nokogiri, one of Ruby’s most beloved HTML parsers. Nokogiri relies on two C
libraries called libxml2 and libxslt, both of which are available on multiple
platforms.32
To install these C libraries on Ubuntu Linux, you would run the following
command:
$ sudo apt-get install libxml2-dev libxslt1-dev
Here’s the Mac equivalent if you’re using Homebrew:
$ brew install libxml2 libxslt
On Windows, you don’t need to do anything; Nokogiri comes bundled with
the required XML libraries.
Once you take care of the dependencies, installing Nokogiri is straightforward.
$ gem install nokogiri
31. http://code.google.com/p/chromedriver/downloads/list
32. http://xmlsoft.org/
www.it-ebooks.info
report erratum • discuss
Chapter 4. Mobile and Web
• 170
Whew! All this setup just for a simple web test. The payoff comes when we
see how easy it is to drive a web browser.
Driving the Browser
Let’s write a test that visits your Pragmatic Bookshelf account and makes
sure you have access to a list of your purchased books. Place the following
code in features/bookshelf.feature:
watir/features/bookshelf.feature
Feature: Bookshelf
Scenario: Purchased books
Given I am logged in
When I view my account
Then I should see a sorted list of purchased books
We’ll need to launch the browser once at the beginning of the test run and
shut it down as Cucumber is exiting. To do this, we’ll use the technique from
Recipe 3, Run Slow Setup/Teardown Code with Global Hooks, on page 13.
Add the following code to features/support/env.rb. Feel free to substitute :firefox,
:safari, :ie, or :opera for the browser.
watir/features/support/env.rb
require 'watir-webdriver'
require 'nokogiri'
module HasBrowser
@@browser = Watir::Browser.new :chrome
at_exit { @@browser.close }
def browser
@@browser
end
end
World HasBrowser
Now, let’s turn our attention to the step definitions. The first thing our
implementation needs to do is visit the account page and log in.
Rather than keeping your Pragmatic credentials in a source file that may get
checked into revision control, let’s stash them in a pair of environment variables we can read from our step definitions. Run the following code in your
Mac or Linux shell, using your actual email address and password:
$ export [email protected]
$ export PRAG_PASSWORD=sekrit
www.it-ebooks.info
report erratum • discuss
Test a Web App Using Watir
• 171
Here’s the Windows version of the same commands:
C:\> SET [email protected]
C:\> SET PRAG_PASSWORD=sekrit
With Watir, you can find HTML elements on a page using their name attribute,
their CSS class or ID, or an XPath expression. For this step, we need to find
the text fields named email and password. Here’s the first step definition in
features/step_definitions/bookshelf_steps.rb:
watir/features/step_definitions/bookshelf_steps.rb
EmailField
= '//div[@id="content"]//input[@name="email"]'
PasswordField = '//div[@id="content"]//input[@name="password"]'
SubmitButton = '//div[@id="content"]//button[@type="submit"]'
Given /^I am logged in$/ do
browser.goto 'http://pragprog.com/login'
browser.text_field(:xpath => EmailField
).set ENV['PRAG_EMAIL']
browser.text_field(:xpath => PasswordField).set ENV['PRAG_PASSWORD']
browser.button(:xpath => SubmitButton).click
end
Watir will wait until the form finishes submitting and the account page loads.
From there, visiting the bookshelf page is easy.
watir/features/step_definitions/bookshelf_steps.rb
When /^I view my account$/ do
browser.goto 'http://pragprog.com/my_bookshelf'
end
The last remaining task is to go through the HTML on the bookshelf page and
make sure it contains the correct book titles.
Parsing the Results
Here’s a simplified version of the HTML containing the book titles:
<table id="bookshelf">
<tr>
<td class="description">
<h4>The Cucumber Book</h4>
</td>
</tr>
</table>
There are a couple of ways to identify the <h4> element containing the title. We
could use an XPath expression or CSS selectors. XPath is a little more flexible,
but CSS is good enough for this simple example. Here’s how to look for an <h4>
inside a <td> inside a table row.
www.it-ebooks.info
report erratum • discuss
Chapter 4. Mobile and Web
• 172
watir/features/step_definitions/bookshelf_steps.rb
Then /^I should see a sorted list of purchased books$/ do
doc = Nokogiri::HTML browser.html
titles = doc.css('table#bookshelf tr td.description p.title').map &:text
titles.should_not be_empty
titles.should == titles.sort_by(&:upcase)
end
Now, run your features. You should see your browser launch, fill in the form
fields, visit the bookshelf page, and exit. For extra credit, try swapping
browsers by changing the browser name in env.rb.
Matt says:
Choosing Between Watir and Capybara
We wanted to include this chapter in the original Cucumber Book because Watir is
such a popular tool in the testing community, but we ran out of time to write it. We
did, however, write about Capybara. (Capybara is also featured in the book you’re
reading now; see Recipe 13, Manipulate Time, on page 67; Recipe 4, Refactor to Extract
Your Own Application Driver DSL, on page 18; and Recipe 30, Parse HTML Tables, on
page 160.)
Now that you’ve seen examples of both Watir and Capybara, how do you choose
between them? It’s largely a matter of personal taste. The two APIs are quite different.
Watir focuses more on the Document Object Model (DOM)—the structure of the page
—whereas Capybara mirrors the kinds of actions that a real user would take (such
as filling in fields or selecting checkboxes). Both allow you to use CSS or XPath
selectors when you need to reach beneath the covers to do something difficult.
Capybara does better at handling the timing issues that crop up during the testing
of asynchronous JavaScript code.
I recommend running a timeboxed experiment (for a week or two, say) where you try
both. Make your decision at the end of the experiment once you have some practical
experience with both of them.
Further Exploration
The Watir family of tools has excellent documentation: detailed instructions
for multiple platforms, getting-started examples, API descriptions, and so on.
In particular, the open source Watir book33 is an enjoyable reference.
33. http://watir.com/book
www.it-ebooks.info
report erratum • discuss
Test a PHP App with cuke4php
• 173
Recipe 33
Test a PHP App with cuke4php
Problem
You want to be able to run quick tests of your PHP app without the overhead
of launching a browser.
Ingredients
•
•
•
•
•
PHP 5.3.x34
Cuke4php,35 a tool for writing step definitions in PHP
Cucumber’s wire protocol,36 used behind the scenes by Cuke4php
The PHPUnit test framework37 for assertions
(Optional) An environment for running full browser tests afterward: Selenium, Firefox, and a web server
Solution
You’re probably testing your PHP app at a few different layers. At the bottom
layer, you may be using PHPUnit to test individual classes and functions. At
the top layer, you might have something like Selenium for testing the app in
a live browser.
Cuke4php sits somewhere in the middle. It lets you test the business logic
of your app in plain English (like Cucumber). But it does so by driving your
PHP code through a Cucumber-specific protocol, rather than going through
the browser. The result is a fast integration test that you can quickly run on
your code base before sharing changes with your colleagues.
This style of testing is much easier if your app’s user interface is just a thin
layer over the business logic, that is, if your user-facing .php files contain only
display information. For this recipe, we’ll create such an app: a temperature
converter. The main index.php file will be mostly HTML markup, with just a
little code to direct the user’s choices into kelvinator.php, where the real work
happens.
34.
35.
36.
37.
http://www.php.net/downloads.php
https://github.com/olbrich/cuke4php/wiki
https://github.com/cucumber/cucumber/wiki/Wire-Protocol
https://github.com/sebastianbergmann/phpunit
www.it-ebooks.info
report erratum • discuss
Chapter 4. Mobile and Web
• 174
Setup
For this recipe, you’ll need to have PHP already on your system.38 Installation
varies widely by platform, so there’s no single recipe I can provide here.
First, install PHPUnit. The easiest way to do this is using the PEAR packaging
tool. If you don’t already have PEAR, download http://pear.php.net/go-pear.phar and
run the following:
$ php go-pear.phar
With PEAR ready to go, you can use it to fetch and install PHPUnit.
$ pear config-set auto_discover 1
$ pear install pear.phpunit.de/PHPunit
At this point, you may want to do a quick sanity check on the installation.
Add the PHPUnit directory (PEAR will tell you this when you install) to your
PATH environment variable. Then, type in a simple PHPUnit test case and save
it as test.php.
php/test.php
<?php
class SimpleTest extends PHPUnit_Framework_TestCase {
public function testMath() {
$this->assertEquals(2 + 2, 4);
}
}
?>
Now, run the test.
$ phpunit test.php
PHPUnit 3.6.10 by Sebastian Bergmann.
.
Time: 0 seconds, Memory: 4.50Mb
OK (1 test, 1 assertion)
The last piece of the puzzle is Cuke4php. This is a collection of PHP and Ruby
code, packaged as a Ruby gem.
$ gem install cuke4php
Now, you’re ready to test some PHP.
38. http://php.net/manual/en/install.php
www.it-ebooks.info
report erratum • discuss
Test a PHP App with cuke4php
• 175
Feature
Let’s start with a Cucumber description of our temperature converter. Add
the following code to features/kelvinator.feature:
php/features/kelvinator.feature
Feature: Kelvinator
Scenario: Centigrade to Kelvin
Given a temperature of 100 degrees centigrade
When I convert it to Kelvin
Then the result should be 373 degrees Kelvin
Normally, this is the point at which you’d run the unimplemented features
and generate some boilerplate step definitions. But because we’re testing
PHP, you’ll need to do a little configuration first.
Cuke4php is actually a server that runs your PHP code in a stand-alone
process. Cucumber connects through that server through its wire protocol.
You’ll need to add a file in the features/step_definitions directory called Cuke4PHP.wire
with the following contents:
php/features/step_definitions/Cuke4PHP.wire
host: localhost
port: <%= ENV['CUKE4PHP_PORT'] %>
Don’t worry about setting that environment variable; Cuke4php will do that
for you.
Step Definitions
Just as you would do when running Cucumber with Ruby, run Cuke4php
without any step definitions to generate some boilerplate code. Notice we’re
using the cuke4php command, rather than plain cucumber. The new command
sets up environment variables, fires up a server to run PHP, and then hands
off to the real Cucumber.
Here’s what the output should look like, complete with boilerplate step definitions at the bottom:
$ cuke4php features
Feature: Kelvinator
Scenario: Centigrade to Kelvin
Given a temperature of 100 degrees centigrade
When I convert it to Kelvin
Then the result should be 373 degrees Kelvin
#
#
#
#
features/kelvinator.feature:3
features/kelvinator.feature:4
features/kelvinator.feature:5
features/kelvinator.feature:6
1 scenario (1 undefined)
3 steps (3 undefined)
www.it-ebooks.info
report erratum • discuss
Chapter 4. Mobile and Web
• 176
0m0.012s
You can implement step definitions for undefined steps with these snippets:
/**
* Given /^a temperature of 100 degrees centigrade$/
**/
public function stepATemperatureOf100DegreesCentigrade() {
self::markPending();
}
/**
* When /^I convert it to Kelvin$/
**/
public function stepIConvertItToKelvin() {
self::markPending();
}
/**
* Then /^the result should be 373 degrees Kelvin$/
**/
public function stepTheResultShouldBe373DegreesKelvin() {
self::markPending();
}
Rather than handing us Ruby snippets, Cuke4php has supplied PHP ones.
Create a new file called features/step_definitions/KelvinatorSteps.php with the following
structure:
php/features/step_definitions/KelvinatorSteps.php
<?php
class KelvinatorSteps extends CucumberSteps {
// Your step definitions will go here
}
?>
Now, paste the empty step definitions from the command line into the body
of your KelvinatorSteps class. When you rerun the tests, the steps should be
marked as pending, rather than undefined.
Drive the Tested Code
Just like classic Cucumber, Cuke4php matches step definitions via regular
expression. The only difference is that with PHP, you just put the regex in a
comment block before your step definition, rather than passing it in as a
parameter. Let’s work on the Given step first.
www.it-ebooks.info
report erratum • discuss
Test a PHP App with cuke4php
• 177
php/features/step_definitions/KelvinatorSteps.php
Line 1 /**
2 * Given /^a temperature of (\d+) degrees centigrade$/
3 **/
4 public function stepATemperatureOfDegreesCentigrade($centigrade) {
$this->aGlobals['centigrade'] = $centigrade;
5
6 }
We’ve only needed to change three things from the boilerplate code snippet
to get this step definition working. First, we’ve changed the specific temperature in the regular expression on line 2 to capture any sequence of digits.
Next, we’ve added a $centigrade parameter to the function at line 4. Finally, at
line 5, we’re storing the temperature in a shared array called aGlobals that
Cuke4php furnishes for keeping data around between steps.
The When step is much simpler; it doesn’t need any changes to the regex or
the signature. All it needs to do is store the converted temperature for later
comparison.
php/features/step_definitions/KelvinatorSteps.php
/**
* When /^I convert it to Kelvin$/
**/
public function stepIConvertItToKelvin() {
$this->aGlobals['kelvin'] = kelvinate(
$this->aGlobals['centigrade']);
}
The final step definition needs to compare the Kelvin value calculated by your
app against the value you expect.
php/features/step_definitions/KelvinatorSteps.php
Line 1 /**
* Then /^the result should be (\d+) degrees Kelvin$/
**/
4 public function stepTheResultShouldBe3DegreesKelvin($expected) {
5
self::assertEquals($this->aGlobals['kelvin'], $expected);
6 }
2
3
As with the Given step, you’ll need to add a capture group to the regular
expression and a parameter to the function. The assertion on line 5 comes
straight from PHPUnit; you can use any of their rich library of assertions.39
Implement the Tested Code
Now that we have failing tests, it’s time to implement the application. Put the
following code in kelvinator.php:
39. http://www.phpunit.de/manual/3.4/en/appendixes.assertions.html
www.it-ebooks.info
report erratum • discuss
Chapter 4. Mobile and Web
• 178
php/kelvinator.php
<?php
function kelvinate($centigrade) {
return $centigrade + 273;
}
?>
The top-level application will be in index.php. It’s just a thin wrapper around
the logic you’ve already written.
php/index.php
<!doctype html>
<html>
<head>
<meta charset="utf-8">
<title>Kelvinator</title>
</head>
<body>
<h1>Kelvinator</h1>
<?
if (array_key_exists("centigrade", $_GET)) {
require("kelvinator.php");
$centigrade = $_GET["centigrade"];
$kelvin = kelvinate($centigrade);
?>
<p><?= $centigrade ?> В°C is <span id="kelvin"><?= $kelvin ?> В°K</span></p>
<?
} else {
?>
<form action="index.php" method="GET">
<input name="centigrade" type="text">
<label for="centigrade">В°C</label>
<input type="submit" value="Kelvinate!">
</form>
<?
}
?>
</body>
</html>
Actually, the main file could be even thinner than this. You could put the
decision of whether to render the form in a different .php file so that it’s easier
to test. But that’s a lot of moving parts for what’s supposed to be short recipe,
so we’ll just keep it simple for now.
You’ll need to teach your step definitions where the kelvinate() function lives.
Add a require() line to KelvinatorSteps.php, just before your class definition.
www.it-ebooks.info
report erratum • discuss
Test a PHP App with cuke4php
• 179
php/features/step_definitions/KelvinatorSteps.php
require('kelvinator.php');
Now, when you rerun cuke4php, you should see passing tests.
Test in the Browser
We’ve just seen how Cuke4php can test application-level logic without a
browser. This can be useful for testing on your development machine, where
fast turnaround time is of paramount importance.
But at some point, you probably want to test the app in a real browser as
well—perhaps on a powerful, centralized build server. If your user interface
is just a thin wrapper around your application logic, you may even be able
to reuse some of your Cuke4php tests as full-on Cucumber tests. That’s what
we’ll to do in this section.
At this point, you’ll need to launch a web server and put index.php and kelvinator.php where your server can see them. On a Mac, you can just copy the two
files to the Sites folder in your home directory and then turn on Personal Web
Sharing in your System Preferences.
You’ll be using the Selenium WebDriver library for this part of the recipe, so
install that now if you don’t already have it.
$ gem install selenium-webdriver
We’re going to keep the Ruby definitions in a separate directory from the PHP
implementations. browser seems like a good name for this directory. Create a
file called browser/env.rb, and put the following code in it:
php/browser/env.rb
require 'selenium-webdriver'
module HasBrowser
@@browser = Selenium::WebDriver.for :firefox
at_exit { @@browser.quit }
def browser
@@browser
end
end
World(HasBrowser)
This code starts Firefox at the beginning of the test and shuts it down at the
end, using the techniques from Recipe 3, Run Slow Setup/Teardown Code
with Global Hooks, on page 13.
www.it-ebooks.info
report erratum • discuss
Chapter 4. Mobile and Web
• 180
Now, you’re ready to fill in the Ruby step definitions in browser/kelvinator_steps.rb.
You may need to adjust the path on line 6 if you’re serving the PHP from
somewhere other than your home user account.
php/browser/kelvinator_steps.rb
Line 1 Given /^a temperature of (\d+) degrees centigrade$/ do |centigrade|
-
@centigrade = centigrade.to_i
- end
5 When /^I convert it to Kelvin$/ do
-
browser.navigate.to "http://localhost/~#{ENV['USER']}/index.php"
input = browser.find_element :name, 'centigrade'
input.send_keys @centigrade.to_s
input.submit
10
output = browser.find_element :id, 'kelvin'
@kelvin = output.text.to_i
- end
15 Then /^the result should be (\d+) degrees Kelvin$/ do |expected|
-
@kelvin.should == expected.to_i
- end
You’ll notice that the behavior inside the steps is similar. The Given step
remembers the input temperature, the When step drives the application to
perform the conversion, and the Then step compares the result. The only difference is that you’re driving the full application through the browser, rather
than undercutting the user interface.
To run these tests using the full browser, pass the browser directory to
Cucumber on the command line.
$ cucumber -rbrowser features
You should now see the same tests run, using Firefox instead of the Cucumber
wire protocol. The test will be quite a bit slower: five to ten times on my
machine.
Further Exploration
When you take the “thin user interface” technique to its logical extreme, you
get the Presenter First style of application,40 where literally every GUI action
is a trivial function call. The result is that you can test even your high-level
user-facing code without having to fire up a graphical application or web
server.
40. https://en.wikipedia.org/wiki/Presenter_First
www.it-ebooks.info
report erratum • discuss
Play Back Canned Network Data Using VCR
• 181
Recipe 34
Play Back Canned Network Data Using VCR
Problem
You’re testing an app that relies on one or more third-party, HTTP-based
APIs. You’re worried about what will happen to your test results if one of the
APIs you use times out or starts returning different data than what you
expected.
Ingredients
• VCR,41 a library that can record a live HTTP interaction and then play it
back during testing
• WebMock42 for simulating web traffic
Solution
Before we start writing the code for this recipe, let’s talk about application
styles. There’s a whole class of apps whose usefulness comes from the way
they tie together data sources from around the Web. Consider, for instance,
the Influence Explorer civic project from Sunlight Labs.43 This site combines
campaign finance disclosures and open U.S. purchasing data (among other
sources) to provide a public service: examining the lobbying habits of companies that are awarded federal contracts.
There are some challenges in testing this style of program. If one of the data
sources goes down, a naГЇvely written test may slow down or hang altogether.
If an assumption about the domain turns out to be false (“Company X always
lobbies more than Company Y on copyright issues”), tests could suddenly
start failing months down the road.
How do we deal with these risks while still using realistic data? One way is
to capture a live interaction once with your data sources and then play the
canned data back during testing. That’s exactly what Myron Marston’s VCR
library does for you.
41. https://github.com/myronmarston/vcr
42. https://github.com/bblimke/webmock
43. http://influenceexplorer.com
www.it-ebooks.info
report erratum • discuss
Chapter 4. Mobile and Web
• 182
In this recipe, we’re going to build a simple library that retrieves stock prices
from the Internet and test it with Cucumber and VCR.
Library
Our library is going to take two stock symbols from the user, look up both
their prices, and report which one has the higher share price. We’ll call it
Stock vs. Stock. We could use this library to build a simple command-line
program or a “fight”-style web app like Googlefight.44
Let’s start with the tests, in stocks.feature.
vcr/features/stocks.feature
Feature: Stock vs. Stock
@vcr
Scenario: Compare two stocks
When I compare GOOG and GRPN
Then GOOG should win
Note the @vcr tag. Later, we’ll use that tag to tell VCR which tests need to be
fed canned data.
The step definitions are just going to pass the stock symbols to our yet-to-bewritten library. These will go in features/step_definitions/stock_steps.rb.
vcr/features/step_definitions/stock_steps.rb
When /^I compare (\w+) and (\w+)$/ do |sym1, sym2|
@winner = StockVsStock.fight sym1, sym2
end
Then /^(\w+) should win$/ do |expected|
@winner.should == expected
end
VCR supports a number of different Ruby I/O libraries, including the standard
Net::HTTP module that ships with Ruby. That’s the one we’ll base our library
on. Put the following code in lib/stock_vs_stock.rb:
vcr/lib/stock_vs_stock.rb
require 'open-uri'
class StockVsStock
def self.fight sym1, sym2
uri = URI.parse("http://download.finance.yahoo.com/d/quotes.csv?" +
"s=#{sym1}+#{sym2}&f=l1s")
response = uri.read
rows
= response.split
results = rows.map do |row|
44. http://googlefight.com
www.it-ebooks.info
report erratum • discuss
Play Back Canned Network Data Using VCR
• 183
price, symbol = row.split(',')
[price.to_f, symbol[1..-2]]
end
winning_row = results.sort.last
winning_row[1] # just the symbol
end
end
This code uses CSV data provided by Yahoo! Finance45 to look up both symbols. We parse the results into an array of price/symbol pairs and then sort
them and return the winner.
You’ll need to require() the new code from support/env.rb, the standard place for
importing libraries into Cucumber tests.
vcr/features/support/env.rb
$LOAD_PATH << 'lib'
require 'stock_vs_stock'
Now, run your features.
$ cucumber features
The tests should pass. This is all well and good for today’s valuations, but
what happens if Groupon surges in the future and overtakes Google? Our
test will suddenly fail, even if our logic is still correct.
Future-Proofing with VCR
This is where VCR comes in. First, install the gem.
$ gem install vcr
You’ll also need to install one of the many fake networking libraries available
for Ruby. For this recipe, we’ll use WebMock.
$ gem install webmock
Now, we can configure Cucumber to use VCR. Add the following code to features/support/env.rb:
vcr/features/support/env.rb
require 'vcr'
VCR.configure do |c|
c.cassette_library_dir = 'fixtures/vcr_cassettes'
c.hook_into :webmock
end
We’ll also need to tell VCR to watch for the @vcr tag we created earlier.
45. http://finance.yahoo.com
www.it-ebooks.info
report erratum • discuss
Chapter 4. Mobile and Web
• 184
vcr/features/support/env.rb
VCR.cucumber_tags do |t|
t.tag '@vcr', :use_scenario_name => true
end
Run your features again. VCR will record the HTTP traffic and save it in a
YAML file deep inside the fixtures directory. Now, on subsequent runs,
Cucumber will use that canned data instead of hitting the network. Try disconnecting your network and running one final time; the tests should still
pass.
Further Exploration
VCR has a lot of additional features. You can set up your canned data to
refresh periodically. You can mask out confidential data like passwords from
appearing in the YAML files. For more information about these topics, see
the official documentation.46
For a great demonstration of setting up VCR with a new project, see Gary
Bernhardt’s excellent screencast on the subject.47
46. https://www.relishapp.com/myronmarston/vcr/docs
47. https://www.destroyallsoftware.com/screencasts/catalog/sucks-rocks-3-the-search-engine
www.it-ebooks.info
report erratum • discuss
Drive a Flash App Using Cuke4AS3
• 185
Recipe 35
Drive a Flash App Using Cuke4AS3
Problem
You’re writing a Flash or Adobe Air application using ActionScript, and you
want to describe and then drive out its behavior using Cucumber.
Ingredients
•
•
•
•
•
Cucumber installed in your system Ruby (i.e., not using RVM)
Adobe Flex SDK
Adobe Air runtime
Cuke4AS348
Your text editor or IDE of choice. We’ve tried to keep this recipe simple enough
that you should be able to follow along using a simple text editor. Obviously,
if you’re happier with an IDE, feel free to use that.
• A nice cup of tea
Solution
Getting Cuke4AS3 running is fairly involved, so we’re going to assume you
have a reasonable level of experience with ActionScript programming and
concentrate on explaining how to automate your ActionScript project using
Cuke4AS3.
We’re going to start by installing a few things to get all the infrastructure in
place that you need to run a Cucumber scenario. Then we’ll build a very
simple Flash game, driving the development of the solution from Cucumber.
Setup
Cuke4AS3 doesn’t currently work with RVM, so you’ll need to make sure you
have installed Cucumber in your system Ruby. If you are using RVM, just
switch to the system Ruby and then install Cucumber.
$ rvm use system
$ gem install cucumber
If you’re not using RVM, just install Cucumber as normal.
48. http://github.com/flashquartermaster/Cuke4AS3
www.it-ebooks.info
report erratum • discuss
Chapter 4. Mobile and Web
• 186
You’ll need the Flex SDK49 installed to be able to compile your ActionScript
app. If you’re using Homebrew on Mac OS X, you can install the Flex SDK
with brew install flex_sdk. Also, make sure you’ve installed the Adobe Air runtime50
so that you can run the Cuke4AS3 developer console.
Now download Cuke4AS3’s All_I_need_to_get_started.zip51 package. Unpack it, and
you should find three versions of the Cuke4AS3DeveloperUI: an .exe for Windows, a .dmg for Mac OS X, and a .deb for Linux. Run the installer for your
platform.
You should now see the Cuke4AS3 developer UI open. The developer UI will
take care of compiling our ActionScript app, starting a wire protocol server,
and running Cucumber. We’d better get started!
A Walking Skeleton
We’ll start by creating the bare bones of a Cuke4AS3 suite before we add our
first scenario and start actually driving out some code in the solution.
Create an src directory in the root of your project folder. In that folder, create
the familiar features folder and within that a step_definitions folder.
Now you need to create three files in the src/features/step_definitions folder. First
create the .wire file that tells Cucumber how to connect to Cuke4AS3 to run
our step definitions. Then create a step definitions file and finally a special
file called Cuke4AS3_Suite.as that tells Cuke4AS3 where to find our steps. Please
take care to spell the name of this file exactly as we have done.
The wire file is simple and just looks like this:
flash/src/features/step_definitions/Cuke4AS3.wire
host: localhost
port: 54321
You’ll start with a blank step definitions file and add step definitions once
you’ve written your scenario. Create a file called src/features/step_definitions/Steps.as
with just an empty class in it.
package features.step_definitions
{
public class Steps
{
}
}
49. http://www.adobe.com/devnet/flex/flex-sdk-download.html
50. http://get.adobe.com/air/
51. Found in https://github.com/flashquartermaster/Cuke4AS3/downloads
www.it-ebooks.info
report erratum • discuss
Drive a Flash App Using Cuke4AS3
• 187
We’ll add some real step definitions to this once we have a failing scenario.
Finally, you need the Cuke4AS3_Suite.as file.
flash/src/features/step_definitions/Cuke4AS3_Suite.as
package features.step_definitions
{
import features.step_definitions.Steps;
import flash.display.Sprite;
public class Cuke4AS3_Suite extends Sprite
{
public function Cuke4AS3_Suite()
{
var steps:Steps;
}
}
}
That’s it. Your project directory should now look like this:
в””в”Ђв”Ђ src
в””в”Ђв”Ђ features
в””в”Ђв”Ђ step_definitions
в”њв”Ђв”Ђ Cuke4AS3.wire
в”њв”Ђв”Ђ Cuke4AS3_Suite.as
в””в”Ђв”Ђ Steps.as
Now you should be able to run Cucumber against your ActionScript step
definitions. It’s time to fire up the Cuke4AS3 developer console.
Configuring the Cuke4AS3 Developer Console
The Cuke4AS3 developer console needs a few configuration settings to be
able to work. Open the Cuke4AS3 developer console, switch to the configuration tab, and enter the following three settings:
Source: This tells Cuke4AS3 where to find your features directory. Point this
to the src folder of your project directory.
Mxmlc: This is the path to your mxmlc executable from the Flash SDK.
Cuke4AS3 will use this to compile your ActionScript step definitions.
On Mac OS X and Linux, you should be able to just type $ which mxmlc at
a command prompt to get this setting.
If you’re using Flash Builder 4.5, then it is likely to be the following:
www.it-ebooks.info
report erratum • discuss
Chapter 4. Mobile and Web
Windows
• 188
C:\Program Files\Adobe\Adobe Flash Builder
4.5\sdks\4.5.0\bin\mxmlc.exe
OS X
/Applications/Adobe Flash Builder
4.5/sdks/4.5.0/bin/mxmlc
If you are using FlashDevelop, then it is likely to be the following:
C:\Program Files\FlashDevelop\Tools\flexsdk\bin\mxmlc.exe
Cucumber: This is the path to your cucumber executable. On Mac OS X and
Linux, you should be able to find this setting by running the following at
a command prompt:
$ which cucumber
Windows users should look in the bin directory of their Ruby installation
and add a path to their Ruby binary, something like C:\Ruby192\bin\ruby.exe.
Then, in the Cucumber Arguments box, put the path to your cucumber
binary, which should be in the same folder, as in C:\Ruby192\bin\cucumber.
Now click the Save button so you never have to type all of that again.
Running Your Cukes
Even without an actual Cucumber feature, you should now be able to run
Cuke4AS3. Go ahead and hit the Run button on the developer console. The
compiler output window should show that it has built a file cuke4as3_steps.swf
in your src directory. The Cucumber output window should show the familiar
“0 scenarios, 0 steps” output.
If you’re having trouble at this point, we suggest starting with the Cuke4AS3
wiki’s troubleshooting page.52
It’s time to add a scenario!
We’re going to build a very simple game. Here’s our scenario:
flash/src/features/epic_win.feature
Feature: Epic Win
Scenario: Win the game
Given the game is running
When I play
Then I should be the winner
Hit the Run button again in the developer console, and you should now see
some ActionScript step definition snippets in the Cucumber output window.
52. https://github.com/flashquartermaster/Cuke4AS3/wiki/Troubleshooting
www.it-ebooks.info
report erratum • discuss
Drive a Flash App Using Cuke4AS3
• 189
Paste those into the features/step_definitions/Steps.as file, adding an import statement
at the top so that it looks like this:
package features.step_definitions
{
import com.flashquartermaster.cuke4as3.utilities.*;
public class Steps
{
[Given (/^the game is running$/)]
public function should_the_game_is_running():void
{
throw new Pending("Awaiting implementation");
}
[When (/^I play$/)]
public function should_i_play():void
{
throw new Pending("Awaiting implementation");
}
[Then (/^I should be the winner$/)]
public function should_i_should_be_the_winner():void
{
throw new Pending("Awaiting implementation");
}
}
}
The function names autogenerated by Cuke4AS3 are sometimes a bit odd,
so feel free to change them to something more sensible. The name of the
function doesn’t affect whether the step matches; that’s done by the previous
annotation.
You should now be able to run the scenario from the developer console and
see the first step fail with a pending exception.
Building the Game
Let’s start building our game. We’ll split the implementation into two layers:
a user interface layer that displays our sophisticated game graphics, delegating
to domain model layer that holds the actual game logic.
For the first iteration we’ll concentrate on building the domain model. Here’s
the updated step definition file that calls an imaginary Game class:
package features.step_definitions
{
import com.flashquartermaster.cuke4as3.utilities.*;
import org.hamcrest.*;
www.it-ebooks.info
report erratum • discuss
Chapter 4. Mobile and Web
• 190
import org.hamcrest.object.*;
import Game;
public class Steps
{
private var _game:Game;
[Given (/^the game is running$/)]
public function should_the_game_is_running():void
{
_game = new Game();
}
[When (/^I play$/)]
public function should_i_play():void
{
_game.play();
}
[Then (/^I should be the winner$/)]
public function should_i_should_be_the_winner():void
{
assertThat( _game.isWinner() );
}
}
}
Notice we’ve used the Hamcrest53 assertion library for our Then step. We prefer
these to the stock FlexUnit ones, because they make for more readable
assertions. Cuke4AS3 bundles in these libraries automatically (though you
can turn this off from the config tab), so you don’t need to add them to the
load path yourself.
We’re importing and then calling a Game class, which we need to define. Create
a file src/Game.as with the following code:
flash/src/Game.as
package
{
public class Game
{
public function play():void
{
}
public function isWinner():Boolean
{
return true;
}
}
}
53. https://github.com/drewbourne/hamcrest-as3
www.it-ebooks.info
report erratum • discuss
Drive a Flash App Using Cuke4AS3
• 191
Run the scenario now from the developer console, and you should see the
code compile and then pass the test. We’re green!
It’s time to enjoy that cup of tea for a moment; then we’ll get to work on the
user interface.
Adding the User Interface
It’s delightfully easy to test ActionScript applications right up to the surface
of the user interface, thanks to a very scriptable event API. We can even watch
the game play out through the Cuke4AS3 developer console!
To achieve this, we’ll use FlexUnit’s UI Impersonation54 library. The first thing
you need to do is modify your Given step to hook up this library to the GameUI
class we’re going to build next.
flash/src/features/step_definitions/Steps.as
[Given (/^the game is running$/, "async")]
public function should_the_game_is_running():void
{
_game = new GameUI();
Async.proceedOnEvent( this, _game, Event.ADDED_TO_STAGE );
UIImpersonator.addChild( _game );
}
You’ll notice that we’re passing a string "async" to the Given annotation on the
step definition method. This tells FlexUnit that this step contains asynchronous code. We want to make sure we wait until the UIImpersonator has fired
the ADDED_TO_STAGE event before we proceed to the next step of the scenario.
To get this code to compile, you also need to add a few import statements at
the top of the file and change the type declaration for the _game instance
variable from Game to GameUI. We’ll show you the full listing further down once
we’ve finished working through the changes to this file.
The game will have a play button on the UI and a textbox that tells the player
whether they’ve won. Now you need to change the last two step definitions to
talk to these GUI widgets instead of the domain model.
flash/src/features/step_definitions/Steps.as
[When (/^I play$/)]
public function should_i_play():void
{
_game.playButton.dispatchEvent( new MouseEvent( MouseEvent.CLICK ) );
}
[Then (/^I should be the winner$/)]
54. http://docs.flexunit.org/index.php?title=UIImpersonator
www.it-ebooks.info
report erratum • discuss
Chapter 4. Mobile and Web
• 192
public function should_i_should_be_the_winner():void
{
assertThat( _game.message.text, equalTo("You win!") );
}
The When step sends a mouse-click event to the play button, just as though
the user had clicked it. The Then examines the text in the message to see
whether it indicates that the user has won.
To get the scenario to pass, create src/GameUI.as and implement it as follows:
flash/src/GameUI.as
package
{
import Game;
import flash.display.Sprite;
import flash.events.MouseEvent;
import flash.text.TextField;
public class GameUI extends Sprite
{
public var playButton:Sprite;
public var message:TextField;
private var _game:Game;
public function GameUI()
{
_game = new Game();
addPlayButton();
addMessage();
}
private function handlePlayButtonClick( event:MouseEvent ):void
{
_game.play();
if ( _game.isWinner() ) message.text = "You win!"
}
private function addPlayButton():void
{
var playButtonLabel:TextField = new TextField();
playButtonLabel.text = "Play"
playButton = new Sprite();
playButton.graphics.beginFill( 0x00ff00 );
playButton.graphics.drawRect( 0, 0, 100, 20 );
playButton.graphics.endFill();
playButton.addChild(playButtonLabel);
playButton.addEventListener( MouseEvent.CLICK, handlePlayButtonClick );
playButton.buttonMode = true;
addChild( playButton )
}
www.it-ebooks.info
report erratum • discuss
Drive a Flash App Using Cuke4AS3
• 193
private function addMessage():void
{
message = new TextField();
message.height = 20;
message.y = playButton.y + playButton.height + 5;
addChild( message );
}
}
}
This is quite long but should be familiar to you if you’re used to putting
together ActionScript user interfaces from code.
The final listing for the step definitions should look like this:
flash/src/features/step_definitions/Steps.as
package features.step_definitions
{
import com.flashquartermaster.cuke4as3.utilities.*;
import org.hamcrest.*;
import org.hamcrest.object.*;
import flash.events.*;
import org.flexunit.async.Async;
import org.fluint.uiImpersonation.UIImpersonator;
import GameUI;
public class Steps
{
private var _game:GameUI;
[Given (/^the game is running$/, "async")]
public function should_the_game_is_running():void
{
_game = new GameUI();
Async.proceedOnEvent( this, _game, Event.ADDED_TO_STAGE );
UIImpersonator.addChild( _game );
}
[When (/^I play$/)]
public function should_i_play():void
{
_game.playButton.dispatchEvent( new MouseEvent( MouseEvent.CLICK ) );
}
[Then (/^I should be the winner$/)]
public function should_i_should_be_the_winner():void
{
assertThat( _game.message.text, equalTo("You win!") );
}
}
}
www.it-ebooks.info
report erratum • discuss
Chapter 4. Mobile and Web
• 194
With this in place, you should be able to run the scenario from the developer
console and see it pass again. Try ticking the visual mode box to see the UI
in all its glory.
Manual Testing
You can build your game into a full-fledged Flash application simply by calling
mxmlc from the console.
$ mxmlc src/GameUI.as -output Game.swf
Open the resulting Game.swf in a browser and amuse yourself for hours.
Further Exploration
This game is pretty boring so far. Try changing the feature so that you win
or lose the game on alternate plays.
Feature: Epic Win
Scenario: Win on first play
Given the game is running
When I play
Then I should be the winner
Scenario: Lose on second play
Given the game is running
And I have played once
When I play again
Then I should lose
Can you implement the step definitions for the second scenario and then
change the logic in Game.as to make it pass?
www.it-ebooks.info
report erratum • discuss
Monitor a Web Service Using Nagios and Cucumber
• 195
Recipe 36
Monitor a Web Service Using Nagios and Cucumber
Problem
You’re monitoring the uptime of your web service with Nagios. The HTTP
monitoring built into Nagios gives a quick up/down status. You want to add
more advanced information to this report. Specifically, you want to run some
acceptance tests to see whether your servers are showing the right content.
Ingredients
• A monitoring server running Nagios55
• The cucumber-nagios gem56 for producing reports in a format easily
understood by Nagios
• Webrat57 for testing web pages
• Nokogiri58 for parsing HTML results
• Bundler59 for installing Ruby libraries onto the monitoring server
Solution
Nagios is an open source tool that gauges the health of your network. It does
so by regularly running individual shell scripts—plug-ins, in Nagios parlance
—and then collecting and presenting the results. A plug-in performs a single
monitoring task, such as verifying that a web server is responding at a particular URL or connecting to a MySQL server to retrieve statistics.
The Nagios documentation describes a few simple output conventions for
plug-ins to follow.60 Plug-ins are not required to adhere to these, but doing
so makes it easier for Nagios to display their reports.
55.
56.
57.
58.
59.
60.
http://www.nagios.org
http://auxesis.github.com/cucumber-nagios
https://github.com/brynary/webrat
http://nokogiri.org
http://gembundler.com
http://nagios.sourceforge.net/docs/3_0/pluginapi.html
www.it-ebooks.info
report erratum • discuss
Chapter 4. Mobile and Web
• 196
cucumber-nagios is a Ruby gem that implements a Cucumber formatter for
Nagios. With it, you can report pass/fail information in the style that Nagios
expects to see. It also has a few helpers for generating new projects, which
we don’t need for this recipe.
In this recipe, we’re going to write a Cucumber scenario that exercises a
search feature on a public web server and then run that scenario regularly
from a Nagios monitoring server.
Monitoring Server Setup
The installation instructions for Nagios vary quite a bit from platform to
platform.61 The good news is that once you have it installed, the procedure
for administering it is the same. We used the Ubuntu installation instructions
for this recipe;62 if you’re on a different operating system, you may need to
tweak the paths a bit.
First, install Nagios and its plug-ins.
$ sudo apt-get install nagios3
Next, install Ruby and the libraries you’ll need for web scraping.
$ sudo apt-get install rubygems ruby-dev libxml2-dev libxslt1-dev
Finally, install Bundler.
$ sudo gem install bundler
Your remote server now has all the software it needs to run a few basic
Cucumber acceptance tests.
Development Machine Setup
Before we add the extra complication of monitoring, let’s get a basic web
scenario working locally in a development environment.
This recipe will use Bundler63 for dependency management so that we can
easily replicate our Ruby libraries later. If you haven’t already installed
Bundler, do so now.
$ gem install bundler
Next, create a Gemfile with the following contents:
61. http://nagios.sourceforge.net/docs/3_0/quickstart.html
62. https://help.ubuntu.com/community/Nagios3
63. http://gembundler.com
www.it-ebooks.info
report erratum • discuss
Monitor a Web Service Using Nagios and Cucumber
• 197
nagios/Gemfile
source :rubygems
gem 'cucumber-nagios'
cucumber-nagios lists Cucumber and Webrat as dependencies, so you don’t
have to name them explicitly. When you run Bundler, you’ll have everything
you need.
$ bundle install
Now that both machines are set up, we can turn our attention to the tests.
Cucumber Scenario
Let’s imagine for this recipe that you’re monitoring a web forum. You want
to do more than a simple HTTP status code check; you want to actually perform a search once in a while to make sure the front end and database are
still talking to each other. Place the following code in features/forum.feature:
nagios/features/forum.feature
Feature: Discussion forums
Scenario: Search
When I search the forums for "Ruby"
Then I should see the most recent posts first
Here’s the definition for the When step (this goes in features/step_definitions/forum_steps.rb):
nagios/features/step_definitions/forum_steps.rb
When /^I search the forums for "([^"]*)"$/ do |term|
escaped = CGI::escape term
visit "http://forums.pragprog.com/search?q=#{escaped}"
end
The visit() method comes with Webrat; we’ll see how to make it available to
Cucumber in a moment. First, let’s finish out the second step definition.
nagios/features/step_definitions/forum_steps.rb
Then /^I should see the most recent posts first$/ do
doc = Nokogiri::HTML response_body
dates = doc.css('div.date').map { |e| Time.parse e.text }
dates.should have_at_least(1).item
dates.should == dates.sort.reverse
end
We grab the response_body() from Webrat, look for all the <div class="date"> elements on the page, and verify that they’re in reverse sorted order.
www.it-ebooks.info
report erratum • discuss
Chapter 4. Mobile and Web
• 198
These step definitions have used several dependencies: CGI for making the
search term URL-friendly, Webrat for visiting the web page, Nokogiri for
parsing the response, and so on. We need to make sure these are all visible
from the step definitions. Create the file features/support/env.rb with the following
contents:
nagios/features/support/env.rb
require 'time'
require 'cgi'
require 'webrat'
require 'nokogiri'
Webrat.configure do |config|
config.mode = :mechanize
end
World Webrat::Methods
The scenario is now ready to run locally. Make sure to run it with the Nagios
formatter, the same way you’ll be running it on the server.
$ bundle exec cucumber -fCucumber::Formatter::Nagios
CUCUMBER OK - Critical: 0, Warning: 0, 2 okay | passed=2; failed=0; ...
Now that the scenario is passing on the local machine, it’s time to hook it up
to Nagios.
Reporting the Results
Transfer your project directory to the monitoring server, taking care to put
them someplace visible to the nagios user, such as /var/lib/nagios/cucumber. Then,
install and run Bundler to make sure you’re using the same set of libraries
as on your development machine.
$ gem install bundler
$ bundle install
Note that several of these gems have components written in C. If you get any
errors during installation, make sure your server has a C compiler and
Nokogiri’s library dependencies installed.64
Nagios follows a chain of configuration files to monitor a server:
•
•
•
•
The host groups file to describe logical collections of servers
Each individual host’s config file to specify what checks to run
A command definition to map command names to scripts
A shell script to implement each command
64. http://nokogiri.org/tutorials/installing_nokogiri.html
www.it-ebooks.info
report erratum • discuss
Monitor a Web Service Using Nagios and Cucumber
• 199
Let’s start with the host groups file. On Ubuntu, this information lives in
/etc/nagios3/conf.d/hostgroups_nagios2.cfg. Find the members line inside the http-servers
group, and add pragprog, the name of the new host we’ll be defining.
nagios/config/hostgroups_nagios2.cfg
define hostgroup {
hostgroup_name http-servers
alias
HTTP servers
вћ¤
members
localhost,pragprog
}
Next, create pragprog_nagios2.cfg in the same directory with the following contents:
nagios/config/pragprog_nagios2.cfg
define host{
host_name pragprog
address forums.pragprog.com
max_check_attempts 10
check_command check_cucumber
}
This will direct Nagios to run the check_cucumber command regularly against
the forum server. You’ll need to define this command as a Nagios plug-in in
/etc/nagios-plugins/config/cucumber.cfg.
nagios/config/cucumber.cfg
define command{
command_name
command_line
}
check_cucumber
/usr/lib/nagios/plugins/check_cucumber
The last piece of this Rube Goldberg contraption is to define the check_cucumber
shell script that gets called by this command. By convention, this script goes
in /usr/lib/nagios/plugins. All it needs to do is jump to the directory where you
saved your scenario and then start Cucumber.
nagios/config/check_cucumber
#!/bin/sh
cd /var/lib/nagios/cucumber
bundle exec cucumber -fCucumber::Formatter::Nagios || exit 2
As one final test, you might try running check_cucumber manually from the shell.
When you’re satisfied that it’s working, start the Nagios server and hit
http://server /nagios3 in your browser. You should see something like Figure 30,
Viewing Cucumber results in Nagios, on page 200.
www.it-ebooks.info
report erratum • discuss
Chapter 4. Mobile and Web
• 200
Figure 30—Viewing Cucumber results in Nagios
www.it-ebooks.info
report erratum • discuss
CHAPTER 5
Other Languages and Platforms
This chapter is a roundup of Cucumber tips that don’t fit neatly into the
categories we’ve seen so far. We’ll look at driving Python and Erlang code
using Cucumber syntax. We’ll also see a couple of recipes for specific operating
systems, such as Linux and Mac OS X.
www.it-ebooks.info
report erratum • discuss
Chapter 5. Other Languages and Platforms
• 202
Recipe 37
Drive a Mac GUI Using AppleScript and System Events
Problem
You want to write Cucumber tests that exercise a Mac application through
its user interface.
Ingredients
• System Events,1 an Apple-provided API for simulating GUI events
• rb-appscript,2 a bridge between Ruby and AppleScript
• Command-Line Tools for Xcode3 to compile rb-appscript
Solution
Since the 1980s, Mac users have customized and automated their systems
using the built-in AppleScript environment. Initially, this technology relied
on software vendors to make their apps’ features available in AppleScript.
Now, users can perform basic GUI automation of just about any program
through an AppleScript API known as System Events.
In this recipe, we’re going to write a simple Cucumber feature to control a
GUI. Our step definitions will use rb-appscript, a Ruby library that will give
us access to AppleScript (and therefore System Events).
For our guinea pig, we’ll choose Hex Fiend, an open source hex editor and
binary file comparison tool. Figure 31, Hex Fiend, on page 203 shows a
screenshot of Hex Fiend in action.
Setup
Hex Fiend is easy to install. Download the zip file from the official site,4 doubleclick the file, and drag the Hex Fiend program to your Applications folder.
1.
https://developer.apple.com/library/mac/#documentation/applescript/conceptual/applescriptx/concepts/
as_related_apps.html
2.
3.
4.
http://appscript.sourceforge.net/rb-appscript/index.html
https://developer.apple.com/xcode
http://ridiculousfish.com/hexfiend/files/HexFiend.zip
www.it-ebooks.info
report erratum • discuss
Drive a Mac GUI Using AppleScript and System Events
• 203
Figure 31—Hex Fiend
Before we can automate Hex Fiend’s user interface, we need to enable the
System Events API. Open your System Preferences, go to the Universal Access
pane, and turn on the option marked “Enable access for assistive devices”
(see Figure 32, Enabling System Events, on page 204). This will allow AppleScript to drive Hex Fiend’s user interface.
Before you can install rb-appscript, you’ll need a C compiler. Install the Xcode
development environment from the Mac App Store.5 Launch Xcode. Go to
Preferences в†’ Downloads and install the Command Line Tools package.
You have everything you need to install rb-appscript now.
$ gem install rb-appscript
Let’s turn our attention to the app and its features.
Inspecting the GUI
Before we can write code to drive the GUI, we need to understand the structure: what are the main parts of the window and types of controls?
The easiest way to do this is to use the Accessibility Inspector, a tool provided
by Apple that displays the type and placement of any control you hover the
mouse over. To install it, you’ll need an account on Apple’s developer site;6
the free level will work. Once you’re signed in, visit the download page7 and
search for Accessibility Tools for Xcode. Download and open the .dmg file, and
drag the two apps to your Applications folder.
Now, let’s get a feel for how the tool works. Launch Hex Fiend, and then start
Accessibility Inspector. Hover over the readout marked (select some data). You
5.
6.
7.
http://itunes.apple.com/us/app/xcode/id497799835
http://developer.apple.com
https://developer.apple.com/downloads/index.action?name=for%20Xcode%20-#
www.it-ebooks.info
report erratum • discuss
Chapter 5. Other Languages and Platforms
• 204
Figure 32—Enabling System Events
should see something like Figure 33, Accessibility Inspector. From this list,
we can see that the control we’re inspecting lives inside a table row, which
in turn is embedded in a scroll area inside a splitter group. When we refer to
these controls in Ruby, we’ll need to know their exact place in the hierarchy.
While we’re here, let’s take a look at one more thing. Hover over the main
editing area, and look at the Accessibility Inspector. You might expect to see
a text field here, but instead we just see the main split group that takes up
the whole window.
Like many OS X apps, Hex Fiend does a lot of custom rendering. In these
situations, there’s a limit to what Apple’s built-in GUI scripting can do. For
this recipe, we’re not inspecting the contents of the text area—but we’d be
out of luck if we needed to do that.
www.it-ebooks.info
report erratum • discuss
Drive a Mac GUI Using AppleScript and System Events
• 205
Figure 33—Accessibility Inspector
Feature
Let’s write a simple Cucumber feature for one of Hex Fiend’s basic operations:
typing in a hexadecimal value and interpreting it as an integer. Put the following code into features/hex.feature:
mac_system_events/features/hex.feature
Feature: Hex editor
Scenario: Convert to integer
Given I have typed "ABCD"
When I view the bytes as an integer
Then I should see "-12885"
Go ahead and run the feature, and paste the step templates into features/step_definitions/hex_steps.rb. Now, let’s fill in the definitions. AppleScript (and therefore
rb-appscript) tends to be a bit chatty, so let’s make these step definitions oneliners that call into support code. We’ll code to an imaginary API for our app
and then implement that API.
www.it-ebooks.info
report erratum • discuss
Chapter 5. Other Languages and Platforms
• 206
mac_system_events/features/step_definitions/hex_steps.rb
Given /^I have typed "(.*?)"$/ do |text|
type_in text
end
When /^I view the bytes as an integer$/ do
click_menu 'Edit', 'Select All'
@actual = readout_value
end
Then /^I should see "(.*?)"$/ do |expected|
@actual.should == expected
end
Now, when we run the feature, we get a bunch of errors because we haven’t
implemented our API yet. Let’s do that now.
GUI Connection
For the first implementation stage, we’re going to punt on setup and teardown.
Launch Hex Fiend and leave it running throughout the exercise. At first, you’ll
need to clear the text manually between test runs. We’ll fix that soon enough.
Let’s define the overall structure for our API. Create a file called features/support/env.rb with the following contents:
mac_system_events/features/support/env.rb
require 'appscript'
include Appscript
module DrivesApp
# helper methods go here...
end
World(DrivesApp)
We’ll put all our GUI automation helper methods in the DrivesApp module so
that they’ll be accessible from the step definitions.
First, let’s look at typing text. To type the letter A in AppleScript, we’d use
the following code:
tell application "System Events" to keystroke "A"
The rb-appscript equivalent is as follows:
app('System Events').keystroke('A')
To type a whole string, you’d just call that code in a loop, like so:
www.it-ebooks.info
report erratum • discuss
Drive a Mac GUI Using AppleScript and System Events
• 207
mac_system_events/features/support/env.rb
def type_in(text)
text.chars.each do |c|
app('System Events').
keystroke c
end
end
Now, we need to be able to click menu items. To choose Edit в†’ Select All in
AppleScript, you’d use the following code:
tell application "System Events"
tell process "Hex Fiend"
click menu item В¬
"Select All" of menu В¬
"Edit" of menu bar item В¬
"Edit" of menu bar 1
end tell
end tell
Once again, rb-appscript maps that incantation to a more Ruby-like style.
Add the following method to the DrivesApp module:
mac_system_events/features/support/env.rb
def click_menu(bar, item)
app('System Events').
processes['Hex Fiend'].
menu_bars[1].
menu_bar_items[bar].
menus[bar].
menu_items[item].
click
end
The final piece of the puzzle is reading back the integer value. Rather than
saying tell ... to click menu item ..., we need to say tell ... to get value of text field. Here’s
how we do that in rb-appscript:
mac_system_events/features/support/env.rb
def readout_value
app('System Events').
processes['Hex Fiend'].
windows[0].
splitter_groups[0].
scroll_areas[0].
tables[0].
rows[0].
text_fields[0].value.get
end
www.it-ebooks.info
report erratum • discuss
Chapter 5. Other Languages and Platforms
• 208
Now, rerun your step. All the steps should pass now. But we’re not quite
done. Our code doesn’t launch the app before the first test or exit the app
afterward. Let’s fix that.
Starting and Stopping
How do we make sure our app is freshly launched and running from a known
state before the first test? The most reliable way is to delete any preference
files and launch the app before each test case. But this adds quite a bit of
time to the process and makes our .feature files less useful for things like
overnight stress testing.
The alternative is to launch the app once at the beginning of the test run and
then find some way to put it in a known state before each test case. If your
app supports some kind of factory preset action, you might choose this path.
Since this recipe has only one scenario, it doesn’t matter too much. Let’s just
launch the app before the first step. We’ll use the global hooks technique
from Recipe 3, Run Slow Setup/Teardown Code with Global Hooks, on page
13. Place the following code in env.rb, just outside the definition of DrivesApp:
mac_system_events/features/support/env.rb
`open -a 'Hex Fiend'`
at_exit { app('Hex Fiend').quit :saving => :no }
Before the test starts, we use the Mac shell’s built-in open command to ensure
that Hex Fiend is launched and has a document open. After Cucumber finishes
the last test, it will run our at_exit hook and quit the app without saving.
Further Exploration
In this recipe, we used a Cucumber technique called global hooks to launch
the app once per test run. For more on how these work, see Recipe 3, Run
Slow Setup/Teardown Code with Global Hooks, on page 13.
The AppleScript API is serviceable, but as you’ve noticed, it’s a bit verbose.
You have to specify the exact path from the root window of the user interface
down to each control. In Recipe 38, Drive a Mac GUI Using MacRuby and
AXElements, on page 209, we look at AXElements, a more Ruby-like way to
drive Mac user interfaces.
www.it-ebooks.info
report erratum • discuss
Drive a Mac GUI Using MacRuby and AXElements
• 209
Recipe 38
Drive a Mac GUI Using MacRuby and AXElements
Problem
You want to test a Mac GUI, but you don’t want to use a bridge to AppleScript.
Instead, you want to use an expressive Ruby-like API that will be easier to
write and maintain.
Ingredients
• AXElements,8 a Ruby wrapper around the Apple Accessibility APIs
• A nightly build of MacRuby,9 an implementation of Ruby tied closely to
the OS X runtime
• Spinach,10 a Cucumber-like framework that’s compatible with MacRuby
• Command-Line Tools for Xcode11 to compile AXElements
Solution
AXElements is an easy-to-use library for Mac GUI automation. Rather than
relying on AppleScript like traditional Mac scripting projects do, AXElements
calls directly into Apple-provided APIs for interacting with on-screen controls.
It is able to do so because it runs on MacRuby, a Ruby implementation that’s
able to call into the OS X system as easily as calling Ruby code.
The only catch is that MacRuby can’t currently run Cucumber reliably.
Instead, we’ll use a test framework called Spinach. Spinach uses the same
Given/When/Then syntax as Cucumber but is built around a simpler infrastructure
that makes it easier to split up and reuse test steps. There are a few things
that Spinach can’t do—such as using parameterized steps like When I type "(.*)"
—but we don’t need those features for this recipe.
8.
9.
10.
11.
https://github.com/Marketcircle/AXElements
http://macruby.org
http://codegram.github.com/spinach
https://developer.apple.com/xcode
www.it-ebooks.info
report erratum • discuss
Chapter 5. Other Languages and Platforms
• 210
In this recipe, we’re going to test Hex Fiend,12 the same open source hex editor
that we looked at in Recipe 37, Drive a Mac GUI Using AppleScript and System
Events, on page 202. In the rest of this book, we’ve tried not to test the same
app twice. Here, we choose to do so specifically because we want to compare
two different Mac testing approaches side by side. Accordingly, we’ll drive the
app to do the same task as before: converting a hex number to decimal.
Setup
First, download the Hex Fiend zip file,13 double-click to extract the contents,
and drag the newly created Hex Fiend icon into your Applications folder.
Launch the text editor and leave it running while we practice automating it.
It should look something like this:
Next, we’ll download MacRuby. AXElements requires features that were only
recently introduced into MacRuby. Rather than running an official MacRuby
release, you’ll need to download and install the latest nightly build.14
You’ll also need command-line C compilers to build AXElements. Install
Xcode,15 and then go into Xcode’s Preferences menu and install the Command
Line Tools add-on.
Now, you’re ready to install AXelements. Because we’re on MacRuby, we’ll
use the macgem command. Unlike other Ruby implementations, MacRuby
installs to system folders—meaning that you’re likely to need to preface the
command with sudo.
$ sudo macgem install AXElements
The last step is to install Spinach. As part of the common setup we discuss
in Section 3, Getting the Tools You'll Need, on page xiv, you’ll also need the
RSpec expectations library.
12.
13.
14.
15.
http://ridiculousfish.com/hexfiend
http://ridiculousfish.com/hexfiend/files/HexFiend.zip
http://macruby.macosforge.org/files/nightlies
http://itunes.apple.com/us/app/xcode/id497799835
www.it-ebooks.info
report erratum • discuss
Drive a Mac GUI Using MacRuby and AXElements
• 211
$ sudo macgem install spinach rspec-expectations
Spinach is written for Ruby 1.9 specifically. MacRuby implements most of
the 1.9 version of the language, so we’re in pretty good shape here. There are
just a couple of small compatibility tweaks we need to make, though. Create
a file called helper.rb with the following contents:
mac_ruby/helper.rb
# A standard 1.9 feature that's not in MacRuby yet
#
def require_relative(path)
require File.join(File.dirname(caller[0]), path.to_str)
end
# Spinach uses Ruby's standard StringIO class but doesn't load it
#
require 'stringio'
# Spinach's error reporting asks for the file and line number;
# MacRuby doesn't provide this
class Method
def source_location
['', '']
end
end
That’s all we need to implement our recipe.
Feature
Spinach uses a pure-Ruby implementation of Cucumber’s Gherkin language,
so our feature will look just like a Cucumber one. Put the following text in
features/hex.feature:
mac_ruby/features/hex.feature
Feature: Hex editor
Scenario: Convert to integer
Given a hex editor
When I type some text
Then I should be able to view the bytes as an integer
In Cucumber, we’d run the test here to generate step definitions on the console
to paste into our Ruby code. Spinach can go one step further and actually
generate the definition file for you; just pass the --generate flag.
$ macruby -rhelper -S spinach --generate
Spinach will create a file called features/steps/hex_editor.rb. Open it up and take a
look:
www.it-ebooks.info
report erratum • discuss
Chapter 5. Other Languages and Platforms
• 212
class HexEditor < Spinach::FeatureSteps
Given 'a hex editor' do
pending 'step not implemented'
end
When 'I type some text' do
pending 'step not implemented'
end
Then 'I should be able to view the bytes as an integer' do
pending 'step not implemented'
end
end
It looks quite a bit like a Cucumber step definition, except that the steps live
inside a Ruby class. It’s also worth noting that Spinach steps can’t take
parameters the way Cucumber steps can. In other words, we can’t write a
step that matches a regular expression like When /^I type "([^"]+)"$/.
Now that we have a place to put our step definitions, let’s connect to our GUI.
Step Definitions
First, add the following lines to the top of hex_editor.rb to bring in the Ruby
libraries we’ll be using:
mac_ruby/features/steps/hex_editor.rb
require 'axelements'
require 'rspec-expectations'
Let’s connect to our app. Replace the Given step definition with the following
code:
mac_ruby/features/steps/hex_editor.rb
Given 'a hex editor' do
@app = AX::Application.new 'Hex Fiend'
end
When we create a new Application object, AXElements will look for a running
instance of the app. Once we have that object, we can type into the program’s
main window.
mac_ruby/features/steps/hex_editor.rb
When 'I type some text' do
type 'ABCD', @app
end
Now we’re ready to pull the results out of the user interface.
mac_ruby/features/steps/hex_editor.rb
Then 'I should be able to view the bytes as an integer' do
edit_menu
= @app.menu_bar_item title:'Edit'
select_all_item = edit_menu.menu_item title:'Select All'
www.it-ebooks.info
report erratum • discuss
Drive a Mac GUI Using MacRuby and AXElements
• 213
press select_all_item
readout = @app.main_window.table.text_field
readout.value.should == "-12885"
end
The first three lines locate and click the Select All item on the Edit menu. The
final two lines locate the readout where the integer value will appear. This
control is actually deeply nested inside a hierarchy: Window в†’ SplitGroup в†’
ScrollArea в†’ Table в†’ Row в†’ TextField. But the beauty of AXElements is that we
can cut through this hierarchy with a few simple search criteria: “Find me a
text field buried somewhere within a table, no matter how deeply.”
Now, when you rerun your Spinach feature, all the steps should pass. There’s
just one more thing we need to take care of.
Starting and Stopping
So far, we’ve just left the app running during the test. It would be nice to
launch the app automatically before the run starts and exit afterward.
We can start the app by just shelling out to the command line at the top level
of our step definition file.
mac_ruby/features/steps/hex_editor.rb
`open -a 'Hex Fiend'`
To exit the app, we can use a Spinach-provided hook called after_run().
mac_ruby/features/steps/hex_editor.rb
Spinach.hooks.after_run do
hex_fiend = Accessibility.application_with_name 'Hex Fiend'
terminate hex_fiend
type '\CMD+d'
end
This will find and close the app and then press Cmd+D to dismiss the save
dialog. Now, you should be able to rerun your Spinach tests and watch the
app start and exit automatically.
Further Exploration
AXElements provides us with a very clean abstraction around GUI elements,
but it’s not without its trade-offs. Because it specifically requires the bleedingedge version of MacRuby, you may encounter gems that aren’t yet compatible.
If you need to use a different Ruby version or you require specific Cucumber
features, you may want to use AppleScript to drive your app instead; see
Recipe 37, Drive a Mac GUI Using AppleScript and System Events, on page 202.
www.it-ebooks.info
report erratum • discuss
Chapter 5. Other Languages and Platforms
• 214
Recipe 39
Test Python Code Using Lettuce
Problem
You want to test a Python app from Cucumber; for consistency’s sake, you
want as much of your test code as possible to be in Python.
Ingredients
• Lettuce for testing Python using a Cucumber-like syntax16
• virtualenv for installing a Python sandbox to play in17
• colorama for viewing pass/fail results in color on Windows18
Solution
There are a few different ways to drive Python code in plain English, each
with its own set of trade-offs. Lettuce is a test framework that strikes a careful
balance: it’s written in pure Python (so you won’t have to install extra
dependencies to use it) but understands basic Gherkin syntax (so you can
write similar tests to the ones you’d use in Cucumber).
For this recipe, we’ll use virtualenv to create a clean Python sandbox to play
in. You’ll need to have an installation of Python on your system to bootstrap
virtualenv, but from there, everything we’re doing will happen inside a separate
environment.
First, download virtualenv.py to your system19 and run it using your installed
Python interpreter. On Mac or Linux, you’d type the following:
$ python virtualenv.py $HOME/sandbox
$ source $HOME/sandbox/activate
Here’s the Windows equivalent:
C:\MyProject> python virtualenv.py C:\sandbox
C:\MyProject> C:\sandbox\Scripts\activate
16.
17.
18.
19.
http://lettuce.it
http://www.virtualenv.org
http://pypi.python.org/pypi/colorama
https://raw.github.com/pypa/virtualenv/master/virtualenv.py
www.it-ebooks.info
report erratum • discuss
Test Python Code Using Lettuce
• 215
Now, if you run python -v, Python will list where it’s loading its various system
libraries; these should be in the sandbox directory you passed to virtualenv.
Next, install Lettuce using the copy of pip that virtualenv provides.
$ pip install lettuce
If you’re on Windows, you may also want to follow Erlis Vidal’s procedure for
enabling output colors.20 Here’s what Erlis recommends. First, install the
colorama library.
C:\MyProject> pip install colorama
Then, add the following two lines to C:\sandbox\Lib\site-packages\lettuce\__init__.py just
after the last from ... import ... line:
from colorama import init()
init()
Now, you’re ready to write tests. First, save the following code in python.feature:
python/python.feature
Feature: Python integration
Scenario: Cucumber tests
Given I am familiar with Cucumber tests
When I write scenarios for Python code
Then I can run them using Lettuce
When you run this using the lettuce command, you’ll see the familiar missingstep messages, with Python boilerplate for you to paste into your step
definitions.
$ lettuce python.feature
Feature: Python integration
# python.feature:1
Scenario: Cucumber tests
# python.feature:3
Given I am familiar with Cucumber tests # python.feature:4
When I write scenarios for Python code # python.feature:5
Then I can run them using Lettuce
# python.feature:6
1 feature (0 passed)
1 scenario (0 passed)
3 steps (3 undefined, 0 passed)
You can implement step definitions for undefined steps with these snippets:
# -*- coding: utf-8 -*-
20. http://www.erlisvidal.com/blog/2010/10/how-install-lettuce-windows
www.it-ebooks.info
report erratum • discuss
Chapter 5. Other Languages and Platforms
• 216
from lettuce import step
@step(u'Given I am familiar with Cucumber tests')
def given_i_am_familiar_with_cucumber_tests(step):
assert False, 'This step must be implemented'
@step(u'When I write scenarios for Python code')
def when_i_write_scenarios_for_python_code(step):
assert False, 'This step must be implemented'
@step(u'Then I can run them using Lettuce')
def then_i_can_run_them_using_lettuce(step):
assert False, 'This step must be implemented'
Paste those step definitions into python_steps.py, and rerun Lettuce to verify
that you now have failing tests instead of undefined ones. Finally, change the
body of each step definition to an empty function, like this:
python/python_steps.py
@step(u'Given I am familiar with Cucumber tests')
def given_i_am_familiar_with_cucumber_tests(step):
pass
When you rerun the tests, they should all pass.
For this recipe, we’ve been using vanilla Cucumber format—nothing too
exotic. Lettuce supports several of Cucumber’s syntactical features, including
scenario outlines and multiline strings. However, there are a few Cucumber
techniques you can’t yet apply in Lettuce at the time of this writing, such as
tags and data tables.
Further Exploration
As we discussed at the beginning of this recipe, there are other ways to write
plain-English tests for Python code. Cucumber actually ships with experimental Python support, which works by running a Python interpreter inside
Ruby.21 This approach has the advantage of supporting the full Gherkin
syntax, but it isn’t officially supported by the Cucumber team.
Another pure-Python project is Pyccuracy.22 It shares Lettuce’s advantage of
not needing any runtimes other than Python installed. I chose to feature
Lettuce here because its syntax is closer to Cucumber’s.
21. https://github.com/cucumber/cucumber/tree/master/examples/python
22. https://github.com/heynemann/pyccuracy/wiki
www.it-ebooks.info
report erratum • discuss
Test Erlang Code
• 217
Recipe 40
Test Erlang Code
Problem
You want to test your Erlang code using Cucumber-like syntax.
Ingredients
• cucumberl,23 a pure Erlang implementation of basic Cucumber syntax
• rebar24 for building cucumberl
Solution
cucumberl is an Erlang test framework that uses a subset of Cucumber’s
Gherkin syntax for describing test features. For this recipe, we’re going to
write a simple feature and connect it to Erlang step definitions. We’ll start by
installing cucumberl and its dependencies using your current Erlang installation. Then, we’ll write a simple feature and see how to connect it to step
definitions written in Erlang. Finally, we’ll see how Erlang’s pattern matching
makes it easy to write multiple step definitions.
Setup
I’ve tested this recipe with Erlang R15B,25 though it may work for you with
other versions. The first thing you’ll need is the rebar build tool.
$ git clone https://github.com/basho/rebar.git
$ cd rebar
$ make
This will build a rebar executable, which cucumberl’s Makefile will call to build
its source. Copy the rebar executable to a location on your $PATH.
Next, install cucumberl from Farruco Sanjurjo’s fork (which has some updates
for the latest Erlang builds).
$ git clone https://github.com/madtrick/cucumberl
$ cd cucumberl
$ make && make test
23. https://github.com/madtrick/cucumberl
24. https://github.com/basho/rebar
25. http://www.erlang.org/download.html
www.it-ebooks.info
report erratum • discuss
Chapter 5. Other Languages and Platforms
• 218
That will build cucumberl and then run a bunch of .feature files. The output
should look something like a regular Cucumber run: a series of Given/When/Then
steps scrolling by.
Features
In keeping with Erlang’s origin in the telecommunications industry, let’s write
a test for a cellular base station. Put the following text in features/base_station.
feature:
erlang/features/base_station.feature
Feature: Base station
Scenario: Handoff
Given a call on channel 140
When the signal quality is better on channel 151
Then the call should hand off to channel 151
As of this writing, cucumberl doesn’t print sample test snippets for you to
paste into your code. But it’s pretty easy to implement step definitions on our
own.
cucumberl looks for step definitions in a module named after your .feature file.
For base_station.feature, we need to create a base_station module in src/base_station.erl.
erlang/src/base_station.erl
-module(base_station).
Each Given, When, or Then step in the .feature file needs a corresponding given(),
when(), or then() function in Erlang. We’ll need to export these three functions
from our base_station module, plus a main() method to run the tests.
erlang/src/base_station.erl
-export([given/3, 'when'/3, then/3, main/0]).
main() ->
cucumberl:run("./features/base_station.feature").
Now, let’s turn to the step definitions.
Step Definitions
Here’s the skeleton of a given() method for this scenario:
given([a, call, on, channel, Number], World, DebugInfo) ->
todo.
The first parameter is simply the text from your scenario, broken into a list
of atoms and parameters. Every literal word from your scenario (a, call, on,
and channel) becomes an Erlang atom in the list, beginning with a lowercase
letter.
www.it-ebooks.info
report erratum • discuss
Test Erlang Code
• 219
To mark one of the words from your scenario as a placeholder for a quantity
(e.g., Number in place of 140), you’d capitalize the entry in the list, making it a
variable instead of an atom.
The DebugInfo parameter contains source file and line number information. We
won’t be using that for this recipe, so we’ll use _ for that parameter name
from now on. The World parameter is a bit like the World object from regular
Cucumber; it carries context around from step to step. The difference here is
that we explicitly return a new World at the end of each step, rather than
modifying an existing one.
What should we put in that World variable? For this simple example, we’ll just
define a record so that we can stash current state like the channel with the
best signal quality.
erlang/src/base_station.erl
-record(world,
{bestChannel=none}).
Our given() method should return a new world record…
erlang/src/base_station.erl
given([a, call, on, channel, _], _, _) ->
{ok, #world{}}.
which our when method can then fill in with the latest channel information.
Note that because when is an Erlang keyword, we must enclose the function
name in quotes.
erlang/src/base_station.erl
'when'([the, signal, quality, is, better, on, channel, Channel], World, _) ->
{ok, World#world{bestChannel=Channel}}.
Finally, we can add an assertion to our test. We don’t need any special
assertion frameworks to do this; we just return true if the test passes or false
if it doesn’t. Erlang’s =:= comparison operator will take care of this for us.
erlang/src/base_station.erl
then([the, call, should, hand, off, to, channel, Channel], World, _) ->
World#world.bestChannel =:= Channel.
Running cucumberl
Now that you have definitions for all your steps, you can compile and run
your project. cucumberl expects compiled Erlang code to be in the ebin directory of your project.
$ mkdir ebin
$ erlc -o ebin src/*.erl
www.it-ebooks.info
report erratum • discuss
Chapter 5. Other Languages and Platforms
• 220
To run cucumberl, make sure it’s on your PATH and then invoke it from the
command line.
$ cucumberl
This was a pretty small setup: one each of given(), when(), and then(). How do
we prevent conflicts if we have more than one of these?
Multiple Definitions
So far, we’ve seen a scenario with exactly one Given, When, and Then step. Each
of these goes with one Erlang given(), when(), or then() function.
What do we do if our scenario has more than one step of a certain type? For
instance, consider the following feature:
erlang/features/handset.feature
Feature: Handset
Scenario: Call
Given a call is in progress
Scenario: No call
Given no calls are in progress
In classic Cucumber, we’d write a separate block of code to implement each
of those two Givens. But in Erlang, we can’t define two separate given() functions
with the same signature.
What we can do is use Erlang’s pattern matching. Here’s the skeleton of a set
of step definitions for this scenario:
erlang/src/handset.erl
given([a, call, is, in, progress], World, _) ->
{ok, World};
given([no, calls, are, in, progress], World, _) ->
{ok, World}.
With cucumberl, you can quickly and easily test your Erlang program’s
interface in the outside world with the familiar Gherkin syntax you’ve been
using in Cucumber.
Further Exploration
cucumberl doesn’t support the entire range of Gherkin syntax. But it does
have scenario outlines,26 which let you build a table of test data and run a
set of steps repeatedly for all the data in the table.
26. https://github.com/cucumber/cucumber/wiki/Scenario-outlines
www.it-ebooks.info
report erratum • discuss
Test Lua Code Using cucumber-lua
• 221
Recipe 41
Test Lua Code Using cucumber-lua
Problem
You want to test your Lua project using Cucumber.
Ingredients
• The Lua programming language, version 5.127
• cucumber-lua,28 a Lua implementation of the Cucumber wire protocol
• The LuaRocks package management system29 to install cucumber-lua
Solution
Lua is an enjoyable programming language that’s small, fast, portable, and
extensible. cucumber-lua is a testing library written in Lua that implements
Cucumber’s wire protocol. With it, you can write your tests in Cucumber
syntax and your step definitions in Lua.
Setup
You’ll need both the base Lua language and the LuaRocks package management system—which is a bit like RubyGems. On the Mac, you can install
both of these with one command if you’re using Homebrew.30
$ brew install lua luarocks
Here’s the Ubuntu equivalent:
$ sudo apt-get install lua5.1 luarocks
On Windows, you’d first download and install the base Lua language;31 then
you’d download the latest LuaRocks zip file32 and run install.bat from where
you extracted the contents.
Now, install cucumber-lua using LuaRocks.
27.
28.
29.
30.
31.
32.
http://www.lua.org/download.html
https://github.com/cucumber/cucumber-lua
http://luarocks.org/
http://mxcl.github.com/homebrew
http://code.google.com/p/luaforwindows
http://luarocks.org/releases
www.it-ebooks.info
report erratum • discuss
Chapter 5. Other Languages and Platforms
• 222
$ luarocks build \
https://raw.github.com/cucumber/cucumber-lua/master/cucumber-lua-0.0-1.rockspec
Finally, launch the cucumber-lua server so it can listen for incoming test
steps using Cucumber’s wire protocol.
$ cucumber-lua
Leave that running in its terminal, and open a new terminal for your work in
the next section.
Feature
Lua excels at making an existing system scriptable. Let’s say we’re dealing
with a laboratory full of equipment and using Lua to let the end user customize
how and when the tests are run. Place the following code in features/lab.feature:
lua/features/lab.feature
Feature: Laboratory
Scenario: Voltage
Given an empty test plan
When I add a test to measure voltage
Then I should see the following tests:
| Measurement |
| voltage
|
Since we’re using the wire protocol, you’ll need to create a .wire file to tell
Cucumber where to look for step definitions. Create a file called features/
step_definitions/cucumber-lua.wire with the following contents:
lua/features/step_definitions/cucumber-lua.wire
host: 0.0.0.0
port: 9666
cucumber-lua looks for a file called features/step_definitions/steps.lua. There’s no reason
that you can’t use that file to load step definitions from elsewhere, but you do at
least need to have a file with that name. Create an empty one now, and then run
Cucumber to generate Lua templates for your step definitions.
$ cucumber features
...
You can implement step definitions for undefined steps with these snippets:
Given("an empty test plan", function ()
end)
When("I add a step to measure voltage", function ()
end)
Then("I should see the following tests:", function ()
end)
www.it-ebooks.info
report erratum • discuss
Test Lua Code Using cucumber-lua
• 223
Go ahead and paste those into your empty steps.lua file, and then change the
Given step to look like this:
lua/features/step_definitions/steps.lua
Given("an empty test plan", function ()
tests = {}
end)
We’re creating a new tests variable to hold the list of laboratory measurements.
If this were a real project, you’d be calling into the storage API for your lab
automation system here.
Now, let’s look at the When step.
lua/features/step_definitions/steps.lua
When("I add a test to measure (%a+)", function (measurement)
table.insert(tests, measurement)
end)
Lua doesn’t support the same kind of regular expressions that Ruby does.
Instead, it uses its own string-matching syntax. Here, %a+ means “one or
more letters.”
Once we’ve filled our list of measurements, we can compare them with what
we’re expecting.
lua/features/step_definitions/steps.lua
Then("I should see the following tests:", function (t)
expected = {}
table.remove(t, 1)
for i, row in ipairs(t) do
table.insert(expected, row[1])
end
assert(unpack(expected) == unpack(tests))
end)
When your .feature file has a table in it, cucumber-lua wraps up the contents
into a Lua table and passes it into your step definition. The structure is simple:
each row in your Cucumber scenario becomes one subtable inside the Lua
table.
So, to get at the measurement names, we just delete the header row and then
loop through the rest of the rows looking at the first (and only) cell.
Now, when you rerun Cucumber, your tests should all pass.
www.it-ebooks.info
report erratum • discuss
Chapter 5. Other Languages and Platforms
• 224
Further Exploration
In this recipe, we used Lua to pull apart tabular test data. To learn how to
do this in regular Cucumber, see Recipe 1, Compare and Transform Tables
of Data, on page 2. For more on the wire protocol, see Recipe 14, Drive
Cucumber's Wire Protocol, on page 72.
www.it-ebooks.info
report erratum • discuss
Test a GUI on Linux, Mac, or Windows with Sikuli
• 225
Recipe 42
Test a GUI on Linux, Mac, or Windows with Sikuli
Problem
You’re testing a Linux program written with a custom toolkit that’s difficult
to automate. Or, you’d like to test a cross-platform application from a single
test suite.
Ingredients
• Sikuli,33 a Java-based visual GUI testing tool from MIT
• JRuby,34 a Ruby implementation written in Java that can call Sikuli’s API
• The sikuli gem35 to provide a few convenience wrappers in Ruby
Solution
Sikuli is a GUI testing tool that takes a bit of a different tack than its peers.
Rather than finding controls on the screen by metadata such as CSS selectors
or automation IDs, Sikuli takes a snapshot of the screen and recognizes
controls by their appearance.
This approach presents a few challenges. For instance, what do you do when the
designer changes the appearance of a control or when an OK button appears in
multiple places on the screen? Sikuli offers a few ways around these issues: fuzzy
image comparison, matching based on screen regions, optical character recognition, and so forth.
The typical way to write Sikuli scripts is to use the built-in IDE, which lets you
mix text and little screenshots like so:
You can also treat Sikuli as just another Java library and drive it from
Cucumber. By doing so, you combine Sikuli’s powerful image matching with
Cucumber’s plain-spoken language. We won’t be able to drag screenshot
images directly into our Cucumber features here, of course. But we can use
image filenames, as in click('search-button.png').
33. http://sikuli.org
34. http://jruby.org
35. https://github.com/chaslemley/sikuli_ruby
www.it-ebooks.info
report erratum • discuss
Chapter 5. Other Languages and Platforms
• 226
Like any testing technology, Sikuli is good fit for some situations, but not all.
Dean Cornish, a test automation lead, explains further.
When Should You Use Sikuki?
by: Dean Cornish
We were testing an old Delphi app that was in a bit of a mess. It contained Win32 controls, as
well as custom ones from a vendor. Both were concealed behind layers of unnecessary abstraction
so that driving the interface through COM or .NET tools wasn’t working.
The team recognized that they needed to refactor the code to make it more testable. I built a
small test suite using Sikuli to give them some test coverage while they refactored. Shortly
thereafter, they made the project testable through COM, which was a more sustainable approach.
Sikuli helped us get through that transition period.
These are contexts where I’ve found Sikuli to be helpful:
•
•
•
•
Native windows invoked from a web browser; e.g., Print dialogs
File contents opened in a third-party application; e.g., PDFs
Flash
Overly complex UIs with mixed technologies and many layers
These are the drawbacks:
•
•
•
•
Can’t easily read text from the app
Interactions such as scrolling make the tests much more complex
Small UI changes can require many images to be re-captured
Difficult to debug
For this recipe, we’re going to write a cross-platform test that launches the
Google Chrome browser and visits the Pragmatic Programmers website.
Setup
The Sikuli IDE is a wrapper around a powerful Java library. As we’ve discussed
elsewhere in this book, there are multiple ways to drive a Java library from
Cucumber. Here, we’ll use JRuby for its simplicity.
First, download and run the appropriate JRuby installer for your platform.36
If JRuby isn’t your primary Ruby, you’ll need to rerun the Cucumber setup
instructions discussed in Section 3, Getting the Tools You'll Need, on page xiv.
$ jruby -S gem install cucumber rspec-expectations
If you’re on a Mac, make sure you’re using the default Java implementation
from Apple. Sikuli isn’t yet compatible with OpenJDK.
36. http://jruby.org/download
www.it-ebooks.info
report erratum • discuss
Test a GUI on Linux, Mac, or Windows with Sikuli
• 227
Next, download and install the Sikuli IDE,37 which comes with the .jar files
you’ll need.
The last piece to install is the sikuli gem, which provides a few Ruby wrappers
around the base Sikuli functions.
$ jruby -S gem install sikuli
Now, we’re ready to write our feature.
Feature
This Cucumber feature will launch the browser, navigate to a specific page,
and verify that the site’s navigation bar correctly indicates what the current
page is. Save the following code in features/browser.feature:
sikuli/features/browser.feature
Feature: Browser
Scenario: Navigate to a magazine
Given I am on "pragprog.com"
When I click the "Magazine" link
Then I should see an underlined "Magazine" link
You’ll also need some screenshots of various screen elements. Launch Google
Chrome and close any open tabs (so that the icon for the location bar becomes
a magnifying glass). Take a screenshot by pressing Cmd+Shift+4 on your Mac
or PrtSc on your PC. Crop the screenshot down to the magnifying glass, and
save it as location-bar.png—or use the version from this book’s source code.
Navigate to the Pragmatic Programmers home page,38 and take a screenshot
of the Magazine link, as shown:
Now, click the link and take another screenshot of the same screen region,
taking care to include the link’s underline. Save these images as magazine.png
and magazine-underlined.png, respectively.
You have everything you need to write the step definitions now.
37. http://sikuli.org/download.shtml
38. http://pragprog.com
www.it-ebooks.info
report erratum • discuss
Chapter 5. Other Languages and Platforms
• 228
Step Definitions
Let’s fill in the step definitions. In a moment, we’ll write a few helper methods
with names like visit(), follow_link_to(), and so on. Create a file called features/step_definitions/browser_steps.rb with the following contents:
sikuli/features/step_definitions/browser_steps.rb
Given /^I am on "(.*?)"$/ do |url|
visit url
end
When /^I click the "(.*?)" link$/ do |name|
follow_link_to name
end
Then /^I should see an underlined "(.*?)" link$/ do |name|
verify_underlined_link_to name
end
It’s time to fill in those API method definitions. The standard place to put
helper methods like these is a World object in features/support/env.rb.
sikuli/features/support/env.rb
require 'java'
require 'sikuli'
class BrowserWorld
# API methods go here...
end
World { BrowserWorld.new }
After { close }
You’ll notice we’ve also added an After hook to close the browser at the end of
each scenario. This Cucumber suite has only one scenario—but if we had
more and wanted to start and stop the browser only once, we’d use the techniques from Recipe 3, Run Slow Setup/Teardown Code with Global Hooks, on
page 13.
The setup code and teardown code are both fairly simple. We just create a couple
of Sikuli objects to represent the scripting context and screen and then start or
stop the browser (adjust the path to where your browser is installed).
sikuli/features/support/env.rb
def initialize
@screen = Sikuli::Screen.new
# from the sikuli gem
@script = org.sikuli.script.SikuliScript.new # from the original Java lib
@script.open_app '/Applications/Google Chrome.app'
sleep 2
end
def close
@screen.type 'W', KeyModifier::CMD
@script.close_app '/Applications/Google Chrome.app'
end
www.it-ebooks.info
report erratum • discuss
Test a GUI on Linux, Mac, or Windows with Sikuli
• 229
To find or click a control, we call the Screen object’s find() or click() method, either
of which will throw an exception if the control doesn’t exist.
sikuli/features/support/env.rb
def follow_link_to(name)
@screen.click "#{name}.png"
end
def verify_underlined_link_to(name)
@screen.find "#{name.downcase}-underlined.png"
end
end
World { BrowserWorld.new }
After { close }
The visit() method combines a mouse click with text entry, which is equally
easy with Sikuli.
sikuli/features/support/env.rb
def visit(url)
@screen.click "location-bar.png"
@screen.type "#{url}\n"
end
And that’s it! If you close all your Chrome tabs and exit and then run your
Cucumber script, you should see the browser launch and go through its
paces.
www.it-ebooks.info
report erratum • discuss
Chapter 5. Other Languages and Platforms
• 230
Recipe 43
Test an Arduino Project Using Serial
Problem
You want to use Cucumber to test an Arduino project or other embedded
device with no network support.
Ingredients
• serialport,39 a Ruby library for sending and receiving data over a serial
port
• An Arduino-compatible board40
• The free Arduino IDE41
• A serial connection to your embedded device, either through a built-in
port or with a USB to RS-232 converter
• (Optional) Pushbuttons, LEDs, and resistors if you want to hook up the
controls for real
Solution
When we’re testing an embedded device, we have to do without some of the
luxuries of desktop or web apps, such as network connectivity or preexisting
test libraries. But as long as we can create a serial connection to the device
under test, we can still use Cucumber to test it.
In this recipe, we’re going to program a simple Arduino game and test it from
Cucumber.
Feature
The game consists of two buttons and two LEDs. The first player to click a
button wins, and their LED lights up. We’ll presume there’s a referee making
sure no one commits a false start.
39. https://github.com/hparra/ruby-serialport/
40. http://arduino.cc/en/Main/Hardware
41. http://arduino.cc/en/Main/Software
www.it-ebooks.info
report erratum • discuss
Test an Arduino Project Using Serial
• 231
Here’s a simple scenario that exercises the three possible outcomes. Put this
in features/buzzer.feature:
serial/features/buzzer.feature
Feature: Buzzer
Scenario Outline: Game
Given a new game
When the first buzz comes from <player>
Then <led> should be lit
Examples:
| player
| player 1
| player 2
| both players
|
|
|
|
led
LED 1
LED 2
both LEDs
|
|
|
|
Before we get to the step definitions, let’s talk about hardware.
Setup
You can test the game logic from this recipe on just about any Arduino board,
even without the physical buttons and LEDs to control the game. If you’d like
to build the full device, you’ll need two pushbuttons and two LEDs, plus wires
and resistors for connecting them.
The intricacies of breadboards and pull-up resistors are a bit beyond the
scope of this recipe, but the Arduino project has good tutorials for hooking
up LEDs42 and buttons.43
In addition to the Arduino IDE, you’ll need the serialport gem for Ruby.
$ gem install serialport
The address of your serial port will vary widely based on your platform and
serial adapter type. For Windows, it will typically be COM1, COM2, or similar.
On Linux, it’s often /dev/ttyS0. With a USB adapter on the Mac, it’s typically a
long code starting with /dev/tty-usbserial.
Once you’ve found the correct name for your serial port, create an environment
variable so that we can keep this kind of configuration data out of our test
script. On Windows, you’d type the following:
C:\> set SERIAL_PORT=COM1
Here’s the Mac and Linux equivalent:
42. http://arduino.cc/en/Tutorial/Blink
43. http://arduino.cc/en/Tutorial/Button
www.it-ebooks.info
report erratum • discuss
Chapter 5. Other Languages and Platforms
• 232
$ export SERIAL_PORT=/dev/tty-usbserial-...
Now we’re ready to implement our step definitions.
Step Definitions
First, let’s look at the Given step. Since we’re not including a reset function in
this edition of the game, all we need to do is create a new SerialPort object and
store it for use later. Put the following code in features/step_definitions/buzzer_steps.rb:
serial/features/step_definitions/buzzer_steps.rb
Given /^a new game$/ do
@port = SerialPort.new ENV['SERIAL_PORT']
@port.baud = 9600
end
Now, we need a way to simulate one (or both) of the players clicking a button.
Let’s invent a simple protocol: we’ll send a 1, 2, or b to the device, depending
on who pushed their button.
serial/features/step_definitions/buzzer_steps.rb
When /^the first buzz comes from (\d+)$/ do |first|
character = case first
when 'player 1' then '1'
when 'player 2' then '2'
when 'both players' then 'b'
else raise 'unknown player'
end
@port.write character
end
We also need a protocol command to query which LED is lit. We’ll send a
single ? character, and the game will respond with the same 1, 2, or b as earlier.
serial/features/step_definitions/buzzer_steps.rb
Then /^LED (\d+) should be lit$/ do |led|
expected = case led
when 'LED 1' then '1'
when 'LED 2' then '2'
when 'both LEDs' then 'b'
else raise 'unknown LED'
end
@port.write '?'
@port.read.should == expected
end
One last bit of housekeeping: we need to require() the serialport library in
features/support/env.rb.
www.it-ebooks.info
report erratum • discuss
Test an Arduino Project Using Serial
• 233
serial/features/support/env.rb
require 'serialport'
Let’s turn our attention to the game firmware.
Embedded Logic
In the Arduino development environment, create a new sketch called buzzer.
At the top of your file, add a few definitions indicating which input and output
pins you’ll be using for the game.
serial/buzzer.ino
#include <Bounce.h>
const
const
const
const
int
int
int
int
BUTTON1
BUTTON2
LED1
LED2
=
=
=
=
2;
3;
9;
10;
Bounce button1(BUTTON1, 100);
Bounce button2(BUTTON2, 100);
Now, let’s define the various characters in the serial protocol we designed in
the previous section.
serial/buzzer.ino
#define QUERY
#define PLAYER1
#define PLAYER2
#define BOTH
#define NONE
'?'
'1'
'2'
'b'
-1
int winner = NONE;
As our game boots, we need to connect to the input and output pins and open
a serial connection for listening. Start-up code like this goes into the special
setup() function on Arduino boards.
serial/buzzer.ino
void setup() {
pinMode(BUTTON1,
pinMode(BUTTON2,
pinMode(LED1,
pinMode(LED2,
INPUT);
INPUT);
OUTPUT);
OUTPUT);
Serial.begin(9600);
}
Now for the main loop() function, which the Arduino system will call repeatedly
for us. All we need to do is read the physical buttons and the serial port,
decide whether someone has pressed a button, and update the status.
www.it-ebooks.info
report erratum • discuss
Chapter 5. Other Languages and Platforms
• 234
serial/buzzer.ino
void loop() {
int button = readButtons();
int serial = (Serial.available() > 0 ? Serial.read() : NONE);
int event = (button != NONE ? button : serial);
switch (event) {
case PLAYER1:
case PLAYER2:
case BOTH:
if (winner == NONE) setWinner(event);
break;
case QUERY:
Serial.write(winner);
break;
default:
break;
}
delay(50);
}
Reading the buttons is easy. Although cheap switches can actually fluctuate
between on and off several times before settling one value, Arduino’s built-in
Bounce library can account for this automatically.
serial/buzzer.ino
int readButtons() {
button1.update();
button2.update();
int b1Pressed = button1.risingEdge();
int b2Pressed = button2.risingEdge();
return b1Pressed ?
(b2Pressed ? BOTH
: PLAYER1) :
(b2Pressed ? PLAYER2 : NONE);
}
All that’s left to do is turn on the appropriate LEDs for the winner.
serial/buzzer.ino
void setWinner(int value) {
winner = value;
digitalWrite(LED1, (winner == PLAYER1 || winner == BOTH));
digitalWrite(LED2, (winner == PLAYER2 || winner == BOTH));
}
Compile and download your sketch to the Arduino device and run your
Cucumber features. If you’re feeling adventurous, connect real pushbuttons
and LEDs to the circuit and try the game for real.
www.it-ebooks.info
report erratum • discuss
Test an Arduino Project Using Serial
• 235
Further Exploration
The Arduino development system ships with a serial protocol called Firmata44
for setting and querying analog and digital pins. We didn’t use it for this recipe
because Firmata can’t override real data with simulated values like we needed
to do here. But it can take a snapshot of your system state for remote
debugging, which is really handy for more complicated embedded systems.
44. http://firmata.org
www.it-ebooks.info
report erratum • discuss
APPENDIX 1
RSpec Expectations
Many of the recipes in this book use test assertions written using the rspecexpectations library. This appendix provides a quick getting-started guide to
writing this style of assertion.
A1.1 Basics
As the name implies, this library is part of the RSpec testing framework.
However, you don’t need the rest of RSpec to use it; you can install rspecexpectations as a stand-alone gem.
$ gem install rspec-expectations
The premise behind rspec-expectations is that test assertions should read
like spoken sentences. The library adds a should() method to every Ruby object
so that instead of writing assert(2 + 2 == 4), you can write readable code like
this:
rspec/examples.rb
(2 + 2).should == 4
If the condition holds true, your Cucumber step will pass. If the condition is
false, Cucumber will report a failure.
rspec-expectations comes with a number of matchers—these are different
ways to use should() (and its counterpart, should_not(), which can be used
anywhere in place of should()). Here are the most commonly used ones for
comparing numbers, strings, and collections:
rspec/examples.rb
(2 + 2).should != 4
(2 + 2).should_not == 4
(2 + 2).should be > 3
(2 + 2).should be <= 5
www.it-ebooks.info
report erratum • discuss
Appendix 1. RSpec Expectations
• 238
Math.sqrt(2).should be_within(0.001).of(1.414)
'hello'.should start_with('hel')
'hello'.should =~ /ell/
[1, 2, 3].should include(2)
{:a => 1, :b => 2}.should have_key(:a)
RSpec also offers an easy way to test objects with Ruby-style method names
like xyz? and has_xyz?.
rspec/examples.rb
# assuming some_object supports a has_flair?() method
some_object.should have_flair
# assuming some_object supports a festive?() method
some_object.should be_festive
If you need to verify that a piece of code throws a specific exception, you can
use should raise_error().
rspec/examples.rb
lambda {
SomeNonExistentClass.new
}.should raise_error(NameError)
These are the most common built-in matchers. RSpec ships with several
more; see the official documentation for the full list.1
A1.2 Custom Matchers
As you work with rspec-expectations, you may find yourself wishing for a
project-specific should() notation to make your assertions more legible. For
example, let’s say you wanted to write the following step to test a Book class:
rspec/examples.rb
this_book.should please('developers')
class Book
def pleases?(people)
people == 'developers'
end
end
rspec-expectations doesn’t ship with a should please() matcher, but you can
write a custom matcher and throw it in your env.rb.
1.
http://rubydoc.info/gems/rspec-expectations
www.it-ebooks.info
report erratum • discuss
Alternatives
• 239
rspec/examples.rb
RSpec::Matchers.define :please do |people|
match do |book|
book.pleases?(people)
end
end
When used in moderation, custom matchers can make your Cucumber step
definitions easy to read and maintain.
A1.3 Alternatives
The should() method makes for nice, readable expectations. But it has a
downside: it doesn’t play well with unconventional Ruby objects like delegates.2
For these cases, RSpec supports a similar notation called expect() that isn’t
subject to these limitations.
rspec/expect.rb
expect(2 + 2).to == 4
Here are a few of the examples from earlier that have been adapted to use
expect():
rspec/expect.rb
expect(2 + 2).not_to == 5
expect(2 + 2).to be > 3
expect('hello').to =~ /ell/
expect(some_object).to be_festive
expect {
SomeNonExistentClass.new
}.to raise_error(NameError)
expect(this_book).to please('developers')
While Cucumber works well with rspec-expectations, you’re certainly not
required to use it. If you don’t have rspec-expectations installed, Cucumber
will fall back on the Test::Unit assertions that ship with Ruby. To use a different framework, all you have to do is require() it inside your env.rb.
2.
http://myronmars.to/n/dev-blog/2012/06/rspecs-new-expectation-syntax
www.it-ebooks.info
report erratum • discuss
Bibliography
[Ada95]
Douglas Adams. The Hitchhiker’s Guide to the Galaxy. Ballantine Books,
New York, NY, USA, 1995.
[Fow10]
Martin Fowler. Domain-Specific Languages. Addison-Wesley Longman,
Reading, MA, 2010.
[WH11]
Matt Wynne and Aslak HellesГёy. The Cucumber Book: Behaviour-Driven
Development for Testers and Developers. The Pragmatic Bookshelf, Raleigh,
NC and Dallas, TX, 2011.
www.it-ebooks.info
report erratum • discuss
Index
SYMBOLS
$? variable, exit code, 31
=:= operator, 219
? character, protocol com-
mand for LEDs, 232
DIGITS
32-bit COM extension, Windows Phone emulator, 141
A
-a flag, testing across multiple
machines, 38
accents, see international
characters
Accessibility Inspector, 203–
204
ActionScript, driving Flash
apps with Cuke4AS3, 185–
194
ActiveX and AutoIt, 135
Adobe Air, driving Flash apps
with Cuke4AS3, 185–194
Adobe Flex SDK, driving
Flash apps with Cuke4AS3,
185–194
After hook
setup/teardown, 14, 64
Sikuli testing, 228
testing GUIs with Win32Autogui, 138
testing multiple interfaces, 64
using global hooks instead, 13, 15
after_features(), custom formatting RTF reports, 9
after_run(), Spinach hook, 213
after_step_result(), custom format-
at_exit()
ting RTF reports, 11
AfterConfiguration hook, 17
Agile, vii–viii
aGlobals, Cuke4php, 177
all(), retrieving table elements,
163
Android, testing with Calabash, 153–159
ANSI escape codes, 118, 123
ANSICON, 118–123
antiques game, 71
APIWorld object, testing multiple interfaces, 61–66
AppleScript, driving Mac
GUIs, 202–208
application driver DSL, refactoring to extract, 18–21
application styles, 181
Arduino testing, 230–235
Ashkenas, Jeremy, 164
assert, Clojure, 110
assertions
C# syntax in .NET testing, 126
Clojure, 110
Erlang, 219
Hamcrest, 190
Node, 167
PHP apps, 173–180
rspec-expectations, xiv,
237–239
Test::Unit, 239
Ast::Table, comparing and
transforming tables, 2–6
asynchronous code, FlexUnit,
191
driving Mac GUIs with
AppleScript and System Events, 208
global hooks for setup/teardown, 13–17,
46, 170, 208
Guard, 46
multiple browser testing
with Watir, 170
audio watermarks, 71
authentication, remote machines, 37
AutoIt, GUI testing, 135–138
AutoitX3.Control, 138
automating
with Guard and Growl,
41–46
GUI testing with Win32Autogui, 135–138
Mac GUIs with AppleScript and System
Events, 202–208
Mac GUIs with MacRuby
and AXElements, 209–
213
on continuous integration
servers, 47–54
automation IDs
locating controls in AutoIt, 136
locating controls in
White, 131, 133
AXElements, driving Mac
GUIs, 209–213
www.it-ebooks.info
Index
B
balloon popping example of
manipulating time, 67–71
bank balance example of
global hooks for setup/teardown, 14–17
base station example of Erlang testing, 218–220
Before hook
setup/teardown, 14
using global hooks instead, 13, 15
Bernhardt, Gary, 184
BigDecimal, comparing and
transforming tables, 2–6
BigInteger, using Cucumber directly with JRuby, 84–86
Bonjour, 39
book list examples
collection example of
Spring + Hibernate
project, 92–97
defining steps as regular
Ruby methods, 22–26
multiple browser testing
with Watir, 170–172
bookmarking app example of
Android testing, 153–159
Boost library, 82
Bounce, Arduino game, 234
browser(), global hooks, 16
$browser object, 15
@browser variable, 14
@@browser variable, 16
browsers
cross-platform testing
with Sikuli, 225–229
global hooks for setup/teardown, 13–17
refactoring to extract an
application driver DSL,
18–21
testing multiple with
Watir, 168–172
testing with cuke4php,
179–180
Bundler
Guard and, 42
monitoring web services
with Nagios, 195
testing across multiple
machines, 38
button(), driving Swing with
FEST, 114
buttons
Arduino game, 230–235
example of driving JavaScript/CoffeeScript,
165–167
example of driving Swing
with FEST, 112–115
iOS app testing with
Frank, 151
locating in White, 131
buzzer, Arduino game, 233
C
C
monitoring web services
with Nagios, 198
wire protocol listener, 75–
82
C#
driving Windows apps
with White, 130–134
testing .NET, 124–129
Windows Phone app testing, 139–146
C# ATDD on a Shoestring, 129
C++, 82
Calabash, Android testing,
153–159
calabash-ios, 159
calculator examples
driving Windows apps
with White, 130–134
iOS app testing with
Frank, 148–152
multiple interface testing,
62–66
.NET testing, 125–129
callback parameter, CoffeeScript, 166
callbacks, parsing XML with,
7
campaign finance disclosures,
181
canned data, playing back
with VCR, 181–184
Capybara
JavaScript support, 70
manipulating time in
testing, 67–71
parsing HTML tables,
160–163
refactoring to extract an
application driver DSL,
18–21
car dealer example of comparing tables, 2–6
www.it-ebooks.info
• 244
cellular base station example
of Erlang testing, 218–220
$centigrade parameter, 177
CGI, monitoring web services
with Nagios, 198
CharacterStyle, custom formatting RTF reports, 10
chcp, pass/fail color output
example, 118–123
check_cucumber, monitoring web
services with Nagios, 199
check_element_exists(), calculator
example with Frank, 152
Chrome, see also browsers
cross-platform testing
with Sikuli, 226–229
multiple browser testing
with Watir, 168–172
ChromeDriver, 168–172
chunky_png, comparing images, 27–32
CI (continuous integration)
servers
auto-testing, 47–54
driving Windows apps
with White, 130–134
circle example of comparing
images, 28–32
classes, organizing step
methods, 25
clbustos-rtf, custom formatting RTF reports, 7–12
click(), Sikuli testing, 229
click events
Flash game, 192
Sikuli testing, 229
Clojure
using Cucumber directly
with JRuby, 84
using Cucumber with
Leiningen, 109–110
using Cucumber-JVM, 87
close(), testing multiple interfaces, 64
code page, Windows text output, 118, 121
CoffeeScript, driving with Cucumber-JS, 164–167
color
comparing images, 27–32
custom formatting RTF
reports, 10
Index
Python testing with Lettuce, 214–216
Windows text output,
118–123
colorama, Python testing with
Lettuce, 214–216
columns, comparing and
transforming, 3–6
COM extension, Windows
Phone emulator, 141
COM object, testing GUIs with
Win32-Autogui, 138
command definition, monitoring web services with Nagios, 198
Command-Line Tools
driving Mac GUIs with
AppleScript and System Events, 202–208
driving Mac GUIs with
MacRuby and AXElements, 209–213
need for, xiv
comparing
Erlang operator, 219
images, 27–32, 225
tables, 2–6, 159–163
cone of silence example of
auto-testing on CI servers,
48–54
config file, monitoring web
services with Nagios, 198
Consolas font, pass/fail color
output example, 118–123
console output, Windows text,
118–123
continuous integration
servers
auto-testing, 47–54
driving Windows apps
with White, 130–134
@controlPanel, CoffeeScript, 166
controllers, Grails game, 102
controls
bookmarking Android
app example, 157, 159
displaying with Symbiote,
149
identifying with Sikuli,
225, 229
locating in Ruby, 150
locating in White, 131,
133
locating with AutoIt, 136
convert_mi_to_km(), 136
converter examples
distance, 135–138
temperature, 173–180
copying tests to remote machines, 38
cores, testing across multiple,
33–35
Cornish, Dean, 226
cross-platform GUI testing
with Sikuli, 225–229
CSS descriptors
in defining steps as regular Ruby methods, 23
locating HTML elements
in Watir, 171
parsing with Nokogiri, 23
CSV stock price data, 183
The Cucumber Book, xiii, 17
cucumber-cpp, 77, 82
Cucumber-JS, driving JavaScript/CoffeeScript, 164–
167
Cucumber-JVM
Grails, 99–103
Scala, 87, 104–108
Spring + Hibernate, 92–
97
testing Java with, 87–91
Cucumber-JVM: Preparation,
91
cucumber-lua, 221–223
cucumber-nagios, 195–199
Cucumber-Scala, 104–108
Cucumber::Guard, 41–46
cucumberl, 217–220
Cuke4AS3, 185–194
cuke4php, 173–180
cURL
automating tests on CI
servers, 47–53
calculator app example,
66
currencies, comparing and
transforming tables, 2–6
custom formatting RTF reports, 7–12
custom matchers, rspec-expectations, 238
D
data
comparing and transforming tables, 2–6, 159–
163
www.it-ebooks.info
• 245
Erlang scenario outlines,
220
lack of support of data
tables in Lettuce, 216
persistence in Spring +
Hibernate project, 92–
97
playing back canned with
VCR, 181–184
databases
persistence in Spring +
Hibernate project, 92–
97
swapping drives, 19
debugging, remote, 235
DebugInfo parameter, 219
delays, removing, 67–71, 115
delegates and should(), 239
--delete flag, testing across
multiple machines, 38
delta, comparing images, 27
dependencies
Clojure testing, 109
Cucumber + Spring
project, 95
monitoring web services
with Nagios, 196
desktop notifications, running
tests automatically with,
41, 45–46
DevKit, xiv
diacritics, see international
characters
diff!(), comparing and transforming tables, 5, 163
documents
custom formatting RTF
reports, 7–12
publishing on Relish, 55–
60
SpecRun reports, 128
domain module, swapping
drives, 19
downsampling, comparing
images, 27, 31
drawing program example of
comparing images, 28–32
driver modules, swapping, 19
DSL
refactoring to extract an
application driver, 18–
21
swapping drives, 19
Index
E
each(), testing across multiple
cores, 34
Eclipse
Android testing with Calabash, 153–159
Cucumber-JVM, 91
embedded devices, testing
with Serial, 230–235
EmuHost.exe, Windows Phone
apps, 145
emulators
Android testing, 154–159
iOS app testing, 148–152
UI Impersonation, 191
Windows Phone app testing, 139–146
encoding, UTF-8, 120
environment variable
choosing World with, 64
iOS app testing with
Frank, 151
PHP apps, 175
USE_GUI, 66
Erlang, 217–220
escape codes, ANSI, 118, 123
event handler, Windows
Phone app, 145
event logging library autotesting example, 42–46
events, custom formatting
RTF reports, 7–12
exceptions, verifying, 238
execute_script(), Capybara, 71
expect(), RSpec, 239
Expensify, 139
Express, 167
extracting
application driver DSL
with refactoring, 18–21
HTML into Ruby module,
23
F
-f flag, 8
FabГіk, Zsolt, 91
.feature files, publishing on
Relish, 55–60
FEST, driving Swing with,
111–115
file scope, global hooks for
setup/teardown, 15
find()
parsing HTML tables, 163
Sikuli testing, 229
finders, parsing HTML tables,
160–163
fingerprints, comparing images, 27, 31
Firefox, see also browsers
global hooks for setup/teardown, 13–17
refactoring to extract an
application driver DSL,
18–21
testing PHP apps with
cuke4php, 179
Firmata, 235
firmware, Arduino game, 233
FIT (Framework for Integrated
Test), ix
fixtures, FEST, 113
flags
comparing images, 30
formatting RTFs, 8
Spinach --generate flag,
211
testing across multiple
machines, 38
Flash
driving apps with
Cuke4AS3, 185–194
Sikuli, 226
wire protocol, 72
FlexUnit, driving Flash apps
with Cuke4AS3, 185–194
flight reservation example of
testing across multiple machines, 36–40
floating-point numbers, 62,
136
follow_link_to(), cross-platform
testing Sikuli, 228
fonts
command prompt, 121
pass/fail color output example, 118–123
format_args(), custom formatting
RTF reports, 9
formatting
documentation on Relish,
55–60
HTML, 12
Nagios, 198
RTF reports, 7–12
Windows text output,
118–123
www.it-ebooks.info
• 246
forum search example of
monitoring web services
with Nagios, 197–199
Framework for Integrated Test
(FIT), ix
Frank, iOS testing, 148–152
frankly_map(), 152
freeze(), TimeCop, 69
Furious Fowl game, 99–103
fuubar, 12
fuzzy image comparison, 225
G
games
antiques, 71
Arduino, 230–235
driving Flash apps with
Cuke4AS3, 185–194
Furious Fowl example of
Grails testing, 99–103
--generate flag, Spinach, 211
Get(), White, 133
Gherkin
Erlang, 220
.NET testing, 124–129
Python, 214, 216
Spinach, 211
Git, automating tests on CI
servers, 47–54
given() method, Erlang testing,
218–220
global hooks
driving Mac GUIs, 208
driving Swing with FEST,
113
Guard, 46
setup/teardown, 13–17,
46, 170, 208, 228
Sikuli testing, 228
Watir, 170
GNTP (Growl Network Transport Protocol), 45
Google Chrome, see Chrome
Googlefight, 182
Grails, 99–103
grails-cucumber, 99–103
grocery bill example of .NET
testing, 126–129
Groovy, Grails testing, 99–
103
@group1 tag, testing across
multiple machines, 37, 39
@group2 tag, testing across
multiple machines, 37, 39
Index
Growl, running tests automatically with, 41, 45–46
Growl Network Transport
Protocol (GNTP), 45
Guard, running tests automatically with, 41–46
Guardfile, 42
GUIs
driving Mac with AppleScript and System
Events, 202–208
driving Mac with MacRuby and AXElements,
209–213
driving Swing with FEST,
111–115
driving Windows apps
with White, 130–134
testing with Sikuli, 225–
229
testing with Win32-Autogui, 135–138
H
<h4> element, identifying, 171
Hamcrest, 190
hardware
Arduino, 231
testing, 63
hashes(), extracting table data,
5
headers, table
comparing and transforming, 2–6
Lua, 223
HellesГёy, Aslak, xiii
Hex Fiend
driving Mac GUIs with
AppleScript and System Events, 202–208
driving Mac GUIs with
MacRuby and AXElements, 210–213
hexadecimal interpretation
examples
driving Mac GUIs with
AppleScript and System Events, 205–208
driving Mac GUIs with
MacRuby and AXElements, 210–213
hexagonal architecture and
swapping drives, 19
Hibernate, 92–97
The Hitchhiker’s Guide to the
Galaxy, 165
hooks
automating tests on CI
servers, 47–54
comparing images, 28
driving Mac GUIs, 208,
213
driving Swing with FEST,
113
Furious Fowl game, 101
Guard, 46
iOS apps testing, 149
in multiple browser testing with Watir, 170
multiple interface testing,
64
setup/teardown, 13–17,
46, 170, 208, 213, 228
Sikuli testing, 228
SpecFlow, 132
Win32-Autogui, 138
host groups, monitoring web
services with Nagios, 198
HSQLDB databases, Spring
+ Hibernate project, 96
HTML
extracting into Ruby
module, 23
formatter, 12
locating elements with
Watir, 171
parsing tables, 160–163
parsing with Nokogiri,
23, 168, 171, 195
SpecRun reports, 128
HTTP
monitoring web services
with Nagios, 195–199
playing back canned data
with VCR, 181–184
simulating in Grails, 100
testing multiple interfaces, 61–66
HTTParty, testing multiple
interfaces, 61–66
Humpty Dumpty example of
custom formatting RTF reports, 8–12
I
IDs
bookmarking Android
app example, 159
locating controls in AutoIt, 136
locating controls in
White, 131, 133
www.it-ebooks.info
• 247
images
comparing, 27–32, 225
matching with Sikuli,
225–229
import statements, Android
apps, 158
in-memory option, Spring +
Hibernate project, 96
Influence Explorer project,
181
input pins, Arduino game,
233
@integration tag, Grails apps,
100
Integration testing with Cucumber, 46
integration tests, see also continuous integration servers
Clojure, 109–110
Grails apps tag, 100
PHP apps, 173–180
IntelliJ IDEA Community
Edition, using CucumberJVM, 87–91
interfaces, testing multiple
with World objects, 61–66,
see also user interfaces
international characters, 118–
123
invoke, wire protocol, 76, 79–
80
IO object, formatting RTF documents, 9
iOS
testing with Calabash,
159
testing with Frank, 148–
152
IP address, iOS app testing,
152
J
Java
Clojure testing, 109–110
driving Swing with FEST,
111–115
Grails testing, 99–103
GUI testing with Sikuli,
225–229
Scala testing, 104–108
Spring + Hibernate
project, 92–97
using Cucumber directly
with JRuby, 84–86
Index
using Cucumber-JVM,
87–91
wire protocol, 72
Java Persistence API (JPA),
95
JavaScript
antiques game, 71
Capybara support, 70
driving with CucumberJS, 164–167
manipulating time, 69–71
JavaScript Object Notation,
see JSON
Jenkins
automating tests, 47–54
remote testing, 39
JFrameFixture, driving Swing
with FEST, 114
JLabel, driving Swing with
FEST, 114
JPA (Java Persistence API),
95
JRuby
driving Swing with FEST,
111–115
GUI testing with Sikuli,
225–229
start-up time and, 86
using Cucumber directly
with, 84–86
jsmn, 79
JSON
bookmarking Android
app example, 159
thermostat wire protocol
listener example, 76,
79
JUnit
Scala testing, 104–108
using Cucumber-JVM,
87–91
JVM
Grails testing, 99–103
Scala, 104–108
Spring + Hibernate
project, 92–97
using Cucumber directly
with JRuby, 84–86
using Cucumber-JVM,
87–91
K
kelvinate(), 178
kelvinator app example, 173–
180
keys
comparing tables, 5
remote machine key
pairs, 37
Windows Phone emulator, 141
keyword, formatting RTF documents, 9
Kreeftmeijer, Jeff, 31
L
label(), driving Swing with
FEST, 114
laboratory equipment example of Lua testing, 222–223
languages
comparing and transforming data tables, 2–6
Cucumber flexibility, xiii
international characters,
118–123
launch_app(), Frank, 152
launching
driving Mac GUIs with
AppleScript and System Events, 208
iOS app testing with
Frank, 152
in multiple browser testing with Watir, 170
Lavena, Luis, 123
lawn darts example of parsing
HTML tables, 160–163
LEDs, Arduino testing, 230–
235
lein-cucumber, Clojure testing, 109–110
Leiningen, Clojure testing,
109–110
Lettuce, Python testing, 214–
216
libraries, testing, 46
libxml2, 169
libxslt, 169
Linux
GUI testing with Sikuli,
225–229
tools needed, xiv
listener, wire protocol, 75–82
living documentation, 59, see
also documents
lobbyists, 181
locating
by name in Swing interface, 114
www.it-ebooks.info
• 248
controls in AutoIt, 136
controls in Ruby, 150
controls in White, 131,
133
controls with Sikuli, 225,
229
elements in parsing
HTML tables, 163
HTML elements with
Watir, 171
@log variable, auto-testing
with Guard and Growl, 44
logging library auto-testing
example, 42–46
login, remote machines, 37
loop(), Arduino game, 233
Lua, 221–223
LuaRocks, 221–223
Lucida Console font, pass/fail
color output example, 118–
123
M
Mac GUIs, see also iOS
driving with AppleScript
and System Events,
202–208
driving with MacRuby
and AXElements, 209–
213
testing with Sikuli, 225–
229
tools needed, xiv
macgem, AXelements installation, 210
MacRuby, driving Mac GUIs,
209–213
main() method, Erlang testing,
218–220
manipulating time in testing,
67–71
map_column!(), converting tables, 4
map_headers!(), transforming
tables, 3
Markdown, publishing documentation on Relish, 55–60
Marston, Myron, 181
match, formatting RTF documents, 9
matchers, rspec-expectations,
237–239
matching
C definitions, 79
Index
digits in regular expressions, 136
images with Sikuli, 225–
229
patterns in Erlang, 220
rspec-expectations
matchers, 237–239
step definitions with
Cuke4php, 176
Math.sqrt(), 66
Maven
lack of artifacts in JRuby,
84
Scala testing, 104–108
Spring + Hibernate
project, 92–97
using Cucumber-JVM,
87–91
Mechanize, step definitions
as regular Ruby methods,
22–26
Microsoft Visual Studio Professional, see Visual Studio
Professional
missing columns, 5
mixins, refactoring to extract
an application driver DSL,
18–21
models, Spring + Hibernate
project, 94
monitoring web services with
Nagios, 195–199
multiple browser testing with
Watir, 168–172
multiple cores, testing across,
33–35
multiple interfaces, testing
with World objects, 61–66
multiple machines, testing
across, 36–40
multiple platform GUI testing
with Sikuli, 225–229
mvn test, Spring + Hibernate
project, 97
mxmlc, Cuke4AS3, 187, 194
N
Nagios, monitoring web services, 195–199
names
columns, 3–6
Cuke4AS3 functions, 189
locating HTML elements
in Watir, 171
locating controls in
White, 132
property in Swing interface, 114
publishing to Relish, 58
serial port, 231
navigation, documentation on
Relish, 57
.NET
automation IDs, 132
testing with Cucumber
syntax, 124–129
wire protocol, 72
Net::HTTP, VCR support, 182
Node Package Manager, driving JavaScript/CoffeeScript, 164–167
Node.js, driving JavaScript/CoffeeScript, 164–
167
Nokogiri, HTML parsing, 23,
168, 171, 195
notifications, running tests
automatically with, 41, 45–
46
nth-of-type modifier, 163
NuGet
.NET testing, 124–129
Windows Phone app testing, 139–146
numbers, floating-point, 62,
136
numeric control IDs, 132
NUnit
.NET testing, 124–129
Windows Phone app testing, 139–146
O
object-oriented programming,
vii, ix
Objective-C and Frank, 152
online resources, xv
open, driving Mac GUIs with
AppleScript and System
Events, 208
OpenCV, 32
OpenJDK and Sikuli, 226
optical character recognition,
225
option_pane(), driving Swing
with FEST, 114
outlines, Erlang scenario, 220
www.it-ebooks.info
• 249
output
Arduino game, 233
custom formatting RTF
reports, 7–12
Nagios conventions, 195
pdiff flag, 30
Python testing with Lettuce, 214–216
Windows text, 118–123
outside-in development, xiii
P
page(), Capybara, 68
page object, defining steps as
regular Ruby methods, 26
palindrome example of Windows Phone app testing,
140–146
parallel gem, testing across
multiple cores, 33–35
parallel testing
across multiple cores,
33–35
across multiple machines, 36–40
Parallel.each(), testing across
multiple cores, 34
parallel_tests gem, testing
across multiple cores, 33–
35
parameterized steps and
Spinach, 209
parsing
CSV stock price data, 183
HTML tables, 160–163
HTML with Nokogiri, 23,
168, 171, 195
XML with callbacks, 7
pass/fail
assertions in C# syntax
in .NET testing, 126
color output in Python
testing with Lettuce,
214–216
color output on Windows
example, 118–123
Nagios conventions, 195
passwords
Jenkins, 49
remote machines, 37
VCR masking, 184
patterns
in Agile development, viii
matching in Erlang, 220
parsing HTML tables,
160–163
Index
pdiff, comparing images, 27–
32
PEAR, 174
perceptual diff, comparing
images, 27–32
performAction, Android testing
with Calabash, 159
Perham, Mike, 31
permissions, Android testing
with Calabash, 157
persistence
JPA (Java Persistence
API), 95
Spring + Hibernate
project, 92–97
phashion library, 31
phone apps
Android testing with Calabash, 153–159
iOS testing with Calabash, 159
testing with Frank, 148–
152
Windows, 139–146
PHP
testing with cuke4php,
173–180
wire protocol, 72
PHPUnit test framework, 173–
180
pie example of Clojure testing,
109–110
Pik, xiv
pixels, comparing images, 27–
32
platforms
cross-platform GUI testing with Sikuli, 225–
229
Cucumber flexibility, viii,
xiii
plug-ins, Nagios, 195
PNG files, comparing images,
27–32
polling source code with
Jenkins, 47, 50
pom.xml
dependencies in Cucumber + Spring project, 95
Scala testing stock broker
example, 104
using Cucumber-JVM,
88, 104
post-commit hooks, automating tests on CI servers, 47–
54
Pragmatic Programmers website examples
cross-platform testing
with Sikuli, 226–229
defining steps as regular
Ruby methods, 22–26
multiple browser testing
with Watir, 170–172
PresentationClock example of
driving Swing with FEST,
111–115
Presenter First, 180
protocol command for LEDs,
232
public key authentication, remote machines, 37
publishing documentation on
Relish, 55–60
Pyccuracy, 216
Python, testing with Lettuce,
214–216
R
Rack
manipulating time, 69–71
parsing HTML tables, 161
Rake, automating tests on CI
servers, 47–54
Rakefile, Jenkins, 48
raster font, 121
raw(), extracting table data, 5
rb-sppscript, driving Mac
GUIs with AppleScript and
System Events, 202–208
rbenv, xiv
rebar, Erlang testing, 217–
220
Redcar text editor, 84
refactoring
defined, 18
extracting an application
driver DSL, 18–21
regular Ruby methods,
22, 25
regular expressions
Cuke4php, 176
floating-point numbers,
62
Lua, 223
matching digits, 136
SpecFlow, 128
Relish, publishing to, 55–60
www.it-ebooks.info
• 250
remote debugging, 235
remote testing across multiple
machines, 36–40
renaming, columns, 3–6
reports
custom formatting RTF,
7–12
SpecRun, 128
require()
Arduino game, 232
PHP kelvinator app, 178
stock price app, 183
reset button example of driving Swing with FEST, 112–
115
Resharper, Windows Phone
app testing, 143
respond_failure(), wire protocol
listener, 81
respond_success(), wire protocol
listener, 81
respond_with_match(), wire protocol listener, 80
response_body(), monitoring web
services with Nagios, 197
result(), distance converter app,
136
Rich Text Format reports,
custom formatting, 7–12
Robotium, Android testing
with Calabash, 153–159
rotation, comparing images,
28, 32
rows(), extracting table data, 5
rows_hash(), extracting table
data, 5
RSpec testing framework, 237
rspec-expectations, xiv, 237–
239
rsync, testing across multiple
machines, 36–40
RTF reports, custom formatting, 7–12
Ruby
and should(), 239
Arduino testing with Serial, 230–235
auto-testing with Guard
and Growl, 41, 45–46
compared to Selenium,
168
comparing and transforming tables, 2–6
comparing images, 31
Index
custom formatting RTF
reports, 7–12
driving Flash apps with
Cuke4AS3, 185–194
driving Mac GUIs with
MacRuby and AXElements, 209–213
extracting HTML, 23
global hooks for setup/teardown, 13–17
GUI testing with Win32Autogui, 135–138
iOS app testing with
Frank, 148–152
locating controls, 150
manipulating time, 69–71
multiple browser testing
with Watir, 168–172
parsing HTML, 168, 171
parsing HTML tables,
160–163
PHP app testing with
cuke4php, 180
refactoring regular Ruby
methods, 22, 25
refactoring to extract an
application driver DSL,
18–21
step definitions as regular Ruby methods, 22–
26
VCR support, 182
versions, xiv
Windows text output,
118–123
ruby_gntp, auto-testing with
Guard and Growl, 41, 45–
46
RubyInstaller project, xiv
RunCukesTest, soda machine
example, 89
RVM, xiv, 185
S
Safari, multiple browser testing with Watir, 168–172,
see also browsers
SafariWatir, 168–172
Sanjurjo, Farruco, 217
Scala
using Cucumber directly
with JRuby, 84
using Cucumber-JVM,
87, 104–108
ScalaCheck project, 108
scale, comparing images, 28,
32
scanf(), matching steps to im-
plementations, 78
scenarios
embedding Markdown to
publish to Relish, 58
Erlang outlines, 220
skipping with tags, 54
Scott, Allister, 129
screenshots, matching with
Sikuli, 225–229
search
example of monitoring
web services with Nagios, 197–199
Shelley syntax, 150
SearchCriteria, White, 133
security, Jenkins, 49, 51
Selenium, compared to Ruby,
168
Selenium WebDriver
global hooks for setup/teardown, 13–17
testing PHP apps with
cuke4php, 179–180
testing multiple interfaces, 61–66
Serial, Arduino testing, 230–
235
serialport, Arduino testing,
230–235
setup
Arduino game, 233
global hooks for, 13–17,
46, 170, 228
Sikuli testing, 228
Watir, 170
sharing
in CoffeeScript/JavaScript, 166
documentation on Relish,
55–60
shell script, monitoring web
services with Nagios, 198
Shelley search syntax, 150
shipping example of testing
across multiple cores, 33–
35
should(), 237, 239
should raise_error(), 238
should_not(), 237
shutdown, see also teardown
driving Mac GUIs with
AppleScript and System Events, 208
www.it-ebooks.info
• 251
driving Mac GUIs with
MacRuby and AXElements, 213
iOS app testing with
Frank, 152
Sikuli, 225–229
simulators, see emulators
Sinatra
manipulating time in
testing, 67–71
parsing HTML tables,
160–163
testing multiple interfaces, 61–66
skipping scenarios with tags,
54
sleep(), testing across multiple
cores, 34–35
slingshot Grails game, 101
slow tests, see speed
Snarl, running tests automatically with, 41, 45–46
soda machine example of Cucumber-JVM, 88–91
SourceForge, 112
SpecFlow
driving Windows apps
with White, 130–134
.NET testing, 124–129
Windows Phone app testing, 139–146
special characters, 118–123
Specjour, 39
SpecRun
driving Windows apps
with White, 130–134
HTML reports, 128
.NET testing, 124–129
Windows Phone app testing, 143
speed
global hooks for setup/teardown, 13–17
JRuby and start-up time,
86
manipulating time in
testing, 67–71
testing PHP apps with
cuke4php, 180
testing across multiple
cores, 33–35
testing across multiple
machines, 36–40
Spinach, driving Mac GUIs
with MacRuby and AXElements, 209–213
Index
Spring, 92–97
square root calculator example of testing multiple interfaces, 62–66
square_root_result(), 63
Squeaker example of refactoring to extract an application
driver DSL, 18–21
src, Cuke4AS3, 187
SSH, testing across multiple
machines, 36–40
start-up time, JRuby and, 86
status, formatting RTF documents, 9
step definitions
Android testing with Calabash, 158
Arduino game, 232–235
C definitions, 78–82
C# in .NET testing, 124,
126
C# in Windows Phone
app testing, 139–146
Clojure, 110
Cucumber-JVM, 89
defining as regular Ruby
methods, 22–26
driving Flash apps with
Cuke4AS3, 186–194
driving Mac GUIs with
AppleScript and System Events, 205–213
driving Mac GUIs with
MacRuby and AXElements, 211–213
driving Swing with FEST,
112
Erlang testing, 218–220
Grails, 101
Guard and Growl autotesting, 42–46
GUI testing with Win32Autogui, 135
iOS app testing with
Frank, 151
JavaScript/CoffeeScript,
165–167
Lua testing, 222–223
manipulating time balloon popping example,
68–71
monitoring web services
with Nagios, 197–199
multiple cores testing,
33–35
multiple interfaces testing, 62–66
parsing HTML tables, 162
PHP apps, 175–180
Python testing with Lettuce, 215–216
refactoring to extract an
application driver DSL,
18–21
Scala, 107
Sikuli cross-platform
testing, 228
Spring + Hibernate
project, 93
swapping driver modules,
19
Swing, 114
Watir multiple browser
testing, 170
White, 132–134
Windows Phone app,
139–146
Windows text output, 119
wire protocol listener, 72–
82
step methods, defining as
regular Ruby methods, 22–
26
step_matches, wire protocol listener, 76
steps_match, wire protocol listener, 79
stock examples
playing back canned data
with VCR, 182–184
Scala testing, 104–108
strictEqual assertion, Node, 167
strings
converting table cells, 3
JSON, 79, 159
Lua string-matching syntax, 223
.NET apps, 132
success?(), comparing images,
31
sudo, AXelements installation,
210
Sunlight Labs, 181
SURF, comparing images,
28, 32
surplus columns, 5
swapping driver modules, 19
Swing, driving with FEST,
111–115
Symbiote, 149
www.it-ebooks.info
• 252
synchronization
antiques game, 71
testing across multiple
machines, 36–40
System Events, driving Mac
GUIs, 202–208
T
-t flag, testing across multiple
machines, 39
tables
comparing and transforming, 2–6, 159–163
Erlang scenario outlines,
220
lack of support in Lettuce, 216
Lua, 223
tags
inside database transaction, 93
integration testing environment, 100
lack of support in Lettuce, 216
skipping scenarios, 54
testing across multiple
machines, 36–40
VCR, 182–183
take_square_root(), 63
TCP
Android testing with Calabash, 153–159
wire protocol, 72–82
<td> elements, comparing
HTML tables, 163
teardown
driving Mac GUIs with
AppleScript and System Events, 208
driving Mac GUIs with
MacRuby and AXElements, 213
global hooks for, 13–17,
46, 170, 208, 228
Guard, 46
Sikuli testing, 228
Watir, 170
temperature converter example of testing PHP apps,
173–180
templates, Lua, 222
Test::Unit assertions, 239
tests variable, 223
Index
text, see also documents
custom formatting RTF
reports, 7–12
Windows output, 118–
123
<th> elements, comparing
HTML tables, 163
then() method, Erlang testing,
218–220
thermostat wire protocol listener example, 75–82
thin user interface, 180
this object, sharing in Cucumber-JS with, 166
time, manipulating in testing,
67–71
Time.now(), Ruby, 69
Timecop, manipulating time
in testing, 67–71
-tolerance option, 31
touch(), calculator ecxample
using Frank, 150–151
<tr> elements, comparing
HTML tables, 163
transforming
floating-point numbers,
62, 136
tables, 2–6
transpose(), extracting table data, 5
@txn tag, Spring + Hibernate
project, 93
U
UI elements, displaying with
Symbiote, 149
UI Impersonation, FlexUnit,
191
UIA Verify, driving Windows
apps with White, 130–134
UISpec, Shelley syntax, 150
Unicode, Windows text output, 118–123
Unit Converter, GUI testing,
135–138
USE_GUI environment variable, 66
used car example of comparing tables, 2–6
user interfaces
driving Mac GUIs with
AppleScript and System Events, 202–208
driving Mac GUIs with
MacRuby and AXElements, 209–213
driving Swing with FEST,
111–115
driving Windows apps
with White, 130–134
swapping drives, 19
testing with Sikuli, 225–
229
testing with Win32-Autogui, 135–138
thin, 180
UTF-8 encoding, 120
uuidgen utility, 51
V
-v flag, testing across multiple
machines, 38
VCR, playing back canned
data, 181–184
@vcr tag, 182–183
versions
Erlang, 217
Ruby, xiv
Vidal, Erlis, 215
virtualenv, Python testing
with Lettuce, 214–216
visit()
Capybara, 68
cross-platform testing
Sikuli, 228
monitoring web services
with Nagios, 197
Sikuli testing, 229
Visual C# Express, .NET
testing, 125, 129
Visual Studio Professional
driving Windows apps
with White, 130–134
.NET testing, 124–129
Windows Phone app testing, 139–146
W
Watchr, auto-testing with
Guard, 43
watermarks, audio, 71
Watir, 168–172
Watir WebDriver, 168–172
web services, monitoring with
Nagios, 195–199
WebDriver, multiple browser
testing with Watir, 168–172
www.it-ebooks.info
• 253
WebMock, playing back
canned data with VCR,
181–184
Webrat, monitoring web services with Nagios, 195–199
weight in formatting RTF reports, 10
when() method, Erlang testing,
218–220
White, driving Windows app
with, 130–134
Wilk, Joseph, 54
Williams, Nic, 46
Win32-Autogui, testing with,
135–138
win_gui, 138
@@window variable, FEST, 113
Windows
driving apps with White,
130–134
GUI testing with Sikuli,
225–229
GUI testing with Win32Autogui, 135–138
.NET testing, 124–129
phone app testing, 139–
146
RubyInstaller project, xiv
text output, 118–123
Windows Phone Test Framework, 139–146
.wire file, 72–74
wire protocol
driving Cucumber with,
72–82
driving Flash apps with
Cuke4AS3, 186
listener, 75–82
Lua testing, 221–223
PHP app testing, 173–179
World()
browser() and global hooks,
16
choosing with environment variable, 64
refactoring to extract an
application driver DSL,
18–21
World object
CoffeeScript/JavaScript,
166
defining steps as regular
Ruby methods, 24
global hooks, 16
testing multiple interfaces, 61–66
Index
World parameter, Erlang test-
ing, 219
Wynne, Matt, xiii, 56
X
xUnit.net, .NET testing, 124–
129
Xcode
driving Mac GUIs with
AppleScript and System Events, 202–208
driving Mac GUIs with
MacRuby and AXElements, 209–213
Mac tools, xiv
XML
configuration for Sping +
Hibernate project, 92
parsing with callbacks, 7
www.it-ebooks.info
• 254
XPath
locating HTML elements
in Watir, 171
parsing HTML tables,
160–163
Y
YAML
playing back canned data
with VCR, 184
publishing to Relish, 58
The Pragmatic Bookshelf
The Pragmatic Bookshelf features books written by developers for developers. The titles
continue the well-known Pragmatic Programmer style and continue to garner awards and
rave reviews. As development gets more and more difficult, the Pragmatic Programmers will
be there with more titles and products to help you stay on top of your game.
Visit Us Online
This Book’s Home Page
http://pragprog.com/book/dhwcr
Source code from this book, errata, and other resources. Come give us feedback, too!
Register for Updates
http://pragprog.com/updates
Be notified when updates and new books become available.
Join the Community
http://pragprog.com/community
Read our weblogs, join our online discussions, participate in our mailing list, interact with
our wiki, and benefit from the experience of other Pragmatic Programmers.
New and Noteworthy
http://pragprog.com/news
Check out the latest pragmatic developments, new titles and other offerings.
Buy the Book
If you liked this eBook, perhaps you'd like to have a paper copy of the book. It's available
for purchase at our store: http://pragprog.com/titles/dhwcr
Contact Us
Online Orders:
http://pragprog.com/catalog
Customer Service:
[email protected]
International Rights: [email protected]
Academic Use:
[email protected]
Write for Us:
http://pragprog.com/write-for-us
Or Call:
+1 800-699-7764
www.it-ebooks.info
© Copyright 2026 Paperzz