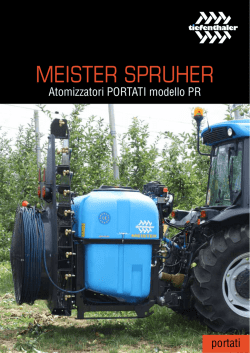
User manual
For the user
User manual
VAI 3-025 WN
VAI 3-035 WN
VAI 3-050 WN
Wall Mounted Units
DK, EN, ES, HR, IT
Betjeningsvejledning
Til Brugeren
Betjeningsvejledning
VAI 3-025 WN
VAI 3-035 WN
VAI 3-050 WN
Væghængte enheder
DK
PAKKEL IST E
Anlægget leveres med de dele som vises i nedenstående tabel
Tilbehør
Antal
Indendørs enhed
Indendørs enhed
1
Fjernbetjening
1
Fjernbetjeningsophængingsbeslag
1
Batterier
2
Møtrikker
5
Skruer
2
Ophængningsplade
1
Ekstra rørisolering
1
Dokumentation
Brugermanual
Typeskilt + EAN 128
5 modelmærkater
5 serienumre
Pakkelisten leveres med enheden.
INDEX
INTRODUKTION
VEDLIGEHOLD
1
Din sikkerhed.................................................... 5
8
Energispareråd.................................................. 23
1.1
Anvendte symboler............................................ 5
8.1
Passende rumtemperatur.................................... 23
1.2
Korrekt brug af enheden.................................... 5
8.2
Elimination af kilder til varme eller kulde............. 23
2
Ekstreme driftsforhold..................................... 5
8.3
Drift i opvarmningstilstand (varmepumpe).......... 23
3
Identifikation af enheden ................................ 5
8.4
Rumtemperatur ved fravær................................. 23
4
Overensstemmelseserklæring........................ 6
8.5
Ensartet opvarmning........................................... 23
5
Beskrivelse af enheden................................... 6
8.6
5.1
Fjernbetjeningen................................................. 6
Nedsat varmeforbrug i nattetimerne
(SLEEPfunktion).................................................. 23
5.2
Tekniske specifikationer...................................... 7
8.7
Nedsat varmeforbrug med programmeret
driftsperiode (TIMER-funktion)............................ 23
8.8
Passende vedligeholdelse af enheden............... 23
9
Fejlsøgning........................................................ 24
10
Vedligeholdelse................................................. 25
BETJENINGSVEJLEDNING
6
Oprindelige indstillinger................................... 8
6.1
Isætning af batterier til fjernbetjening.................. 8
6.2
Indstilling af ur..................................................... 8
7
Betjeningsvejledning........................................ 9
7.1
Generelle sikkerhedsforanstaltninger ved brug... 9
7.2
Funktioner........................................................... 10
7.2.1 Taster til fjernbetjening........................................ 10
10.1 Rengøring af fjernbetjeningen............................. 25
10.2 Rengøring af indvendig enhed............................ 25
10.3 Rengøring af luftfiltre........................................... 25
10.4 Rengøring af den udvendige enhed.................... 25
11
Opbevaring i længere tid.................................. 26
12
Produktet tages ud af brug............................... 26
7.2.2 Skærmindikatorer................................................ 11
7.3
Tip til brug af fjernbetjening................................. 11
7.3.1 Lås til fjernbetjening............................................ 11
7.3.2 Lys funktion......................................................... 11
7.4
Tilslutning/afbrydelse af enhed............................ 11
7.5
Valg af driftstilstand............................................. 12
7.5.1 Automatisk tilstand (AUTO)................................. 12
7.5.2 Afkølingstilstand (COOL).................................... 13
7.5.3 Affugtningstilstand (DRY).................................... 14
7.5.4 Ventilatortilstand (FAN)....................................... 15
7.5.5 Opvarmningstilstand (HEAT ).............................. 16
7.6
Indstille luftstrømmens retning............................ 16
7.7
Vælg specialfunktioner........................................ 17
7.7.1 Sleep funktion..................................................... 17
7.7.2 Funktionen TIMER ON/OFF (TILSLUTTE/
AFBRYDE VED HJÆLP AF TIMER)................... 18
7.7.3 TURBO-funktion.................................................. 19
7.7.4 X-FAN funktion.................................................... 19
7.7.5 Temp funktion...................................................... 20
7.7.6 I Feel funktion...................................................... 20
7.7.7 Aktiv ionseringsfunktion...................................... 21
7.7.8 Frostbeskyttelsesfunktion.................................... 21
7.8
Indikatorer på den indvendige enhed.................. 22
7.9
Nøddrift............................................................... 22
-3-
-4-
INTRODUKTION
1
Din sikkerhed
1.1
Anvendte symboler
2
Ekstreme driftsforhold
Dette anlæg er beregnet til brug i de temperaturområder, der er
anført i figur 2.1.
FARE:
Direkte fare for liv og helbred.
a
e
b
Køling
Udvendig
FARE:
Fare for elektrisk stød.
WARNING:
Potentielt farlig situation for produktet og dets
omgivelser.
NB:
Nyttige oplysninger og anvisninger.
Indvendig
i
1.2
Korrekt brug af enheden
Dette anlæg er designet og fremstillet med henblik på
anvendelse til temperaturregulering inden døre ved hjælp af
luftkonditionering. Ansvaret for enhver anvendelse af anlægget
til andre husholdnings- eller industriformål vil alene de personer,
der projekterer, installerer eller anvender anlægget på en sådan
måde.
Før håndtering, installation, opstart, anvendelse eller udførelse
af vedligeholdelse på anlægget, skal de personer, der
udfører disse opgaver, have sat sig ind i alle instruktioner og
anbefalinger beskrevet i anlæggets installationsvejledning.
NB:
Opbevar de medfølgende vejledninger i hele enhedens
levetid.
i
NB:
Oplysningerne om denne enhed er delt op
i 2 vejledninger: installationsvejledning og
brugervejledning.
i
Opvarmning
Fig. 2.1Driftstemperaturområder for anlægget.
Signaturforklaring
D.B. Temperatur målt med tør luft
Funktionsevnen for anlægget ændrer sig afhængig af
arbejdstemperaturen for udendørsenheden.
3
Identifikation af enheden
Denne vejledning er gældende for Split-serien. For at finde
ud af den specifikke modelbetegnelse for det aktuelle anlæg,
henvises der til typeskiltene på anlægget.
Typeskiltene er placeret på de udvendige og indvendige
enheder.
NB:
Dette anlæg indeholder R-410A som kølemiddel.
R-410A må ikke slippes ud i atmosfæren: R-410A er
en fluorineret drivhusgas, som er omfattet af Kyotoprotokollen, med et global opvarmningspotentiale
(GWP) = 1975.
i
NB:
Kølemidlet i dette anlæg skal opsamles korrekt
med henblik på genanvendelse, genindvinding eller
destruktion før anlægget endeligt bortskaffes.
i
NB:
De personer, som udfører vedligeholdelsesarbejder,
der indebærer håndtering af kølemidlet, skal være
i besiddelse af de nødvendige godkendelser fra de
lokale myndigheder.
i
DK
VAI 3-WN-U_DK - 05/14 - Vaillant
-5-
INTRODUKTION
4
Overensstemmelseserklæring
5
Beskrivelse af enheden
Producenten erklærer, at dette anlæg er designet og
konstrueret i overensstemmelse med gældende standarder
med henblik på opnåelse af CE- mærkning.
Denne enhed består af følgende elementer:
Anlægget opfylder de væsentligste krav i de relevante direktiver
og standarder:
-- Udvendig enhed.
• 2006/95/EF inklusive tilføjelser:
”Direktiv om tilnærmelse af medlemsstaternes lovgivning
om elektrisk materiel bestemt til anvendelse inden for visse
spændingsgrænser“
-- Indvendig enhed.
-- Fjernbetjening.
-- Tilslutninger og kanaler.
Figure 5.1 viser enhedskomponenterne.
Designet og bygget i henhold til europæiske standarder:
-- EN 60335-1
-- EN 60335-2-40
5
-- EN 50366
• 2004/108/EF inklusive tilføjelser:
”Direktiv om indbyrdes tilnærmelse af medlemsstaternes
lovgivning om elektromagnetisk kompatibilitet“
4
Designet og bygget i henhold til europæiske standarder:
-- EN 55014-1
1
-- EN 55014-2
-- EN 61000-3-2
-- EN 61000-3-3
-- EN 61000-3-11
3
2
Fig. 5.1Enhedskomponenter.
Signaturforklaring
1 Tilslutninger og kanaler
2 Rør til udledning af kondensvand
3 Udvendig enhed
4Fjernbetjening
5 Indvendig enhed
5.1
Fjernbetjeningen
Fjernbetjeningen gør det muligt at bruge enheden. For at
enheden skal modtage signaler korrekt, skal fjernbetjeningen
pege direkte på indendørsenheden uden nogen forhindringer
imellem dem.
-6-
VAI 3-WN-U_DK - 05/14 - Vaillant
INTRODUKTION
5.2
Tekniske specifikationer
Tekniske specifikationer
Billedsymbol
Beskrivelse
Varmepumpe
Varmepumpe Systemet er vendbart. Det kan afkøle eller opvarme rummene efter ønske.
Kølemiddel R-410A
Kølemiddel uden klorin, økologisk og miljøvenligt med en større overførselskapacitet end
R 407 C eller R22, hvilket giver langt bedre effektniveauer.
Inverter DC teknologi
Mere energibesparende end traditionelle inverter systemer.
Inverter teknologi
Forbruget tilpasses til akklimatiseringsbehovet på en afpasset måde som garanterer lave
energiudgifter. Anlægget kan køre under ekstreme temperaturforhold (se side 3).
Aktiveret kulfilter
Filter som eliminerer støv og snavs som cirkulerer gennem enheden.
Fjernbetjening
Fjernbetjening med infrarøde stråler.
Varmstartfunktion
Indendørsenheden starter først når denne er blevet opvarmet, hvilket hindrer udledning
af kold luft, i varmedrift
Autogenstartfunktion
Sikrer automatisk genstart af enheden efter en strømafbrydelse under de forhold,
der var til stede før afbrydelsen.
Ventilbeskyttelse
Dette beskytter serviceventilerne på den udvendige enhed ved dårligt vejr.
Anti-frost
Dette hindrer, at den udvendige enhed fryser i vinterhalvåret.
Antirust-kabinet
Udvendig enhed lavet i galvaniseret stål og rustfri materialer.
Table 5.1
Tekniske specifikationer.
DK
VAI 3-WN-U_DK - 05/14 - Vaillant
-7-
BETJENINGSVEJLEDNING
6
Oprindelige indstillinger
6.1
Isætning af batterier til fjernbetjening
Isæt batterierne størrelse AAA, som beskrevet nedenfor (se
figur 6.1).
NB:
Hvis der ikke kommer noget frem på skærmen efter
tryk på ON/OFF, kan du prøve at vende batterierne.
Udskift begge batterier samtidig.
i
NB:
Hvis fjernbetjeningen ikke virker korrekt - fjern
batterierne og sæt dem i igen efter et par minutter.
i
Hvis enheden skal tages ud af brug i et stykke tid
- fjern batterierne. Hvis der ikke vises noget på
displayet, tryk på reset tasten.
ADVARSEL:
Risiko for forurening af miljøet, hvis batterierne ikke
bortskaffes korrekt. Når du udskifter batterierne til
fjernbetjeningen, skal du lægge de brugte batterier
i passende beholdere. Smid dem aldrig ud med
husholdningsaffaldet.
b
A
B
6.2
Indstilling af ur
Benyt fjernbetjeningen til at indstille enhedens ur, se figur 6.2
1
• Tryk på CLOCK- tasten (UR).
2
1
Fig. 6.1 Isætning af batterier til fjernbetjening.
Signaturforklaring
1Batteridæksel
2Batterier
A Trykområde til åbning af dæksel
BBatterirum
• Fjern batteridækslet ved at trykke forsigtigt på zone A og
presse dækslet ned.
• Sæt batterier i fjernbetjeningen, og kontroller, at de vender
rigtigt i forhold til positiv og negativ polaritet (markeret på
batterirummet).
“AM”- eller “PM”-indikatorerne begynder at blinke på
fjernbetjeningens skærm.
• Tryk på HOUR-tasterne (TIME) for indstilling af ønsket
tidspunkt:
Tryk på +/- tasterne øger eller reducerer timeindstillingen med 1
minut ad gangen.
Ved at holde +/- tasterne nede kan du øge eller reducere tiden
hurtigere.
• Tryk på SET-tasten (INDSTIL) for at bekræfte
tidsindstillingerne.
“AM”- eller “PM”-indikatorerne holder op med at blinke, og uret
begynder at gå.
• Sæt dækslet på igen.
• Tryk på ON/OFF-knappen (se figur 7.1) for at kontrollere, at
batterierne er sat rigtigt i.
-8-
VAI 3-WN-U_DK - 05/14 - Vaillant
BETJENINGSVEJLEDNING
7
Betjeningsvejledning
7.1
Generelle sikkerhedsforanstaltninger ved
brug
FARE for læsioner og fysiske skader!:
-Lad ikke børn lege med airconditionanlægget.
Enheden er ikke beregnet til at blive brugt af børn.
a
1
-Placer ikke ting oven på airconditionanlægget.
-Slut ikke udstyret til under anvendelse af insekt- eller
sprøjtegifte. Disse kan hobe sig op i enheden og have
helbredsskadelige virkninger på personer med allergier
over for bestemte kemiske stoffer.
2
-Undgå længere perioder med kølig luft eller ekstreme
temperaturer i rummet. Det kan være skadeligt for
helbredet.
-Brug ikke enheden til opbevaring af mad,
brugsgenstande, planter eller dyr.
-Stik ikke fingre eller andre genstande ind i
luftindsugninger eller -udsugninger eller mellem
enhedens lameller, mens den er i drift. Ventilatorens
høje hastighed kan forårsage læsioner.
-Husk altid at afbryde enheden, før åbning af
luftindtaget. Afbryd aldrig enheden ved at trække i
ledningen.
3
Fig. 6.2 Indstilling af ur.
Signaturforklaring
1 CLOCK-tast (UR)
2 Tasten HOUR (op/ned)
3SET-tast
-Efterlad ikke ledningen sammenrullet, og pas på ikke
at beskadige ledningen. Efter installationen skal stikket
være let at nå.
-Ødelæg ikke nogen dele af enheden, der indeholder
kølemiddel ved at stikke hul i airconditionanlæggets rør
med skarpe eller spidse genstande, ved at knuse eller
vride rør eller ved at skrabe belægningen af overfladen.
Hvis kølemidlet sprøjter ud og kommer i øjnene,
kan det resultere i alvorlige øjenskader. Søg straks
lægehjælp.
-Afbryd ikke driften af airconditionanlægget ved at
trække i ledningen.
DK
VAI 3-WN-U_DK - 05/14 - Vaillant
-9-
BETJENINGSVEJLEDNING
FARE for læsioner og fysiske skader!:
Fare for brand og eksplosion.
a
-Beskadigede airconditionanlæg bør ikke sættes i drift.
I tilfælde af tvivl, skal du kontakte din leverandør.
7.2
Funktioner
7.2.1
Taster til fjernbetjening
-Airconditionanlægget skal jordes korrekt i
overensstemmelse med specifikationerne.
-Placer aldrig en varmekilde med åben flamme i
luftstrømmen fra anlægget. Anvend aldrig spraydåser
eller andre brændbare gasser i nærheden af
klimaanlægget. Dette kan forårsage brand.
-Ved registrering af uregelmæssigheder af nogen
art (f.eks. en brændt lugt) skal strømforsyningen til
enheden straks afbrydes, hvorefter forhandleren
kontaktes med henblik på korrekt procedure
efterfølgende. Hvis du fortsat anvender enheden på
trods af disse uregelmæssigheder, risikerer den at tage
skade og forårsage kortslutning eller brand.
1
-Hvis strømforsyningen er beskadiget, skal den
udskiftes af fabrikanten eller dennes serviceværksted
eller af en kvalificeret person.
15
3
-Ledningsføring skal ske i henhold til de lokale
standarder.
14
4
- For at beskytte apparatet, skal du slukke for anlægget
først og afbryde strømmen efter mindst 30 sekunder.
13
5
-Ring til en faguddannet tekniker for at sikre
iværksættelse af de nødvendige forholdsregler for at
undgå udslip af kølemiddel. Udsivende kølemiddel af
en vis tæthed kan forårsage iltmangel.
12
6
11
7
10
8
FARE:
Fare for elektrisk stød.
Betjen ikke anlægget med våde eller fugtige hænder.
e
ADVARSEL:
Risiko for nedbrud eller funktionssvigt.
- Placer ikke genstande på den udvendige enhed.
b
2
- Hvis sikringen til den indvendige enhed er sprunget,
skal du ændre den med type T.3.15A / 250V. Hvis
sikringen til den udvendige enhed er sprunget, skal den
udskiftes med type T.25A/250V.
9
Fig. 7.1 Oversigt over taster.
Signaturforklaring
1 ON/OFF-tast (TÆND/SLUK)
2 +/- tast
3 FAN-tast (VENTILAT OR)
4 I FEEL-tast
5 SLEEP-tast (NAT FUNKTION)
6 TIMER-ON tast
7 TIMER-OFF tast
8 X-FAN tast
9 LIGHT-tast, tænder og slukker for lyset på displayet
10TURBO-tast
11 CLOCK-tast (UR)
12 TEMP-tast (TEMPERAT UR)
13 ACTIVE IONIZER-tast
14 SWING-tast (LUFTSTRØMMENS RETNING OP/NED)
15 MODE-tast (TILSTA ND)
- 10 -
VAI 3-WN-U_DK - 05/14 - Vaillant
BETJENINGSVEJLEDNING
7.2.2
7.3
Skærmindikatorer
Tip til brug af fjernbetjening
Følg nedenstående anbefalinger for brug af fjernbetjeningen:
20
1
• Ved brug skal du rette signalet fra senderen direkte mod
modtageren på den indvendige enhed.
19
2
• Afstanden mellem sender og modtager må ikke være større
end 7 m.
18
3
4
17
5
6
16
13
7
7.3.1
Lås til fjernbetjening
For at låse taster og skærm på fjernbetjeningen:
8
• Tryk på - & + tasterne på samme tid i to sekunder.
De øvrige taster deaktiveres.
9
10
12
• Reducer afstanden mellem fjernbetjeningen og den
indvendige enhed i områder med fluorescerende lys,
elektronisk tænd/sluk-funktion sat til eller trådløse telefoner.
• Tab eller slå ikke på fjernbetjeningen.
15
14
• Undgå forhindringer mellem sender og modtager.
11
Statusindikatoren for LOCK-funktionen kommer frem.
For at deaktivere låsen:
• Tryk på - & +-tasterne samtidigt igen.
De øvrige taster aktiveres.
Fig. 7.2 Oversigt over indikatorer.
Signaturforklaring
1TURBO-indikator
2TRANSMISSON-indikator
3 FREEZE PROTECTION-indikator
4 Air-indicator (funktionen er ikke tilgængelig for denne model)
5 Active Ionizer-indicator
6X-FAN-indikator
7 TEMPERAT URE-indikator
8TIMER-indikator
9 LOCK-indikator (LÅS)
10 SWING-indikator (LUFTSTRØMMENS RETNING OP/NED)
11 TEMP-indikator (TEMPERAT UR)
12LIGHT-indikator
13SLEEP-indikator
14 HEAT MODE-indikator
15 FAN MODE-indikator
16 DRY MODE-indikator
17 COOL MODE-indikator
18 AUTO MODE-indikator
19 I FEEL-indikator
20 FAN SPEED-indikator
Statusindikatoren for LOCK-funktionen forsvinder.
7.3.2
Lys funktion
Tryk på LIGHT-tasten i mindre end 2 sekunder for at oplyse
displayet på den indvendige enhed. For at slukke lyset, tryk
igen på LIGHT-tasten i mindre end 2 sekunder.
7.4
Tilslutning/afbrydelse af enhed
For at tilslutte enheden:
• Tryk på ON-tasten på fjernbetjeningen; enheden går i gang.
For at afbryde enheden::
• Tryk på OFF-tasten på fjernbetjeningen; enheden stopper.
DK
VAI 3-WN-U_DK - 05/14 - Vaillant
- 11 -
BETJENINGSVEJLEDNING
7.5
Valg af driftstilstand
7.5.1
For at aktivere:
Med enheden tilsluttet (se afsnit 7.4)::
Automatisk tilstand (AUTO)
I automatisk tilstand vælger airconditionanlægget automatisk
afkølings- (COOL) eller opvarmningstilstand (HEAT) i forhold til
den aktuelle, omgivende temperatur.
• Tryk på MODE-tasten.
De forskellige driftstilstande bliver vist.
• I COOL-tilstand er den indstillede rumtemperatur 25°C. Over
denne rumtemperatur vil enheden køre i COOL-tilstand.
• I HEAT-tilstand er den indstillede rumtemperatur 20°C. Under
denne rumtemperatur vil enheden køre i HEAT-tilstand.
Fig. 7.4 Driftstilstande.
• Vælg automatisk driftstilstand (AUTO).
• Tryk på TEMP/TIME-tasterne for at vælge
temperaturindstilling.
3
Ved tryk på -/+-tasterne reduceres eller forøges
temperaturindstillingen med 1°C.
Når ventilatoren sættes i AUTO-tilstand, indstiller
airconditionanlægget automatisk ventilatorhastigheden i forhold
til den aktuelle, omgivende temperatur.
1
2
Fig. 7.3 Automastisk valg af driftstilstand.
Signaturforklaring
1 - / + taster
2 MODE-tast (TILSTA ND)
3 Indikator for AUTO-tilstand
- 12 -
VAI 3-WN-U_DK - 05/14 - Vaillant
BETJENINGSVEJLEDNING
7.5.2
Afkølingstilstand (COOL)
For at aktivere:
I afkølingstilstand tillader airconditionanlægget kun afkøling.
NB:
I afkølingstilstand anbefales det at vende gitteret vandret.
i
4
Med enheden tilsluttet (se afsnit 7.4):
• Tryk på MODE-tasten.
De forskellige driftstilstande bliver vist.
Fig. 7.6 Driftstilstande.
• Vælg afkølingstilstand (COOL).
• Tryk på TEMP-tasterne for at vælge temperaturindstilling..
Tryk på -/+-tasterne øger eller reducerer temperaturindstillingen
med 1ºC.
• Tryk på FAN-tasten for at vælge ventilatorhastighed.
Hver gang du trykker på FAN-tasten, ændres
ventilatorhastigheden, som vist på figur 7.7.
1
3
2
Fig. 7.7 Ventilatorhastighed.
NB:
I afkølingstilstand kan længerevarende brug af
enheden i et område med meget høj luftfugtighed
resultere i, at der falder vanddråber på gitteret til den
indvendige enhed.
i
Fig. 7.5 Vælg afkølingstilstand.
Signaturforklaring
1 -/+-tast (forøge/reducere)
2 FAN-tast (VENTILAT OR)
3 MODE-tast (TILSTA ND)
4 Indikator for COOL-tilstand
DK
VAI 3-WN-U_DK - 05/14 - Vaillant
- 13 -
BETJENINGSVEJLEDNING
7.5.3
Affugtningstilstand (DRY)
For at aktivere:
I affugtningstilstand arbejder airconditionanlægget på at fjerne
fugten i luften.
Med enheden tilsluttet (se afsnit 7.4)::
• Tryk på MODE-tasten.
De forskellige driftstilstande bliver vist..
3
Fig. 7.9 Driftstilstande.
• Vælg affugtningstilstand (DRY).
• Tryk på -/+-tasterne for at vælge temperaturindstilling.
Tryk på TEMP-tasterne øger eller reducerer
temperaturindstillingen med 1ºC.
1
2
Når ventilatoren sættes i DRY-tilstand, vælger
airconditionanlægget automatisk den lave ventilatorhastighed
for den mest effektive tilstand.
NB:
I affugtningstilstand kan længerevarende brug af
enheden i et område med meget høj luftfugtighed
resultere i, at der falder vanddråber fra gitteret på den
indvendige enhed.
i
Fig. 7.8 Vælge affugtningstilstand.
Signaturforklaring
1 -/+-tast (øge/reducere)
2 MODE-tast (TILSTA ND)
3 Indikator for DRY-tilstand
- 14 -
VAI 3-WN-U_DK - 05/14 - Vaillant
BETJENINGSVEJLEDNING
7.5.4
Ventilatortilstand (FAN)
For at aktivere ventilatortilstand:
I ventilatortilstand (FAN) er SLEEP funktionen deaktiveret.
Med enheden tilsluttet (se afsnit 7.4):
• Tryk på MODE-tasten.
De forskellige driftstilstande bliver vist..
3
Fig. 7.11 Driftstilstande.
• Vælg ventilatortilstanden.
• Tryk på FAN-tasten for at vælge ventilatorhastighed.
Hver gang du trykker på FAN-tasten, ændres
ventilatorhastigheden, som vist på figur 7.12.
2
1
Fig. 7.12 Ventilatorhastighed.
Fig. 7.10 Vælg ventilatortilstand.
Signaturforklaring
1 FAN-tast (VENTILAT OR)
2 MODE-tast (TILSTA ND)
3 Indikator for ventilatortilstand (FAN)
DK
VAI 3-WN-U_DK - 05/14 - Vaillant
- 15 -
BETJENINGSVEJLEDNING
7.5.5
Opvarmningstilstand (HEAT )
For at aktivere:
Med enheden tilsluttet (se afsnit 7.4):
I opvarmningstilstand tillader airconditionanlægget kun
opvarmning.
• Tryk på MODE-tasten.
Fig. 7.14 Driftstilstande.
• Vælg driftstilstanden HEAT.
4
• Tryk på -/+ tasterne for at vælge temperaturindstilling..
Tryk på -/+ tasterne øger eller reducerer temperaturindstillingen
med 1ºC.
• Tryk på FAN-tasten for at vælge ventilatorhastighed.
Hver gang du trykker på FAN-tasten, ændres
ventilatorhastigheden, som vist på figur 7.15.
1
3
2
Fig. 7.15 Ventilatorhastighed.
NB:
I opvarmningstilstand (HEAT) stopper den varme luft
efter en kort periode på grund af den funktion, der skal
hindre kolde luftstrømme.
i
7.6
Indstille luftstrømmens retning
Luftstrømmens retning kan indstilles både lodret og vandret.
FARE FOR LÆSIONER OG FYSISKE SKADER!:
Undgå at kroppen kommer direkte i kontakt med
kraftige luftstrømme. Udsæt ikke dyr eller planter for
den direkte luftstrøm. De kan tage skade.
e
Fig. 7.13 Vælg opvarmningstilstand.
Signaturforklaring
1 -/+ taster (reducere/øge)
2 FAN-tast (VENTILAT OR)
3 MODE-tast (TILSTA ND)
4 ndikator for HEAT -tilstand
- 16 -
ADVARSEL:
Risiko for nedbrud eller funktionssvigt.
Åbn ikke gitteret på den indvendige enhed manuelt.
b
NB:
If the louvre does not work correctly, stop the unit
for one minute and restart it carrying out the settings
required with the remote controller.
i
VAI 3-WN-U_DK - 05/14 - Vaillant
BETJENINGSVEJLEDNING
7.7
Vælg specialfunktioner
7.7.1
For at aktivere:
• Vælg den ønskede driftstilstand (se afsnit 7.5).
Sleep funktion
Tilstandene COOL, HEAT kan indstilles om natten for at undgå
overdreven temperatursstigning eller -fald.
• Tryk på SLEEP-tasten..
I tilstanden COOL
Den omgivende temperatur stiger 1ºC per time i de første
to timer i forhold til den indstillede temperatur i de første to
timer. Denne nye temperatur fastholdes i de næste 5 timer og
reduceres herefter gradvist igen i de næste to timer for at nå
den oprindelig indstillede temperatur.
I HEAT -tilstand
Den omgivende temperatur falder 1ºC per time i de første
to timer i forhold til den indstillede temperatur. Denne nye
temperatur fastholdes i de næste 5 timer og forøges herefter
gradvist igen i de næste to timer for at nå den oprindelig
indstillede temperatur.
2
NB:
Når SLEEP funktionen er aktiveret, kører ventilatoren ved
lav hastighed.
i
1
Fig. 7.16 Vælg SLEEP-funktionen.
Signaturforklaring
1SLEEP-tast
2 Indikator for SLEEP-funktion
DK
VAI 3-WN-U_DK - 05/14 - Vaillant
- 17 -
BETJENINGSVEJLEDNING
7.7.2
Funktionen TIMER ON/OFF (TILSLUTTE/
AFBRYDE VED HJÆLP AF TIMER)
Enheden kan tilsluttes/afbrydes ved hjælp af timeren.
For at programmere en tilslutningstid for enheden:
• Tryk på TIMER ON tasten, mens enheden er afbrudt. TIMER
ON indikatoren begynder at blinke. Indstil det ønskede
starttidspunkt ved hjælpe af -/+ tasterne. Tryk på TIMER ON
tasten igen for at bekræfte starttidspunktet.
For at programmere en afbrydelsestid for enheden::
• Tryk på TIMER OFF tasten, mens enheden er tilsluttet.
TIMER OFF indikatoren begynder at blinke. Indstil den
ønskede afbrydelsestid for enheden ved hjælp af -/+
tasterne. Tryk på TIMER OFF tasten igen for at bekræfte
afbrydelsestiden.
1
For at annullere:
• Tryk på TIMER ON eller TIMER OFF tasten igen.
NB:
REPEAT funktionen er tilgængelig som standard. Hvis
programmet ikke annulleres, vil det gentages dagligt.
i
NB:
Husk at indstille uret rigtigt, før du indstiller timeren.
2
i
i
NB:
Genstart tidsindstillingen efter udskiftning af batterier
eller efter eventuelt strømsvigt.
3
4
Fig. 7.17 Vælg TIMER-funktion.
Signaturforklaring
1 Indikator for TIMER ON/OFF-funktion
2 - / + taster (reducere/forøge)
3 TIMER ON-tast
4 TIMER OFF-tast
- 18 -
VAI 3-WN-U_DK - 05/14 - Vaillant
BETJENINGSVEJLEDNING
7.7.3
TURBO-funktion
7.7.4
X-FAN funktion
Benyt TURBO-funktionen, når du har brug for hurtig opvarmning
(HEAT MODE) eller afkøling (COOL MODE).
1
1
2
2
Fig. 7.19 Fig. 7.18 Vælg TURBO-funktionen.
Signaturforklaring
1 Indikator for TURBO-funktionen
2TURBO-tast
For at aktivere TURBO-funktionen:
• Hold TURBO-tasten nede i to sekunder.
Vælg X-FAN-funktionen.
Signaturforklaring
1 Indikator for X-FAN
2X-FAN-tasten
Ved tryk på ”X-FAN”-tasten i COOL eller DRY tilstand, vil
indikatoren lyse op i displayet og den indvendige enheds
ventilator vil køre i ca. to minutter, selv efter at have afbrudt
enheden eller programmeret en afbrydelse. Efter de to minutter
vil enheden automatik slukke og den indvendige enheds
indikator for COOL-tilstand vil glimte hvert 10. sekund.
Dette bevirker at fugt i den indvendige enhed fjernes så
den holdes tør og forhindrer bakteriedannelse og rust på
komponenterne.
X-FAN funktionen er ikke tilgængelig i AUTO, FAN eller HEAT
tilstand.
DK
VAI 3-WN-U_DK - 05/14 - Vaillant
- 19 -
BETJENINGSVEJLEDNING
7.7.5
Temp funktion
7.7.6
I Feel funktion
2
1
1
2
Fig. 7.20 Vælg TEMP funktion.
Fig. 7.21 I FEEL funktion.
Signaturforklaring
1TEMP-tast
2 Indikator for TEMP funktion
Signaturforklaring
1 I FEEL-tast
2 Indikator for I FEEL funktion
Denne funktion viser den indstillede temperatur for den
indvendige enhed og omgivelselsestemperaturen på den
indvendige enheds display..
Tryk på denne tast for at tænde I FEEL funktionen.
Ved tryk på TEMP-tasten vises:
Indstillet temperatur
Fjernbetjeningen registrerer temperaturen fra omgivelserne og
sender signal tilbage til den indvendige enhed for tilpasning af
luftstrømsvolumen og følgeligt temperaturen for at give optimal
temperatur alt imens der spares på energien.
Tryk på tasten igen for at annullere I FEEL funktionen.
Indendørs omgivende temperatur
Udendørs omgivende temperatur
(ikke tilgængelig for denne model)
- 20 -
VAI 3-WN-U_DK - 05/14 - Vaillant
BETJENINGSVEJLEDNING
7.7.7
7.7.8
Aktiv ionseringsfunktion
Frostbeskyttelsesfunktion
1
1
4
2
3
2
Fig. 7.22 Vælg ACTIVE IONIZER funktion.
Fig. 7.23 Valg af FREEZE PROTECTION funktion.
Signaturforklaring
1X-FAN-tast
2 Indikator for X-FAN funktion
Signaturforklaring
1 Indikator for FREEZE PROTECTION funktion
2CLOCK-tast
3TEMP-tast
4 Indikator for HEAT -tilstand
vises på fjernbetjeningen når du trykker på ACTIVE
IONIZER knappen fire på hinanden følgende gange.
Denne funktion renser luften i et rum gennem den elektriske
ladning af luftmolekyler, skaber negative ioner ved hjælp af
elektricitet. En ion er en ladet partikel, enten positivt eller
negativt. Modsætninger tiltrækkes, således at negative ioner
søger at fylde luften og positivt ladede partikler, såsom støv,
bakterier, pollen, røg, og mange andre allergener.
Brug FREEZE PROTECTION funktionen til automatisk at
tilpasse temperaturen til 8°C i opvarmningstilstand.
For at aktivere: Tryk på tasterne CLOCK og TEMP samtidigt i
mere end to sekunder. Gentag proceduren for at deaktivere.
Tryk på tasten igen for at deaktivere funktionen.
DK
VAI 3-WN-U_DK - 05/14 - Vaillant
- 21 -
BETJENINGSVEJLEDNING
7.8
Indikatorer på den indvendige enhed
2
1
3
4
5
Fig. 7.21 Oversigt over displayet på den indvendige enhed.
Signaturforklaring
1 Indikator for HEATING funktion
2 Indikator for COOLING funktion
3 Indikator for TEMPERAT URE
4 Indikator for ON-OFF
5 Indikator for DEFROST funktion
7.9
Nøddrift
Anvend kun denne funktion, hvis fjernbetjeningen er gået i
stykker eller forsvundet.
For at aktivere:
• Tryk på kontakten nøddrift/drifttest..
• Der høres en hyletone, der betyder, at funktionen er blevet
aktiveret.
Fig 7.22 Kontakt til nøddrift/drifttest.
Betjeningsrækkefølge:
• Ved det første tryk på tasten, går enheden på Auto-tilstand.
• Ved det andet tryk på tasten, slukkes enheden.
NB:
Under nøddrift kører enheden som standard i
AUTOtilstand.
i
- 22 -
VAI 3-WN-U_DK - 05/14 - Vaillant
VEDLIGEHOLD
8
8.1
Energispareråd
Passende rumtemperatur
Indstil rumtemperaturen til en passende værdi for at sikre
fysisk velbefindende og komfort og under alle omstændigheder
overholde juridiske standarder. Alle grader over denne værdi
øger energiforbruget betydeligt.
Temperaturen bør også passe til rummets specifikke
anvendelse: Temperaturen i tomme rum og soveværelser
behøver ikke at være den samme som i opholdsrummet.
8.2
Elimination af kilder til varme eller kulde
Hvis der er kilder til enten varme (i afkølingstilstand) eller kulde
(i opvarmningstilstand), der kan elimineres, bør du gøre det
(f.eks. et vindue eller en dør, der ikke er ordentligt lukket). Dette
sikrer et lavere energiforbrug for enheden.
8.3
Drift i opvarmningstilstand (varmepumpe)
Din enhed virker som varmepumpe i opvarmningstilstand,
dvs.den trækker varme ind udefra (via den udvendige enhed)
og frigiver den inde (via den indvendige enhed). Ikke desto
mindre producerer et almindeligt opvarmningssystem varme
udelukkende ved energiforbrug. Derfor er opvarmning af et rum
med varmepumpe langt mere økonomisk end med almindelig
varme (radiatorer, varmeapparater, fyr etc.).
8.4
Rumtemperatur ved fravær
I opvarmningstilstand kan der spares ved at holde
rumtemperaturen ca. 5ºC lavere end den normale temperatur.
En reduktion på mere end de 5º C giver ikke større
energibesparelser, eftersom der kræves større varmestyrke til
de efterfølgende driftsperioder i normal driftstilstand.
Det kan kun svare sig at sænke temperaturen yderligere ved
længere fraværsperioder, f.eks. ved ferier og helligdage.
Om vinteren er det meget vigtigt at sørge for frostsikring.
8.5
Ensartet opvarmning
I et hus er det ofte kun et rum, der er opvarmet. Ud over de
flader, der afgrænser dette område, dvs. vægge, døre vinduer,
loft og gulv, kan opvarmningen i de tilstødende rum heller ikke
kontrolleres: utilsigtet varmetab er resultatet. Det er derfor
umuligt at opvarme rummet tilstrækkeligt, og man får en
ubehagelig kuldefornemmelse (det samme sker, når man lader
døre mellem opvarmede og uopvarmede rum stå åbne).
Dette er en falsk besparelse: der er tændt for varmen, men
rumtemperaturen er ikke behagelig. Man opnår større komfort
og en mere fornuftig drift ved ensartet opvarmning af alle
rummene i et hus, når man tager højde for hver enkelt rums
funktion (temperaturen i tomme rum eller soveværelser skal
ikke være den samme som i opholdsrummet).
8.6
Nedsat varmeforbrug i nattetimerne
(SLEEPfunktion)
Din enhed har en SLEEP-funktion, der gør det muligt
automatisk at ændre temperaturen om natten i forhold til de
forindstillede værdier (i opvarmningstilstand falder temperaturen
en smule; i afkølingstilstand stiger temperaturen en smule). På
den måde opnås større komfort, samtidig med at elforbruget
falder. Se afsnit 7.7.1, hvis du ønsker at læse mere om
SLEEPfunktionen).
8.7
Nedsat varmeforbrug med programmeret
driftsperiode (TIMER-funktion)
Ved at bruge TIMER-funktionen kan du bestemme, hvornår du
ønsker, din enhed skal gå i driftstilstand. Det er derfor muligt at
programmere din enhed til kun at køre, når det er nødvendigt,
og dermed sikre, at den er økonomisk i drift.
8.8
Passende vedligeholdelse af enheden
En enhed i perfekt stand er effektiv i drift og udnytter
energiforbruget maksimalt. Sørg for passende vedligeholdelse
af din enhed (du kan læse mere herom i afsnit 10). Kontroller
især, at filtrene er rene, og at luftindsugning og -udsugning ikke
blokeres på hverken den indvendige eller udvendige enhed.
DK
VAI 3-WN-U_DK - 05/14 - Vaillant
- 23 -
VEDLIGEHOLD
9
Fejlsøgning
Nedenstående tabel beskriver en række problemer sammen
med mulige årsager og løsninger, se tabel 9.1.
Hvis disse ikke løser problemet, skal du kontakte din
sædvanlige installatør eller Vaillant kundeservice.
SYMPTOMER
Systemet starter ikke øjeblikkeligt
MULIGE ÅRSAGER
MULIGE LØSNINGER
Når enheden er stoppet vil den ikke genstarte
før efter 3 minutter for at beskytte systemet
Vent i 3 minutter på at genstarte enheden
Når strømmen er afbrudt og tilsluttes igen, vil
beskyttelseskredsløbet virke i tre minutter foar
at bekytte enheden
Vent i 3 minutter efter at have sat strøm til før
der genstartes
Ledningen er ikke korrekt tilsluttet
Tilslut ledningen korrekt
Strømafbrydelse
Slå strømmen til igen
Sikringen er gået
Udskift sikringen. Benyt kun de korrekte
sikringer til hver model. Anvend ikke kabel eller
andet materiale til at udskifte sikringen.
Dette kan forårsage brand
Døre og/eller vinduer er åbne
Luk døre og/eller vinduer
Varmekilde i nærheden (f.eks. mange
mennesker i rummet)
Fjern varmekilden, hvis det er muligt.
Termostaten er sat til en ekstremt høj
temperatur i afkølingstilstand eller ekstremt lav
i opvarmningstilstand
Indstil temperaturen korrekt
Genstand foran luftindsugning eller udsugning.
Fjern genstanden for at få en ordentlig
luftcirkulation
Den omgivende temperatur har ikke nået det
angivne niveau
Vent et øjeblik
Snavset eller tilstoppet luftfilter
Rengør luftfiltret (luftfiltret skal rengøres hver
15. dag)
Er der nogen direkte sollys gennem vinduet
under køledrift?
Brug et gardin for at beskytte
airconditionanlægget
Der høres en gurglende lyd under drift eller når
enheden stoppes. Denne støj er højere i de
første 2-3 minutter af driften
Dette er normalt for et airconditionanlæg.
Lyden forårsages af kølemidlet som løber i
systemet.
Der høres en knagende lyd under driften
Dette er normalt for et airconditionanlæg.
Lyden forårsages af kabinettet som
udvides eller sammentrækkes som følge af
temperaturændringer
Hvis lyden er høj og kommer fra lamellerne
under drift, kan luftfiltrene være snavsede
Rengør luftfiltrene
Der forekommer lugte
Dette er fordi systemet cirkulerer lugte fra
omgivelserne indenfor (møbler, cigaretter)
Situation behøver ikke nogen aktion
Dis eller damp blæses fra enheden
Under COOL eller DRY tilstanden, kan
er blæses dis pga. pludselig køling af
indendørsluften.
Situation behøver ikke nogen aktion
Systemet virker overhovedet ikke (ventilation
går ikke i gang)
Utilstrækkelig opvarmning eller nedkøling
Der høres støj
Table 9.1 Fejlsøgning.
- 24 -
VAI 3-WN-U_DK - 05/14 - Vaillant
VEDLIGEHOLD
10 Vedligeholdelse
FARE:
Fare for elektrisk stød.
Afbryd enheden og den termiske magnetkontakt, før du
går i gang med at udføre vedligeholdelsesarbejder på
anlægget. Dette forhindrer skader.
e
FARE:
Fare for elektrisk stød.
Rengør ikke enheden med vand.
e
ADVARSEL:
Risiko for nedbrud eller funktionssvigt.
Anvend ikke benzin, opløsningsmidler eller polermidler
til rengøringen.
b
ADVARSEL:
Varmt vand over 40ºC kan forårsage misfarvning eller
deformitet.
b
10.1 Rengøring af fjernbetjeningen
• Tør fjernbetjeningen med den tør klud, Brug ikke vand.
• Brug ikke glasrens eller kemiske klude.
10.2 Rengøring af indvendig enhed
• Tør enhedens udvendige side med en tør klud.
• Til vanskelige pletter, skal du bruge et neutralt
rengøringsmiddel fortyndet med vand. Fjern overskydende
vand fra kluden før aftørring. Fjern overskydende
rengøringsmiddel fra enheden.
ADVARSEL:
Risiko for nedbrud eller funktionssvigt.
Påmonter ikke parfumesystemer, antilugtsystemer etc.
i filtret eller indvendigt i luft tilbageføringen. Dette kan
beskadige og tilsnavse varmeveksleren. Installer om
nødvendigt disse systemer ved enhedens udgang, men
sørg for, at de kun er aktive, når ventilatoren er tændt.
b
10.4 Rengøring af den udvendige enhed
ADVARSEL:
Brug altid passende personlige værnemidler (hjelm,
handsker, sikkerhedsstøvler og beskyttelsesbriller).
b
• Tør enhedens udvendige side med en tør klud.
• Fjern jævnlig støv fra åbningens overflade.
• Rengør jævnligt varmeveksleren med en blød børste, hvis
enheden er placeret i støvede omgivelser.
• Tjek også jævnligt bunden på den udvendige enhed.
FARE FOR LÆSIONER OG FYSISKE SKADER!
En ødelagt eller beskadiget bund kan få enheden til at
falde ned og forårsage fysisk eller materiel skade.
e
FARE FOR LÆSIONER OG FYSISKE SKADER!
Afmonter ikke udløbet på den udvendige enhed.
Fritlægning af ventilatoren kan være meget farligt.
e
NB:
Vi råder dig til at kontakte en dygtig reparatør
af airconditionanlæg eller Vaillants tekniske
serviceafdeling for at få udarbejdet en forebyggende
servicekontrakt. Dette vil forlænge dit udstyrs levetid og
forbedre ydelsen.
i
10.3 Rengøring af luftfiltre
Luftfiltret forhindrer støv fra rummet i at trænge ind i den
indvendige enhed.
Hvis filtret stopper til, forringes airconditionanlæggets
effektivitet, kompressoren kan blive beskadiget, og
varmeveksleren i den indvendige enhed kan fryse til.
Rengør jævnligt luftfiltret for at undgå dette. Det gør du på
følgende måde:
• Fjern luftfiltrene ved at skubbe filteret ud af låseanordningen
midt på og træk filteret nedad.
• Fjern støv og snavs fra filtrene med en støvsuger, eller
rengør dem med koldt vand.
• Sørg for, at filtrene er helt tørre før du sætter dem tilbage
i enheden. De aktiverede kulfiltre (hvis monteret) kan
reaktiveres ved at placere dem i direkte sollys. Hvis
mærkelige lugte stadig forekommer skal de erstattes med
nye. Hvis stærke lugte fortsat er et problem, skal du kontakte
din leverandør for fuldstændig rengøring af enheden.
• Monter filteret korrekt, og sørg for at det sidder helt fast
bag låseordningen. Hvis højre og venstre filter ikke sidder
ordentligt fast, kan det medføre funktionsfejl.
DK
VAI 3-WN-U_DK - 05/14 - Vaillant
- 25 -
VEDLIGEHOLD
11 Opbevaring i længere tid
Hvis du ikke ønsker at anvende enheden i en længere periode:
• Sæt ventilatoren i gang i 3-4 timer ved en temperatur på
30°C, i COOL-tilstand og ved høj ventilatorhastighed for at
tørre den.
• Stop enheden og slå den termiske magnetkontakt fra.
• Rengør luftfiltrene.
• Rengør den udvendige enhed.
Fig. 12.1 Genanvendelsessymbol.
• Fjern batterierne fra fjernbetjeningen.
Dit produkt er mærket med et genanvendelsessymbol (se figur
12.1), hvilket betyder, at du bør tage hensyn til følgende ved
bortkastning:
Før du tænder enheden igen:
• Sæt batterierne til fjernbetjenigen i.
• Sørg for at højre og venstre filter sidder korrekt før drift.
• Kontroller, at luftfiltrene ikke er tilstoppede.
• Kontroller at luftudsugningen og -indsugningen ikke er
tilstoppede.
• Tilslut strømmen igen og kør og test systemet i alle tilstande.
Hvis der bemærkes nogen mærkelige lyde eller ydeevne skal
leverandøren kontaktes.
FARE FOR LÆSIONER OG FYSISKE SKADER!
Hvis udstyret fjernes og geninstalleres på et senere
tidspunkt, skal du sørge for, at udstyret installeres
korrekt af personer med godkendte kvalifikationer (se
vejledning vedr. montør). I modsat fald kan der opstå
lækage af vand, lækage af kølemiddel, kortslutning
eller endog brand.
e
• Smid ikke enheden væk sammen med øvrigt usorteret
husholdningsaffald.
• Kasser udstyret i overensstemmelse med relevante lokale og
nationale standarder, på en korrekt og miljøvenlig måde.
• Aflever enheden til en affaldshåndteringscentral, der er
godkendt af de lokale myndigheder til at transportere den til
en rigtig affaldssorteringscentral.
• Hvis produktet udskiftes med et nyt produkt til samme brug,
skal du aflevere det gamle produkt til leverandøren af den
nye enhed til korrekt affaldshåndtering.
• Kontakt de lokale myndigheder, hvis du ønsker flere
oplysninger.
12 Produktet tages ud af brug
FARE for læsioner og fysiske skader!:
Ved kassering af produktet, skal du kontrollere, at de
nødvendige foranstaltninger er taget. Det gør du ved
at følge trinnene beskrevet i installationsvejledningen
i modsat rækkefølge og anvende nødvendigt værktøj
og beskyttelsesudstyr. Sørg for, at afmonteringen
foretages af kvalificerede, teknisk uddannede personer.
a
ADVARSEL:
Risiko for forurening af miljøet ved bortkastelse
af enheden. For at undgå dette skal du følge
anvisningerne i dette afsnit.
b
ADVARSEL:
Airconditionanlæg indeholder kølemidler, som kræver
speciel bortskaffelse som affald. De værdifulde
materialer i airconditionanlægget kan genbruges.
b
- 26 -
VAI 3-WN-U_DK - 05/14 - Vaillant
User manual
For the user
User manual
VAI 3-025 WN
VAI 3-035 WN
VAI 3-050 WN
Wall Mounted Units
EN
PACKING L IST
The units are provided with the items shown in the following table
Accesory
Quantity
Indoor Unit
Indoor Unit
1
Remote Control
1
Remote Control bracket
1
Batteries
2
Nuts
5
Screws
2
Mounting Plate
1
Extra pipe insulation
1
Documentation
User Manual
Name plate + EAN 128 (IU)
5 model code stickers
5 serial numbers
Packing list supplied with the unit.
CONTENTS
INTRODUCTION
MAINTENANCE
1
Your safety........................................................ 5
8
Advice for saving energy................................ 23
1.1
Symbols used..................................................... 5
8.1
Suitable room temperature................................. 23
1.2
Correct use of the unit........................................ 5
8.2
Eliminating heat or cold sources........................ 23
2
Extreme operating conditions........................ 5
8.3
Operation in heating mode (heat pump)............ 23
3
Identification of the unit ................................. 5
8.4
Ambient temperature when absent.................... 23
4
Declaration of conformity................................ 6
8.5
Uniform heating.................................................. 23
5
Description of the unit..................................... 6
8.6
5.1
Remote Controller.............................................. 6
Reduction in consumption during night hours
(Sleep function).................................................. 23
5.2
Features and Benefits........................................ 7
8.7
Reduction in consumption with programmed
operating time (Timer function).......................... 23
8.8
Appropriate maintenance of the unit.................. 23
9
Troubleshooting............................................... 24
10
Maintenance..................................................... 25
OPERATING INSTRUCTIONS
6
Getting started.................................................. 8
6.1
Fitting the Remote Controller Batteries.............. 8
6.2
Clock Settings.................................................... 8
7
Operating instructions..................................... 9
7.1
General Safety Considerations During Use....... 9
7.2
Identification of functions.................................... 10
7.2.1 Remote Controller Buttons................................. 10
10.1 Cleaning the remote controller........................... 25
10.2 Cleaning the indoor unit..................................... 25
10.3 Cleaning the air filters........................................ 25
10.4 Cleaning the Outdoor Unit.................................. 25
11
Storage over a prolonged period.................... 26
12
Product decommissioning.............................. 26
7.2.2 Display Indicators............................................... 11
7.3
Advice on how to use the remote controller....... 11
7.3.1 Remote controller lock....................................... 11
7.3.2 Light function...................................................... 11
7.4
Switching the unit on and off.............................. 11
7.5
Selection of the operation mode........................ 12
7.5.1 Automatic mode (AUTO).................................... 12
7.5.2 Cooling mode (COOL)....................................... 13
7.5.3 Dehumidifying Mode (DRY)................................ 14
7.5.4 Fan mode (FAN)................................................. 15
7.5.5 Heating mode (HEAT)........................................ 16
7.6
Setting the direction of the airflow...................... 16
7.7
Special function selection................................... 17
7.7.1 Sleep function.................................................... 17
7.7.2 Timer On/Off function
(Switch On/Switch Off using timer)..................... 18
7.7.3 Turbo function.................................................... 19
7.7.4 X-fan function..................................................... 19
7.7.5 Temp function..................................................... 20
7.7.6 I Feel function..................................................... 20
7.7.7 Active Ionizer function........................................ 21
7.7.8 Freeze Protection function................................. 21
7.8
Indicators of the indoor unit................................ 22
7.9
Emergency operation......................................... 22
-3-
-4-
INTRODUCTION
1
Your safety
1.1
Symbols used
2
Extreme operating conditions
This unit has been designed to operate within the range of
temperatures indicated on Figure 2.1. Ensure that these ranges
are not exceeded.
DANGER:
Direct danger for life and health.
a
e
b
Cooling
Heating
DANGER:
Danger electric shock.
Outdoor
WARNING:
Potentially dangerous situation for the product and the
environment.
NOTE:
Useful information and indications.
i
Correct use of the unit
This unit has been designed and manufactured for the sole
purpose of providing cooling and heating in occupied residential
and commercial premises. The use thereof for other domestic
or industrial purposes shall be the exclusive responsibility of the
persons specifying, installing or using them in that way.
Prior to handling, installing, start up, using or performing
maintenance on the unit, the persons assigned to perform
these tasks should be familiar with all the instructions and
recommendations set forth in the unit's installation manual.
NOTE:
Keep the manuals throughout the service life of the
unit.
i
Indoor
1.2
Fig. 2.1Operating ranges of the unit.
Legend
D.B. Temperature measured by dry bulb method
The working capacity of the unit changes depending on the
working temperature of the outdoor unit.
3
Identification of the unit
NOTE:
The information relating to this unit is divided between
two manuals: installation manual and user manual.
This manual is valid for the Split system series. In order to
know the specific model of your unit please refer to the unit
nameplates.
NOTE:
This equipment contains R-410A refrigerant. Do not
vent R-410A into atmosphere: R-410A, is a fluorinated
greenhouse gas, covered by Kyoto Protocol, with a
Global Warming Potential (GWP) = 1975.
The nameplates are located on the outdoor and indoor units.
i
i
NOTE:
The refrigerant fluid contained in this equipment must
be properly recovered for recycling, reclamation or
destruction before the final disposal of the equipment.
i
NOTE:
The relevant personnel performing any service of
maintenance operations involving the handling of the
refrigerant fluid must have the necessary certification to
comply with all local and international regulations.
i
EN
VAI 3-WN-U_EN - 05/14 - Vaillant
-5-
INTRODUCTION
4
Declaration of conformity
5
Description of the unit
The manufacturer declares that this unit has been designed and
constructed in compliance with the standard in force with regard
to obtaining the CE Marking.
This unit is comprised of the following elements:
The appliance type satisfy the essential requirements of the
relevant directives and Standards:
-- Outdoor unit.
• 2006/95/EEC including amendments:
”Directive on the harmonisation of the laws of Member States
relating to electrical equipment designed for use within certain
voltage limits“
-- Indoor unit.
-- Remote controller.
-- Connections and accessories.
Figure 5.1 shows the unit components.
Designed and built according to European Standards:
-- EN 60335-1
-- EN 60335-2-40
5
-- EN 50366
• 2004/108/EEC including amendments:
”Directive on the approximation of the law of the member states
relating to electromagnetic compatibility“
4
Designed and built according to European Standards:
-- EN 55014-1
1
-- EN 55014-2
-- EN 61000-3-2
-- EN 61000-3-3
-- EN 61000-3-11
3
2
Fig. 5.1Unit components.
Legend
1 Interconnecting pipework
2 Condensed water drainage pipe
3 Outdoor Unit
4 Remote controller
5 Indoor Unit
5.1
Remote Controller
The remote controller allows the unit´s functions to be set as
required. In order for the unit to receive the commands properly,
the remote control must be pointing directly at the indoor unit,
with no obstacles between them whatsoever.
-6-
VAI 3-WN-U_EN - 05/14 - Vaillant
INTRODUCTION
5.2
Features and benefits
Technical Specifications
Pictorial
Symbol
Description
Heat pump
The refrigeration system can be reversed. It allows either cooling or heating to the room
as desired.
Refrigerant R-410A
Refrigerant which is free of chlorine, ecological and non ozone depleting with efficiencies
greater than R 407 C or than R22, providing far better COP levels.
Inverter DC technology
Energy saving greater than conventional inverter systems.
Inverter technology
Consumption is adapted to the acclimatisation requirement in a regulated way,
guaranteeing very low energy costs. The equipment can be operated under extreme
temperature conditions (See page 3).
Anti-dust filter
General filter which eliminates much of the dirt and dust circulating through the unit
Remote controller
Remote controller: an infra-red device which allows remote access and control to the units
functions
Hot start function
The indoor unit fan is only operated after the indoor coil reaches temperature. Thereby
eliminating cold drafts during the heating cycle
Auto restart function
After a power outage the unit will re-start automatically at the same setting as last set.
Valve protection
A cover used to protect the service valves from the effects of bad weather
Anti-freeze
All heat pump units will tend to freeze up during the colder winter months, the anti-freeze
function automatically defrosts the outdoor coil as required
Anti-corrosion casing
Outdoor unit made of galvanised steel and anti-corrosion materials.
Resistant even in highly saline environments.
Table 5.1
Features and benefits.
EN
VAI 3-WN-U_EN - 05/14 - Vaillant
-7-
OPERATING INSTRUCTIONS
6
Getting started
6.1
Fitting the Remote Controller Batteries
Insert two batteries (2 No. size AAA), as described below (see
Figure 6.1).
NOTE:
If nothing appears on the display after pressing ON/
OFF, refit or replace the batteries.
Always replace both batteries at the same time.
i
NOTE:
If the remote controller does not work correctly during
operation, please remove the batteries and reposition
after a few minutes.
i
If the unit is going to be out of use for a long period
remove the batteries. If there is anything still showing in
display, just press the reset button.
ATTENTION:
Danger of the enviromental contamination by not
disposing of the batteries properly.
When replacing the remote controller batteries, dispose
of batteries in the correct manner.
Never throw away in the rubbish.
b
A
B
6.2
Clock Settings
Use the remote controller buttons to adjust the unit clock the first time
the unit is started or after replacing the batteries, see Figure 6.2.
1
2
• Press the CLOCK button once.
1
Fig. 6.1 Fitting the remote controller batteries.
Legend
1 Battery lid
2Batteries
A Pressure area for opening the lid
B Battery compartment
• Remove the battery lid by pressing gently on zone A and
pushing the lid downwards.
• Insert the batteries in the remote control ensuring correct positive
and negative polarity (Shown on the battery compartment).
The hour indicator start to flash on the remote controller display.
• Press the + / - buttons to set the desired time:
When pressing the + / - buttons, the time configuration will
increase or decrease by 1 minute.
If the + / - buttons are kept pressed, the time will increase or
decrease rapidly.
• Press the CLOCK button once.
The hour indicator will stop flashing and the clock will start to
operate.
• Put the lid back on.
• Press the ON/OFF button (see Figure 7.1) to check that the
batteries are correctly inserted.
-8-
VAI 3-WN-U_EN - 05/14 - Vaillant
OPERATING INSTRUCTIONS
7
Operating instructions
7.1
General Safety Considerations During
Use
DANGER of injury and physical damage!:
-Do not let children play with the Air to Air heat pump
unit. The unit is not designed for use by children or
infirm persons without supervision. Do not sit on the
outdoor unit under any circumstances.
a
1
-Do not put any objects on top of the unit.
-Do not operate the equipment whilst using insecticides
or pesticides. These could settle in the unit and harm
the health of people with allergies to specific chemical
substances.
2
-Avoid prolonged direct exposure to cooled air or
extreme temperatures in the room and do not direct the
air flow at people, especially infants, infirm people or
old people.
-Do not use this unit to preserve food, art work,
precision equipment, plants or animals.
-Do not cover the ventilation grille and do not insert
your fingers or other objects in the air inlets and outlets,
or between the unit slats whilst the unit is operating.
The high speed of the fan can cause injuries.
3
-Always remember to disconnect the unit before
openning the Inlet grille. Never disconnect the unit by
pulling the power cord.
-Do not leave the power supply cord in a roll and
take care not to damage the power supply cord. After
installation the power plug should be easily reached.
Fig. 6.2 Clock Settings.
Legend
1 Hour indicator
2 +/- buttons
3 CLOCK button
-Do not damage any parts of the unit containing
refrigerant by piercing the Air to Air heat pumps' tubes
with sharp or pointed items, by crushing or twisting any
tube or by scraping the coating off the surface. If the
refrigerant spurts out and gets into your eyes it may
result in serious eye injuries. Seek immediate medical
assistance.
-Do not interrupt the operation of the Air to Air heat
pump unit by pulling the cord.
EN
VAI 3-WN-U_EN - 05/14 - Vaillant
-9-
OPERATING INSTRUCTIONS
DANGER of injury and physical damage!:
Danger of fire and explosion.
a
-Damaged air conditioners should not be put into
operation. In case of doubt, consult your supplier.
7.2
Identification of functions
7.2.1
Remote Controller Buttons
-The air conditioner must be properly grounded in
accordance with specifications.
-Do not place any heat source with a naked flame
in the equipment airflow. Do not use sprays or other
flammable gases near the Air to Air heat pump
equipment. This could cause a fire.
-In the event that any irregularity is detected (such as
a burning smell), disconnect the unit from the mains
immediately and contact the distributor/installer in order
to proceed properly. If you continue to use the unit
under these irregular conditions, it could be irrepairably
damaged and cause short circuiting or fire.
1
-If the power supply is damaged, make sure it is
replaced by the manufacturer or its service agent or a
qualified person.
- If the fuse of the Indoor unit is broken, please change
it with type T.3.15A/ 250V. If the fuse of the Outdoor
unit is broken, change it with type T.25A/250V.
2
-The wiring should be done according to the local
wiring standards.
15
3
- In order to protect the unit, please turn off the A/C first
and at least 30 seconds later, disconnect the power.
14
4
13
5
12
6
11
7
10
8
-Phone a specialist technician and ensure that
preventive measures are implemented to avoid
refrigerant gas leaks. Leaking refrigerant of a certain
density can cause oxygen deficiency.
DANGER:
Danger electric shock.
Do not handle the equipment with wet or moist hands.
e
WARNING:
Danger of breakdowns or malfunction.
- Do not place any object on or near to the outdoor
unit.
9
b
Fig. 7.1 Overview of the buttons.
Legend
1 ON/OFF button
2 - / + buttons
3 FAN button
4 I FEEL button
5 SLEEP button
6 TIMER-ON button
7 TIMER-OFF button
8 X-FAN button
9 LIGHT button
10 TURBO button
11 CLOCK button
12 TEMP button
13 ACTIVE IONIZER button
14 SWING button
15 MODE button
- 10 -
VAI 3-WN-U_EN - 05/14 - Vaillant
OPERATING INSTRUCTIONS
7.2.2
7.3
Display Indicators
20
1
19
2
18
3
4
17
5
6
16
7
15
Follow the recommendations below as to how to use the remote
controller:
• When in use, direct the head of the signal transmitter directly
to the indoor unit receiver.
• Keep the distance between the transmitter and the receiver
within 7 m.
• Avoid obstacles between the transmitter and the receiver.
• If experiencing difficulties with the remote control
communicating with the indoor unit, reduce the distance
between the remote controller and the indoor unit.
• Do not drop, throw or hit the remote controller.
7.3.1
14
8
13
9
10
12
11
Advice on how to use the remote
controller
Remote controller lock
In order to lock the buttons and display of the remote controller
device:
• Press and hold the - & + buttons, at the same time for over
two seconds.
The rest of the buttons are deactivated.
The lock status indicator appears.
Fig. 7.2 Overview of the indicators.
Legend
1 TURBO indicator
2 TRANSMISSION indicator
3 FREEZE PROTECTION indicator
4 Air indicator (function not available for these models)
5 Active Ionizer indicator
6 X-FAN indicator
7 TEMPERATURE indicator
8 TIMER indicator
9 LOCK indicator
10 SWING indicator
11 TEMP indicator
12 LIGHT indicator
13 SLEEP indicator
14 HEAT MODE indicator
15 FAN MODE indicator
16 DRY MODE indicator
17 COOL MODE indicator
18 AUTO MODE indicator
19 I FEEL indicator
20 FAN SPEED indicator
In order to deactivate the lock:
• Press and hold the - & + buttons, at the same time again.
The rest of the buttons are activated.
The lock status indicator disappears.
7.3.2
Light function
Press the LIGHT button for less than 2 seconds to light the
display of the Indoor Unit. To switch the display back off, press
the LIGHT button for less than 2 seconds once again.
7.4
Switching the unit on and off
In order to switch the unit on:
• Press the ON button on the remote controller; the unit will
start to operate.
In order to switch the unit off:
• Press the OFF button on the remote controller; the unit will
stop.
EN
VAI 3-WN-U_EN - 05/14 - Vaillant
- 11 -
OPERATING INSTRUCTIONS
7.5
Selection of the operation mode
7.5.1
In order to activate:
With the unit switched on (see section 7.4):
Automatic mode (AUTO)
In automatic mode (AUTO) the Air to Air heat pump unit
automatically selects the cooling (COOL) or heating (HEAT)
mode in accordance with the actual ambient temperature.
• Press the MODE button.
The different operation modes are displayed.
• In COOL mode the set room temperature is 25º C. Above
this room temperature the unit will operate in COOL mode.
• In HEAT mode the set room temperature is 20º C. Below this
room temperature the unit will operate in HEAT mode.
Fig. 7.4 Operation modes.
• Select the automatic operation mode (AUTO).
• Press the TEMP / TIME buttons to select the temperature
setting.
3
When pressing the - / + buttons, the temperature configuration
will increase or decrease by 1ºC.
When the fan is configured in AUTO mode, the Air to Air heat
pump unit automatically sets the fan speed in accordance with
the actual ambient temperature.
1
2
Fig. 7.3 Automatic mode selection.
Legend
1 - / + buttons
2 MODE button
3 AUTO mode indicator
- 12 -
VAI 3-WN-U_EN - 05/14 - Vaillant
OPERATING INSTRUCTIONS
7.5.2
Cooling mode (COOL)
In order to activate:
In cooling mode (COOL), the Air to Air heat pump unit only
allows cooling.
NOTE:
In cooling mode it is recommendable to direct the front
louvres horizontally.
i
With the unit switched on (see section 7.4):
• Press the MODE button.
The different operation modes are displayed.
Fig. 7.6 Operation modes.
4
• Select the cooling operation mode (COOL).
• Press the - / + buttons to select the temperature setting.
When pressing the - / + buttons, the temperature configuration
will increase or decrease by 1ºC.
• Press the FAN button to select the fan speed.
Each time the FAN button is pressed, the fan speed will be
modified as shown in Figure 7.7.
1
3
2
Fig. 7.7 Fan speed.
NOTE:
n cooling mode, prolonged use of the unit under
conditions of considerable air humidity can cause drops
of water to fall from the outlet louvres.
i
Fig. 7.5 Cooling mode selection.
Legend
1 - / + buttons
2 FAN button
3 MODE button
4 COOL mode indicator
EN
VAI 3-WN-U_EN - 05/14 - Vaillant
- 13 -
OPERATING INSTRUCTIONS
7.5.3
Dehumidifying Mode (DRY)
In order to activate:
In dehumidifying mode (DRY), the Air to Air heat pump unit
operates by reducing the humidity from the atmosphere.
With the unit connected (see section 7.4):
• Press the MODE button.
The different operation modes are displayed.
3
Fig. 7.9 Operation modes.
• Select the dehumidifying mode (DRY).
• Press the - / + buttons to select the temperature setting.
When pressing the - / + buttons, the temperature configuration
will increase or decrease by 1ºC.
When the fan is set to DRY mode, the air conditioner selects
the low fan speed to make the most effective mode.
1
2
NOTE:
In dehumidifying mode, prolonged use of the unit under
conditions of considerable air humidity can cause drops
of water to fall on the outlet louvres.
i
Fig. 7.8 Dehumidifying mode selection.
Legend
1 - / + buttons
2 MODE button
3 DRY mode indicator
- 14 -
VAI 3-WN-U_EN - 05/14 - Vaillant
OPERATING INSTRUCTIONS
7.5.4
Fan mode (FAN)
In order to activate the fan mode (FAN):
With the unit switched on (see section 7.4):
In fan mode (FAN) the SLEEP function is disabled.
• Press the MODE button.
The different operation modes are displayed.
3
Fig. 7.11 Operation modes.
• Select the fan operation mode (FAN).
• Press the FAN button to select the fan speed.
Each time the FAN button is pressed, the fan speed will be
modified as shown in Figure 7.12.
2
1
Fig. 7.12 Fan speed.
Fig. 7.10 Fan selection mode.
Legend
1 FAN button
2 MODE button
3 FAN mode indicator
EN
VAI 3-WN-U_EN - 05/14 - Vaillant
- 15 -
OPERATING INSTRUCTIONS
7.5.5
Heating mode (HEAT)
In order to activate:
In heating mode, the Air to Air heat pump only allows heating.
With the unit switched on (see section 7.4):
• Press the MODE button.
Fig. 7.14 Operation modes.
4
• Select the heating operation mode (HEAT).
• Press the - / + buttons to select the temperature setting.
When pressing the - / + buttons, the temperature configuration
will increase or decrease by 1ºC.
• Press the FAN button to select the fan speed.
1
3
Each time the FAN button is pressed, the fan speed will be
modified as shown in Figure 7.15.
2
Fig. 7.15 Fan speed.
NOTE:
When the unit stops the compressor by thermostat,
or when the defrost function is performing, the indoor
units fan will remain stopped to prevent cold air
expelled.
i
7.6
Setting the direction of the airflow
The direction of the airflow can be set in vertical direction on
HEAT mode, and in horizontal direction on COOL mode.
DANGER OF INJURY AND PHYSICAL DAMAGE!:
Avoid direct body contact with the powerful airflows. Do
not expose animals and plants directly to the airflow.
They could suffer damage.
Fig. 7.13 Heating mode selection.
e
Legend
1 - / + buttons
2 FAN button
3 MODE button
4 HEAT mode indicator
b
WARNING:
Danger of breakdowns or malfunction.
Do not open the outlet louvres manually.
NOTE:
If the louvre does not work correctly, stop the unit
for one minute and restart it carrying out the settings
required with the remote controller.
i
- 16 -
VAI 3-WN-U_EN - 05/14 - Vaillant
OPERATING INSTRUCTIONS
7.7
Special function selection
7.7.1
In order to activate:
• Select the desired operation mode (see section 7.5).
Sleep function
The COOL and HEAT modes can be set during the nighttime
hours to avoid an excessive increase or decrease in the
temperature.
• Press the SLEEP button.
SLEEP function in COOL mode
The ambient temperature is increased by 1 °C per hour with
respect to the set temperature during the first two hours. This
new temperature is then maintained for the next 5 hours, then
gradually decreased again over the next two hours to reach the
original set temperature.
SLEEP function in HEAT mode
The ambient temperature is decreased by 1 °C every hour with
respect to the set temperature during the first two hours. This
new temperature is then maintained for the next 5 hours, then
gradually increased again over the next two hours to reach the
original set temperature.
2
NOTE:
While the SLEEP function is activated, the fan
operates at low speed.
i
1
Fig. 7.16 Selection of SLEEP function.
Legend
1 SLEEP button
2 SLEEP function indicator
EN
VAI 3-WN-U_EN - 05/14 - Vaillant
- 17 -
OPERATING INSTRUCTIONS
7.7.2
Timer On/Off function (Switch On/Switch
Off using timer)
The unit can be switched on/switch off using the timer.
In order to program a switch on time for the unit:
• With the unit switched off, press the TIMER ON button. The
TIMER ON indicator starts to blink. Set the desired starting
time by pressing the - / + buttons. Press the TIMER ON
button again to confirm the desired starting time.
In order to program a switch off time for of the unit:
• With the unit switched on, press the TIMER OFF. The TIMER
OFF indicator starts to blink. Set the desired switch off time
of the unit by pressing the - / + buttons. Press the TIMER
OFF button again to confirm the desired switch off time.
In order to cancel:
1
• Press the TIMER ON or TIMER OFF button again.
NOTE:
REPEAT function available by default. If the program is
not canceled, it will be repeated daily.
i
NOTE:
Correctly set the clock before operating the timer.
2
i
i
NOTE:
Restart the time configuration after replacing the
batteries or after a possible power failure.
3
4
Fig. 7.17 Selection of TIMER function.
Legend
1 TIMER ON/OFF function indicator
2 - / + buttons (increase/decrease)
3 TIMER ON button
4 TIMER OFF button
- 18 -
VAI 3-WN-U_EN - 05/14 - Vaillant
OPERATING INSTRUCTIONS
7.7.3
Turbo function
7.7.4
X-fan function
Use the TURBO function when you need fast cooling (COOL
MODE) or fast heating (HEAT MODE).
1
1
2
2
Fig. 7.19 X-FAN function selection.
Fig. 7.18 TURBO function selection.
Legend
1 TURBO icon
2 TURBO button
To activate or deactivate the TURBO function:
• Press the TURBO button for less than two seconds.
Legend
1 X-FAN icon
2 X-FAN button
When pressing the “X-Fan” button in COOL or DRY mode,
the indicator in the remote control’s display will light up and
the indoor unit’s fan will remain functioning for aproximately
2 minutes , even after having switched the appliance off or
having it programmed for the switch off. Once this period of time
passes, the unit will automatically turn off, and the indoor unit’s
COOL mode indicator will flicker every 10 seconds.
This causes the humidity in the indoor unit to be expelled,
keeping it dry and preventing it’s components from going rusty
and bacteria from appearing.
The X-Fan function is not available in AUTO, FAN or HEAT
mode.
EN
VAI 3-WN-U_EN - 05/14 - Vaillant
- 19 -
OPERATING INSTRUCTIONS
7.7.5
Temp function
7.7.6
I Feel function
2
1
1
2
Fig. 7.20 TEMP function selection.
Fig. 7.21 I FEEL function selection.
Legend
1 TEMP indicator
2 TEMP button
Legend
1 I FEEL button
2 I FEEL indicator
This function displays the indoor setting temperature and indoor
ambient temperature on the Indoor Unit display.
Press this button to turn on the I FEEL function.
Pressing the TEMP button will display:
Set temperature
The remote control sense the temperature of their environment
and transmit the signal back to the indoor unit, adjusting the
airflow volume and temperature accordingly to provide optimum
temperature while saving energy.
Press this button again to cancel the function I FEEL.
Indoor ambient temperature
Outdoor ambient temperature
(Not available for this model)
- 20 -
VAI 3-WN-U_EN - 05/14 - Vaillant
OPERATING INSTRUCTIONS
7.7.7
7.7.8
Active Ionizer function
Freeze Protection function
1
1
4
2
3
2
Fig. 7.22 ACTIVE IONIZER function selection.
Fig. 7.23 FREEZE PROTECTION function selection.
Legend
1 X-FAN indicator
2 X-FAN button
Legend
1 FREEZE PROTECTION indicator
2 CLOCK button
3 TEMP button
4 HEAT mode indicator
is displayed on the remote control when you press the
ACTIVE IONIZER buttonfour consecutive times.
This function cleans the air of a room through the electrical
charge of the air molecules, creating negative ions by means
of electricity. An ion is a charged particle, either positively or
negatively. Opposites attract, so that negative ions seek to fill
the air and positively charged particles, such as dust, bacteria,
pollen, smoke, and many other allergens.
Use the FREEZE PROTECTION function to automatically
adjust the temperature to 8 ° C in heating mode.
To activate this function: Press the buttons CLOCK and TEMP
simultaneously for more than 2 seconds. Repeat the procedure
to deactivate.
Press the button again to disable this function.
EN
VAI 3-WN-U_EN - 05/14 - Vaillant
- 21 -
OPERATING INSTRUCTIONS
7.8
Indicators of the indoor unit
1
2
3
4
5
Fig. 7.21 Overview of the display in the indoor unit.
Legend
1 HEATING indicator
2 COOLING indicator
3 TEMPERATURE indicator
4 ON-OFF indicator
5 DEFROST indicator
7.9
Emergency operation
Only use this function when the remote controller is broken or
has been mislaid.
In order to activate:
• Press the emergency operation switch.
• A beeping noise is heard which indicates that the function
has been put into operation.
Fig 7.22 Emergency operation/operation test switch.
Operating sequence:
• With the first press of the button, the unit enters into Auto
mode.
• With the second press of the button, the unit switches off.
NOTE:
During Emergency Operation, the unit operates in
AUTO mode by default.
i
- 22 -
VAI 3-WN-U_EN - 05/14 - Vaillant
MAINTENANCE
8
8.1
Advice for saving energy
Suitable room temperature
Set the room temperature to an appropriate value to ensure
physical wellbeing, comfort and to comply with the legal
standards if required. Each degree above this value significantly
increases the energy consumption.
The temperature must also be suitable for the specific use
being made of the room: the temperature of empty rooms and
bedrooms does not have to be the same as the main living
room.
8.2
Eliminating heat or cold sources
In the event that there are any heat (in cooling mode) or cold
(in heating mode) sources that could be eliminated please do
so (e.g. a window or a door which are not properly closed). This
will ensure that the unit consumes less energy.
8.3
Operation in heating mode (heat pump)
Your unit, when operating in heating mode, acts as a heat
pump, i.e. it takes heat from the outside (via the outdoor unit)
and releases it inside (via the indoor unit). Nevertheless,
a conventional heating system produces heat purely by
consuming energy. Therefore, heating a room using a heat
pump is far more economical than using conventional heating
(radiators, heaters, boilers, etc.).
8.5
Often in a house only the one room is heated. In addition to
the surfaces which form the perimeter of this area, i.e. the
walls, doors, windows, ceiling and floor, the adjacent rooms are
cooler than the room temperature therefore: thermal energy is
unintentionally lost. It is therefore difficult to adequately heat the
room and an unpleasant feeling of cold is felt (the same occurs
when leaving open doors which separate heated areas and
unheated areas in a limited way).
This is false economy: the heating is on and, nevertheless,
the ambient temperature is not pleasant. Greater comfort and
a more reasonable operating mode are achieved by heating
all the rooms in a house uniformly, taking into account the use
being made of each room (the temperature of empty rooms and
bedrooms does not have to be the same as the main room, as
long as they are not significantly cooler than the main room).
8.6
Ambient temperature when absent
During heating mode, an economic saving is made by keeping
the room temperature at approx. 5ºC lower than the normal
temperature. A reduction which exceeds these 5º C does not
provide any further energy savings since greater heating power
is required for consecutive periods of operation in normal
operating conditions.
It is only worth reducing the temperature even further in the
event of prolonged absences, e.g. during holidays.
During winter when protection against freezing must be
guaranteed.
Reduction in consumption during night
hours (Sleep function)
Your unit has a SLEEP function which allows the temperature
to be modified automatically in relation to the predetermined
values (in heating mode the temperature decreases slightly; in
cooling mode the temperature increases slightly) during sleep
setting period. Thus, apart from greater comfort being provided
there is also a reduction in the electricity consumption. For more
details regarding the SLEEP function, please consult section
7.7.1).
8.7
8.4
Uniform heating
Reduction in consumption with
programmed operating time (Timer
function)
By using the TIMER function you can adjust the operation start
time of your unit. Therefore, it is possible to programme the
operation of your unit to make it function only when required
and thus achieve more economic operation.
8.8
Appropriate maintenance of the unit
A unit in perfect condition operates efficiently, taking maximum
advantage of the energy it consumes. Ensure that your unit is
correctly serviced (for more details please consult section 10).
In particular, make sure that the filters are kept clean and that
the air inlets and outlets are not obstructed either on the indoor
or outdoor unit. Failure to do so will lead to an increase in
energy consumption.
EN
VAI 3-WN-U_EN - 05/14 - Vaillant
- 23 -
MAINTENANCE
9
Troubleshooting
The table below describes a selection of problems with their
possible causes and solutions, see Table 9.1.
If these solutions do not solve the problem contact your usual
installer or call your nearest Vaillant office.
SYMPTOMS
POSSIBLE CAUSES
POSSIBLE SOLUTION
The system does not restart immediately
When unit is stopped, it won't restart until 3
minutes have elapsed to protect the system
Wait 3 minutes before starting the unit again
When power is disconnected and reconnected
again, the protection circuit will work for three
minutes to protect the air to air heat pump unit
Wait 3 minutes after inserting the plug and
before starting the unit again
The power lead is not connected correctly
Connect the power lead correctly
Power supply cut
Reconnect the power supply
The fuse has blown
Replace the fuse. Only use the right fuses for
each model. Do not use wire or other material to
replace the fuse. Fires could be caused
Doors and/or windows open
Close the doors and/or windows
Heat source nearby (e.g. lots of people in the
room)
If possible, remove the heat source
The thermostat is set to an excessively high
temperature in cooling mode or excessively low
temperature in heating mode
Set the temperature properly
Obstacle in front of the air inlet or outlet
Remove the obstacle to allow the air to circulate
properly
The ambient temperature has not reached the
designated level
Wait for a few moments
Dirty or blocked air filter
Clean the air filter (the air filter should be
cleaned every 15 days)
Is there any direct sunlight through the window
during the cooling operation?
Use a curtain to protect the Air to Air heat pump
unit
During unit operation or when stopping the unit
a gurgling noise may be heard. This noise is
more audible the first 2-3 minutes of operation
This is normal in an Air to Air heat pump unit.
The noise is caused by the refrigerant flowing in
the system).
A cracking noise is heard during operation
This is normal in an Air to Air heat pump unit.
The noise is caused by the casing expanding or
shrinking due to the temperature changes
If the noise is loud and comes from the louvers
during the unit operation, the air filters may be
too dirty
Clean the air filters properly
Smells are generated
This is because the system circulates smells
from the indoor surrounding (furniture,
cigarettes)
This situation does not require any action
Mist or steam come are blown out from the unit
During COOL mode or DRY mode operation,
the indoor unit may blow some mist. This is due
to the sudden cooling of the indoor air.
This situation does not require any action
The system does not work at all (the ventilation
does not start)
Insufficient cooling or heating
Noise is heard
Table 9.1 Troubleshooting.
- 24 -
VAI 3-WN-U_EN - 05/14 - Vaillant
MAINTENANCE
10 Maintenance
DANGER:
Danger of electric shock.
Disconnect the unit and isolate the mains supply before
proceeding to carry out maintenance on the unit.
Ensure the the mains supply cannot be reconnected
inadvertently. This will prevent injuries..
e
DANGER:
Danger of electric shock.
Do not clean the unit with water.
e
WARNING:
Danger of breakdowns or malfunction.
Do not use gasoline, benzine, thinner or cleansers
when cleaning the unit. It may damage the coating of
the unit.
b
WARNING:
Hot water over 40ºC may cause discoloring or
deformation.
• Attach the filter correctly and make sure it is completely fixed
behind the stopper. If the right and left filters are not properly
fixed, this could cause a malfunction.
WARNING:
Danger of breakdowns or malfunction.
Do not attach perfume systems, anti-odour systems
etc. in the filter or in the inside air return.
This can damage and soil the heat exchanger coil. If
necessary, install these systems at the unit's outlet
point and ensure they only run when the fan is on.
b
10.4 Cleaning the Outdoor Unit
WARNING:
Always use suitable personal protection equipment
(helmet, gloves, safety boots and protective glasses).
b
• Wipe the outer part of the unit with a dry cloth.
b
• Occasionally remove dust and leaves from the inlet surface.
10.1 Cleaning the remote controller
• Occasionally check the base of the outdoor unit.
• Wipe the controller with a dry cloth. Do not use water to
clean the remote controller.
• Do not use glass cleaners or chemical cloths.
10.2 Cleaning the indoor unit
• Wipe the outer part of the unit with a soft and dry cloth.
• For difficult stains, use a neutral detergent diluted in water.
Eliminate the excess of water form the cloth before wiping.
Leave the unit clean from any detergent.
10.3 Cleaning the air filters
The air filter traps the dust circulated from the room into the
indoor unit.
• Periodically clean the heat exchanger fins with a soft brush
when the unit is located in a dusty environment.
DANGER OF INJURY AND PHYSICAL DAMAGE!
A damaged or deteriorated base could make the unit
unstable and potentially cause physical or material
damage.
e
DANGER OF INJURY AND PHYSICAL DAMAGE!
Except for servicing or replacement, do not dismantle
the outdoor unit outlet. Exposing the fan can be very
dangerous.
e
NOTE:
We advise you to contact a reliable air conditioner
specialist or the Vaillant Group Technical Service to
contract a preventative maintenance service. This will
help to prolong the life of your equipment and improve
its performance.
i
If the filter becomes blocked, the air conditioner's efficiency will
be reduced, the compressor could be damaged and the indoor
unit's heat exchanger coil could freeze up.
Clean the air filter regularly to prevent this from happening. In
order to do so:
• Remove the air filters by slightly pushing up the center tab
until it is released from the stopper and remove the filter
downwards.
• Clean the filter removing the dust or the dirt using a vacuum
cleaner or cleaning them with cold water.
• Ensure that the filters are dried completely (dry in the shade)
before putting them back into the unit. The activated carbon
filters (where fitted) can be reactivated by placing in direct
sunlight. If strange odours are still smelt replace with new. If
strong odours continue to be a problem, contact your after
sales service provider to fully clean the unit.
EN
VAI 3-WN-U_EN - 05/14 - Vaillant
- 25 -
MAINTENANCE
11 Storage over a prolonged period
If you do not intend to use the unit over a period of time:
• Put the fan into operation for two or three hours at a
temperature of 30ºC, in COOL mode and at High Speed fan
in order to prevent mold or smells.
• Stop the unit and disconnect the mains power supply.
• Clean the air filters.
• Clean the Outdoor unit.
Fig. 12.1 Recycling symbol.
• Remove the batteries from the remote controller.
Before turning the unit back on:
Your product is marked with the recycling symbol (see Figure
12.1), which means that the following must be taken into
account during the disposal:
• Replace the remote controller batteries.
• Do not mix the unit with other domestic, unclassified waste.
• Be sure to attach both right and left filters prior operation.
• Dispose of the equipment in accordance with the
relevant local and national standards, correctly and in an
environmentally-friendly way.
• Check that the air filters are not blocked.
• Check that the air outlet and inlet are not blocked.
• Re-connect the mains power and run and test the system
in all modes. If any strange noise or performance is
experienced contact your after sales service provider.
DANGER OF INJURY AND PHYSICAL DAMAGE!
In the event that the equipment is removed and
reinstalled at a later date, ensure that the equipment
is properly installed by personnel with the appropriate
qualifications (see manual for installer). Otherwise
water leakage, refrigerant leakage, short circuiting or
even fire could be caused.
e
• Hand in the unit to a waste management company that is
authorised by the local authorities to transport it to a proper
treatment plant.
• If the product is being replaced with a new product destined
for the same use, hand in the old product to the distributor of
the new unit for waste management as appropriate.
• Contact local authorities for more information.
12 Product decommissioning
DANGER of injury and physical damage!:
When disposing of the product, ensure that is done
safely and in accordance with local by-laws and
regulations. In order to do so follow the steps described
in the installation manual in reverse order and use the
necessary tools and protection equipment.
Ensure that the disassembly is carried out by qualified,
technically competent individuals.
a
WARNING:
Danger of environmental contamination when
disposing of the unit. To avoid this, follow the
instructions described in this section.
b
WARNING:
Air conditiong systems contain refrigerants which
require specialised waste disposal. The valuable
materials contained in an air conditioner can be
recycled.
b
- 26 -
VAI 3-WN-U_EN - 05/14 - Vaillant
Manual de usuario
Para el usuario
Manual de usuario
VAI 3-025 WN
VAI 3-035 WN
VAI 3-050 WN
Murales
ES
L I S TA D O DE EM BAL AJ E
Este aparato se suministra con los articulos mencionados en la siguiente tabla
Articulo
Cantidad
Unidad Interior
Unidad Interior
1
Mando
1
Soporte de mando
1
Pilas
2
Tuercas
5
Tornillos
2
Placa de montaje
1
Aislamiento adicional de la tubería
1
Documentación
Manual del usuario
Placa de identificación + EAN 128
5 pegatinas de modelo de código
5 números de serie
Articulos suministrados con el aparato.
ÍNDICE
INTRODUCCIÓN
1
Para su seguridad............................................ 5
1.1
Símbolos Utilizados............................................ 5
1.2
Uso adecuado del aparato................................. 5
2
Condiciones extremas de funcionamiento.... 5
3
Identificación del aparato................................ 5
4
Declaración de conformidad........................... 6
5
Descripción del aparato.................................. 6
5.1
Mando a distancia.............................................. 6
5.2
Características y ventajas.................................. 7
INSTRUCCIONES DE
FUNCIONAMIENTO
7.7.8 Función Freeze Protection (Protección contra
congelación)....................................................... 21
7.8
Indicadores en la unidad interior........................ 22
7.9
Funcionamiento de emergencia......................... 22
MANTENIMIENTO
8
Consejos para el ahorro energético............... 23
8.1
Temperatura ambiente adecuada...................... 23
8.2
Eliminar fuentes de calor o de frío..................... 23
8.3
Funcionamiento en modo calefacción (Bomba de
calor)23
8.4
Temperatura ambiente durante las ausencias... 23
8.5
Calefacción uniforme......................................... 23
8.6
Reducción del consumo durante las horas de
sueño (Función Sleep)....................................... 23
8.7
Reducción del consumo programando el tiempo
de funcionamiento (Función Timer).................... 23
8.8
Mantenimiento adecuado del aparato................ 23
6
Ajustes iniciales............................................... 8
6.1
Instalación de las pilas del mando a distancia... 8
6.2
Ajustes del reloj.................................................. 8
7
Instrucciones de funcionamiento................... 9
7.1
Consideraciones generales de seguridad durante
el uso.................................................................. 9
9
Solución de averías......................................... 24
10
Mantenimiento.................................................. 25
7.2
Identificación de funciones................................. 10
10.1 Limpieza del mando a distancia......................... 25
7.2.1 Botones del mando a distancia.......................... 10
10.2 Limpieza de la unidad interior............................ 25
7.2.2 Indicadores en la pantalla.................................. 11
10.3 Limpieza de los filtros de aire............................. 25
7.3
10.4 Limpieza de la unidad exterior........................... 25
Consejos de utilización del mando a distancia.. 11
7.3.1 Bloqueo del mando a distancia.......................... 11
7.3.2 Función light....................................................... 11
7.4
Conexión/Desconexión del aparato................... 11
7.5
Selección del modo de funcionamiento............. 12
11
Almacenamiento durante un largo periodo de
tiempo............................................................... 26
12
Retirada de servicio del producto.................. 26
7.5.1 Modo Automático (AUTO).................................. 12
7.5.2 Modo Refrigeración (COOL).............................. 13
7.5.3 Modo Deshumidificación (DRY)......................... 14
7.5.4 Modo Ventilador (FAN)....................................... 15
7.5.5 Modo calefacción (HEAT)................................... 16
7.6
Ajuste de la dirección del flujo del aire............... 16
7.7
Selección de funciones especiales.................... 17
7.7.1 Función sleep..................................................... 17
7.7.2 Función timer on/off (Conexión/desconexión
mediante temporizador)..................................... 18
7.7.3 Función turbo..................................................... 19
7.7.4 Función X-fan..................................................... 19
7.7.5 Función Temp..................................................... 20
7.7.6 Función I Feel.................................................... 20
7.7.7 Función Active Ionizer (Ionizador)...................... 21
-3-
-4-
INTRODUCCIÓN
1
Para su seguridad
1.1
Símbolos Utilizados
¡PELIGRO!:
Peligro para su vida o salud.
a
e
b
2
Condiciones extremas de
funcionamiento
Este aparato ha sido diseñado para funcionar en los rangos de
temperaturas indicados en la figura 2.1. Asegúrese de que no
se sobrepasan dichos rangos.
¡PELIGRO!:
Peligro de descarga eléctrica.
Cooling
Outdoor
¡ATENCIÓN!:
Situación peligrosa posible para el producto y el medio
ambiente.
NOTA:
Información e indicaciones útiles.
i
1.2
Heating
Uso adecuado del aparato
Indoor
Este aparato ha sido diseñado y fabricado para la climatización
mediante el acondicionamiento de aire. El uso de este aparato
para otros fines domésticos y/o industriales será responsabilidad de
aquellas personas que así lo proyecten, instalen o utilicen.
Previamente a las intervenciones en el aparato, instalación,
puesta en servicio, utilización y mantenimiento, el personal
encargado de estas operaciones deberá conocer todas las
instrucciones y recomendaciones que figuran en el manual de
instalación y en el manual de usuario del aparato.
NOTA:
Conserve los manuales durante toda la vida útil del
aparato.
i
NOTA:
La información referente a este aparato está repartida
en dos manuales: manual de usuario y manual de
instalación.
i
NOTA:
Este equipo contiene refrigerante R-410A. No
descargar el R-410A a la atmósfera: El R-410A es un
gas fluorado de efecto invernadero, contemplado en el
Protocolo de Kyoto, con un potencial de calentamiento
global (GWP) = 1975.
i
Fig. 2.1Rangos de funcionamiento del aparato.
Leyenda
D.B. Temperaturas medidas por bulbo seco
La capacidad de trabajo de la unidad interior cambia
dependiendo del rango de temperatura de trabajo de la unidad
exterior.
3
Identificación del aparato
Este manual es válido para la serie de aparatos Split Murales.
Para conocer el modelo concreto de su aparato, consulte las
placas de características del aparato.
La placas de características están ubicadas en las unidades
exterior e interior.
NOTA:
Antes de retirar el equipo, deberá recuperarse el
fluido refrigerante contenido en el mismo de forma
adecuada para su posterior reciclaje, transformación o
destrucción.
i
NOTA:
El personal encargado de las tareas de mantenimiento
relacionadas con la manipulación del fluido refrigerante
deberá poseer la certificación pertinente, expedida por
las autoridades locales.
i
ES
VAI 3-WN-U_ES - 05/14 - Vaillant
-5-
INTRODUCCIÓN
4
Declaración de conformidad
5
Descripción del aparato
El fabricante declara que este aparato ha sido diseñado y
construido conforme a la normativa vigente, de cara a obtener
el marcado CE.
Este aparato está compuesto por los siguientes elementos:
El tipo de aparato cumple los requisitos esenciales de las
directivas y normas:
-- Unidad interior.
• 2006/95/EEC incluidas las enmiendas:
”Directiva relativa a la armonización de las legislaciones de
los Estados miembros relacionadas con equipos eléctricos
destinado a utilizarse con determinados límites de voltaje“
-- Unidad exterior.
-- Mando a distancia.
-- Conexiones y conductos.
En la figura 5.1 se muestran los componentes del aparato.
Diseñado y fabricado según la normativa europea:
-- EN 60335-1
-- EN 60335-2-40
5
-- EN 50366
• 2004/108/EEC incluidas las enmiendas:
”Directiva relativa a la aproximación de las legislaciones
de los Estados Miembros en materia de compatibilidad
electromagnética“
4
Diseñado y fabricado según la normativa europea:
-- EN 55014-1
1
-- EN 55014-2
-- EN 61000-3-2
-- EN 61000-3-3
-- EN 61000-3-11
3
2
Fig. 5.1 C
omponentes del aparato.
Leyenda
1 Conexiones y conductos
2 Tubo drenaje agua condensada
3 Unidad exterior
4 Mando a distancia
5 Unidad interior
5.1
Mando a distancia
El mando a distancia permite utilizar el aparato.
Para que la unidad interior reciba las órdenes del mando
apropiadamente, el control remoto debe apuntar directamente a
ella, sin que exista ningún obstáculo entre ambos.
-6-
VAI 3-WN-U_ES - 05/14 - Vaillant
INTRODUCCIÓN
5.2
Características y ventajas
Especificaciones
Técnicas
Pictograma
Descripción
Bomba Calor
El equipo es reversible. Permite refrigerar o calentar las estancias según se desee.
Refrigerante R-410A
Refrigerante libre de cloro, ecológico y respetuoso con el medio ambiente con una
capacidad de transferencia mucho mayor al R 407 C o al R 22, aportando por lo tanto
niveles de COP mucho mejores.
Tecnología Inverter
El consumo se adapta a la necesidad de climatización de forma modulante, garantizando
un gasto energético muy bajo. El equipo puede funcionar bajo condiciones extremas de
temperatura.
Tecnología Inverter DC
Ahorro energético mayor a los sistemas inverter convencionales.
Filtro antipolvo.
Filtro antipolvo.
Control remoto
Mando a distancia por infrarrojos.
Función Hot Start
Arranque y paro con batería caliente que evita la impulsión de aire frío.
Función Auto Restart
Trás un corte de tensión se garantiza el rearranque automático del aparato en las
condiciones establecidas antes de la caída.
Protección de válvulas
Protege las llaves de la unidad exterior de las inclemencias del tiempo.
Antihielo
Evita el congelamiento de la unidad exterior en los meses de invierno.
Carcasa anticorrosión
Unidad exterior fabricada en acero galvanizado y materiales anticorrosión.
Resistente incluso en ambientes altamente salinos.
Tabla 5.1Características y ventajas.
ES
VAI 3-WN-U_ES - 05/14 - Vaillant
-7-
INSTRUCCIONES DE FUNCIONAMIENTO
6
Ajustes iniciales
6.1
Instalación de las pilas del mando a
distancia
Coloque dos pilas R-03 (AAA), tal como se describe a
continuación (ver figura 6.1).
NOTA:
Si después de pulsar el botón ON/OFF, no se observa
nada en la pantalla, vuelva a colocar las pilas.Sustituya
siempre las dos pilas al mismo tiempo.
i
NOTA:
Si el mando a distancia no funciona correctamente,
quite las pilas y colóquelas de nuevo transcurridos
unos minutos.
i
Extraiga las pilas si no va a utilizar el aire
acondicionado durante tiempo prolongado. Si todavía
se observa algo en la pantalla, presione el botón reset.
¡ATENCIÓN!:
Peligro de contaminación del medio ambiente por
desecho de pilas inadecuado. Cuando sustituya las
pilas del mando a distancia, deposite las pilas viejas
en contenedores adecuados. No las tire nunca a la
basura.
b
A
B
6.2
Ajustes del reloj
Ajuste el reloj de la unidad con el mando a distancia si es la
primera vez que pone en marcha la unidad o si ha cambiado
las pilas (ver figura 6.2.)
1
2
• Pulse el botón CLOCK.
1
Se produce el parpadeo de indicador de hora en la pantalla del
mando a distancia.
Figura 6.1 Instalación de las pilas del mando a distancia.
• Pulse los botones + / - para ajustar la hora deseada:
Leyenda
1 Tapa de las pilas
2Pilas
A Zona de presión para apertura de la tapa
B Compartimiento de las pilas
Al pulsar los botones + / - aumentará o disminuirá la
configuración del tiempo en 1 minuto.
• Extraiga la tapa de las pilas, presionando ligeramente en la
zona A y empujando la tapa hacia abajo.
• Pulse el botón CLOCK.
• Coloque las pilas en el mando, teniendo en cuenta la
posición de los polos positivo y negativo (se muestra en el
compartimiento de las pilas).
Al mantener los botones + / - pulsados, el tiempo aumentará o
disminuirá a gran velocidad.
El indicador de hora dejará de parpadear y el reloj comenzará a
funcionar
• Coloque nuevamente la tapa.
• Pulse el botón ON/OFF (ver figura 7.1) para comprobar que
ha colocado correctamente las pilas.
-8-
VAI 3-WN-U_ES - 05/14 - Vaillant
INSTRUCCIONES DE FUNCIONAMIENTO
7
Instrucciones de funcionamiento
7.1
Consideraciones generales de seguridad
durante el uso
¡PELIGRO de lesiones y daños personales!:
-No permita a los niños jugar con el aparato de aire
acondicionado. El aparato no deberá ser utilizado por
niños o personas discapacitadas sin supervisión. No
deje que los niños se sienten sobre la unidad interior
en ningún caso.
a
1
-No colocar ningún objeto sobre la unidad.
-No conecte el equipo si está utilizando insecticidas o
pesticidas. Podrían depositarse en la unidad y afectar
a personas alérgicas a determinadas sustancias
químicas.
2
-Evite la exposición prolongada al aire de refrigeración,
así como a una temperatura extrema en la habitación,
y no dirija el flujo de aire directamente hacia las
personas, especialmente si se trata de niños,
discapacitados o ancianos.
-No utilice la unidad para conservar alimentos, obras
de arte, equipos de precisión, plantas o animales.
3
-No cubra la rejilla de ventilación y no introduzca los
dedos u otros objetos en las entradas o salidas de aire
ni en las lamas del aparato, mientras se encuentre
en funcionamiento el aparato. La alta velocidad del
ventilador puede causar lesiones.
-Desconecte siempre la unidad antes de abrir la rejilla
de entrada. No desconecte la unidad tirando del cable
de alimentación.
Fig. 6.2 Ajustes del reloj.
Leyenda
1 Indicador de hora
2 Botones +/3 Botón CLOCK (RELOJ)
-No disponga el cable de alimentación en mazo y
tenga cuidado de no dañarlo. Una vez completada la
instalación, el cable de alimentación debe ser de fácil
acceso.
-No apriete, doble ni agujeree los conductos con
objetos puntiagudos o afilados, ni arañe la superficie
para evitar dañar las piezas de la unidad que
contengan refrigerante. Si salpicara refrigerante y le
entrara en los ojos, podría causarle lesiones oculares
de importancia.
-No tire del cable para detener el funcionamiento de la
unidad de aire acondicionado.
ES
VAI 3-WN-U_ES - 05/14 - Vaillant
-9-
INSTRUCCIONES DE FUNCIONAMIENTO
¡PELIGRO de lesiones y daños personales!:
Peligro de incendio y explosión.
a
-No ponga en funcionamiento el aire acondicionado
si está dañado. En caso de duda, consulte a su
proveedor.
7.2
Identificación de funciones
7.2.1
Botones del mando a distancia
-Conecte a tierra adecuadamente la unidad de acuerdo
con las especificaciones.
-No sitúe ninguna fuente de calor con llama en el flujo
de aire del equipo. No utilice sprays ni otros gases
inflamables cerca del equipo de aire. Puede provocar
un incendio.
-Si se detecta cualquier anomalía (por ejemplo, olor
a fuego), desconecte de inmediato la alimentación
eléctrica y póngase contacto con el distribuidor para
proceder adecuadamente. Si continúa utilizando
el aparato en condiciones anómalas, éste puede
deteriorarse y provocar un cortocircuito o un incendio.
1
-Si la fuente de alimentación está dañada, debe ser
sustituida por el fabricante, un agente de servicio
técnico o persona cualificada.
2
- Si el fusible de la unidad interior está dañado,
sustitúyalo por otro del tipo T.3.15A/250V. Si el fusible
de la unidad exterior está dañado, sustitúyalo por otro
del tipo T.25A/250V.
15
3
-El método de cableado debe estar conforme con la
norma local de conexionado.
14
4
13
5
12
6
11
7
10
8
- Para proteger la unidad, primero desconecte la
corriente alterna, y unos 30 segundos después,
interrumpa la alimentación.
-Llame al técnico especialista y asegúrese de que
se toman medidas preventivas para evitar fugas de
gas refrigerante. La fuga de refrigerante en ciertas
cantidades puede provocar la pérdida de oxígeno.
¡PELIGRO!:
Peligro de descarga eléctrica.
No manipule el equipo con las manos mojadas o
húmedas.
e
¡ATENCIÓN!:
Peligro de mal funcionamiento y averías.
- No coloque ningún cuerpo sobre la unidad exterior.
b
- 10 -
9
Fig. 7.1 Presentación de los botones.
Leyenda
1 Botón ON/OFF
2 Botónes - / +
3 Botón FAN
4 Botón I FEEL
5 Botón SLEEP
6 Botón TIMER-ON
7 Botón TIMER-OFF
8 Botón X-FAN
9 Botón LIGHT
10 Botón TURBO
11 Botón CLOCK
12 Botón TEMP
13 Botón ACTIVE IONIZER
14 Botón SWING
15 Botón MODE
VAI 3-WN-U_ES - 05/14 - Vaillant
INSTRUCCIONES DE FUNCIONAMIENTO
7.2.2
7.3
Indicadores en la pantalla
20
1
19
2
18
3
4
17
5
6
16
7
15
8
13
9
10
12
Siga las siguientes recomendaciones para la utilización del
mando a distancia:
• Durante su funcionamiento, oriente la cabeza del transmisor
de señales directamente al receptor de la unidad interior.
• Mantenga una distancia inferior a 7 m. entre el transmisor y
el receptor.
• Evite los obstáculos entre el transmisor y el receptor.
• Reduzca la distancia entre el mando y la unidad interior en
locales con lámparas fluorescentes de encendido electrónico
o teléfonos inalámbricos.
• No tire ni golpee el mando.
7.3.1
14
11
Fig. 7.2 Presentación de los indicadores.
Leyenda
1 Indicador TURBO
2 Indicador de TRANSMISIÓN
3 Indicador de FREEZE PROTECTION (Protección contra
congelación)
4 Indicador Air (Función no disponible para este modelo)
5 Indicador ACTIVE IONIZER (Ionizador)
6 Indicador X-FAN
7 Indicador de TEMPERATURA
8 Indicador TIMER
9 Indicador LOCK
10 Indicador SWING
11 Indicador TEMP
12 Indicador LIGHT
13 Indicador SLEEP
14 Indicador HEAT MODE (Modo Calefacción)
15 Indicador FAN MODE (Modo Ventilador)
16 Indicador DRY MODE (Modo Deshumidificación)
17 Indicador COOL MODE (Modo Refrigeración)
18 Indicador AUTO MODE (Modo Automático)
19 Indicador I FEEL
20 Indicador FAN SPEED
Consejos de utilización del mando a
distancia
Bloqueo del mando a distancia
Para bloquear los botones y la pantalla del mando a distancia:
• Pulse el botón - / + durante mas de dos segundos.
Se desactivan el resto de los botones.
Aparece el indicador de estado de bloqueo.
Para desactivar el bloqueo:
• Pulse nuevamente el botón - / +.
Se activan el resto de los botones.
Desaparece el indicador de estado de bloqueo.
7.3.2
Función light
Pulse el botón LIGHT durante menos de 2 segundos para
iluminar el visor de la unidad interior. Para apagarlo, pulse de
nuevo el botón LIGHT durante menos de 2 segundos.
7.4
Conexión/Desconexión del aparato
Para conectar el aparato:
• Pulse el botón ON de la unidad interior o del mando a
distancia; el aparato comenzará a funcionar.
Para desconectar el aparato:
• Pulse el botón OFF de la unidad interior o del mando a
distancia; el aparato se detendrá.
ES
VAI 3-WN-U_ES - 05/14 - Vaillant
- 11 -
INSTRUCCIONES DE FUNCIONAMIENTO
7.5
Selección del modo de funcionamiento
7.5.1
Para activarlo:
Con el aparato conectado (ver apartado 7.4):
Modo Automático (AUTO)
En el modo automático (AUTO) el aparato de aire
acondicionado selecciona de forma automática el modo de
refrigeración (COOL) o calefacción (HEAT) de acuerdo con la
temperatura ambiente existente.
• Pulse el botón MODE.
Se visualizarán las diferentes modalidades de
funcionamiento.
• En modo FRÍO la temperatura de set es de 25º C.
• En modo CALOR la temperatura de set es de 20º C.
Fig. 7.4 Modos de funcionamiento.
• Seleccione el funcionamiento en modo automático (AUTO).
3
• Pulse los botones - / + para seleccionar el ajuste de
temperatura.
Al pulsar los botones - / + aumentará o disminuirá la
configuración de la temperatura 1ºC.
Cuando el ventilador se configura en modo AUTO, la unidad
de aire acondicionado ajusta automáticamente la velocidad del
ventilador según la temperatura ambiente.
1
2
Fig. 7.3 Selección del modo Automático.
Leyenda
1 Botónes - / +
2 Botón MODE (MODO)
3 Indicador modo AUTO
- 12 -
VAI 3-WN-U_ES - 05/14 - Vaillant
INSTRUCCIONES DE FUNCIONAMIENTO
7.5.2
Modo Refrigeración (COOL)
Para activarlo:
En modo Refrigeración (COOL) la unidad de aire acondicionado
sólo permite refrigerar.
¡NOTA!:
En modo Refrigeración resulta aconsejable orientar las
rejillas horizontalmente.
i
Con el aparato conectado (ver apartado 7.4):
• Pulse el botón MODE.
Se visualizarán las diferentes modalidades de funcionamiento.
Fig. 7.6 Modos de funcionamiento.
• Seleccione el funcionamiento en modo Refrigeración
(COOL).
4
• Pulse los botones - / + para seleccionar el ajuste de
temperatura.
Al pulsar los botones - / + aumentará o disminuirá la
configuración de la temperatura 1ºC.
• Pulse el botón FAN para seleccionar la velocidad del
ventilador.
Cada vez que pulse el botón FAN la velocidad del ventilador se
modificará tal y como se muestra, ver figura 7.7.
1
3
2
Fig. 7.7 Velocidad del ventilador.
¡NOTA:
En modo Refrigeración, la utilización prolongada del
aparato en condiciones de gran humedad del aire
puede provocar la caída de gotas de agua de la rejilla
de salida.
i
Fig. 7.5 Selección modo Refrigeración.
Leyenda
1 Botónes - / +
2 Botón FAN
3 Botón MODE (MODO)
4 Indicador COOL MODE
ES
VAI 3-WN-U_ES - 05/14 - Vaillant
- 13 -
INSTRUCCIONES DE FUNCIONAMIENTO
7.5.3
Modo Deshumidificación (DRY)
Para activarlo:
En el modo Deshumidificación (DRY), el aparato de aire
acondicionado funciona eliminando la humedad del aire.
Con el aparato conectado (ver apartado 7.4):
• Pulse el botón MODE.
Se visualizarán las diferentes modalidades de funcionamiento.
3
Fig. 7.9 Modos de funcionamiento.
• Seleccione el funcionamiento en modo Deshumidificación
(DRY).
• Pulse los botones - / + para seleccionar el ajuste de
temperatura.
Al pulsar los botones - / + aumentará o disminuirá la
configuración de la temperatura 1ºC.
1
2
Cuando el ventilador se configura en modo DRY, la unidad de
aire acondicionado selecciona la velocidad baja de ventilador
para hacer mas efectivo el modo.
NOTA:
En modo Deshumidificación, la utilización prolongada del
aparato en condiciones de gran humedad del aire puede
provocar la caída de gotas de agua de la rejilla de salida.
i
Fig. 7.8 Selección modo Deshumidificador.
Leyenda
1 Botónes - / +
2 Botón MODE (MODO)
3 Indicador DRY MODE
- 14 -
VAI 3-WN-U_ES - 05/14 - Vaillant
INSTRUCCIONES DE FUNCIONAMIENTO
7.5.4
Modo Ventilador (FAN)
Para activar el modo Ventilador (FAN):
En modo Ventilador (FAN) se encuentra deshabilitada la
configuración de temperatura y la función nocturna SLEEP.
Con el aparato conectado (ver apartado 7.4):
• Pulse el botón MODE.
Se visualizarán las diferentes modalidades de funcionamiento.
3
Fig. 7.11 Modos de funcionamiento.
• Seleccione el funcionamiento en modo Ventilador (FAN).
• Pulse el botón FAN para seleccionar la velocidad del
ventilador.
Cada vez que pulse el botón FAN la velocidad del ventilador se
modificará tal y como se muestra, ver figura 7.12.
2
1
Fig. 7.12 Velocidad de ventilador.
Fig. 7.10 Selección modo Ventilador.
Leyenda
1 Botón FAN (VENTILADOR)
2 Botón MODE (MODO)
3 Indicador modo FAN
ES
VAI 3-WN-U_ES - 05/14 - Vaillant
- 15 -
INSTRUCCIONES DE FUNCIONAMIENTO
7.5.5
Modo calefacción (HEAT)
Para activarlo:
En modo Calefacción la unidad de aire acondicionado sólo
permite calentar.
Con el aparato conectado (ver apartado 7.4):
• Pulse el botón MODE.
• Se visualizarán las diferentes modalidades de funcionamiento.
Fig. 7.14 Modos de funcionamiento.
4
• Seleccione el funcionamiento en modo Calefacción (HEAT).
• Pulse los botones - / + para seleccionar el ajuste de
temperatura.
Al pulsar los botones - / + aumentará o disminuirá la
configuración de la temperatura 1ºC.
1
• Pulse el botón FAN para seleccionar la velocidad del
ventilador.
Cada vez que pulse el botón FAN la velocidad del ventilador se
modificará tal y como se muestra, ver figura 7.15.
3
2
Fig. 7.15 Velocidad de ventilador.
NOTA:
Cuando la unidad detiene el compresor por termostato,
o cuando la función de desescarche se realiza, el
ventilador permanecerá parado para evitar que que
este expulse aire frío.
i
7.6
Fig. 7.13
Selección modo Calefacción.
Leyenda
1 Botónes - / +
2 Botón FAN (VENTILADOR)
3 Botón MODE (MODO)
4 Indicador modo HEAT
Ajuste de la dirección del flujo del aire
La dirección del flujo de aire se puede ajustarse en dirección
vertical en modo HEAT (calor), y en dirección horizontal en el
modo COOL (frío).
¡PELIGRO de lesiones y daños personales!:
Evite el contacto directo del cuerpo con los potentes
flujos de aire. No exponga plantas ni animales
directamente al flujo de aire. Podrían sufrir daños.
e
ATENCIÓN:
Peligro de averías o funcionamiento incorrecto.
No abra manualmente la rejilla de salida.
b
NOTA:
Si la rejilla no funciona correctamente, detenga la
unidad un minuto y vuelva a ponerla en marcha,
realizando los ajustes pertinentes con el mando a
distancia.
i
- 16 -
VAI 3-WN-U_ES - 05/14 - Vaillant
INSTRUCCIONES DE FUNCIONAMIENTO
7.7
Selección de funciones especiales
7.7.1
Para activarla:
• Seleccione el modo de funcionamiento deseado (vea
apartado 7.5).
Función sleep
Solo los modos COOL (Refrigeración) y HEAT (Calefacción)
se pueden ajustar durante las horas nocturnas para evitar un
aumento o descenso excesivo de la temperatura.
• Pulse el botón SLEEP.
En modo COOL
Se aumenta 1ºC cada hora respecto a la temperatura
configurada durante las dos primeras horas. Alcanzado ese
punto la temperatura se mantiene durante las siguientes 5
horas, para despues volver a descender progresivamente
durante las dos siguientes horas hasta alcanzar la temperatura
configurada originalmente.
En modo HEAT
Se disminuye 1ºC cada hora respecto a la temperatura
configurada durante las dos primeras horas. Alcanzado ese
punto la temperatura se mantiene durante las siguientes 5
horas, para despues recuperar la temperatura configurada
originalmente, ascendiendo 1 ºC por hora.
2
NOTA:
Mientras la función SLEEP esté activada, la velocidad
del ventilador permanece en baja.
i
1
Fig. 7.16 Selección función SLEEP.
Leyenda
1 Botón SLEEP
2 Indicador función SLEEP
ES
VAI 3-WN-U_ES - 05/14 - Vaillant
- 17 -
INSTRUCCIONES DE FUNCIONAMIENTO
7.7.2
Función timer on/off (Conexión/
desconexión mediante temporizador)
El aparato se puede conectar/desconectar mediante
temporizador.
Para programar la conexión de la unidad:
• Con la unidad apagada, pulse el botón TIMER ON. El
indicador TIMER ON comienza a parpadear. Programe
la hora de arranque deseada de la unidad pulsando los
botones - / +. Vuelva a pulsar el boton TIMER ON para fijar
la hora.
Para programar la desconexión de la unidad:
• Con la unidad encendida, pulse el botón TIMER OFF dos
veces. El indicador TIMER OFF comienza a parpadear.
Programe la hora de desconexión deseada de la unidad
pulsando los botones - / +. Vuelva a pulsar el boton TIMER
OFF para fijar la hora.
1
Para cancelarlo:
• Pulse el botón TIMER ON o TIMER OFF de nuevo.
NOTA:
Función REPEAT disponible. Si no se cancela la
programación, esta se repetira diariamente.
i
2
NOTA:
Ajuste el reloj correctamente antes de poner en
funcionamiento el temporizador.
i
NOTA:
Reinicie la configuración del tiempo tras la sustitución
de las pilas o tras una posible caída de tensión.
i
3
4
Fig. 7.17 Selección de la función TIMER.
Leyenda
1 Indicador función TIMER ON/OFF
2 Botones - / + (aumentar/disminuir)
3 Botón TIMER ON
4 Botón TIMER OFF
- 18 -
VAI 3-WN-U_ES - 05/14 - Vaillant
INSTRUCCIONES DE FUNCIONAMIENTO
7.7.3
Función turbo
7.7.4
Función X-fan
Utilice la función TURBO cuando necesite mayor potencia de
refrigeración (modo Cool) o calefacción (modo Heat, sólo en
unidades inverter).
1
1
2
2
Fig. 7.19 Fig. 7.18 Selección de la función TURBO.
Leyenda
1 Indicador función TURBO
2 Botón TURBO
Active y desactive la función TURBO de la siguiente manera:
• Pulse el botón TURBO durante menos de dos segundos.
Selección de la función X-FAN.
Leyenda
1 Indicador función X-FAN
2 Botón X-FAN
Al pulsar el botón “X-Fan” tanto en modo COOL o DRY, el
indicador en el visor del mando a distancia se iluminará y el
ventilador de la unidad interior se mantendrá en funcionamiento
durante unos 2 minutos aproximadamente, incluso apagando
o programando el apagado de la unidad. Una vez transcurrido
este periodo de tiempo, la unidad se apagará automáticamente,
y el indicador de modo COOL en la unidad interior parpadeará
cada 10 segundos.
Esto provoca que la humedad en el interior de la unidad sea
expulsada, manteniéndola seca y evitando la corrosión de sus
componentes y la aparición de bacterias.
La función X-Fan no está disponible en modo AUTO, FAN o
HEAT.
ES
VAI 3-WN-U_ES - 05/14 - Vaillant
- 19 -
INSTRUCCIONES DE FUNCIONAMIENTO
7.7.5
Función Temp
7.7.6
Función I Feel
2
1
1
2
Fig. 7.20
Selección de la función TEMP.
Fig. 7.21
Selección de la función I FEEL.
Leyenda
1 Indicador función TEMP
2 Botón TEMP
Leyenda
1 Botón I FEEL
2 Indicador función I FEEL
Esta función muestra la temperatura programada y la
temperatura ambiente en la pantalla de la unidad interior.
Pulse este botón para encender la función I FEEL.
Al pulsar el botón TEMP, se mostrará:
Temperatura programada
Temperatura ambiente
El sensor en el mando a distancia detectará la temperatura de
su entorno y transmitirá la señal de vuelta a la unidad interior,
ajustando el volumen del flujo de aire y la temperatura en
consecuencia para proporcionar una temperatura óptima y al
mismo tiempo ahorrar energía.
Pulse este botón de nuevo para cancelar la función I FEEL.
Temperatura ambiente en el exterior
(No disponible para este modelo)
- 20 -
VAI 3-WN-U_ES - 05/14 - Vaillant
INSTRUCCIONES DE FUNCIONAMIENTO
7.7.7
Función Active Ionizer (Ionizador)
7.7.8
Función Freeze Protection (Protección
contra congelación)
1
1
4
2
3
2
Fig. 7.21
Selección de la función ACTIVE IONIZER.
Leyenda
1 Indicador función X-FAN
2 Botón X-FAN
aparece en la pantalla del mando a distancia cuando se
pulsa el botón ACTIVE IONIZER cuatro veces consecutivas.
Esta función purifica el aire de una habitación mediante la
carga eléctrica de las moléculas del aire, creando iones
negativos por medio de la electricidad. Un ion es una partícula
que se carga, ya sea positiva o negativamente. Los opuestos
se atraen, por lo que los iones negativos inundan el ambiente
y buscan partículas cargadas positivamente, como el polvo,
bacterias, polen, humo y muchos otros alérgenos.
Fig. 7.22
Selección de la función FREEZE PROTECTION.
Leyenda
1 Indicador función FREEZE PROTECTION
2 Botón CLOCK
3 Botón TEMP
4 Indicador modo HEAT
Utilice la función FREEZE PROTECTION para ajustar
automáticamente la temperatura a 8 º C en modo calefacción.
Para activar esta función: Presione la tecla TEMP y CLOCK
simultáneamente durante más de 2 segundos. Repita el
procedimiento para desactivarla.
Pulse el botón de nuevo para desactivar esta funcion.
ES
VAI 3-WN-U_ES - 05/14 - Vaillant
- 21 -
INSTRUCCIONES DE FUNCIONAMIENTO
7.8
Indicadores en la unidad interior
2
1
Fig. 7.21
3
4
5
Presentación de los indicadores.
Leyenda
1 Indicador HEATING (Calefacción)
2 Indicador COOLING (Refrigeración)
3 Indicador de TEMPERATURA
4 Indicador de ON-OFF
5 Indicador de DESESCARCHE
7.9
Funcionamiento de emergencia
Use esta función únicamente cuando el mando a distancia esté
roto o extraviado.
Para la activación:
• Pulse el interruptor de funcionamiento de emergencia.
• Se escuchará un pitido indicativo de que la función se ha
puesto en funcionamiento.
Fig 7.22 Interruptor de funcionamiento de emergencia.
Secuencia operativa:
• Al pulsar el botón por primera vez, la unidad accederá al
modo Auto.
• Al pulsar el botón por seguda vez, la unidad se apagará.
NOTA:
Durante el funcionamiento de emergencia, la unidad
funciona en modo AUTO por defecto.
i
- 22 -
VAI 3-WN-U_ES - 05/14 - Vaillant
MANTENIMIENTO
8
8.1
Consejos para el ahorro energético
Temperatura ambiente adecuada
Fije la temperatura ambiente en un valor adecuado para
garantizar el bienestar físico, el confort y, en cualquier caso,
el cumplimiento de la normativa legal. Cada grado por encima
de ese valor implica un aumento importante del consumo
energético.
Adecue la temperatura al uso concreto que haga de la
habitación: la temperatura de las estancias vacías y de los
dormitorios no es necesario que sea la misma que la de la
estancia principal.
8.2
Eliminar fuentes de calor o de frío
En caso de existir alguna fuente de calor (en modo de
refrigeración) o de frío (en modo de calefacción) que pueda ser
eliminada, hágalo (por ejemplo, una ventana o una puerta que
no están correctamente cerradas). De este manera, el aparato
consumirá menos energía.
8.3
Funcionamiento en modo calefacción
(Bomba de calor)
Su aparato, durante el funcionamiento en modo de calefacción,
opera como bomba de calor, es decir, toma calor del exterior
(por la unidad exterior) y lo expulsa al interior (por la unidad
interior). Sin embargo, una calefacción convencional produce
calor única y exclusivamente consumiendo energía. Por este
motivo, calentar una estancia mediante una bomba de calor
es mucho más económico que hacerlo mediante calefacción
convencional (radiadores, calefactores, calderas, etc.).
8.4
Temperatura ambiente durante las
ausencias
En modo de calefacción, se consigue un ahorro económico
manteniendo una temperatura ambiente de unos 5ºC inferior a
la temperatura de régimen normal. Una disminución superior a
esos 5º C no supone ahorros de energía adicionales, ya que se
necesita una mayor potencia de calefacción para los períodos
sucesivos de funcionamiento a régimen normal.
Únicamente vale la pena disminuir aún más la temperatura
en caso de ausencias prolongadas, por ejemplo durante las
vacaciones.
Garantice la protección contra el congelamiento durante los
meses de invierno.
8.5
Calefacción uniforme
A menudo, en una casa, se calienta una sola estancia. Además
de las superficies que delimitan ese ambiente, es decir,
las paredes, las puertas, las ventanas, el techo y el suelo,
se calientan también de forma incontrolada las estancias
adyacentes: se pierde energía térmica de forma involuntaria.
Resulta por tanto imposible calentar la habitación de forma
adecuada y sentirá una desagradable sensación de frío (como
ocurre cuando se dejan las puertas abiertas que separan zonas
calentadas y zonas no calentadas de forma limitada).
Esto constituye un falso ahorro: la calefacción está en
funcionamiento, y sin embargo, la temperatura ambiente
no es agradable. Se obtiene mayor confort y un modo de
funcionamiento más sensato de la calefacción calentando
todas las estancias de una vivienda de una manera uniforme
teniendo en cuenta la utilización que se de a cada estancia (la
temperatura de las estancias vacías y de los dormitorios no es
necesario que sea la misma que la de la estancia principal).
8.6
Reducción del consumo durante las
horas de sueño (Función Sleep)
Su aparato dispone de la función SLEEP, la cual permite que
la temperatura, durante las horas de sueño, se modifique
automáticamente respecto a los valores predeterminados
(en modo calefacción, la temperatura disminuye ligeramente;
en modo refrigeración la temperatura aumenta ligeramente).
De esta manera, además de conseguir un mayor confort, se
consigue una disminución del consumo eléctrico. Para más
detalles acerca de la función SLEEP, vea el apartado 7.7.1).
8.7
Reducción del consumo programando
el tiempo de funcionamiento (Función
Timer)
Mediante la función TIMER, puede ajustar la hora de
comienzo de funcionamiento de su aparato. Por tanto, es
posible programar el funcionamiento del aparato para que
comience a funcionar sólo cuando es necesario y conseguir un
funcionamiento económico.
8.8
Mantenimiento adecuado del aparato
Un aparato en perfecto estado funciona de forma eficiente,
aprovechando al máximo la energía que consume. Asegúrese
de que su aparato está correctamente mantenido (para más
detalles, vea el capítulo 10). En especial, tenga cuidado de
mantener limpios los filtros y de no obstaculizar las entradas y
salidas de aire, tanto de la unidad interior como de la exterior.
ES
VAI 3-WN-U_ES - 05/14 - Vaillant
- 23 -
MANTENIMIENTO
9
Solución de averías
A continuación se detallan una serie de problemas junto con
las causas que lo han podido producir y posibles soluciones al
problema, ver tabla 9.1.
Si con estas soluciones no se resuelve el problema póngase
en contacto con su instalador de confianza o llame al servicio
Vaillant de atención al cliente más próximo.
SÍNTOMA
POSIBLES CAUSA
SOLUCIÓN
El sistema no se vuelve a poner
en marcha inmediatamente
Tras una parada el sistema no se pone
en marcha hasta que han transcurridos
aproximadamente 3 minutos para proteger el
sistema.
Espere 3 minutos antes de volver a poner en
marcha la unidad
Cuando se extrae y vuelve a introducir el
enchufe del cable en la base de corriente
el circuito de protección se activará durante
3 minutos para proteger el aparato de aire
acondicionado.
Espere 3 minutos antes de introducir el enchufe
y poner de nuevo en marcha la unidad
El enchufe de alimentación ha sido extraído
Introduzca el enchufe y ponga el selector en I"
(inicio) para poner en marcha la unidad
Corte de suministro eléctrico
Restablezca la alimentación
El fusible se ha fundido
Sustituya el fusible. Utilice únicamente los
fusibles adecuados a cada modelo. No use
alambre u otro material para sustituir el fusible.
Podrían producirse incendios
Puertas y/o ventanas abiertas
Cierre las puertas y/o ventanas
Presencia de una fuente de calor (por ejemplo
mucha gente en la sala)
Si es posible, elimine la fuente de calor.
El termostato está ajustado a una temperatura
demasiado alta en modo Refrigeración o
demasiado baja en modo Calefacción
Ajuste la temperatura adecuadamente
Presencia de un obstáculo delante de la
entrada o salida de aire
Retirar el obstáculo para proporcionar una
buena circulación del aire.
La temperatura ambiente no ha alcanzado el
nivel designado
Espere unos momentos
Filtro de aire sucio u obstruido
Limpie el filtro de aire (el filtro de aire debe
limpiarse cada 15 días)
Entra luz solar directa por la ventana durante el
funcionamiento en refrigeración
Utilice una cortina para proteger el aparato de
aire acondicionado
Durante el funcionamiento o parada de la
unidad puede percibirse un "borboteo". Durante
los Primeros 2-3 minutos iniciales este sonido
es más perceptible
Es un ruido normal en un aparato de aire
acondicionado. (el ruido es generado por el flujo
de refrigerante en la unidad).
Se oye un chasquido durante el funcionamiento
Es un ruido normal en un aparato de aire
acondicionado. Este ruido lo generan los
cambios de temperatura que provocan la
dilatación o contracción de la caja
Si se produce un fuerte ruido del flujo de aire
durante el funcionamiento de la unidad puede
significar que los filtros del aire estén sucios.
Limpie los filtros del aire correctamente
Se generan olores
El sistema circula olores del aire interior
como pueden ser los olores de cigarros o del
mobiliario.
No es necesario que haga nada al respecto
Se genera neblina o vapor procedente de la
unidad
En modalidad refrigeración y deshumidificación
la unidad interior puede generar neblina. La
causa es el rápido enfriamiento del aire interior.
No es necesario que haga nada al respecto
El sistema no funciona en absoluto (la
ventilación no se pone en funcionamiento)
Refrigeración o calefacción insuficiente
Se perciben ruidos
Tabla 9.1 Diagnóstico de fallos.
- 24 -
VAI 3-WN-U_ES - 05/14 - Vaillant
MANTENIMIENTO
10 Mantenimiento
¡PELIGRO!:
Peligro de descarga eléctrica.
Desconecte el aparato y el interruptor magnetotérmico
antes de proceder al mantenimiento del aparato.
Evitará el riesgo de lesiones.
e
¡PELIGRO!:
Peligro de descarga eléctrica.
No limpie con agua el aparato.
e
¡ATENCIÓN!:
Peligro de averías o funcionamiento incorrecto.
No utilice gasolina, bencina, disolventes ni purgantes
para limpiar la unidad. Podría dañar su superficie.
b
¡ATENCIÓN!:
El uso de agua caliente a más de 40º C puede
provocar decoloración o deformaciones.
b
10.1 Limpieza del mando a distancia
• Limpie el mando a distancia con un paño seco. No limpie el
mando a distancia con agua.
• No utilice limpiacristales o paños empapados en productos
químicos.
10.2 Limpieza de la unidad interior
• Limpie la parte exterior de la unidad con un trapo suave y
limpio.
• En caso de manchas difíciles, utilice un detergente
neutro diluido en agua. Elimine el agua del paño antes de
proceder a la limpieza. Elimine el detergente totalmente.
10.3 Limpieza de los filtros de aire
El filtro del aire elimina el polvo que absorbe del local la unidad
interior.
¡ATENCIÓN!:
Peligro de averías o funcionamiento incorrecto.
No acople sistemas perfumadores, antiolores, etc.
en el filtro o en el retorno del aire interior.Esto puede
dañar y ensuciar la batería evaporadora. En caso
necesario, instale dichos sistemas en la salida del
aparato para que actúen únicamente cuando el
ventilador esté funcionando.
b
10.4 Limpieza de la unidad exterior
¡ATENCIÓN!:
Utilice medios de protección personal adecuados
(casco, guantes, botas de seguridad y gafas de
seguridad).
b
• Frote con un paño seco la parte exterior de la unidad.
• Elimine el polvo de la superficie de entrada de aire, si
existiera.
• Limpie periódicamente la batería del condensador con
un cepillo suave cuando la unidad este emplazada en un
ambiente polvoriento.
• Compruebe ocasionalmente la base de la unidad exterior.
PELIGRO DE LESIONES Y DAÑOS PERSONALES:
Si la base está dañada o deteriorada, el aparato podría
caerse y causar daños personales o materiales.
e
PELIGRO DE LESIONES Y DAÑOS PERSONALES:
No desmonte la salida de la unidad exterior. Puede
resultar peligroso exponer el ventilador.
e
NOTA:
Le recomendamos ponerse en contacto con un
especialista en aires acondicionados de confianza
o contratar el servicio de mantenimiento preventivo
con el Servicio Técnico Oficial de Vaillant. Le ayudará
a prolongar la vida de su equipo y a mejorar su
rendimiento.
i
Si el filtro está obstruido la eficacia de la unidad disminuirá, el
compresor sufrirá daños y la batería de la unidad interior puede
congelarse.
Limpie el filtro del aire regularmente para evitar que esto
suceda. Para ello:
• Empuje la pestaña central del filtro ligeramente hasta que
alcance el tope y extraiga el filtro empujando hacia abajo.
• Limpie el polvo o la suciedad presente en los filtros,
utilizando una aspiradora o limpiándolos con agua fría.
• Asegúrese de que los filtros estén completamente secos
antes de volver a colocarlos en la unidad.
• Coloque el filtro correctamente y asegúrese de que queda
ajustado totalmente detrás del tope. La incorrecta instalación
de los filtros derecho e izquierdo puede producir defectos de
funcionamiento.
ES
VAI 3-WN-U_ES - 05/14 - Vaillant
- 25 -
MANTENIMIENTO
11 Almacenamiento durante un largo
periodo de tiempo
Si no tiene previsto utilizar la unidad durante un periodo de
tiempo:
• Ponga el ventilador en funcionamiento a alta velocidad en el
modo COOL durante dos o tres horas a una temperatura de
30ºC para evitar la aparición de moho o malos olores.
• Detenga la unidad y desconecte el interruptor
magnetotérmico.
• Limpie los filtros de aire.
• Limpie la unidad exterior.
• Saque las pilas del mando a distancia.
Antes de volver a poner la unidad en marcha:
• Coloque las pilas del mando a distancia.
• Asegúrese de acoplar los filtros derecho e izquierdo antes
de ponerlo en funcionamiento.
• Compruebe que los filtros de aire no estén bloqueados.
• Compruebe que la salida y la entrada de aire no estén
bloqueadas.
• Compruebe que el interruptor magnetotérmico esté
conectado.
PELIGRO DE LESIONES Y DAÑOS PERSONALES:
En caso de que el equipo se retire y se reinstale
posteriormente, asegúrese de que el aparato es
debidamente instalado por personal debidamente
cualificado (ver manual del instalador). En caso
contrario se podrían generar fugas de agua, fugas de
refrigerante, cortocircuitos o incluso incendios.
e
Fig. 12.1 Símbolo de reciclaje.
Su producto está marcado con el símbolo de reciclaje (ver
figura 12.1), lo que significa que debe tener en cuenta las
siguientes observaciones cuando lo deseche:
• No mezcle el aparato con el resto de residuos domésticos no
clasificados.
• Lleve a cabo la eliminación del aparato de acuerdo con la
normativa local y nacional pertinente, de forma correcta y
respetuosa con el medio ambiente.
• Entregue el aparato a una empresa de tratamiento de
residuos autorizada por las autoridades locales para su
transporte a una planta de tratamiento adecuada.
• Si la retirada del producto es debida a la sustitución del
producto por otro nuevo para uso análogo, entregue el
producto retirado al distribuidor del nuevo aparato para que
realice dicha gestión.
• Contacte con las autoridades locales para obtener más
información.
12 Retirada de servicio del producto
PELIGRO DE LESIONES Y DAÑOS PERSONALES:
Cuando deseche el aparato, asegúrese de tomar las
precauciones adecuadas. Para ello, siga los pasos
inversos a los descritos en el manual de instalación
y utilice las herramientas y medios de protección
adecuados.
El desmontaje debe realizarlo personas cualificadas y
con los conocimientos técnicos necesarios.
a
ATENCIÓN:
Peligro de dañar el medio ambiente al desechar el
aparato. Para impedirlo, observe las indicaciones que
se describen en este apartado.
b
ATENCIÓN:
Los sistema de acondicionamiento de aire contienen
refrigerantes que deben ser desechados de manera
especializada. Los materiales útiles que contiene el
acondicionador de aire puede ser reciclados.
b
- 26 -
VAI 3-WN-U_ES - 05/14 - Vaillant
Upute za rukovanje
Za korisnike
Upute za rukovanje
VAI 3-025 WN
VAI 3-035 WN
VAI 3-050 WN
Zidni klima uređaji
HR
PRIBOR KOJI SE NALAZI U OPSEGU ISPORUKE
Uređaji se isporučuju sa sljedećim stavkama
Pribor
Količina
Unutarnja jedinica
Unutarnja jedinica
1
Daljinski upravljač
1
Daljinski upravljač nosač
1
Baterije
2
Maticu
5
Vijci
2
Ploča za montažu
1
Dodatna izolacija cijevi
1
Dokumentacija
Upute za rad
Ime ploča + EAN 128 (IU)
5 Kljuc naljepnice
5 serijski brojevi
Pribor koji se nalazi u opsegu isporuke.
SADRŽAJ
UVOD
1
1.1
1.2
2
3
4
5
5.1
5.2
Vaša sigurnost................................................... 5
Simboli koji se koriste......................................... 5
Pravilna upotreba jedinice................................... 5
Radni rasponi uređaja...................................... 5
Identifikacija uređaja ....................................... 5
Izjava o sukladnosti.......................................... 6
Opis jedinice...................................................... 6
Daljinski upravljač............................................... 6
Značajke i prednosti............................................ 7
UPUTE ZA RUKOVANJE
6
6.1
6.2
7
7.1
7.2
7.2.1
7.2.2
7.3
7.3.1
7.3.2
7.4
7.5
7.5.1
7.5.2
7.5.3
7.5.4
7.5.5
7.6
7.7
7.7.1
7.7.2
7.7.3
7.7.4
7.7.5
7.7.6
7.7.7
7.7.8
7.8
7.9
Pokretanje uređaja............................................ 8
Stavljanje baterija u daljinski upravljač............... 8
Namještanje sata................................................ 8
Upute za rukovanje........................................... 9
Opće sigurnosne napomene kojih se treba
pridržavati tijekom upotrebe................................ 9
Funkcije............................................................... 10
Tipke daljinskog upravljača................................. 10
Prikazi na zaslonu............................................... 11
Savjeti za korištenje daljinskog upravljača......... 11
Zaključavanje daljinskog upravljača.................... 11
Funkcija LIGHT (svjetlo)...................................... 11
Uključivanje i isključivanje uređaja...................... 11
Odabir režima rada............................................. 12
Automatski režim rada (AUTO)........................... 12
Hlađenje (COOL)................................................ 13
Odvlaživanje (DRY)............................................. 14
Ventilacija (FAN).................................................. 15
Grijanje (HEAT)................................................... 16
Namještanje smjera protoka zraka..................... 16
Odabir posebnih funkcija.................................... 17
Funkcija SLEEP (noćna funkcija)........................ 17
Funkcija TIMER ON/OFF (uključivanje/isključivanje
uz pomoć vremenske sklopke)........................... 18
Funkcija TURBO................................................. 19
Funkcija X-FAN................................................... 19
Funkcija Temp..................................................... 20
I Feel funkcija...................................................... 20
Aktivni ionizator funkcija...................................... 21
Funkcija zaštite od smrzavanja........................... 21
Indikatori unutarnje jedinice................................ 22
Upravljanje u slučaju nužde................................ 22
ODRŽAVANJE
8
8.1
8.2
8.3
8.4
8.5
8.6
8.7
8.8
9
10
10.1
10.2
10.3
10.4
11
12
Savjeti za uštedu energije................................ 23
Prikladna unutarnja temperatura......................... 23
Uklanjanje izvora topline ili hladnoće.................. 23
Rad u režimu grijanja (toplinska crpka).............. 23
Sobna temperatura u odsutnosti......................... 23
Ravnomjerno grijanje.......................................... 23
Smanjenje potrošnje noću (funkcija SLEEP)...... 23
Smanjenje potrošnje s funkcijom programiranog
vremena rada (funkcija TIMER).......................... 23
Ispravno održavanje uređaja............................... 23
Otklanjanje kvarova.......................................... 24
Održavanje......................................................... 25
Čišćenje daljinskog upravljača............................ 25
Čišćenje unutarnje jedinice................................. 25
Čišćenje filtra za zrak.......................................... 25
Čišćenje vanjske jedinice.................................... 25
Skladištenje tijekom dužeg razdoblja............. 26
Zbrinjavanje proizvoda..................................... 26
-3-
-4-
UVOD
1
Vaša sigurnost
1.1
Simboli koji se koriste
2
Radni rasponi uređaja
Ovaj je uređaj konstruiran za rad unutar temperaturnih raspona
prikazanih na slici 2.1. Osigurajte da ne dođe do prekoračenja
ovih raspona.
OPASNOST!:
Izravna opasnost po život i zdravlje.
a
e
b
i
Hlađenje
OPASNOST!:
Opasnost od električnog udara.
Vani
OPREZ:
Potencijalno opasna situacija za proizvod i okoliš.
Grijanje
NAPOMEMA:
Korisne informacije i napomene.
Pravilna upotreba jedinice
Ova je jedinica konstruirana i proizvedena isključivo u svrhu
hlađenje i grijanja u korištenim stambenim i poslovnim
prostorijama, stoga je korištenje ovog uređaja u druge svrhe
u kućanstvima ili industriji isključiva odgovornost osoba koje
uređaj specificiraju, instaliraju ili koriste na taj način.
Prije rukovanja, instalacije, pokretanja, korištenja ili radova na
održavanju, osobe određene za provedbu tih zadaća moraju
se upoznati sa svim uputama i preporukama iz priručnika za
instalaciju uređaja.
NAPOMEMA:
Čuvajte priručnike tijekom životnog vijeka trajanja
uređaja.
i
NAPOMEMA:
Informacije vezane za ovaj uređaj podijeljene su na
dva priručnika: priručnik za instalaciju i priručnik za
korisnika,
i
Unutra
1.2
Slika 2.1Raspon rada uređaja.
Legenda
D.B. Temperatura mjerena metodom suhe cijevi
Radni kapacitet uređaja mijenja se ovisno o temperature
vanjske jedinice.
3
Identifikacija uređaja
Ovaj priručnik vrijedi za serije sa split uređajima. Točan model
vaše jedinice pronaći ćete na natpisnoj pločici.
Natpisne pločice nalaze se na vanjskim i unutarnjim jedinicama.
NAPOMEMA:
Oprema sadrži rashladnog sredstvo R-410A. Ne
ispuštajte R-410A u atmosferu budući da je R-410A
fluorirani staklenički plin iz Kyoto protokola s
potencijalom za zagrijavanje klime (GWP) = 1975.
i
NAPOMEMA:
Osoblje zaduženo za radove na održavanju, uključujući
i rukovanje rashladnim sredstvom mora imati potrebna
ovlaštenja kako bi zadovoljili sve nacionalne i
međunarodne propise.
i
HR
VAI 3-WN-U_HR - 05/14 - Vaillant
-5-
UVOD
4
Izjava o sukladnosti
5
Opis jedinice
Proizvođač izjavljuje da je ovaj uređaj konstruiran i proizveden
u skladu s važećim standardima vezanim za dobivanje CE
oznake.
Ova se jedinica sastoji od sljedećih elemenata:
Ova vrsta uređaja zadovoljava bitne zahtjeve relevantnih
direktiva i standarda:
-- Vanjska jedinica.
●● 2006/95/EEZ uključujući i njezine izmjene i dopune:
”Direktiva o usklađivanju zakonodavstava država članica
o električnoj opremi namijenjenoj upotrebi u određenim
naponskim granicama”
-- Unutarnja jedinica.
-- Daljinski upravljač.
-- Spojevi i pribor.
Na slici 5.1 prikazane su komponente jedinice.
Uređaj je konstruiran i proizveden sukladno sljedećim
europskim standardima:
-- EN 60335-1
5
-- EN 60335-2-40
-- EN 50366
●● 2004/108/EEZ uključujući i njezine izmjene i dopune:
4
”Direktiva o usklađivanju zakona država članica koji se
odnose na elektromagnetsku kompatibilnost”
Uređaj je konstruiran i proizveden sukladno sljedećim
europskim standardima:
1
-- EN 55014-1
-- EN 55014-2
-- EN 61000-3-2
-- EN 61000-3-3
-- EN 61000-3-11
3
2
Slika 5.1 Komponente jedinice.
Legenda
1 Priključci i cijevi
2 Crijevo za odvod kondenzata
3 Vanjska jedinica
4 Daljinski upravljač
5 Unutarnja jedinica
5.1
Daljinski upravljač
Daljinski upravljač omogućava da se funkcije jedinice namjesto
po želji., Kako bi jedinica ispravno primala komande, daljinski
upravljač mora biti usmjeren izravno prema unutarnjoj jedinici,
bez ikakvih prepreka između.
-6-
VAI 3-WN-U_HR - 05/14 - Vaillant
UVOD
5.2
Značajke i prednosti
Tehničke specifikacije
Simbol
Opis
Toplinska crpka
Rashladni sustav je reverzibilan, što znači da se može koristiti ili za hlađenje ili za grijanje
prostorije, po želji.
Rashladno sredstvo
R-410A
Rashladno sredstvo bez klora, ekološko, nije štetno za ozonski omotač, bolje
učinkovitosti od R 407 C ili R22, osigurava znatno bolje COP razine.
Inverterska DC
tehnologija
Veće uštede energije nego kod konvencionalnih inverterskih sustava.
Inverterska tehnologija
Potrošnja je kroz regulaciju prilagođena klimatizacijskim zahtjevima te tako jamči vrlo
niske troškove za energiju. Oprema može raditi pod ekstremnim temperaturnim uvjetima
(vidi stranicu 3).
Filtar za prašinu
Filtar koji eliminira većinu prljavštine i prašine koja cirkulira kroz jedinicu.
Daljinski upravljač
Daljinski upravljač: infracrveni uređaj koji omogućava daljinski pristup i upravljanje
funkcijama jedinice
Hot start funkcija
Unutarnja jedinica ventilatora radi samo nakon što zavojnica unutarnje jedinice dosegne
određenu temperaturu. Time se eliminiraju hladne faze tijekom ciklusa grijanja
Auto restart funkcija
Nakon ispada struje se pomoću ove funkcije uređaj automatski pokreće s istim
postavkama koje su bile posljednje namještene.
Zaštita ventila
Štiti ventile od utjecaja li posljedica lošeg vremena
Zaštita od smrzavanja
Sve toplinske crpke imaju tendenciju da se smrznu tijekom hladnijih zimskih mjeseci,
a funkcija zaštite od smrzavanja automatski odleđuje vanjsku jedinicu, ukoliko je to
potrebno
Nehrđajuće kućište
Vanjska jedinica od galvaniziranog čelika i nehrđajućih materijala. Otporna i u
područjima s visokim sadržajem soli.
Tablica 5.1 Značajke i prednosti.
HR
VAI 3-WN-U_HR - 05/14 - Vaillant
-7-
UPUTE ZA RUKOVANJE
6
Pokretanje uređaja
6.1
Stavljanje baterija u daljinski upravljač
Stavite u daljinski upravljač dvije baterije (2 baterije veličine
AAA), kao što je niže opisano (vidi sliku 6.1).
NAPOMENA:
Ako se nakon upotrebe tipke ON/OFF ništa ne pokaže
na pokazivaču (displeju), stavite nove ili zamijenite
baterije.
Zamijenite uvijek obje baterije istovremeno.
i
NAPOMENA:
Ako daljinski upravljač tijekom rada ne funkcionira
ispravno, izvadite baterije i vratite ih nakon nekoliko
minuta.
i
Ako se jedinica neće koristiti tijekom dužeg raz-doblja,
izvadite baterije iz daljinskog upravljača. Ako se i
nadalje nešto prikazuje na pokazivaču, samo pritisnite
tipku RESET.
A
B
OPREZ:
Opasnost od zagađenja okoliša uslijed nestručnog
zbrinjavanja baterija. Kada mijenjate baterije daljinskog
upravljača, zbrinite baterije na ispravan način. Nikada
ih nemojte bacati u kućni otpad.
b
6.2
1
Namještanje sata
Koristite daljinski upravljač za namještanje sata uređaja kada se
uređaj koristi po prvi puta ili nakon zamjene baterija, vidi sliku
6.2.
2
1
Slika 6.1 Stavljanje baterija u daljinski upravljač.
Legenda
1 Poklopac za baterije
2Baterije
A Dio na koji treba pritisnuti kako bi se otvorio poklopac
B Pretinac za baterije
●● Pritisnite tipku CLOCK.
Prikaz vremena počinje treperiti na pokazivaču daljinskog
upravljača.
●● Koristite tipke + / - kako biste namjestili željeno vrijeme:
Upotrebom tipki + / - vrijeme može ispraviti prema gore ili dolje
u koracima od po 1 minutu.
●● Skinite poklopac za baterije tako što lagano pritisnete na
područje A i lagano ga povucite prema dolje.
Ako tipke + / - držite pritisnutima, vrijeme se može brzo
namjestiti prema dolje ili gore.
●● Stavite baterije u daljinski upravljač, vodeći pritom računa o
uspravnom položaju pozitivnog i negativnog pola (vidi nacrt u
pretincu za baterije).
Prikaz vremena će prestati treperiti i sat počinje raditi
●● Vratite poklopac na mjesto.
●● Pritisnite tipku ON/OFF (vidi sliku 7.1) kako biste provjerili
jesu li baterije ispravno stavljene.
-8-
VAI 3-WN-U_HR - 05/14 - Vaillant
UPUTE ZA RUKOVANJE
7
Upute za rukovanje
7.1
Opće sigurnosne napomene kojih se
treba pridržavati tijekom upotrebe
OPASNOST od ozljeda i fizičkog oštećenja!:
-Ne dopustite da se djeca igraju klima-uređajem.Uređaj
nije namijenjen da ga koriste djeca ili nemoćne osobe
bez nadzora. Nipošto se ne smije sjediti na vanjskoj
jedinici.
a
1
-Ne stavljajte predmete na uređaj.
-Ne koristite uređaj dok se koriste insekticidi ili pesticide
jer bi se mogli taložiti u klima-uređaju i ugroziti zdravlje
osoba koje alergično reagiraju na određene kemijske
supstancije.
2
-Izbjegavajte duže, izravno izlaganje hladnom zraku ili
ekstremne temperature u prostoriji i ne usmjeravajte
zrak izravno u osobe, pogotovo ne u djecu,nemoćne ili
starije osobe.
-Ne koristite uređaj za konzerviranje namirnica,
umjetnina, preciznog alata, biljaka ili životinja.
-Ne pokrivajte rešetke ventilatora i ne gurajte prste niti
druge predmete u otvore za ulaz/izlaz zraka ili lamele
za usmjeravanje zraka, dok uređaj radi. Veliki broj
okretaja ventilatora može izazvati ozljede.
3
-Ne zaboravite izvući utikač jedinice iz struje prije
otvaranja ulazne rešetke. Utikač nikad nemojte izvlačiti
za strujni kabel.
-Strujni kabel nemojte ostavljati namotan u klupko i
pazite da ga ne oštetite. Strujni utikač mora biti lako
dostupan nakon instalacije.
Slika 6.2 Namještanje sata.
Legenda
1 prikaz vremena
2 tipke +/3 tipka CLOCK
-Nemojte oštetiti dijelove uređaja koji sadrže rashladno
sredstvo, npr. bušenjem vodova klimauređaja oštrim ili
šiljatim predmetima, gnječenjem ili savijanjem cijevi te
struganjem površinskog sloja. Ako rashladno sredstvo
iscuri van i dospije u vaše oči, može izazvati teške
ozljede očiju. Odmah zatražite liječničku pomoć.
-Ne prekidajte rad klima-uređaja povlačenjem za strujni
kabel.
HR
VAI 3-WN-U_HR - 05/14 - Vaillant
-9-
UPUTE ZA RUKOVANJE
OPASNOST od ozljeda i fizičkog oštećenja!:
Opasnost od požara i eksplozije.
a
-Oštećeni klima-uređaji ne smiju se puštati u pogon.
Ukoliko ste u nedoumici, posavjetujte se sa svojim
dobavljačem.
7.2
Funkcije
7.2.1
Tipke daljinskog upravljača
-Klima-uređaj mora biti ispravno uzemljen u skladu sa
specifikacijama.
-Ne postavljajte izvore topline s plamenom u opremu
za protok zraka . Ne rabite sprejeve ili druge zapaljive
plinove u blizini klima-uređaja jer to može uzrokovati
vatru.
-U slučaju da primijetite bilo kakve nepravilnosti (poput
dima), odmah isključite jedinicu iz napajanja i obratite
se distributeru/instalateru u vezi s daljnjim koracima .
Ukoliko nastavite koristiti jedinicu pod ovim nepravilnim
uvjetima, ona bi se mogla oštetiti i uzrokovati kratak
spoj ili požar.
1
-Ukoliko je strujni kabel oštećen, pobrinite se da ga
zamijeni ovlašteni servis.
-Ako je pregorio osigurač na unutarnjoj jedinici,
zamijenite ga tipom T. 3 15A/ 250V .Ako je pregorio
osigurač na vanjskoj jedinici, zamijenite ga tipom T
.25A/ 250V.
-Ožičenje je potrebno izvesti u skladu s lokalnim
propisima za el instalacije.
- Kako biste zaštitili jedinicu uvijek prvo isključite
uređaj, a zatim barem 30 sekundi kasnije, prekinite
dovod struje.
-Nazovite ovlaštenog servisera i uvjerite se da su
poduzete preventivne mjere kako biste izbjegli
istjecanje plina rashladnog sredstva. Istjecanje
rashladnog sredstva određene gustoće može
uzrokovati nedostatak kisika.
2
15
3
14
4
13
5
12
6
11
7
10
8
OPASNOST:
Opasnost od strujnog udara.
Ne rukujte opremom dok su vam ruke mokre ili vlažne.
e
OPREZ:
Opasnost od kvarova ili neispravnog rada.
-Nemojte postavljati nikakve predmete na vanjsku
jedinicu
b
- 10 -
9
Slika 7.1 Pregled tipki.
Legenda
1 Tipka ON/OFF
2 Tipke - / +
3 Tipka FAN
4 Tipka I FEEL
5 Tipka SLEEP
6 Tipka TIMER-ON
7 Tipka TIMER-OFF
8 Tipka X-FAN
9 Tipka LIGHT
10 Tipka TURBO
11 Tipka CLOCK
12 Tipka TEMP
13 Tipka ACTIVE IONIZER
14 Tipka SWING
15 Tipka MODE
VAI 3-WN-U_HR - 05/14 - Vaillant
UPUTE ZA RUKOVANJE
7.2.2
7.3
Prikazi na zaslonu
Savjeti za korištenje daljinskog upravljača
Pridržavajte se uputa navedenih u nastavku o tome kako
koristiti daljinski upravljač:
20
1
●● Prilikom korištenja usmjerite gornji dio upravljača izravno
prema unutarnjoj jedinici.
19
2
18
3
4
●● Održavajte udaljenost između upravljača i prijemnika unutar
7 m.
17
5
6
●● Smanjite udaljenost između daljinskog upravljača i unutarnje
jedinice ako postoje poteškoće u komunikaciji daljinskog
upravljača i unutarnje jedinice.
16
7
●● Nemojte dopustiti da vam daljinski upravljač padne, nemojte
ga bacati ili udarati.
15
14
13
7.3.1
8
9
10
12
●● Izbjegavajte prepreke između upravljača i prijemnika.
11
Slika 7.2 Pregled tipki.
Legenda
1 Indikator TURBA
2 Indikator TRANSMISSION
3 Indikator FREEZE PROTECTION (Zaštita od smrzavanja)
4 Indikator Air (nije raspoloživa)
5 Indikator ACTIVE IONIZER (ionizator)
6 Indikator X-FAN
7 Indikator TEMPERATURE
8 Indikator TIMER
9 Indikator LOCK (blokada)
10 Indikator SWING (pomicanje lamela)
11 Indikator “TEMP” (temperatura)
12 Indikator LIGHT (svjetlo)
13 Indikator SLEEP (noćna funkcija)
14 Indikator HEAT MODE(režim grijanja)
15 Indikator FAN MODE (režim rada ventilatora)
16 Indikator DRY MODE (režim rada odvlaživanja)
17 Indikator COOL MODE (režim rada hlađenja)
18 Indikator AUTO MODE (automatski režim rada)
19 Indikator I FEEL
20 Indikator FAN SPEED (brzina rada ventilatora)
Zaključavanje daljinskog upravljača
Kako biste zaključali tipke i zaslon daljinskog upravljača:
●● Pritisnite i držite tipke – i + više od dvije sekunde
istovremeno pritisnutima.
Ostale tipke su deaktivirane.
Prikazuje se indikator da je upravljač zaključan. Kako biste
deaktivirali funkciju zaključavanja:
●● Pritisnite i držite tipke - i + istovremeno.
Ostale tipke su aktivirane.
Nestaje indikator da je upravljač zaključan.
7.3.2
Funkcija LIGHT (svjetlo)
Tipku LIGHT (svjetlo) pritisnite kraće od 2 sekunde za
uključivanje svjetla na zaslonu unutarnje jedinice. Za ponovno
isključivanje zaslona, ponovno pritisnite tipku LIGHT kraće od 2
sekunde.
7.4
Uključivanje i isključivanje uređaja
Kako biste uključili uređaj:
●● Pritisnite tipku ON na daljinskom upravljaču, uređaj će
započeti s radom.
Kako biste isključili uređaj:
●● Pritisnite tipku OFF na daljinskom upravljaču, uređaj će se
zaustaviti.
HR
VAI 3-WN-U_HR - 05/14 - Vaillant
- 11 -
UPUTE ZA RUKOVANJE
7.5
Odabir režima rada
7.5.1
Za aktiviranje:
Kada je uređaj uključen (vidi odlomak 7.4):
Automatski režim rada (AUTO)
U automatskom režimu rada (AUTO) uređaj automatski bira
režim rada hlađenja (COOL) ili grijanja (HEAT), ovisno o
trenutnoj okolnoj temperaturi.
●● Pritisnite tipku MODE.
Prikazuju se različiti režimi rada.
●● U režimu rada COOL (hlađenje), sobna je temperatura
namještena na 25º C. Iznad te temperature uređaj će raditi u
režimu hlađenja (COOL).
●● U režimu rada HEAT (grijanje), sobna je temperatura
namještena na 20º C. Ispod te temperature uređaj će raditi u
režimu grijanja (HEAT).
Slika 7.4 Režimi rada.
●● Odaberite automatski režim rada (AUTO).
●● Pritisnite tipku TEMP / TIME kako biste odabrali postavke
temperature.
Pritiskivanjem tipki - / + temperatura će se smanjivati ili
povećavati za 1ºC.
3
Kada je ventilator postavljen u režimu AUTO, uređaj automatski postavlja brzinu ventilatora u skladu s aktualnom okolnom
temperaturom.
1
2
Slika 7.3 Odabir automatskog režima rada.
Legenda
1 tipka MODE
2 tipka - / +
3 indikator režima rada AUTO
- 12 -
VAI 3-WN-U_HR - 05/14 - Vaillant
UPUTE ZA RUKOVANJE
7.5.2
Hlađenje (COOL)
Za aktiviranje:
Kada je uređaj uključen (vidi odlomak 7.4):
U režimu hlađenja (COOL) klima-uređaj dopušta samo
hlađenje.
●● Pritisnite tipku MODE.
NAPOMENA:
U režimu hlađenja preporučuje se da krilca usmjerite
vodoravno.
i
Prikazuju se različiti režimi rada.
Slika 7.6 Režimi rada
●● Odaberite hlađenja (COOL).
4
●● Pritisnite tipke - / + kako biste odabrali postavke temperature.
Pritiskivanjem tipki - / + temperatura će se smanjivati ili
povećavati za 1ºC.
●● Pritisnite tipku FAN (ventilator) kako biste odabrali brzinu
ventilatora.
UPUTE ZA RUKOVANJE
Svaki put kada pritisnete tipku FAN (Ventilator), brzina
ventilatora će se promijeniti kao što je prikazano na slici 7.7.
1
3
2
Slika 7.7 Brzina ventilatora.
NAPOMENA:
U režimu hlađenje, produžena uporaba uređaja pod
uvjetima velike vlage zraka može uzrokovati kapanje
vode iz uređaja.
i
Slika 7.5 Odabir funkcije hlađenja.
Legenda
1 Tipka - / +
2 Tipka FAN (ventilator)
3 Tipka MODE
4 Indikator režima hlađenja (COOL)
HR
VAI 3-WN-U_HR - 05/14 - Vaillant
- 13 -
UPUTE ZA RUKOVANJE
7.5.3
Odvlaživanje (DRY)
Za aktiviranje:
U režimu odvlaživanja (DRY) uređaj odvlažuje zrak u prostoriji.
Kada je uređaj uključen (vidi odlomak 7.4):
●● Pritisnite tipku MODE.
Prikazuju se različiti režimi rada.
3
Slika 7.9 Režimi rada.
●● Odaberite režim odvlaživanja (DRY).
●● Pritisnite tipke - / + kako biste odabrali postavke temperature.
Pritiskivanjem tipki - / + temperatura će se smanjivati ili
povećavati za 1ºC.
1
2
Kada je uređaj postavljen na režim rada DRY, uređaj automatski
postavlja brzinu ventilatora kako bi bila najučinkovitija.
NAPOMENA:
U režimu odvlaživanja, produžena uporaba uređaja
pod uvjetima velike vlažnosti zraka može uzrokovati
kapanje vode iz uređaja.
i
Slika 7.8 Odabir režima odvlaživanja.
Legenda
1 tipka MODE
2 Tipke - / +
3 Indikator režima odvlaživanja (DRY)
- 14 -
VAI 3-WN-U_HR - 05/14 - Vaillant
UPUTE ZA RUKOVANJE
7.5.4
Ventilacija (FAN)
Za aktiviranje režima rada ventilatora (FAN):
U režimu rada ventilacije (FAN) funkcija SLEEP je deaktivirana.
Kada je uređaj uključen (vidi odlomak 7.4):
●● Pritisnite tipku MODE.
Prikazuju se različiti režimi rada.
3
Slika 7.11 Režimi rada.
●● Odaberite režim rada ventilatora (FAN).
●● Pritisnite tipku FAN kako biste odabrali brzinu rada
ventilatora.
Svaki put kada pritisnete tipku FAN (ventilator), brzina
ventilatora će se promijeniti kao što je prikazano na slici 7.12.
2
1
Slika 7.12 Brzina ventilatora.
Slika 7.10 Odabir režima rada ventilatora.
Legenda
1 Tipka FAN (ventilator)
2 Tipka MODE
3 Indikator režima rada FAN (ventilator)
HR
VAI 3-WN-U_HR - 05/14 - Vaillant
- 15 -
UPUTE ZA RUKOVANJE
7.5.5
Grijanje (HEAT)
Za aktiviranje:
Kada je uređaj uključen (vidi odlomak 7.4):
U režimu grijanja uređaj dopušta samo grijanje.
●● Pritisnite tipku MODE.
Prikazuju se različiti režimi rada.
4
Slika 7.14 Režim rada.
●● Odaberite režim rada grijanja (HEAT).
●● Pritisnite tipke - / + kako biste odabrali postavke temperature.
Pritiskivanjem tipki - / + temperatura će se smanjivati ili
povećavati za 1ºC.
1
●● Pritisnite tipku FAN (Ventilator) kako biste odabrali brzinu
ventilatora.
Svaki put kada pritisnete tipku FAN (Ventilator), brzina
ventilatora će se promijeniti kao što je prikazano na slici 7.15.
3
2
Slika 7.15 Brzina ventilatora.
NAPOMENA:
Kada uređaj pomoću termostata zaustavi kompresor
ili kada je aktivirana funkcija odmrzavanja, ventilator
unutarnje jedinice neće raditi kako bi se spriječilo
strujanje hladnog zraka.
i
7.6
Namještanje smjera protoka zraka
Smjer protoka zraka može se namjestiti okomito u režimu
grijanja (HEAT), a vodoravno u režimu hlađenja (COOL).
Slika 7.13 Odabir režima grijanja.
Legenda
1 Tipka - / +
2 Tipka FAN (ventilator)
3 Tipka MODE
4 Indikator režima grijanja ( HEAT)
OPASNOST OD OZLJEDA I IZIČKIH OŠTEĆENJA!:
Izbjegavajte izravan kontakt tijela sa snažnim
strujanjima zraka . Ne izlažite životinje i biljke izravnom
protoku zraka.
e
OPREZ:
Opasnost od kvarova ili neispravnog rada.
Ne stavljajte stvari na ili pored vanjske jedinice.
b
NAPOMENA:
Ako krilca ne rade ispravno, zaustavite uređaj na jednu
minutu i ponovo je pokrenite zadavanjem potrebnih
postavki daljinskim upravljačem.
i
- 16 -
VAI 3-WN-U_HR - 05/14 - Vaillant
UPUTE ZA RUKOVANJE
7.7
Odabir posebnih funkcija
7.7.1
Za aktiviranje:
●● Odaberite željeni režim rada (vidi odlomak 7.5).
Funkcija SLEEP (noćna funkcija)
Ovom funkcijom se režimi rada COOL i HEAT mogu namjestiti
u noćnim satima, kako bi se izbjeglo pretjerano povećanje ili
smanjenje temperature.
●● Pritisnite tipku SLEEP.
Funkcija SLEEP u režimu rada COOL
Okolna temperatura raste za 1 °C po satu u odnosu na
temperaturu koja je bila postavljena prva dva sata. Ta se nova
temperatura onda održava tijekom narednih 5 sati, a zatim se
postupno smanjuje tijekom naredna dva sata kako bi se postigla
izvorno namještena temperatura.
Funkcija SLEEP u režimu rada HEAT
Okolna se temperatura smanjuje za 1 °C po satu u odnosu na
temperaturu koja je bila postavljena prva dva sata. Ta se nova
temperatura onda održava tijekom narednih 5 sati, a zatim
se postupno povećava tijekom naredna dva sata kako bi se
postigla izvorno namještena temperatura.
2
NAPOMENA:
Kad je aktivirana funkcija SLEEP, ventilator radi pri
malom broju okretaja.
i
1
Slika 7.16 Odabir funkcije SLEEP.
Legenda
1 Tipka SLEEP
2 Indikator funkcije SLEEP
HR
VAI 3-WN-U_HR - 05/14 - Vaillant
- 17 -
UPUTE ZA RUKOVANJE
7.7.2
Funkcija TIMER ON/OFF (uključivanje/
isključivanje uz pomoć vremenske sklopke)
Uređaj se može uključiti/isključiti pomoću timera (vremenske
sklopke).
Kako biste programirali uključivanje uređaja:
●● Dok je uređaj isključen, pritisnite tipku TIMER ON. Indikator
TIMER ON započet će treptati. Namjestite željeno vrijeme
početka rada uređaja pritiskom na tipke - / +. Pritisnite
ponovno tipku TIMER ON kako biste potvrdili željeno vrijeme
uključivanja.
Kako biste programirali isključivanje uređaja:
●● Dok je uređaj uključen, pritisnite tipku TIMER OFF. Indikator
TIMER OFF započet će treptati. Namjestite željeno vrijeme
isključivanja uređaja pritiskom na tipke - / +. Pritisnite
ponovno tipku TIMER OFF kako biste potvrdili željeno
vrijeme isključivanja.
1
Kako biste poništili postavku:
●● Ponovno pritisnite tipku TIMER ON ili TIMER OFF.
NAPOMENA:
Funkcija REPEAT je automatski raspoloživa. Ako
program nije poništen, ponavljat će se svakodnevno.
i
NAPOMENA:
Prije aktiviranja timera ispravno namjestite sat.
2
i
i
NAPOMENA:
Nakon zamjene baterija ili eventualnog nestanka struje
ponovno namjestite postavke vremena.
3
4
Slika 7.17 Odabir funkcije TIMER.
Legenda
1 Indikator funkcije timer on/off
2 Tipke - / + (povećanje/smanjenje)
3 Tipka TIMER ON
4 Tipka TIMER OFF
- 18 -
VAI 3-WN-U_HR - 05/14 - Vaillant
UPUTE ZA RUKOVANJE
7.7.3
Funkcija TURBO
7.7.4
Funkcija X-FAN
Koristite funkciju TURBO kada vam treba brzo hlađenje (COOL)
ili brzo grijanje (HEAT).
1
1
2
2
Slika 7.19 Odabir funkcije X-FAN.
Slika 7.18 Odabir funkcije TURBO.
Legenda
1 Ikona za turbo
2 Tipka turbo
Kako biste aktivirali funkciju TURBO:
●● Pritisnite tipku TURBO kraće od 2 sekunde.
Legenda
1 Ikona x-fan
2 Tipka X-FAN
Kada pritisnite tipku “X-Fan” tijekom režima rada COOL
(hlađenje) ili DRY (odvlaživanje), uključit će se indikator na
pokazivaču daljinskog upravljača te će ventilator unutarnje
jedinice raditi još otprilike 2 minute, čak i nakon isključivanja
uređaja ili nakon što je programiran za isključivanje. Kada prođe
to vrijeme, uređaj će se isključiti automatski te će indikator
režima rada COOL (hlađenje) unutarnje jedinice zatreperiti
svakih 10 sekunda.
Ovime se smanjuje vlaga u unutarnjoj jedinici, održava se
suhom te se spriječava hrđanje njezinih komponenata i
nastanak bakterija.
Funkcija X-Fan nije raspoloživa u režimu rada AUTO, FAN
(ventilator) ili HEAT (grijanje).
HR
VAI 3-WN-U_HR - 05/14 - Vaillant
- 19 -
UPUTE ZA RUKOVANJE
7.7.5
Funkcija Temp
7.7.6
I Feel funkcija
2
1
1
2
Slika 7.20 Odabir funkcije TEMP.
Slika 7.21 I FEEL funkcija odabir.
Legenda
1 Indikator TEMP
2 Tipka TEMP
Legenda
1 I FEEL gumb
2 I FEEL indikator
Ova funkcija na prikazu unutarnje jedinice prikazuje namještenu
temperaturu prostorije i okolnu temperaturu.
Pritisnite ovu tipku za uključenje I FEEL funkcije.
Pritiskom na tipku TEMP prikazat će se:
Namještena temperatura
Daljinski upravljač osjeća temperaturu okoline i prenosi
signal natrag na unutarnju jedinicu, podešavanje količine
protoka zraka i temperature u skladu s tim postiže optimalnu
temperaturu, uz uštedu energije.
Pritisnite ovu tipku ponovo za isključiti funkciju I FEEL.
Okolna temperatura u prostoriji
Vanjska okolna temperatura (nije raspoloživa u 7.8 Indikatori unutarnje jedinice)
- 20 -
VAI 3-WN-U_HR - 05/14 - Vaillant
UPUTE ZA RUKOVANJE
7.7.7
Aktivni ionizator funkcija
7.7.8
Funkcija zaštite od smrzavanja
1
1
4
2
3
2
Slika 7.21 AKTIVE IONIZER odabir funkcije.
Slika 7.22 ZAŠTITA OD SMRZAVANJA odabir funkcije.
Legenda
1 X- FAN indikator
2 X- FAN tipka
Legenda
1 ZAŠTITA OD SMRZAVANJA indikator
2 CLOCK gumb
3 TEMP gumb
4 HEAT indikator
se prikazuje na daljinskom upravljaču kad pritisnete
ACTIVE IONIZER tipku četiri puta uzastopno.
Ova funkcija čisti zrak u prostoriji putem električnog naboja
molekula zraka, stvara negativne ione pomoću električne
energije.Ion je nabijena čestica, bilo pozitivno ili negativno.
Suprotnosti se privlače, tako da negativni ioni nastoje ispuniti
zrak i pozitivno nabijene čestice, poput prašine, bakterija, pelud,
dim, i mnoge druge alergene.
Koristite funkciju ZAŠTITA OD SMRZAVANJA na automatsko
podešavanje temperature od 8 ° C u načinu grijanja.
Da biste aktivirali ovu funkciju: Pritisnite tipke CLOCK i TEMP
istovremeno i držite ih pritisnuteviše od dvije sekunde. Ponovite
postupak za deaktiviranje.
Ponovno pritisnite tipku ACTIVE IONIZER za isključiti tu
funkciju.
HR
VAI 3-WN-U_HR - 05/14 - Vaillant
- 21 -
UPUTE ZA RUKOVANJE
7.8
Indikatori unutarnje jedinice
2
1
3
4
5
Slika 7.21 Pregled prikaza na unutarnjoj jedinici.
Legenda
1 Indikator za grijanje
2 Indikator za hlađenje
3 Indikator temperature
4 Indikator on-off (uključivanje-isključivanje)
5 Prijamnik infracrvenog svjetla
7.9
Upravljanje u slučaju nužde
Ovu funkciju koristite samo kada je daljinski upravljač slomljen
ili zagubljen.
Za aktiviranje:
●● Pritisnite prekidač za upravljanje u slučaju nužde.
●● Zvučni signal označava da je funkcija uključena.
Slika 7.22 Prekidač za provjeru upravljanja u slučaju nužde.
Slijed postupka upravljanja:
●● Prvim pritiskom na tipku, uređaj prelazi u automatski režim
rada.
●● Drugim pritiskom na tipku uređaj se isključuje.
NAPOMENA:
Tijekom rada u slučaju nužde, uređaj je namješten za rad
u AUTOMATSKOM režimu rada.
i
- 22 -
VAI 3-WN-U_HR - 05/14 - Vaillant
ODRŽAVANJE
8
8.1
Savjeti za uštedu energije
Prikladna unutarnja temperatura
Namjestite temperaturu prostorije na odgovarajuću vrijednost
kako bi se zajamčila fizička dobrobit, udobnost i, u svakom
slučaju, kako bi se udovoljilo važećim standardima. Svaki
stupanj iznad ove vrijednosti znatno povećava potrošnju
energije.
Temperatura mora također biti pogodna za specifičnu uporabu
postojeće prostorije: temperatura praznih prostorija i spavaćih
soba ne mora biti ista kao temperatura glavne prostorije.
8.2
Uklanjanje izvora topline ili hladnoće
U slučaju da postoje izvori topline (u režimu hlađenja) ili
hladnoće (u režimu grijanja) koji bi se mogli ukloniti, molimo vas
to učinite (npr. prozor ili vrata koji nisu dobro zatvoreni). To će
osigurati da uređaj troši manje energije.
8.3
Rad u režimu grijanja (toplinska crpka)
Uređaj u režimu rada grijanje djeluje kao toplinska crpka, tj.
uzima toplinu izvana (putem vanjske jedinice) i upušta je unutra
(putem unutarnje jedinice). Ipak, uobičajen sustav grijanja
stvara toplinu isključivo kroz trošenje energije. Stoga je grijanje
prostorije putem toplinske crpka daleko štedljivije od uporabe
uobičajenog grijanja (radijatori, grijalice, bojleri, itd.).
8.4
8.6
Smanjenje potrošnje noću (funkcija
SLEEP)
Vaša jedinica raspolaže funkcijom SLEEP, koja omogućava
automatsku promjenu temperature u odnosu na prethodno
određene vrijednosti (u režimu grijanja temperatura sa blago
smanjuje; u režimu hlađenja temperatura se blago povećava) u
noćnim satima. Dakle, pored veće udobnosti koju ova funkcija
nudi, ona osigurava i smanjenje potrošnje el. energije. Za više
detalja o funkciji SLEEP vidi odlomak 7.7.1).
8.7
Smanjenje potrošnje s funkcijom
programiranog vremena rada (funkcija
TIMER)
Korištenjem funkcije TIMER možete namjestiti uključenje
početnog vremena vašeg uređaja. Stoga je moguće
programirati rad uređaja kako bi radio samo kada je nužno i
prema tome postigao štedljiviji način rada.
8.8
Ispravno održavanje uređaja
Uređaj u besprijekornom stanju radi učinkovito, iskorištavajući
maksimalno energiju koju troši. Pobrinite se da vaš uređaj bude
ispravno servisiran (za detalje vidi odlomak 10). Osobito se
pobrinite da filtri budu čisti i da ulazni i izlazni otvori za zrak na
unutarnjoj ili vanjskoj jedinici ne budu začepljeni.Ukoliko to nije
slučaj, povećat će se potrošnja energije.
Sobna temperatura u odsutnosti
Tijekom grijanja štedi se energija održavanjem okolne
temperature oko 5 ºC nižom od normalne temperature.
Smanjenje koje prelazi ovih 5º C ne predviđa daljnju uštedu
energije budući da je veća snaga grijanja potrebna za
uzastopne periode djelovanja u normalnim radnim uvjetima.
Smanjenje temperature isplati se čak i kasnije u slučaju dužeg
izbivanja, npr. tijekom praznika.
Tijekom zime zaštita od smrzavanja mora biti zajamčena.
8.5
Ravnomjerno grijanje
Često je u kući zagrijana samo jedna prostorija, a površine
koje omeđuju ovo područje, tj. zidovi, vrata, prozori, strop i
pod, susjedne prostorije su hladniji od sobne temperature, što
znači da je toplinska energija neprimjetno izgubljena. Stoga
je nemoguće jednako zagrijati prostoriju, a neugodan osjećaj
hladnoće je prisutan (isto se javlja pri ostavljanju otvorenih
vrata koje odvajaju zagrijana područja i nezagrijana područja na
ograničen način).
To je pogrešno ekonomično razmišljanje: grijanje je uključeno,
a temperatura prostorije ipak nije ugodna. Veća udobnost i
razumniji način rada osiguravaju se ravnomjernim grijanjem
svih prostorija u kući, uzimajući u obzir iskorištenost svake
prostorije (temperatura praznih prostorija i spavaćih soba ne
treba biti ista kao ona glavne prostorije).
HR
VAI 3-WN-U_HR - 05/14 - Vaillant
- 23 -
ODRŽAVANJE
9
Otklanjanje kvarova
Tablica u nastavku prikazuje niz problema, njihove moguće
uzroke i rješenja, vidi tablicu 9.1.
Ako vam ovi savjeti ne pomognu riješiti postojeći problem,
obratite se ovlaštenom serviseru.
SIMPTOMI
MOGUĆI UZROCI
MOGUĆA RJEŠENJA
Sustav se ne može odmah ponovno pokrenuti
Kad je uređaj zaustavljen, ne može se ponovno
pokrenuti sve dok ne isteknu 3 minute kako bi
se zaštitio sustav
Pričekajte tri minute prije ponovnog pokretanja
uređaja.
Kad je električni utikač izvučen i ponovno
utaknut zaštitna sklopka radi tri minute kako bi
se zaštitila jedinica klima-uređaja
Pričekajte 3 minute nakon što utaknete utikač i
prije ponovnog pokretanja uređaja.
Električni utikač nije utaknut ispravno
Utaknite utikač ispravno
Prekid napajanja
Ponovno spojite napajanje
Osigurač je izgorio
Zamijenite osigurač. Koristite samo ispravne
osigurače za svaki model. Nemojte
upotrebljavati žicu ili druge materijale kako
biste zamijenili osigurač jer to može uzrokovati
požar
Vrata i /ili prozori su otvoreni
Zatvorite vrata i/ili prozore
U blizini je izvor topline (npr. mnogo ljudi u
prostoriji)
Ako je moguće, uklonite izvor topline
Termostat je namješten a previsoku
temperaturu u režimu hlađenja ili na prenisku u
režimu grijanja.
Pravilno namjestite temperaturu
Prepreka pred ulaznim ili izlaznim otvorom
Zrak.
Uklonite prepreku kako biste omogućili
dobru cirkulaciju zraka.
Temperatura okoline nije postigla određeni
Stupanj.
Pričekajte nekoliko minuta
Onečišćeni ili blokirani filtar za zrak
Očistite filter za zrak (filter za zrak treba
čistiti svakih 15 dana).
Dolazi li kroz prozor izravna sunčeva svjetlost
za vrijeme režima hlađenja?
Koristite zavjese kako biste zaštitili jedinicu
klima-uređaja.
Za vrijeme rada uređaja ili prilikom
zaustavljanja uređaja može se čuti grgljanje.
Taj zvuk se jače čuje u prve 2-3 minute rada
To je normalno za jedinicu klima-uređaja.
Zvukove uzrokuje dotok rashladnog sredstva
u sustav).
Čuje se krckanje za vrijeme rada uređaja.
To je normalno za jedinicu klima-uređaja. Te
zvukove uzrokuje širenje i stezanje kućišta
uslijed promjena temperature
Ako glasna buka dolazi iz protoka zraka za
vrijeme rada jedinice, možda su filtri suviše
prljavi.
Pravilno očistite filtre.
Stvaraju se mirisi
To je zbog toga što sustavom cirkuliraju
mirisi iz unutarnje okoline (namještaj, cigarete).
Ova situacija ne zahtijeva nikakve mjere
Iz jedinice izlaze magla ili para
Za vrijeme režima rada COOL ili DRY, iz
unutarnje jedinice može izlaziti malo magle.
To se događa uslijed iznenadnog hlađenja
unutarnjeg zraka.
Ova situacija ne zahtijeva nikakve mjere
Sustav uopće ne radi (ventilator se ne pokreće)
Nedostatno hlađenje ili grijanje
Čuje se buka
Tablica 9.1 Uklanjanje kvarova.
- 24 -
VAI 3-WN-U_HR - 05/14 - Vaillant
ODRŽAVANJE
10 Održavanje
OPASNOST:
Opasnost od strujnog udara. Isključite uređaj i glavno
napajanje prije nego počnete s radovima na održavanju
uređaja. Tako ćete spriječiti.
e
OPASNOST:
Opasnost od strujnog udara.
Nemojte uređaj čistiti vodom.
e
OPREZ:
Opasnost od kvarova i neispravnog rada.
Nemojte za čišćenje uređaja koristiti benzin,
razrjeđivače ili sredstva za čišćenje jer mogu oštetiti
premaz uređaja.
b
OPREZ:
Vruća voda iznad 40ºC može uzrokovati gubljenje boje
ili deformaciju.
b
●● Pravilno pričvrstite filter i pobrinite se da bude potpuno
fiksiran iza graničnika. Ako desni i lijevi filtri nisu ispravno
pričvršćeni, to može uzrokovati smetnje u.
OPREZ:
Opasnost od kvarova ili neispravnog rada.
Nemojte dodavati parfeme i slične proizvode za
uklanjanje neugodnih mirisa u filtar ili u unutrašnjost
povratnog zračnog sustava.To može oštetiti i zaprljati
izmjenjivač topline. Ako je potrebno, ovakve uređaje
postavite kod izlazne točke zraka i pobrinite se da budu
uključeni samo kad ventilator radi.
b
10.4 Čišćenje vanjske jedinice
OPREZ:
Uvijek koristite prikladnu osobnu zaštitu (kaciga,
rukavice, sigurnosnu obuću i zaštitne naočale).
b
●● Vanjski dio jedinice obrišite suhom krpom.
●● S vremena na vrijeme ulazni otvor očistite od prašine i lišća.
10.1 Čišćenje daljinskog upravljača
●● Daljinski upravljač obrišite suhom krpom. Za čišćenje
daljinskog upravljača nemojte koristiti vodu.
●● Nemojte koristiti sredstva za čišćenje stakla ili tkanine
natopljene kemikalijama.
10.2 Čišćenje unutarnje jedinice
●● Vanjski dio uređaja obrišite mekom i suhom krpom.
●● Za tvrdokorne mrlje upotrijebiti neutralno sredstvo za pranje
suđa otopljeno u vodi. Prije brisanja iscijedite višak vode iz
krpe. Očistite uređaj od ostataka bilo kakvog sredstva za
pranje.
10.3 Čišćenje filtra za zrak
Filtar za zrak eliminira prašinu koja iz sobe dospije u unutarnju
jedinicu.
●● S vremena na vrijeme izmjenjivač topline očistite mekom
četkom ako je jedinica postavljena na prašnjavoj lokaciji.
●● S vremena na vrijeme provjerite podnožje vanjske jedinice.
OPASNOST OD OZLJEDA I FIZIČKOG OŠTEĆENJA! :
Oštećeno ili istrošeno podnožje moglo bi dovesti do
pada jedinice i fizičke ili materijalne štete.
e
OPASNOST OD OZLJEDA I FIZIČKOG OŠTEĆENJA!:
Osim u svrhe servisiranja ili zamjene, ne rastavljajte
izlazni dio vanjske jedinice. Izlaganje ventilatora može
biti vrlo opasno.
e
NAPOMENA:
Preporučamo da za ugovaranje usluga održavanja
kontaktirate ovlašteni servis Vaillanta. To će produžiti
životni vijek vašeg uređaja i poboljšati njegov rad.
i
Ako se filtar blokira, učinkovitost klima-uređaja se smanjuje,
mogao bi se oštetiti kompresor, a izmjenjivač topline unutarnje
jedinice bi se mogao smrznuti.
Da biste to spriječili, filter za dovod zraka čistite redovito.
Postupite na sljedeći način:
●● Uklonite filtre za zrak laganim guranjem središnje ploče sve
dok se ne oslobodi iz graničnika i izvadite filtre prema dolje.
●● Uporabom usisivača ili hladne vode uklonite prašinu ili
nečistoće iz filtera.
●● Pobrinite se da se filtri u potpunosti osuše (sušiti u sjeni)
nakon čišćenja prije nego što ih ponovno umetnete u uređaj.
Filtri od aktivnog ugljena (gdje postoje) mogu se reaktivirati
tako da se stave izravno na sunce. Ako se i nadalje osjete
čudni mirisi, zamijenite ih novima. Ako su jaki mirisi i
nadalje problem, kontaktirajte svoj ovlašteni servis kako bi u
potpunosti očistio uređaj.
HR
VAI 3-WN-U_HR - 05/14 - Vaillant
- 25 -
ODRŽAVANJE
11 Skladištenje tijekom dužeg razdoblja
Ako uređaj ne namjeravate koristiti duže vrijeme:
●● Uključite ventilator na dva do tri sata pri temperaturi od 30ºC,
u režimu rada hlađenja (COOL) i pri velikoj brzini ventilatora
(High Speed) kako bi se spriječio nastanak plijesni ili
neugodnih mirisa.
●● Prekinite rad jedinice i isključite glavno napajanje.
●● Očistite filtre za zrak.
●● Očistite vanjsku jedinicu.
●● Izvadite baterije iz daljinskog upravljača.
Prije ponovnog uključivanja jedinice:
●● Umetnite baterije u daljinski upravljač.
●● Nemojte zaboraviti pričvrstiti lijevi i desni filtar prije puštanja
u rad.
●● Provjerite da filtri za protok zraka nisu blokirani.
●● Provjerite da ulazni i izlazni otvori nisu blokirani.
●● Ponovno uključite glavno napajanje i provjerite rad uređaja u
svim režimima rada. Ako se čuje bilo kakav čudan zvuk i rad,
kontaktirajte svoj postprodajni servis.
Slika 12.1 Simbol za recikliranje.
Vaš je proizvod označen simbolom za recikliranja (vidi sliku
12.1), što znači da prilikom zbrinjavanja trebate imati na umu
sljedeće:
●● Uređaj ne miješajte s drugim kućnim nerazvrstanim otpadom.
●● Uređaj bacite u skladu s važećim lokalnim i nacionalnim standardima, ispravno i na ekološki prihvatljiv način.
●● Uređaj predajte poduzeću za zbrinjavanje otpada koje je od
strane lokalnih vlasti ovlašteno za prijenos uređaja do mjesta
za zbrinjavanje.
●● Ako proizvod mijenjate drugim proizvodom u istu svrhu, stari
proizvod u svrhu zbrinjavanja ustupite distributeru novog
uređaja.
●● Za više informacija kontaktirajte lokalna nadležna tijela.
OPASNOST OD OZLJEDA I FIZIČKOG OŠTEĆENJA!:
U slučaju da se uređaj ukloni i ponovno instalirakasnije,
osigurajte da je uređaj ispravno instaliranod strane
kvalificiranog osoblja (vidi Priručnik za montažu). U
protivnom može doći do curenje vode, rashladnog
sredstva, kratkog spoja ili čak požara.
e
12 Zbrinjavanje proizvoda
OPASNOST od ozljeda i fizičkog oštećenja!:
Kada zbrinjavate proizvod, pobrinite se da to učinite
sigurno i u skladu s lokalnim propisima i zahtjevima.
To možete postići pridržavanjem koraka opisanih
u priručniku za montažu po obratnom redoslijedu i
korištenjem svih potrebnih alata i zaštitne opreme.
Pobrinite se da rastavljanje obave kvalificirane i
tehnički kompetentne osobe.
a
POZOR:
Opasnost od zagađenja okoliša kod nepropisnog
zbrinjavanja uređaja. Kako biste izbjegli zagađenje
pridržavajte se uputa opisanih u ovom odlomku.
b
POZOR:
Sustavi za klimatizaciju sadrže rashladna sredstva koja
zahtijevaju zbrinjavanje kao posebni otpad. Vrijedni
materijali sadržani u klima-uređaju mogu se reciklirati.
b
- 26 -
VAI 3-WN-U_HR - 05/14 - Vaillant
Manuale d’uso
Per l‘utente
Manuale d’uso
VAI 3-025 WN
VAI 3-035 WN
VAI 3-050 WN
Unità A Parete
IT
L I S TA D I IM BAL L AGGIO
L'unità è dotata degli elementi indicati nella seguente Tabella
Lista di imballaggio
Quantità
Unità interna
Unità interna
1
Telecomando
1
Supporto di telecomando
1
Batteria
2
Dadi
5
Viti
2
Dima di montaggio
1
Materiale addizionale anti condensa per la tubazione
1
Documentazione
Manuale d'uso
Targhetta identificativa + EAN 128
5 adesivi di codice del modello
5 numeri di serie
Elementi a corredo del prodotto.
INDICE
INTRODUZIONE
MANUTENZIONE
1
Istruzioni di sicurezza...................................... 5
8
Consigli per il risparmio energetico .............. 23
1.1
Simboli utilizzati.................................................. 5
8.1
Temperatura ambiente adatta............................ 23
1.2
Utilizzo conforme dell'unità................................. 5
8.2
Evitare dispersioni di energia............................. 23
2
Condizioni operative estreme......................... 5
8.3
3
Identificazione dell'unità ................................. 5
Funzionamento in modalità riscaldamento (pompa
di calore)............................................................ 23
4
Dichiarazione di conformità............................ 6
8.4
Temperatura ambiente in caso di assenza......... 23
5
Descrizione dell'unità...................................... 6
8.5
Riscaldamento uniforme.................................... 23
5.1
Telecomando...................................................... 6
8.6
5.2
Specifiche tecniche............................................ 7
Riduzione dei consumi durante le ore notturne
(funzione sleep).................................................. 23
8.7
Riduzione dei consumi con la programmazione
dell'orario di funzionamento (funzione timer)...... 23
8.8
Manutenzione corretta dell'unità........................ 23
9
Risoluzione dei problemi................................. 24
10
Manutenzione................................................... 25
ISTRUZIONI OPERATIVE
6
Impostazioni iniziali......................................... 8
6.1
Inserimento delle batterie del telecomando....... 8
6.2
Regolazione dell'orologio................................... 8
7
Istruzione operative......................................... 9
7.1
Considerazioni generali sulla sicurezza durante l'uso.. 9
7.2
Identificazione delle funzioni.............................. 10
7.2.1 Pulsanti del telecomando................................... 10
7.2.2 Indicatori display................................................ 11
7.3
10.1 Pulizia del telecomando..................................... 25
10.2 Pulizia dell'unità interna...................................... 25
10.3 Pulizia dei filtri dell'aria....................................... 25
10.4 Pulizia dell'unità esterna..................................... 25
11
Stoccaggio per periodi di tempo prolungati.. 26
12
Smaltimento del prodotto................................ 26
Consigli sull'uso del telecomando...................... 11
7.3.1 Blocco del telecomando..................................... 11
7.3.2 Modalità LIGHT.................................................. 11
7.4
Accensione / Spegnimento dell'unità................. 11
7.5
Selezione della modalità operativa.................... 12
7.5.1 Modalità automatica (AUTO).............................. 12
7.5.2 Modalità raffreddamento (COOL)....................... 13
7.5.3 Modalità deumidificazione (DRY)....................... 14
7.5.4 Modalità fan (FAN)............................................. 15
7.5.5 Modalità riscaldamento (HEAT).......................... 16
7.6
Regolazione della direzione del flusso dell'aria.. 16
7.7
Selezione di funzioni particolari.......................... 17
7.7.1 Funzione sleep................................................... 17
7.7.2 Funzione Timer On/Off (accensione/spegnimento
tramite timer)...................................................... 18
7.7.3 Funzione turbo................................................... 19
7.7.4 Funzione X-fan................................................... 19
7.7.5 Funzione Temp................................................... 20
7.7.6 Funzione I Feel.................................................. 20
7.7.7 Funzione Active Ionizer...................................... 21
7.7.8 Funzione Freeze Protection............................... 21
7.8
Indicatori dell’unità interna................................. 22
7.9
Funzionamento d’emergenza............................. 22
-3-
-4-
INTRODUZIONE
1
Istruzioni di sicurezza
1.1
Simboli utilizzati
2
Condizioni operative estreme
Quest'unità è stata progettata per operare entro il campo di
temperature indicato in Figura 2.1. Assicurarsi che tali i valori
siano rispettati.
PERICOLO:
Pericolo immediato per la vita e la salute.
a
e
b
Raffreddamento
PERICOLO:
Pericolo di scossa elettrica.
Riscaldamento
Esterno
AVVERTENZA:
Situazione potenzialmente pericolosa per il prodotto e
per l'ambiente.
NOTA:
Informazioni ed indicazioni utili.
i
Interno
1.2
Utilizzo conforme dell'unità
Questa unità è stata progettata e costruita per scopi di
climatizzazione con aria condizionata. L'uso per scopi domestici
o industriali di altro tipo è di esclusiva responsabilità di chi
progetta, installa o utilizza l'unità per tali scopi.
Prima di manipolare, installare, avviare, utilizzare o manutenere
l'unità, le persone preposte a compiere queste azioni devono
essere consapevoli di tutte le istruzioni ed i consigli riportati nel
manuale di installazione dell'unità e nel manuale d'uso.
NOTA:
Conservare i manuali per tutta la durata utile dell'unità.
i
i
NOTA:
Le informazioni relative a questa unità si dividono in
due manuali: il manuale di installazione e il manuale
d'uso.
NOTA:
L’impianto contiene refrigerante R-410A. Non immettere
il refrigerante R-410A nell’atmosfera: R-410A, è un gas
fluorurato con effetto serra, classificato nel Protocollo di
Kioto con un potenziale di riscaldamento globale (GWP)
= 1975.
i
Fig. 2.1Intervalli di funzionamento dell'unità.
Legenda
D.B.
Temperatura misurata a bulbo secco
La capacità operativa dell'unità interna varia a seconda della
temperatura di funzionamento dell'unità esterna.
3
Identificazione dell'unità
Questo manuale si riferisce alla serie Split. Per conoscere il
modello specifico della propria unità, consultare la targhetta
dati.
Le targhette dati sono poste sia sull'unità esterna che su quella
interna.
NOTA:
Prima dello smantellamento finale dell’apparecchio, il
refrigerante contenuto in questo impianto deve essere
adeguatamente raccolto per procedere al riciclaggio,
riutilizzo o smaltimento.
i
NOTA:
Il personale incaricato delle operazioni di manutenzione
relative alla manipolazione del fluido refrigerante, deve
avere la necessaria certificazione emessa dall’ente
locale preposto.
i
IT
VAI 3-WN-U_IT - 05/14 - Vaillant
-5-
INTRODUZIONE
4
Dichiarazione di conformità
5
Descrizione dell'unità
Il costruttore dichiara che la presente unità è stata progettata
e costruita in conformità alla norma in vigore ai fini della
concessione del marchio CE.
L'unità è composta dai seguenti elementi:
Il modello di apparecchio soddisfa i requisiti essenziali contenuti
nelle direttive e nelle norme:
-- Unità interna.
• 2006/95/EEC compresi gli emendamenti:
”Direttiva concernente il ravvicinamento delle legislazioni degli
Stati membri relative al materiale elettrico destinato ad essere
adoperato entro taluni limiti di tensione“
-- Unità esterna.
-- Telecomando.
-- Collegamenti e tubazioni.
In Figura 5.1 sono indicati i componenti dell'unità.
Progettato e fabbricato in base alla normativa europea:
-- EN 60335-1
-- EN 60335-2-40
5
-- EN 50366
• 2004/108/EEC compresi gli emendamenti:
”Direttiva concernente il ravvicinamento delle legislazioni degli
Stati membri relative alla compatibilità elettromagnetica“
4
Progettato e fabbricato in bas alla normativa europea:
-- EN 55014-1
1
-- EN 55014-2
-- EN 61000-3-2
-- EN 61000-3-3
-- EN 61000-3-11
3
2
Fig. 5.1Componenti dell'unità.
Legend
1 Collegamenti e tubazioni
2 Tubo di scarico dell'acqua condensata
3 Unità esterna
4Telecomando
5 Unità interna
5.1
Telecomando
Il telecomando consente l'utilizzo dell'unità. Affinché l’unità
riceva correttamente i comandi, il telecomando deve puntare
direttamente ad essa e non deve frapporsi alcun ostacolo.
-6-
VAI 3-WN-U_IT - 05/14 - Vaillant
INTRODUZIONE
5.2
Specifiche tecniche
Specifiche Tecniche
Pittogramma Descrizione
Pompa Calore
Il dispositivo è reversibile. Può essere utilizzato sia per il raffreddamento che per il
riscaldamento delle stanze.
Refrigerante R-410A
Refrigerante privo di cloro, ecologico ed ecocompatibile, con un coefficiente di
trasferimento superiore all'R 407 C o all'R22 ed in grado di fornire valori di COP di gran
lunga superiori.
Tecnologia inverter DC
Risparmio energetico superiore rispetto ai sistemi con inverter tradizionale.
Tecnologia inverter
Il consumo si adatta in modo controllato alle esigenze di climatizzazione, garantendo così
costi energetici particolarmente bassi. Il dispositivo può funzionare anche a condizioni
estreme di temperatura.
Filtro antipolvere
Filtro antipolvere.
Telecomando
Telecomando ad infrarossi.
Funzione Hot start
Accensione e spegnimento con batteria calda che evita il rilascio di aria fredda.
Funzione AUTO RESTART
(riaccensione automatica)
Dopo un'interruzione di corrente, la funzione AUTO RESTART assicura la riaccensione
automatica dell'unità in base alle impostazioni effettuate prima dell'interruzione.
Protezione delle valvole
Protezione dei rubinetti dell'unità esterna da condizioni meteorologiche avverse.
Anticongelamento
Evita il congelamento dell'unità esterna nei mesi invernali.
Cassa anticorrosione
L'unità esterna è costruita con acciaio zincato e materiali anticorrosivi.
Resistente anche in ambienti particolarmente salini.
Tabella 5.1 Specifiche tecniche.
IT
VAI 3-WN-U_IT - 05/14 - Vaillant
-7-
ISTRUZIONI OPERATIVE
6
Impostazioni iniziali
6.1
Inserimento delle batterie del telecomando
Inserire due batterie R-03 (AAA) come descritto sotto (vedere
Figura 6.1).
NOTA:
Se sul display non compare alcun messaggio
dopo aver premuto il pulsante ON/OFF, ricollocare
le batterie.Sostituire sempre le due batterie
contemporaneamente.
i
NOTA:
Se il telecomando non funziona correttamente,
rimuovere le batterie e ricollocarle dopo qualche
minuto.
i
Rimuovere le batterie se il climatizzatore non viene
utilizzato a lungo. Se sul dispIaycompare ancora
qualche messaggio, premere il pulsante reset.
A
B
AVVERTENZA:
Pericolo di contaminazione ambientale in caso di
smaltimento non corretto delle batterie.
Quando si sostituiscono le batterie del telecomando,
depositare le batterie vecchie in appositi contenitori.
Non gettarle mai nei rifiuti domestici.
b
6.2
1
Regolazione dell'orologio
Utilizzare il telecomando per regolare l'orologio la prima volta
che si accende l'unità o dopo aver sostituito le batterie, vedere
la Figura 6.2.
2
1
Fig. 6.1 Inserimento delle batterie del telecomando.
Legenda
1 Coperchio batterie
2Batterie
A Area da premere per l'apertura del coperchio
B Compartimento batterie
• Premere il pulsante CLOCK.
Gli indicatori di ora iniziano a lampeggiare sul display del
telecomando.
• Premere i pulsanti + / - per impostare l'ora desiderata:
Premendo i pulsanti + / -, l'impostazione dell'ora aumenterà o
diminuirà di 1 minuto.
• Rimuovere il coperchio batterie premendo leggermente sulla
zona A e spingendo in giù il coperchio.
Tenendo premuti i pulsanti + / -, l'ora aumenterà o diminuirà più
velocemente.
• Inserire le batterie nel telecomando verificando la corretta
posizione dei poli positivo e negativo (indicata sul
compartimento batterie).
• Premere il pulsante CLOCK.
Gli indicatori di ora smetteranno di lampeggiare e l'orologio
inizierà a funzionare.
• Riporre il coperchio.
• Premere il pulsante ON/OFF (vedere la Figura 7.1) per
controllare che le batterie siano inserite correttamente.
-8-
VAI 3-WN-U_IT - 05/14 - Vaillant
ISTRUZIONI OPERATIVE
7
Istruzione operative
7.1
Considerazioni generali sulla sicurezza
durante l'uso
PERICOLO di lesioni fisiche!:
-Non consentire ai bambini di giocare con il
climatizzatore. L'unità non è concepita per l'uso da
parte di bambini o infermi in assenza di supervisione.
Non consentire in nessun caso ai bambini di sedere
sull'unità esterna.
a
1
-Non appoggiare alcun oggetto sull'unità.
-Non azionare l'unità durante l'uso di insetticidi o
pesticidi. Queste sostanze potrebbero penetrare
nell'unità e nuocere alla salute di coloro che sono
allergici a determinate sostanze chimiche.
2
-Evitare l'esposizione prolungata all'aria condizionata
o a temperature estreme nella stanza e non orientare
il flusso d'aria verso le persone, soprattutto bambini,
malati o anziani.
-Non utilizzare quest'unità per conservare generi
alimentari, opere d'arte, dispositivi di precisione, piante
o animali.
3
-Non coprire la griglia di ventilazione e non inserire le
dita o altri oggetti negli sfiati di ingresso e di uscita,
o fra le alette dell'unità quando l'unità è in funzione.
L'elevata velocità della ventola può essere causa di
lesioni.
-Ricordarsi sempre di scollegare l'unità prima di aprire
la griglia di ingresso. Non scollegare l'unità tirando il
cavo di alimentazione.
Fig. 6.2 Regolazione dell'orologio.
Legenda
1 Indicatore di ora
2 Pulsanti +/3 Pulsante CLOCK
-Non lasciare aggrovigliato il cavo di alimentazione
ed evitare accuratamente di danneggiarlo. Dopo
l'installazione, deve essere possibile raggiungere
senza difficoltà il cavo di alimentazione.
-Non danneggiare i componenti dell'unità che
contengono il refrigerante: non forare i tubi del
climatizzatore con oggetti affilati o appuntiti, non
schiacciare né torcere i tubi, non grattare via il
trattamento superficiale. Se il refrigerante fuoriesce
penetrando negli occhi, può causare gravi lesioni
ocular.
-Non interrompere il funzionamento del climatizzatore tirando il cavo.
IT
VAI 3-WN-U_IT - 05/14 - Vaillant
-9-
ISTRUZIONI OPERATIVE
PERICOLO di lesioni fisiche!:
Pericolo di incendio e di esplosione.
a
-I climatizzatori danneggiati non vanno rimessi in
funzione. In presenza di dubbi, rivolgersi al proprio
negoziante di fiducia.
7.2
Identificazione delle funzioni
7.2.1
Pulsanti del telecomando
-Il climatizzatore va collegato a massa in conformità
alle sue caratteristiche tecniche.
-Non porre fonti di calore con fiamma nel flusso
d'aria del dispositivo. Non utilizzare spray o altri gas
infiammabili accanto all'unità. Ciò può essere causa di
incendio.
-In caso di anomalie (es. odore di bruciato), scollegare
immediatamente l'unità dall'alimentazione elettrica
e contattare il proprio distributore affinché vengano
prese le necessarie contromisure. Se il climatizzatore
continua ad essere usato in condizioni di irregolarità
può danneggiarsi e provocare un cortocircuito o un
incendio.
1
-Se l'alimentazione è danneggiata, assicurarsi che sia
sostituita dal costruttore o dall'addetto alla riparazione
oppure da personale abilitato a tale scopo.
- Se il fusibile dell'unità interna è rotto, sostituirlo
con uno di tipo T.3.15A/ 250V. Se il fusibile dell'unità
esterna è rotto, sostituirlo con uno di tipo T.25A/ 250V.
15
3
-Il cablaggio va eseguito in conformità alle norme di
cablaggio locali.
14
4
- Per proteggere l'unità, disattivare dapprima l'A/C e
dopo almeno 30 secondi, scollegare l'alimentazione.
13
5
-Contattare un tecnico specializzato ed assicurarsi
che vengano prese precauzioni per evitare fughe
di refrigerante. Le fughe di refrigerante di una certa
densità possono causare mancanza d'ossigeno.
12
6
11
7
10
8
PERICOLO:
Pericolo di scossa elettrica.
Non maneggiare l'unità con le mani umide o bagnate.
e
AVVERTENZA:
Pericolo di guasti o malfunzionamento.
- Non porre oggetti sull'unità esterna.
b
2
9
Fig. 7.1 Panoramica dei pulsanti.
Legenda
1 Pulsante ON/OFF
2 Pulsanti + / 3 Pulsante FAN
4 Pulsante I FEEL
5 Pulsante SLEEP
6 Pulsante TIMER-ON
7 Pulsante TIMER-OFF
8 Pulsante X-FAN
9 Pulsante LIGHT
10 Pulsante TURBO
11 Pulsante CLOCK
12 Pulsante TEMP
13 Pulsante ACTIVE IONIZER
14 Pulsante SWING
15 Pulsante MODE
- 10 -
VAI 3-WN-U_IT - 05/14 - Vaillant
ISTRUZIONI OPERATIVE
7.2.2
7.3
Indicatori display
Consigli sull'uso del telecomando
Attenersi ai seguenti consigli sull'uso del telecomando:
20
1
• Quando si usa il telecomando, orientare la testa del
trasmettitore del segnale direttamente verso il ricevitore
dell'unità interna.
19
2
18
3
4
• Mantenere una distanza massima fra il trasmettitore e il
ricevitore di 7 m.
17
5
6
• Ridurre la distanza fra il trasmettitore e l'unità interna in
luoghi in cui siano presenti luci fluorescenti con attivazione
elettronica o telefoni cordless.
16
7
• Non far cadere, non lanciare né colpire il telecomando.
7.3.1
15
14
8
13
9
10
12
• Evitare ostacoli fra il trasmettitore ed il ricevitore.
11
Blocco del telecomando
Per bloccare i pulsanti ed il display del telecomando:
• Premere il pulsante - / + per più di 2 secondi.
Gli altri pulsanti sono disattivati.
Appare l'indicatore di blocco.
Per disattivare il blocco:
• Premere nuovamente il pulsante - / +.
Fig. 7.2 Panoramica degli indicatori.
Gli altri pulsanti sono riattivati.
Legenda
1 Indicatore TURBO
2 Indicazione di TRASMISSIONE
3 Indicazione di FREEZE PROTECTION
4 Indicatore Air (funzione non disponibile per questi modelli)
5 Indicatore ACTIVE IONIZER
6 Indicatore X-FAN
7 Indicazione della TEMPERATURA
8 Indicatore TIMER
9 Indicatore LOCK
10 Indicatore SWING
11 Indicatore TEMP
12 Indicatore LIGHT
13 Indicatore SLEEP
14 Indicatore HEAT MODE
15 Indicatore FAN MODE
16 Indicatore DRY MODE
17 Indicatore COOL MODE
18 Indicatore AUTO MODE
19 Indicatore I FEEL
20 Indicatore FAN SPEED
L'indicatore di blocco scompare.
7.3.2
Modalità LIGHT
Premere il pulsante LIGHT per meno di 2 secondi per attivare
la funzione LIGHT. Il display dell’unità interna viene spento. Per
riaccendere il display, premere nuovamente il bottone LIGHT
per meno di 2 secondi.
7.4
Accensione / Spegnimento dell'unità
Per accendere l'unità:
• Premere il pulsante ON sull'unità interna o sul telecomando:
l'unità inizierà a funzionare.
Per spegnere l'unità:
• Premere il pulsante OFF sull'unità interna o sul telecomando:
l'unità si arresterà.
IT
VAI 3-WN-U_IT - 05/14 - Vaillant
- 11 -
ISTRUZIONI OPERATIVE
7.5
Selezione della modalità operativa
7.5.1
Per attivare questa modalità:
Con l'unità accesa (vedere sezione 7.4):
Modalità automatica (AUTO)
In modalità Automatica (AUTO), il climatizzatore seleziona
automaticamente il raffreddamento (COOL) o il riscaldamento
(HEAT) a seconda della temperatura ambiente.
• Premere il pulsante MODE.
Vengono visualizzate le diverse modalità operative.
• In modalità RAFFREDDAMENTO la temperatura impostata
è di 25 ° C.
• In modalità RISCALDAMENTO la temperatura impostata è di
20 ° C.
Fig. 7.4 Modalità operative.
• Selezionare la modalità operativa Automatica (AUTO).
• Premere i pulsanti TEMP per selezionare l'impostazione
della temperatura.
3
Premendo i pulsanti - / +, l'impostazione della temperatura
aumenterà o diminuirà di 1°C.
Quando la ventola viene impostata in modalità AUTO, il
climatizzatore imposta automaticamente la velocità della
ventola in base all'effettiva temperatura ambiente.
1
2
Fig. 7.3 Selezione della modalità Automatica.
Legenda
1 Pulsanti + / - 2 Pulsante MODE
3 Indicatore modalità AUTO
- 12 -
VAI 3-WN-U_IT - 05/14 - Vaillant
ISTRUZIONI OPERATIVE
7.5.2
Modalità raffreddamento (COOL)
Per attivare questa modalità:
In modalità Raffreddamento (COOL), il climatizzatore consente
solo di raffreddare.
NOTA:
In modalità Raffreddamento, si consiglia di orientare le
griglie orizzontalmente.
i
Con l'unità accesa (vedere sezione 7.4):
• Premere il pulsante MODE.
Vengono visualizzate le diverse modalità operative.
Fig. 7.6 Modalità operative.
4
• Selezionare la modalità operativa Raffreddamento (COOL).
• Premere i pulsanti - / + per selezionare l'impostazione della
temperatura.
Premendo i pulsanti - / +, l'impostazione della temperatura
aumenterà o diminuirà di 1°C.
• Premere il pulsante FAN per selezionare la velocità della
ventola.
Ad ogni pressione del pulsante FAN, la velocità della ventola
cambia come illustrato in Figura 7.7.
1
3
2
Fig. 7.7 Velocità della ventola.
NOTA:
In modalità Raffreddamento, l'uso prolungato dell'unità
in condizioni di elevata umidità dell'aria può provocare
la caduta di gocce d'acqua sulla griglia dell'uscita.
i
Fig. 7.5 Selezione della modalità Raffreddamento.
Legenda
1 Pulsanti + / 2 Pulsante FAN
3Pulsante MODE
4Indicatore modalità COOL
IT
VAI 3-WN-U_IT - 05/14 - Vaillant
- 13 -
ISTRUZIONI OPERATIVE
7.5.3
Modalità deumidificazione (DRY)
Per attivare questa modalità:
In modalità Deumidificazione (DRY), il climatizzatore elimina
l'umidità dall'atmosfera.
Con l'unità accesa (vedere sezione 7.4):
• Premere il pulsante MODE.
Vengono visualizzate le diverse modalità operative.
3
Fig. 7.9 Modalità operative.
• Selezionare la modalità operativa (DRY).
• Premere i pulsanti - / + per selezionare l'impostazione della
temperatura.
Premendo i pulsanti - / +, l'impostazione della temperatura
aumenterà o diminuirà di 1°C.
1
2
Quando la ventola viene impostata in modalità DRY, il
climatizzatore imposta automaticamente la ventola a bassa
velocità per fare il modo più efficace.
NOTA:
In modalità Deumidificazione, l'uso prolungato dell'unità
in condizioni di elevata umidità dell'aria può provocare
la caduta di gocce d'acqua sulla griglia di uscita.
i
Fig. 7.8 Selezione della modalità Deumidificazione.
Legenda
1 Pulsanti + / - 2 Pulsante MODE
3Indicatore della modalità DRY
- 14 -
VAI 3-WN-U_IT - 05/14 - Vaillant
ISTRUZIONI OPERATIVE
7.5.4
Modalità fan (FAN)
Per attivare la modalità Fan (FAN):
In modalità Fan (FAN), l'impostazione della temperatura e la
funzione SLEEP sono disabilitate.
Con l'unità accesa (vedere sezione 7.4):
• Premere il pulsante MODE.
Vengono visualizzate le diverse modalità operative.
3
Fig. 7.11 Modalità operative.
• Selezionare la modalità operativa Fan (FAN).
• Premere il pulsante FAN per selezionare la velocità della ventola.
Ad ogni pressione del pulsante FAN, la velocità della ventola
cambia come illustrato in Figura 7.12.
Fig. 7.12 Velocità della ventola.
2
1
Fig. 7.10 Selezione della modalità Fan.
Legenda
1 Pulsante FAN
2 Pulsante MODE
3 Indicatore della modalità FAN
IT
VAI 3-WN-U_IT - 05/14 - Vaillant
- 15 -
ISTRUZIONI OPERATIVE
7.5.5
Modalità riscaldamento (HEAT)
Per attivare questa modalità:
In modalità Riscaldamento, il climatizzatore consente solo di
riscaldare.
Con l'unità accesa (vedere sezione 7.4):
• Premere il pulsante MODE.
• Vengono visualizzate le diverse modalità operative.
Fig. 7.14 Modalità operative.
4
• Selezionare la modalità operativa Riscaldamento (HEAT).
• Premere i pulsanti TEMP / TIME per selezionare
l'impostazione della temperatura.
Premendo i pulsanti TEMP / TIME, l'impostazione della
temperatura aumenterà o diminuirà di 1°C.
1
• Premere il pulsante FAN per selezionare la velocità della
ventola.
Ad ogni pressione del pulsante FAN, la velocità della ventola
cambia come illustrato in Figura 7.15.
3
2
Fig. 7.15 Velocità della ventola.
NOTA:
Quando l'unità arresta il compressore da termostato, o
quando la funzione sbrinamento è attiva, il ventilatore
dell'unità interna rimane fermo per evitare l'espulsione di
aria fredda.
i
7.6
Fig. 7.13 Selezione della modalità Riscaldamento.
Legenda
1 Pulsanti + / 2 Pulsante FAN
3 Pulsante MODE
4 Indicatore della modalità HEAT
Regolazione della direzione del flusso
dell'aria
La direzione del flusso d'aria può essere regolato in direzione
verticale su modalità HEAT (raffreddamento), e in direzione
orizzontale in modalità COOL (freddo).
PERICOLO di lesioni fisiche!:
Evitare il contatto fisico diretto con i flussi d'aria,
particolarmente potenti. Non esporre animali o piante al
flusso d'aria diretto poiché potrebbero subire danni.
e
AVVERTENZA:
Pericolo di guasti o malfunzionamento.
Non spostare manualmente la griglia dell'uscita.
b
NOTA:
Se la griglia non è in posizione corretta, arrestare
l'unità per qualche minuto e riavviarla eseguendo le
regolazioni richieste per mezzo del telecomando.
i
- 16 -
VAI 3-WN-U_IT - 05/14 - Vaillant
ISTRUZIONI OPERATIVE
7.7
Selezione di funzioni particolari
7.7.1
Per attivare questa modalità:
• Selezionare la modalità operativa desiderata (vedere
sezione 7.5).
Funzione sleep
Le modalità COOL e HEAT possono essere impostate durante
le ore notturne per evitare un eccessivo aumento o diminuzione
della temperatura.
• Premere il pulsante SLEEP.
In modalità COOL
Viene aumentato 1 ° C ogni ora rispetto alla temperatura
impostata durante le prime due ore. Raggiunto questo
punto la temperatura è mantenuta per i successivi 5 ore, poi
gradualmente diminuita nuovamente durante le successive due
ore per raggiungere la temperatura impostata inizialmente.
In modalità HEAT
La temperatura ambiente è diminuita 1 °C ogni ora rispetto alla
temperatura impostata durante le prime due ore. Raggiunto
quel punto la temperatura è mantenuta per le successive 5
ore, e quindi recuperare la temperatura impostata inizialmente,
crescente 1 °C ogni ora.
2
NOTA:
Quando la funzione SLEEP è attiva, la ventola funziona
a bassa velocità.
i
1
Fig. 7.16 Selezione della funzione SLEEP.
Legenda
1 Pulsante SLEEP
2 Indicatore della funzione SLEEP
IT
VAI 3-WN-U_IT - 05/14 - Vaillant
- 17 -
ISTRUZIONI OPERATIVE
7.7.2
Funzione Timer On/Off (accensione/
spegnimento tramite timer)
Per programmare un collegamento dell’unità:
• Con l’unità spenta, premere il pulsante TIMER ON.
L’indicatore TIMER ON inizia a lampeggiare. Impostare
l’orario di avvio desiderato per l’unità premendo i pulsanti
- / +. Premere il pulsante TIMER ON per impostare l'ora
desiderata.
L'unità può essere accesa/spenta tramite il timer.
Per programmare uno spegnimento dell’unità:
• Con l’unità accesa, premere il pulsante TIMER OFF
due volte. L’indicatore TIMER OFF inizia a lampeggiare.
Impostare l’orario di spegnimento desiderato per l’unità
premendo i pulsanti - / +. Premere il pulsante TIMER OFF
per impostare l'ora desiderata.
1
Per disattivare questa modalità:
• Premere il pulsante TIMER ON o TIMER OFF di nuovo.
NOTA:
REPEAT disponibili per impostazione predefinita. Se
il programma non viene annullato, verrà ripetuta ogni
giorno.
i
2
NOTA:
Prima di attivare il timer, impostare l'ora corretta.
i
i
NOTA:
Dopo la sostituzione delle batterie o l'eventuale
mancanza di alimentazione, riavviare l'impostazione
dell'ora.
3
4
Fig. 7.17 Selezione della funzione TIMER.
Legenda
1 Indicatore della funzione TIMER ON/OFF
2 Pulsanti - / + (aumento/diminuzione)
3 Pulsante TIMER ON
4 Pulsante TIMER OFF
- 18 -
VAI 3-WN-U_IT - 05/14 - Vaillant
ISTRUZIONI OPERATIVE
7.7.3
Funzione turbo
7.7.4
Funzione X-fan
Utilizzare la funzione TURBO se si desidera raffreddare (COOL
MODE) o riscaldare (HEAT MODE) rapidamente.
1
1
2
2
Fig. 7.19 Selezione della funzione X-FAN.
Fig. 7.18 Selezione della funzione TURBO .
Legenda
1 Indicatore della funzione TURBO
2 Pulsante TURBO
Per attivare o disattivare la funzione TURBO:
• Premere il pulsante TURBO per meno di 2 secondi.
Legenda
1 Indicatore della funzione X-FAN
2 Pulsante X-FAN
Premendo il pulsante “X-fan”, sia in modo COOL che in modo
DRY, si illumina l’indicatore sul display del telecomando e il
ventilatore dell’unità interna rimane in funzionamento per circa
2 minuti, anche se l’unità viene spenta o ne viene programmato
lo spegnimento. Trascorso questo lasso di tempo, l’unità
si spegne automaticamente e l’indicatore del modo COOL
presente nell’unità interna lampeggia ogni 10 secondi.
Questo fa sì che l’umidità all’interno dell’unità venga espulsa,
permettendo di mantenere la stessa asciutta ed evitando così la
corrosione dei suoi componenti, nonché l’apparizione di batteri.
La funzione X-fan non è disponibile in modalità AUTO, FAN o
HEAT.
IT
VAI 3-WN-U_IT - 05/14 - Vaillant
- 19 -
ISTRUZIONI OPERATIVE
7.7.5
Funzione Temp
7.7.6
Funzione I Feel
2
1
1
2
Fig. 7.20 Selezione della funzione TEMP.
Fig. 7.21 Selezione della funzione I FEEL.
Legenda
1 Indicatore della modalità TEMP
2Pulsante TEMP
Legenda
1Pulsante I FEEL
2 Indicatore della modalità I FEEL
Questa funzione mostra la temperatura impostata e la
temperatura ambiente sul display dell'unità interna.
Premere questo pulsante per attivare la funzione di I FEEL.
Premere il pulsante TEMP visualizzerà:
Temperatura programmata
Temperatura ambiente
Con questa modalità la temperatura ambiente viene rilevata
dal telecomando, che trasmette all'unità interna il segnale,
regola automaticamente la velocità del ventilatore dell'unità
interna per ottenere un comfort ottimale, ottenendo un risparmio
energetico.
Premere nuovamente questo tasto per annullare la funzione di
I FEEL.
Temperatura esterna
(Non disponibile per questo modello)
- 20 -
VAI 3-WN-U_IT - 05/14 - Vaillant
ISTRUZIONI OPERATIVE
7.7.7
Funzione Active Ionizer
7.7.8
Funzione Freeze Protection
1
1
4
2
3
2
Fig. 7.21 Selezione della funzione ACTIVE IONIZER.
Fig. 7.22 Selezione della funzione FREEZE PROTECTION.
Legenda
1 Indicatore della modalità ACTIVE IONIZER
2 Pulsante ACTIVE IONIZER
Legenda
1 Indicatore della modalità FREEZE PROTECTION
2Pulsante CLOCK
3Pulsante TEMP
4 Indicatore della modalità HEAT
viene visualizzato sul visore del telecomando quando
si preme il pulsante ACTIVE IONIZER quattro volte
consecutivamente.
Questa funzione immette nell'ambiente un flusso costante di
ioni. Lo ionizzatore genera ioni che, dispersi nell'ambiente,
eliminano le particelle microscopiche di polvere e sporcizia
presenti nell'aria. Eliminano i batteri e gli odori, migliorando la
qualità dell'aria e rendendola più fresca.
Selezionando questa funzione l'unità si attiverà
automaticamente in riscaldamento per non far abbassare la
temperatura ambiente sotto gli 8°C.
Per attivare la protezione FREEZE PROTECTION: Premere
il pulsante TEMP e CLOCK simultaneamente per più di 2
secondi. Ripetere per disabilitare.
Premere nuovamente il pulsante per azzerare il visore.
IT
VAI 3-WN-U_IT - 05/14 - Vaillant
- 21 -
ISTRUZIONI OPERATIVE
7.8
Indicatori dell’unità interna
2
1
3
4
5
Fig. 7.21 Panoramica dello schermo nell’unità interna.
Legenda
1 Indicatore della modalità HEATING (Riscaldamento)
2 Indicatore della modalità COOLING (Raffreddamento)
3 Indicazione della TEMPERATURA
4 Indicatore ON-OFF
5 Indicatore della modalità DEFROST (Sbrinamento)
7.9
Funzionamento d’emergenza
Utilizzare questa funzione solo quando il telecomando è rotto o
è stato piazzato in modo erroneo.
Per attivare:
• Premere l’interruttore di funzionamento d’emergenza.
• Si sentirà un bip, che indica che la funzione è attiva.
Fig 7.22 Interruttore di funzionamento d’emergenza.
Successione operativa:
• Alla prima pressione del pulsante, l’unità entra in modalità
Auto.
• Alla seconda pressione del pulsante, l’unità si spegne.
NOTA:
Durante il funzionamento d’emergenza, l’unità opera,
per impostazione predefinita, a 24º.
i
- 22 -
VAI 3-WN-U_IT - 05/14 - Vaillant
MANUTENZIONE
8
8.1
Consigli per il risparmio energetico
Temperatura ambiente adatta
Impostare la temperatura ambiente ad un livello adeguato al
fine di garantire il benessere fisico, il confort e il rispetto delle
norme di legge. Ogni grado al di sopra del valore indicato
comporta un aumento significativo del consumo energetico.
La temperatura deve essere adatta all'uso specifico della
stanza: la temperatura nelle stanze vuote e nelle camere da
letto non deve essere uguale a quella della stanza principale.
8.2
Evitare dispersioni di energia
In estate, durante il funzionamento in raffrescamento evitare
qualsiasi fonte di calore, in inverno ( in modalità riscaldamento)
evitare dispersioni di calore,ad esempio chiudendo le finestre
o leporte rimaste parzialmente aperte.. In questo modo l'unità
consumerà meno energia.
8.3
Funzionamento in modalità riscaldamento
(pompa di calore)
Quando è in modalità Riscaldamento, l'unità opera come pompa
di calore, ovvero preleva l'aria dall'esterno (tramite l'unità esterna)
e la rilascia all'interno (tramite l'unità interna). I tradizionali sistemi
di riscaldamento, invece, producono calore consumando energia.
Riscaldare una stanza per mezzo di una pompa di calore risulta
quindi più economico rispetto all'uso di sistemi di riscaldamento
tradizionali (radiatori, stufe, caldaie, ecc.).
8.4
8.5
Spesso, all'interno della casa, è riscaldata solo una stanza.
Oltre alle superfici di delimitazione delle stanze, ad esempio,
pareti, porte, finestre, soffitti e pavimenti, anche le stanze
adiacenti vengono riscaldate incontrollatamente, sprecando
così energia. La stanza non viene perciò riscaldata
adeguatamente e si avverte una spiacevole sensazione di
freddo (lo stesso avviene in parte lasciando aperte le porte che
separano le zone riscaldate dalle zone non riscaldate).
Si tratta di un'abitudine che comporta sprechi: il riscaldamento
è acceso e ciononostante la temperatura ambiente non è
confortevole. È possibile ottenere un confort maggiore ed una
modalità di utilizzo più razionale riscaldando tutte le stanze
della casa in modo uniforme, in base all'uso di ogni stanza (la
temperatura delle stanze vuote e delle camere da letto non
deve essere uguale alla temperatura della stanza principale).
8.6
È utile invece ridurre ulteriormente la temperatura in caso di
assenze prolungate, ad esempio durante le vacanze.
Durante l'inverno è necessario fornire protezione dal
congelamento.
Riduzione dei consumi durante le ore
notturne (funzione sleep)
L'unità è dotata di una funzione SLEEP che modifica
automaticamente la temperatura durante le ore notturne in base
a valori predefiniti (in modalità Riscaldamento, la temperatura
scende leggermente; in modalità Raffreddamento, aumenta
leggermente). In tal modo, non solo si ottiene un maggior
confort, ma anche un risparmio dei consumi elettrici. Per
maggiori informazioni sulla funzione SLEEP, consultare la
sezione 7.7.1).
8.7
Temperatura ambiente in caso di assenza
In modalità Riscaldamento, è possibile risparmiare energia
mantenendo la temperatura ambiente a circa 5 ºC al di sotto
della temperatura normale. Una riduzione superiore a 5º C
non aumenta il risparmio energetico poiché è necessario
un maggiore potere calorifico per garantire il funzionamento
continuo in condizioni operative normali.
Riscaldamento uniforme
Riduzione dei consumi con la
programmazione dell'orario di
funzionamento (funzione timer)
Utilizzando la funzione TIMER, è possibile regolare l'orario
di attivazione dell'unità. È quindi possibile programmare il
funzionamento dell'unità in modo da farla funzionare solo quando
necessario, ottenendo così un funzionamento economico.
8.8
Manutenzione corretta dell'unità
Un'unità in perfette condizioni è in grado di funzionare in
modo efficiente, sfruttando al massimo l'energia consumata.
Assicurarsi che l'unità sia sottoposta a corretta manutenzione
(per maggiori informazioni, consultare la sezione 10). In
particolare, verificare che i filtri siano puliti e che gli sfiati di
ingresso e di uscita nell'unità interna ed esterna non siano
ostruiti.
IT
VAI 3-WN-U_IT - 05/14 - Vaillant
- 23 -
MANUTENZIONE
9
Risoluzione dei problemi
La tabella sottostante descrive una serie di problemi e le
possibili cause e soluzioni (vedere la Tabella 9.1).
Se le soluzioni descritte non sono sufficienti a risolvere il
problema, contattare l'installatore di fiducia o rivolgersi al centro
di assistenza CAT Vaillant più vicino.
SINTOMI
POSSIBILI CAUSE
POSSIBILI SOLUZIONI
Il sistema non riparte immediatamente
Per la protezione del sistema, quando l'unità si
ferma, non riparte prima che siano trascorsi 3
minuti
Attendere 3 minuti prima di far ripartire l'unità
Quando si estrae e si reinserisce la spina
di corrente, il circuito di protezione entrerà
in azione per tre minuti per proteggere il
climatizzatore
Dopo aver reinserito la spina, attendere 3 minuti
prima di far ripartire l'unità
La spina dell'alimentazione non è inserita
Inserire la spina e avviare l'unità posizionando il
selettore su "I" (start)
Interruzione dell'alimentazione
Riattivare l'alimentazione
Il fusibile è saltato
Sostituire il fusibile. Usare solo i fusibili indicati
per ogni modello. Non usare cavi o altro
materiale per sostituire il fusibile. Sussiste il
pericolo di incendio
Vi sono porte e/o finestre aperte
Chiudere le porte e/o finestre
Fonte di calore nelle vicinanze (ad es. presenza
di molte persone nella stanza)
Se possibile, eliminare la fonte di calore
Il termostato è impostato su una temperatura
troppo elevata in modalità Raffreddamento
o eccessivamente bassa in modalità
Riscaldamento
Impostare correttamente la temperatura
Vi è un ostacolo di fronte agli sfiati dell'aria
Rimuovere l'ostacolo per consentire all'aria di
circolare adeguatamente
La temperatura ambiente non ha raggiunto il
livello previsto
Attendere qualche istante
Filtro dell'aria sporco od occluso
Pulire il filtro dell'aria (il filtro dell'aria andrebbe
pulito ogni 15 giorni)
Durante il funzionamento in modalità
Raffreddamento, penetrano raggi di sole diretti
attraverso la finestra?
Utilizzare una tenda per proteggere il
climatizzatore
Durante il funzionamento o in fase di arresto del
climatizzatore, si può percepire un gorgoglio.
Questo rumore è maggiormente udibile durante
i primi 2-3 minuti di funzionamento
Ciò è normale in un climatizzatore. Il rumore è
provocato dal refrigerante che scorre all'interno
del sistema).
Durante il funzionamento si sente uno
scricchiolio
Ciò è normale in un climatizzatore. Il rumore
è provocato dall'involucro che si espande
o si restringe a causa delle differenze di
temperatura
Se il rumore è forte ed è generato dal flusso
d'aria durante il funzionamento, è possibile che i
filtri dell'aria siano troppo sporchi
Pulire adeguatamente i filtri dell'aria
Il climatizzatore emette degli odori
Ciò è dovuto al fatto che il sistema mette in
circolo gli odori provenienti dall'interno (mobili,
sigarette)
La situazione non richiede contromisure
Il climatizzatore emette della nebbiolina o
vapore
Durante il funzionamento in modalità
COOL o DRY, l'unità interna può emettere
della nebbiolina. Ciò è dovuto al rapido
raffreddamento dell'aria interna.
La situazione non richiede contromisure
Il sistema non funziona (la ventilazione non
parte)
Raffreddamento o riscaldamento insufficiente
Il climatizzatore fa rumore
Tabella 9.1
- 24 -
Risoluzione dei problemi.
VAI 3-WN-U_IT - 05/14 - Vaillant
MANUTENZIONE
10 Manutenzione
PERICOLO:
Pericolo di scossa elettrica.
Scollegare l'unità e l'interruttore magnetotermico prima
di eseguire la manutenzione sull'unità per evitare
lesioni.
e
PERICOLO:
Pericolo di scossa elettrica.
Non pulire l'unità con acqua.
e
AVVERTENZA:
Pericolo di guasti o malfunzionamento.
Per pulire l'unità, non utilizzare benzina, diluenti o
detergenti. Questi prodotti potrebbero danneggiare il
rivestimento dell'unità.
b
AVVERTENZA:
L'uso di acqua calda con temperatura superiore ai
40ºC può causare lo scolorimento o la deformazione
dell'unità.
b
10.1 Pulizia del telecomando
• Pulire il telecomando con un panno asciutto. Non utilizzare
acqua calda per la pulizia del telecomando.
• Non utilizzare detergenti per vetri o panni chimici.
10.2 Pulizia dell'unità interna
• Pulire la parte esterna dell'unità con un panno asciutto e
soffice.
• Per le macchie ostinate, utilizzare un detergente neutro
diluito con acqua. Eliminare dal panno l'acqua in eccesso
prima di pulire. Eliminare ogni traccia di detergente dall'unità
al termine della pulizia.
10.3 Pulizia dei filtri dell'aria
Il filtro dell'aria elimina la polvere proveniente dalla stanza e
assorbita dall'unità interna.
Se il filtro è ostruito, la funzionalità del climatizzatore verrà
ridotta, il compressore potrebbe danneggiarsi e la batteria
dell'unità interna potrebbe bloccarsi.
• Fissare il filtro correttamente e assicurarsi che sia ben
bloccato dietro il fermo. Se i filtri di destra e di sinistra
non sono fissati correttamente, ciò potrebbe causare
malfunzionamenti.
AVVERTENZA:
Pericolo di guasti o malfunzionamento.
Non inserire profumi, sistemi antiodore o simili nel filtro
o nel ritorno dell'aria interna.
Ciò potrebbe danneggiare e imbrattare la batteria di
evaporazione. Se necessario, installare questi sistemi
nel punto di uscita dell'unità e assicurarsi che siano in
funzione solo quando la ventola è in funzione.
b
10.4 Pulizia dell'unità esterna
AVVERTENZA:
Utilizzare appositi dispositivi di protezione personale
(elmetto, guanti, stivali di sicurezza ed occhiali di
protezione).
b
• Pulire la parte esterna dell'unità con un panno asciutto.
• Rimuovere all'occorrenza la polvere dalla superficie degli
sfiati.
• Se l'unità è collocata in un ambiente polveroso, pulire
periodicamente la batteria del condensatore con una
spazzola morbida.
• Controllare saltuariamente la base dell'unità esterna.
PERICOLO DI LESIONI FISICHE!
Se la base è danneggiata o deteriorata, l'apparecchio
potrebbe cadere e causare danni fisici o materiali.
e
PERICOLO DI LESIONI FISICHE!
Non smontare l'uscita dell'unità esterna. Lasciare
esposta la ventola può essere molto pericoloso.
e
NOTA:
Si consiglia di contattare un tecnico esperto di
climatizzatori o l'Assistenza Tecnica Vaillant
per richiedere un preventivo per un servizio di
manutenzione. Ciò aiuterà a prolungare la durata
operativa del climatizzatore e a migliorarne le
prestazioni.
i
Pulire regolarmente il filtro dell'aria per prevenire tali problemi. A
tale scopo:
• Rimuovere i filtri dell'aria sollevando leggermente la linguetta
centrale finché si sarà staccata dal fermo e togliere il filtro dal
basso.
• Pulire il filtro rimuovendo la polvere o le impurità presenti per
mezzo di un aspirapolvere o pulire i filtri con acqua fredda.
• Assicurarsi che i filtri siano completamente asciutti
(mettendoli ad asciugare all'ombra) prima di ricollocarli
nell'unità.
IT
VAI 3-WN-U_IT - 05/14 - Vaillant
- 25 -
MANUTENZIONE
11 Stoccaggio per periodi di tempo
prolungati
Se non si intende utilizzare l'unità entro breve:
• Azionare la ventola per due o tre ore ad una temperatura di
30ºC, in modalità COOL e con la ventola ad alta velocità per
evitare sedimenti od odori.
• Arrestare l'unità e scollegare l'interruttore magnetotermico.
• Pulire i filtri dell'aria.
Fig. 12.1 Simbolo di riciclaggio.
• Pulire l'unità esterna.
Il prodotto è contrassegnato da questo simbolo (vedere figura
12.1).
• Rimuovere le batterie dal telecomando.
Prima di riaccendere l'unità:
• Inserire le batterie del telecomando.
• Assicurarsi che siano fissati sia il filtro di destra sia quello di
sinistra prima di mettere in funzione il climatizzatore.
• Controllare che i filtri dell'aria non siano ostruiti.
• Controllare che l'uscita e l'ingresso dell'aria non siano
ostruiti.
• Controllare che l'interruttore magnetotermico sia collegato.
PERICOLO DI LESIONI FISICHE!
In caso che l'apparecchio sia rimosso e rimontato
successivamente, assicurarsi che sia installato
correttamente da personale qualificato (vedere il
manuale di installazione). Altrimenti si può verificare
la fuoriuscita di acqua, la fuga di refrigerante, il corto
circuito o addirittura un incendio.
e
• Ciò significa che al termine della sua vita utile non potrà
essere smaltito come rifiuto urbano bensì, in conformità
al DLGS 151/2005 sul recupero dei RAEE, nel rispetto
dell’ambiente, dovrà essere smaltito come rifiuto elettrico
presso la piazzola ecologica comunale e/o secondo le
disposizioni del Comune di residenza e del relativo pubblico
servizio di igiene urbana, oppure, nel caso in cui il prodotto
venisse sostituito da uno nuovo per lo stesso uso, potrà
essere consegnato al rivenditore presso il quale si effettua
l’acquisto del nuovo dispositivo.
• Nel caso in cui il rifiuto elettrico non venga smaltito in
ottemperanza a quanto prescritto dalla Legge Italiana
si contravverrà a quanto prescritto nell’articolo 14 del
DLGS 22/1997 e si incorrerà quindi nelle sanzioni previste
nell’articolo 50 del medesimo Decreto Legge.
12 Smaltimento del prodotto
PERICOLO DI LESIONI FISICHE!:
Nell'effettuare lo smaltimento del prodotto, assicurarsi
che siano adottate le necessarie precauzioni. A tale
scopo, seguire a ritroso i passi descritti nel manuale
di installazione e utilizzare gli strumenti e i mezzi di
protezione necessari.
Assicurarsi che lo smontaggio sia eseguito da tecnici
qualificati ed appositamente addestrati.
a
AVVERTENZA:
Lo smaltimento dell'unità comporta il pericolo di
inquinamento ambientale. Per evitare tale pericolo,
seguire le istruzioni descritte in questa sezione.
b
AVVERTENZA:
I sistemi di climatizzazione contengono refrigeranti
che richiedono lo smaltimento speciale. I materiali utili
contenuti nel climatizzatore possono invece essere
riciclati..
b
- 26 -
VAI 3-WN-U_IT - 05/14 - Vaillant
Vaillant forbeholder os ret til at ændre disse specifikationer uden forudgående varsel
Vaillant reserves the right to add modifications without prior notice
Vaillant se reserva el derecho de introducir modificaciones sin previo aviso
Vaillant zadržava pravo promjene bez prethodne najave
Vaillant si riserva il diritto di apportare modifiche senza preavviso
Vaillant A/S
Drejergangen 3 A
DK-2690 Karlslunde
Telefax +45 46 16 02 20
Telefon +45 46 16 02 00
www.vaillant.dk
[email protected]
Vaillant Ltd
Nottingham Road
Belper
Telephone 0845 602 2922
Derbyshire
DE56 1JT
www.vaillant.co.uk
[email protected]
Vaillant, S.L.
Atención al cliente
Polígono Ugaldeguren III, Parcela 22
48170 Zamudio (Bizkaia)
Atención al profesional 902 11 63 56
Asistencia Técnica 902 43 42 44
Vaillant d.o.o.
Planinska ul. 11
10000 Zagreb
Tehnički odjel: 01/6188 673
www.vaillant.hr
Hrvatska
Faks: 01/6188 669
Tel.: 01/6188 670, 6188 671, 6064 380
OIB: 65932949804
[email protected]
Vaillant S.p.A.
20159 Milano
Via Benigno Crespi 70
Telefax 02/69 71 22 00•www.vaillant.it
Telefono 02/69 21 71
[email protected]
0020178869_0305/14 [email protected]
VAI3-WN-U www.vaillant.es
© Copyright 2026 Paperzz