Elgg Documentation
Release master
Various
February 04, 2015
Contents
1
2
3
Getting Started
1.1 Features . . . . . . .
1.2 Bundled plugins . .
1.3 License . . . . . . .
1.4 Installation . . . . .
1.5 Developer Overview
.
.
.
.
.
.
.
.
.
.
.
.
.
.
.
.
.
.
.
.
.
.
.
.
.
.
.
.
.
.
.
.
.
.
.
.
.
.
.
.
.
.
.
.
.
.
.
.
.
.
.
.
.
.
.
.
.
.
.
.
.
.
.
.
.
.
.
.
.
.
.
.
.
.
.
.
.
.
.
.
.
.
.
.
.
.
.
.
.
.
.
.
.
.
.
.
.
.
.
.
.
.
.
.
.
.
.
.
.
.
.
.
.
.
.
.
.
.
.
.
.
.
.
.
.
.
.
.
.
.
.
.
.
.
.
.
.
.
.
.
.
.
.
.
.
.
.
.
.
.
.
.
.
.
.
.
.
.
.
.
.
.
.
.
.
.
.
.
.
.
.
.
.
.
.
.
.
.
.
.
.
.
.
.
.
.
.
.
.
.
.
.
.
.
.
.
.
.
.
.
.
.
.
.
.
.
.
.
.
.
.
.
.
.
.
3
3
4
13
15
25
Administrator Guides
2.1 Getting Started . . . .
2.2 Upgrading Elgg . . .
2.3 Plugins . . . . . . . .
2.4 Performance . . . . .
2.5 Cron . . . . . . . . .
2.6 Backup and Restore .
2.7 Duplicate Installation .
2.8 Getting Help . . . . .
.
.
.
.
.
.
.
.
.
.
.
.
.
.
.
.
.
.
.
.
.
.
.
.
.
.
.
.
.
.
.
.
.
.
.
.
.
.
.
.
.
.
.
.
.
.
.
.
.
.
.
.
.
.
.
.
.
.
.
.
.
.
.
.
.
.
.
.
.
.
.
.
.
.
.
.
.
.
.
.
.
.
.
.
.
.
.
.
.
.
.
.
.
.
.
.
.
.
.
.
.
.
.
.
.
.
.
.
.
.
.
.
.
.
.
.
.
.
.
.
.
.
.
.
.
.
.
.
.
.
.
.
.
.
.
.
.
.
.
.
.
.
.
.
.
.
.
.
.
.
.
.
.
.
.
.
.
.
.
.
.
.
.
.
.
.
.
.
.
.
.
.
.
.
.
.
.
.
.
.
.
.
.
.
.
.
.
.
.
.
.
.
.
.
.
.
.
.
.
.
.
.
.
.
.
.
.
.
.
.
.
.
.
.
.
.
.
.
.
.
.
.
.
.
.
.
.
.
.
.
.
.
.
.
.
.
.
.
.
.
.
.
.
.
.
.
.
.
.
.
.
.
.
.
.
.
.
.
.
.
.
.
.
.
.
.
.
.
.
.
.
.
.
.
.
.
.
.
.
.
.
.
.
.
.
.
.
.
.
.
.
.
.
.
.
.
.
.
.
.
.
.
.
.
.
.
.
.
.
.
.
.
.
.
.
.
.
.
.
.
.
.
.
.
.
.
.
.
.
.
.
.
.
.
.
.
27
27
28
30
32
36
38
50
56
Developer Guides
3.1 Don’t Modify Core . . .
3.2 Plugins . . . . . . . . .
3.3 Plugin coding guidelines
3.4 Accessibility Guidelines
3.5 Helper functions . . . .
3.6 Forms + Actions . . . .
3.7 Database . . . . . . . .
3.8 Internationalization . . .
3.9 Menus . . . . . . . . .
3.10 Notifications . . . . . .
3.11 River . . . . . . . . . .
3.12 Page handler . . . . . .
3.13 Routing . . . . . . . . .
3.14 Page ownership . . . . .
3.15 Gatekeeper . . . . . . .
3.16 Widgets . . . . . . . . .
3.17 Views . . . . . . . . . .
3.18 Context . . . . . . . . .
3.19 Themes . . . . . . . . .
3.20 JavaScript . . . . . . . .
.
.
.
.
.
.
.
.
.
.
.
.
.
.
.
.
.
.
.
.
.
.
.
.
.
.
.
.
.
.
.
.
.
.
.
.
.
.
.
.
.
.
.
.
.
.
.
.
.
.
.
.
.
.
.
.
.
.
.
.
.
.
.
.
.
.
.
.
.
.
.
.
.
.
.
.
.
.
.
.
.
.
.
.
.
.
.
.
.
.
.
.
.
.
.
.
.
.
.
.
.
.
.
.
.
.
.
.
.
.
.
.
.
.
.
.
.
.
.
.
.
.
.
.
.
.
.
.
.
.
.
.
.
.
.
.
.
.
.
.
.
.
.
.
.
.
.
.
.
.
.
.
.
.
.
.
.
.
.
.
.
.
.
.
.
.
.
.
.
.
.
.
.
.
.
.
.
.
.
.
.
.
.
.
.
.
.
.
.
.
.
.
.
.
.
.
.
.
.
.
.
.
.
.
.
.
.
.
.
.
.
.
.
.
.
.
.
.
.
.
.
.
.
.
.
.
.
.
.
.
.
.
.
.
.
.
.
.
.
.
.
.
.
.
.
.
.
.
.
.
.
.
.
.
.
.
.
.
.
.
.
.
.
.
.
.
.
.
.
.
.
.
.
.
.
.
.
.
.
.
.
.
.
.
.
.
.
.
.
.
.
.
.
.
.
.
.
.
.
.
.
.
.
.
.
.
.
.
.
.
.
.
.
.
.
.
.
.
.
.
.
.
.
.
.
.
.
.
.
.
.
.
.
.
.
.
.
.
.
.
.
.
.
.
.
.
.
.
.
.
.
.
.
.
.
.
.
.
.
.
.
.
.
.
.
.
.
.
.
.
.
.
.
.
.
.
.
.
.
.
.
.
.
.
.
.
.
.
.
.
.
.
.
.
.
.
.
.
.
.
.
.
.
.
.
.
.
.
.
.
.
.
.
.
.
.
.
.
.
.
.
.
.
.
.
.
.
.
.
.
.
.
.
.
.
.
.
.
.
.
.
.
.
.
.
.
.
.
.
.
.
.
.
.
.
.
.
.
.
.
.
.
.
.
.
.
.
.
.
.
.
.
.
.
.
.
.
.
.
.
.
.
.
.
.
.
.
.
.
.
.
.
.
.
.
.
.
.
.
.
.
.
.
.
.
.
.
.
.
.
.
.
.
.
.
.
.
.
.
.
.
.
.
.
.
.
.
.
.
.
.
.
.
.
.
.
.
.
.
.
.
.
.
.
.
.
.
.
.
.
.
.
.
.
.
.
.
.
.
.
.
.
.
.
.
.
.
.
.
.
.
.
.
.
.
.
.
.
.
.
.
.
.
.
.
.
.
.
.
.
.
.
.
.
.
.
.
.
.
.
.
.
.
.
.
.
.
.
.
.
.
.
.
.
.
.
.
.
.
.
.
.
.
.
.
.
.
.
.
.
.
.
.
.
.
.
.
.
.
.
.
.
.
.
.
.
.
.
.
.
.
.
.
.
.
.
.
.
.
.
.
.
.
.
.
.
.
.
.
.
.
.
.
.
.
.
.
.
.
.
.
.
.
.
.
.
.
.
.
.
.
.
.
.
.
.
.
.
.
.
.
.
.
.
.
.
.
.
.
.
.
.
.
.
.
.
.
.
.
.
.
.
.
.
.
.
.
.
.
.
.
.
.
.
.
.
.
.
.
.
.
.
.
.
.
.
.
.
.
.
.
.
.
.
.
.
.
.
.
.
.
.
.
.
.
.
.
.
.
.
.
.
.
.
.
.
.
.
.
.
.
.
.
.
.
.
.
.
.
.
.
.
.
.
.
.
.
.
.
.
.
.
.
.
.
.
.
.
.
.
.
.
.
.
.
.
.
.
.
.
59
59
60
71
73
74
76
82
88
90
93
97
98
99
99
100
100
105
111
112
114
i
3.21
3.22
3.23
3.24
3.25
3.26
3.27
3.28
4
5
6
7
ii
Plugin settings . . . . . . .
Permissions Check . . . . .
Authentication . . . . . . .
Walled Garden . . . . . . .
Web services . . . . . . . .
Upgrading Plugins . . . . .
List of events in core . . . .
List of plugin hooks in core
.
.
.
.
.
.
.
.
.
.
.
.
.
.
.
.
.
.
.
.
.
.
.
.
.
.
.
.
.
.
.
.
.
.
.
.
.
.
.
.
.
.
.
.
.
.
.
.
.
.
.
.
.
.
.
.
.
.
.
.
.
.
.
.
.
.
.
.
.
.
.
.
.
.
.
.
.
.
.
.
.
.
.
.
.
.
.
.
.
.
.
.
.
.
.
.
.
.
.
.
.
.
.
.
.
.
.
.
.
.
.
.
.
.
.
.
.
.
.
.
.
.
.
.
.
.
.
.
.
.
.
.
.
.
.
.
.
.
.
.
.
.
.
.
.
.
.
.
.
.
.
.
.
.
.
.
.
.
.
.
.
.
.
.
.
.
.
.
.
.
.
.
.
.
.
.
.
.
.
.
.
.
.
.
.
.
.
.
.
.
.
.
.
.
.
.
.
.
.
.
.
.
.
.
.
.
.
.
.
.
.
.
.
.
.
.
.
.
.
.
.
.
.
.
.
.
.
.
.
.
.
.
.
.
.
.
.
.
.
.
.
.
.
.
.
.
.
.
.
.
.
.
.
.
.
.
.
.
.
.
.
.
.
.
.
.
.
.
.
.
.
.
.
.
.
.
.
.
.
.
.
.
.
.
.
.
.
.
.
.
.
.
.
.
.
.
.
.
.
.
.
.
.
.
.
.
.
.
.
.
.
.
120
121
123
124
124
129
139
141
Plugin Tutorials
4.1 Hello world . . . . . . . . . .
4.2 Customizing the Home Page .
4.3 Building a Blog Plugin . . . .
4.4 Integrating a Rich Text Editor
4.5 Basic Widget . . . . . . . . .
.
.
.
.
.
.
.
.
.
.
.
.
.
.
.
.
.
.
.
.
.
.
.
.
.
.
.
.
.
.
.
.
.
.
.
.
.
.
.
.
.
.
.
.
.
.
.
.
.
.
.
.
.
.
.
.
.
.
.
.
.
.
.
.
.
.
.
.
.
.
.
.
.
.
.
.
.
.
.
.
.
.
.
.
.
.
.
.
.
.
.
.
.
.
.
.
.
.
.
.
.
.
.
.
.
.
.
.
.
.
.
.
.
.
.
.
.
.
.
.
.
.
.
.
.
.
.
.
.
.
.
.
.
.
.
.
.
.
.
.
.
.
.
.
.
.
.
.
.
.
.
.
.
.
.
.
.
.
.
.
.
.
.
.
.
.
.
.
.
.
.
.
.
.
.
.
.
.
.
.
.
.
.
.
.
.
.
.
.
.
149
149
151
152
157
158
Design Docs
5.1 Actions . . . . . . . . . .
5.2 Database . . . . . . . . .
5.3 Events and Plugin Hooks .
5.4 Internationalization . . . .
5.5 AMD . . . . . . . . . . .
5.6 Security . . . . . . . . . .
5.7 Loggable . . . . . . . . .
.
.
.
.
.
.
.
.
.
.
.
.
.
.
.
.
.
.
.
.
.
.
.
.
.
.
.
.
.
.
.
.
.
.
.
.
.
.
.
.
.
.
.
.
.
.
.
.
.
.
.
.
.
.
.
.
.
.
.
.
.
.
.
.
.
.
.
.
.
.
.
.
.
.
.
.
.
.
.
.
.
.
.
.
.
.
.
.
.
.
.
.
.
.
.
.
.
.
.
.
.
.
.
.
.
.
.
.
.
.
.
.
.
.
.
.
.
.
.
.
.
.
.
.
.
.
.
.
.
.
.
.
.
.
.
.
.
.
.
.
.
.
.
.
.
.
.
.
.
.
.
.
.
.
.
.
.
.
.
.
.
.
.
.
.
.
.
.
.
.
.
.
.
.
.
.
.
.
.
.
.
.
.
.
.
.
.
.
.
.
.
.
.
.
.
.
.
.
.
.
.
.
.
.
.
.
.
.
.
.
.
.
.
.
.
.
.
.
.
.
.
.
.
.
.
.
.
.
.
.
.
.
.
.
.
.
.
.
.
.
.
.
.
.
.
.
.
.
.
.
.
.
.
.
.
.
.
.
.
.
.
.
.
.
.
.
161
161
161
176
180
180
181
184
Contributor Guides
6.1 Translations . . . . . . . . . . .
6.2 Reporting Issues . . . . . . . . .
6.3 Writing Code . . . . . . . . . . .
6.4 Writing Documentation . . . . .
6.5 Internationalizing documentation
6.6 Becoming a Financial Supporter .
6.7 Release Process Workflow . . . .
.
.
.
.
.
.
.
.
.
.
.
.
.
.
.
.
.
.
.
.
.
.
.
.
.
.
.
.
.
.
.
.
.
.
.
.
.
.
.
.
.
.
.
.
.
.
.
.
.
.
.
.
.
.
.
.
.
.
.
.
.
.
.
.
.
.
.
.
.
.
.
.
.
.
.
.
.
.
.
.
.
.
.
.
.
.
.
.
.
.
.
.
.
.
.
.
.
.
.
.
.
.
.
.
.
.
.
.
.
.
.
.
.
.
.
.
.
.
.
.
.
.
.
.
.
.
.
.
.
.
.
.
.
.
.
.
.
.
.
.
.
.
.
.
.
.
.
.
.
.
.
.
.
.
.
.
.
.
.
.
.
.
.
.
.
.
.
.
.
.
.
.
.
.
.
.
.
.
.
.
.
.
.
.
.
.
.
.
.
.
.
.
.
.
.
.
.
.
.
.
.
.
.
.
.
.
.
.
.
.
.
.
.
.
.
.
.
.
.
.
.
.
.
.
.
.
.
.
.
.
.
.
.
.
.
.
.
.
.
.
.
.
.
.
.
.
.
.
.
.
.
.
185
185
185
186
196
198
198
199
Appendix
7.1 FAQs and Other Troubleshooting
7.2 Roadmap . . . . . . . . . . . . .
7.3 Release Policy . . . . . . . . . .
7.4 Support policy . . . . . . . . . .
7.5 History . . . . . . . . . . . . . .
.
.
.
.
.
.
.
.
.
.
.
.
.
.
.
.
.
.
.
.
.
.
.
.
.
.
.
.
.
.
.
.
.
.
.
.
.
.
.
.
.
.
.
.
.
.
.
.
.
.
.
.
.
.
.
.
.
.
.
.
.
.
.
.
.
.
.
.
.
.
.
.
.
.
.
.
.
.
.
.
.
.
.
.
.
.
.
.
.
.
.
.
.
.
.
.
.
.
.
.
.
.
.
.
.
.
.
.
.
.
.
.
.
.
.
.
.
.
.
.
.
.
.
.
.
.
.
.
.
.
.
.
.
.
.
.
.
.
.
.
.
.
.
.
.
.
.
.
.
.
.
.
.
.
.
.
.
.
.
.
.
.
.
.
.
.
.
.
.
.
.
.
.
.
.
.
.
.
.
.
203
203
230
232
232
233
.
.
.
.
.
.
.
.
.
.
.
.
.
.
Elgg Documentation, Release master
Elgg (pronunciation) is a rapid development framework with built-in social features. It is a great fit for building
any app where users log in and share information.
It has been used to build all kinds of social apps:
• open networks (similar to Facebook)
• topical (like the Elgg Community)
• private intranets
• dating
• educational
• company blog
There is also a demo site running a standard installation of Elgg.
This is the canonical documentation for the Elgg project.
Contents
1
Elgg Documentation, Release master
2
Contents
CHAPTER 1
Getting Started
Discover if Elgg is right for your community.
1.1 Features
Demo: http://demo.elgg.org/
Showcases: https://community.elgg.org/showcase
1.1.1 For developers
• Permissive license
• Theme framework
• Internationalization
• Templating engine
• Widgets framework
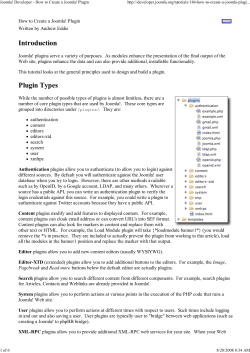
• Plugin APIs
• Social graph
• Web services API
• jQuery-based JS framework
• Session management
• Custom URL routing
1.1.2 For admins
• User profiles and avatars
• Fine-grained access control lists
• Friends and friends lists (ala G+ circles)
• Responsive, mobile-friendly design
• RSS support
3
Elgg Documentation, Release master
• Activity stream
• Plugins for common content types like blogs, bookmarks, files, microblogging, private messages, documents,
message boards, discussion
• User authentication and administration
If you need more functionality than what Elgg offers out-of-the-box there are a couple of options:
• Add more by installing plugins - for example, blogs, forums, social bookmarks
• Develop your own features via plugins
• Hire someone to do the above for you
1.2 Bundled plugins
Elgg comes with a set of plugins. These provide the basic functionality for your social network.
1.2.1 Blog
A weblog, or blog, is arguably one of the fundamental DNA pieces of most types of social networking site. The
simplest form of personal publishing, it allows for text-based notes to be published in reverse-chronological order.
Commenting is also an important part of blogging, turning an individual act of publishing into a conversation.
Elgg’s blog expands this model by providing per-entry access controls and cross-blog tagging. You can control exactly
who can see each individual entry, as well as find other entries that people have written on similar topics. You can also
see entries written by your friends (that you have access to).
See also:
Blogging on Wikipedia
1.2.2 Dashboard
The dashboard is bundled with both the full and core-only Elgg packages. This is a users portal to activity that is
important to them both from within the site and from external sources. Using Elgg’s powerful widget API, it is
possible to build widgets that pull out relevant content from within an Elgg powered site as well as grab information
from third party sources such as Twitter or Flickr (providing those widgets exist). A users dashboard is not the same
as their profile, whereas the profile is for consumption by others, the dashboard is a space for users to use for their own
needs.
1.2.3 Diagnostics
For the technically savvy user, system diagnostics enables you to quickly evaluate the server environment, Elgg code,
and plugins of an Elgg install. System diagnostics is a core plugin that comes turned on by default with Elgg. To
download the diagnostics file, follow the steps below. The file is a dump of all sorts of useful information.
To use:
• Log in as Administrator
• Go to Administration -> Administer -> Utilities ->System diagnostics
• Click ‘Download’
System diagnostics dump file contents:
4
Chapter 1. Getting Started
Elgg Documentation, Release master
Figure 1.1: An typical Elgg dashboard
1.2. Bundled plugins
5
Elgg Documentation, Release master
• List of all Elgg files along with a hash for each file
• List of all the plugins
• PHP superglobals
• PHP settings
• Apache settings
• Elgg CONFIG values
– language strings
– site settings
– database settings
– plugin hooks
– actions
– views
– page handlers
– much more
1.2.4 File repository
Figure 1.2: A file in an Elgg file repository
The file repository allows users to upload any kind of file. As with everything in an Elgg system, you can filter
uploaded files by tag and restrict access so that they’re only visible by the people you want them to be. Each file may
also have comments attached to it.
There are a number of different uses for this functionality
6
Chapter 1. Getting Started
Elgg Documentation, Release master
Photo gallery
When a user uploads photographs or other pictures, they are automatically collated into an Elgg photo gallery that can
be browsed through. Users can also see pictures that their friends have uploaded, or see pictures attached to a group.
Clicking into an individual file shows a larger version of the photo.
Podcasting
An Elgg file repository RSS feed automatically doubles as an RSS feed, so you can subscribe to new audio content
using programs like iTunes. Using the zaudio plugin, supplied in the default Elgg package, MP3 audio files are also
directly playable in the page.
Special content
It is possible for other plugins to add to the players available for different content types. It’s possible for a plugin
author to embed a viewer for Word documents, for example.
Note for developers
To add a special content type player,
create a plugin with views of the form
file/specialcontent/mime/type. For example, to create a special viewer for Word documents, you would
create a view called file/specialcontent/application/msword, because application/msword is
the MIME-type for Word documents. Within this view, the ElggEntity version of the file will be referenced as
$vars[’entity’]. Therefore, the URL of the downloadable file is:
<?php echo $vars[’url’]; ?>action/file/download?file_guid=<?php echo $vars[’entity’]->getGUID(); ?>
Using this, it should be possible to develop most types of embeddable viewers.
1.2.5 Groups
Once you have found others with similar interests - or perhaps you are part of a research groups or a course/class - you
may want to have a more structured setting to share content and discuss ideas. This is where Elgg’s powerful group
building can be used. You can create and moderate as many groups as you like
• You can keep all group activity private to the group or you can use the ‘make public’ option to disseminate work
to the wider public.
• Each group produces granular RSS feeds, so it is easy to follow group developments
• Each group has its own URL and profile
• Each group comes with a File repository, forum, pages and messageboard
1.2.6 Messageboard
The messageboard - similar to ‘The Wall’ in Facebook or a comment
wall in other networks is a plugin that lets users put a messageboard
widget on their profile. Other users can then post messages that will
appear on the messageboard. You can then reply directly to any message and view the history between yourself and the person posting the
message.
1.2. Bundled plugins
7
Elgg Documentation, Release master
Figure 1.3: A typical group profile
8
Chapter 1. Getting Started
Elgg Documentation, Release master
1.2.7 Messages
Private messaging can be sent to users by clicking on their avatar or
profile link, providing you have permission. Then, using the built in
WYSIWYG editor, it is possible to format the message. Each user has
their own inbox and sentbox. It is possible to be notified via email of
new messages.
When users first login, they will be notified about any new message by
the messages notification mechanism in their top toolbar.
1.2.8 Pages
Figure 1.6: An Elgg Page
The pages plugin allows you to save and store hierarchically-organized
pages of text, and restrict both reading and writing privileges to them.
This means that you can collaboratively create a set of documents with
a loose collection of people, participate in a writing process with a
formal group, or simply use the functionality to write a document that
only you can see, and only choose to share it once it’s done. The easy
navigation menu allows you to see the whole document structure from
any page. You can create as many of these structures as you like; each
individual page has its own access controls, so you can reveal portions
of the structure while keeping others hidden. In keeping with all other
elements in Elgg, you can add comments on a page, or search for pages
by tag.
Usage
Pages really come into their own in two areas, firstly as a way for users
to build up things such as a resume, reflective documentation and so
1.2. Bundled plugins
9
Elgg Documentation, Release master
on. The second thing is in the area of collaboration, especially when in the context of groups. With the powerful
access controls on both read and write, this plugin is ideal for collaborative document creation.
Note: Developers should note that there are actually 2 types of pages:
1. Top-level pages (with subtype page_top)
Figure 1.5: Message notification
2. Normal pages (with subtype page)
1.2.9 Profile
Figure 1.7: An Elgg profile
The profile plugin is bundled with both the full and core-only Elgg
packages. The intention is that it can be disabled and replaced with
another profile plugin if you wish. It provides a number of pieces of
functionality which many consider fundamental to the concept of a
social networking site, and is unique within the plugins because the
profile icon it defines is referenced as standard from all over the system.
User details
This provides information about a user, which is configurable from
within the plugin’s start.php file. You can change the available profile
fields form the admin panel. Each profile field has its own access
restriction, so users can choose exactly who can see each individual
element. Some of the fields contain tags (for example skills) limiting
access to a field will also limit who can find you by that tag.
10
Chapter 1. Getting Started
Elgg Documentation, Release master
Figure 1.8: The Elgg context menu
1.2. Bundled plugins
11
Elgg Documentation, Release master
User avatar
The user avatar represents a user (or a group) throughout the site. By
default, this includes a context-sensitive menu that allows you to perform actions on the user it belongs to wherever you see their avatar.
For example, you can add them as a friend, send an internal message,
and more. Each plugin can add to this context menu, so its full contents will vary depending on the functionality active in the current Elgg site.
Notes for developers
Using a different profile icon To replace the profile icon, or provide more
content, extend the icon/user/default view.
Adding to the context menu The context menu can be expanded by registering a plugin hook for ‘register’ ‘menu:user_hover’, the following
sections have special meaning:
• default for non-active links (eg to read a blog)
• admin for links accessible by administrators only
In each case, the user
$params[’entity’].
in
question
will
be
passed
as
1.2.10 The Wire
Elgg wire plugin “The Wire” is Twitter-style microblogging plugin
that allows users to post notes to the wire.
The following plugins are also bundled with Elgg, but are not (yet)
documented
• aalborg_theme
• bookmarks
• categories
• ckeditor
• custom_index
• developers
• embed
• externalpages
• garbagecollector
• htmlawed
• invitefriends
• legacy_urls
• likes
• logbrowser
• logrotate
12
Chapter 1. Getting Started
Elgg Documentation, Release master
• members
• notifications
• reportedcontent
• search
• site_notifications
• tagcloud
• twitter_api
• uservalidationbyemail
• web_services
• zaudio
1.3 License
1.3.1 MIT or GPLv2
A full Elgg package that includes the framework and a core set of plugins is available under version 2 of the GNU General Public License
(GPLv2). We also make the framework (without the plugins) available
under the MIT license.
1.3.2 FAQ
The following answers are provided as a convenience to you; they are
not legal counsel. Consult with a lawyer to be sure about the answers
to these questions. The Elgg Foundation cannot be held responsible
for decisions you make based on what you read on this page.
For questions not answered here, please refer to the official FAQ for
the GPLv2.
How much does Elgg cost?
Elgg is free to download, install, and use. If you’d like to donate, we
do appreciate our financial supporters!
Can I remove the Elgg branding/links?
Yes.
Can I modify the source code?
Yes, but in general we recommend you make your modifications as
plugins so that when a new version of Elgg is released, the upgrade
process is as painless as possible.
1.3. License
13
Elgg Documentation, Release master
Can I charge my users membership fees?
Yes.
If I modify Elgg, do I have to make the changes available?
No, if you are using Elgg to provide a service, you do not have to make
the source available. If you distribute a modified version of Elgg, then
you must include the source code for the changes.
If I use Elgg to host a network, does The Elgg Foundation
have any rights over my network?
No.
What’s the difference between the MIT and GPL versions?
Plugins are not included with the MIT version.
You can distribute a commercial product based on Elgg using the MIT
version without making your modifications available.
With the GPL licensed version, you have to include make your modifications of the framework public if you redistribute the framework.
Why are plugins missing from the MIT version?
The plugins were developed under the GPL license, so they cannot be
released under an MIT license. Also, some plugins include external
dependencies that are not compatible with the MIT license.
May I distribute a plugin for Elgg under a commercial license?
We believe you can, since plugins typically depend only the core
framework and the framework is available under the MIT license. That
said, we really recommend you consult with a lawyer on this particular
issue to be absolutely sure.
Note that plugins released via the community site repository must be
licensed under a GPLv2-compatible license. They do not necessarily
have to be GPLv2, just compatible (like MIT).
Can we build our own tool that uses Elgg and sell that tool
to our clients?
Yes, but then your clients will be free to redistribute that tool under the
terms of the GPLv2.
14
Chapter 1. Getting Started
Elgg Documentation, Release master
1.4 Installation
Get your own instance of Elgg running in no time.
Contents
•
•
•
•
Requirements
Overview
Other Configurations
Troubleshooting
1.4.1 Requirements
• MySQL 5+
• PHP 5.3.3+ with the following extensions:
– GD (for graphics processing)
– Multibyte String support (for i18n)
– Proper configuration and ability to send email through an MTA
• Web server with support for URL rewriting
Official support is provided for the following configuration:
• Apache with the rewrite module enabled
• PHP running as an Apache module
By “official support”, we mean that:
• Most development and testing is performed with this configuration
• Much of the installation documentation is written assuming Apache is
used
• Priority on bug reports is given to Apache users if the bug is web server
specific (but those are rare).
Browser support policy
Feature branches support the latest 2 versions of all major browsers as
were available at the time of the first stable release on that branch.
Bugfix release will not alter browser support, even if a new version of
the browser has since been released.
Major browsers here means all of the following, plus their mobile
counterparts:
• Android Browser
• Chrome
• Firefox
• IE
1.4. Installation
15
Elgg Documentation, Release master
• Safari
“Support” may mean that we take advantage of newer, unimplemented
technologies but provide a JavaScript polyfill for the browsers that
need it.
You may find that Elgg happens to work on unsupported browsers, but
compatibility may break at any time, even during a bugfix release.
1.4.2 Overview
Upload Elgg
• Download the latest version of Elgg
• Upload the ZIP file with an FTP client to your server
• Unzip
the
files
in
(/home/username/www).
your
domain’s
document
root
Create a data folder
Elgg needs a special folder to store uploaded files including profile
icons and photos. You will need to create this directory.
Warning: For security reasons, this folder MUST be stored outside of your document root. If you created it under
/www/ or /public_html/, you’re doing it wrong.
Once this folder has been created, you’ll need to make sure the web
server Elgg is running on has permission to write to and create directories in it. This shouldn’t be a problem on Windows-based servers,
but if your server runs Linux, Mac OS X or a UNIX variant, you’ll
need to set the permissions on the directory.
If you are using a graphical FTP client to upload files, you can usually
set permissions by right clicking on the folder and selecting ‘properties’ or ‘Get Info’.
Note: Directories must be executable to be read and written to. The suggested permissions depend upon the exact
server and user configuration. If the data directory is owned by the web server user, the recommended permissions are
770.
Setting your data directory to 777 will work, but it is insecure and is
not recommended. If you are unsure how to correctly set permissions,
contact your host for more information.
Create a MySQL database
Using your database administration tool of choice (if you’re unsure
about this, ask your system administrator), create a new MySQL
database for Elgg. You can create a MySQL database with any of
the following tools:
16
Chapter 1. Getting Started
Elgg Documentation, Release master
Make sure you add a user to the database with all privileges and record
the database name, username and password. You will need this information when installing Elgg.
Visit your Elgg site
Once you’ve performed these steps, visit your Elgg site in your web
browser. Elgg will take you through the rest of the installation process from there. The first account that you create at the end of the
installation process will be an administrator account.
A note on settings.php and .htaccess
The Elgg installer will try to create two files for you:
• engine/settings.php, which contains the database settings for your installation
• .htaccess, which allows Elgg to generate dynamic URLs
If these files can’t be automatically generated, for example because
the web server doesn’t have write permissions in the directories, Elgg
will tell you how to create them. You could also temporarily change
the permissions on the root directory and the engine directory. Set the
permissions on those two directories so that the web server can write
those two files, complete the install process, and them change the permissions back to their original settings. If, for
some reason, this won’t work, you will need to:
• Copy engine/settings.example.php to engine/settings.php, open it up
in a text editor and fill in your database details
• Copy /htaccess_dist to /.htaccess
1.4.3 Other Configurations
Lighttpd
Have you installed Elgg on a server running lighttpd? We are looking
for someone to share any configuration and installation steps involved
in setting this up.
Nginx
To run Elgg on Nginx, you will need to:
• configure Nginx to talk to a PHP process in either CGI or FPM mode
• Port the rewrite rules
TODO: Add the rewrite rules from the community site.
1.4. Installation
17
Elgg Documentation, Release master
IIS
When installing on IIS, the problem is that the Apache mod_rewrite
rules will not be recognized, and this breaks the application. You need
to convert the mod_rewrite rules to the IIS URL Rewrite module format.
You can do this using the IIS 7+ management console, and the “Import
Rules” feature that will do the conversion, as describe in the tutorial
“importing Apache mod_rewrite rules”.
MariaDB
This DBMS should be a drop-in replacement for MySQL, if you prefer
it.
http://community.elgg.org/discussion/view/1455994/alternative-dbmss
Virtual host (e.g. Rackspace, Amazon EC2)
For installation to proceed successfully, modify the .htaccess file in the
root, and uncomment:
#RewriteBase /
To be:
RewriteBase /
MAMP
On certain versions of MAMP, Elgg will either fail to install or have
intermittent problems while running.
This is a known issue with MAMP and is related to the Zend Optimizer. Until Zend/MAMP have resolved this issue it is recommended
that you turn off the Zend Optimizer in your PHP settings.
XAMPP
These intructions are provided in case you want to test your Elgg installation on your local computer running Windows.
• Download and install XAMPP to your
http://www.apachefriends.org/en/xampp.html
computer
from
• Once the installation is completed, it will prompt you to start the
XAMPP controller panel. Leave it for now.
• Open C:\xampp\apache\conf\httpd.conf file with notepad
and uncomment these lines:
#LoadModule rewrite_module modules/mod_rewrite.so
#LoadModule filter_module modules/mod_filter.so
18
Chapter 1. Getting Started
Elgg Documentation, Release master
• Edit the php.ini file and change arg_separator.output =
&amp; to arg_separator.output = &
• Go to C:\xampp and double click on the xampp_start application
• Go to http://localhost/
• Change your server’s password in the security option
• Go to http://localhost/phpmyadmin and login with the username and
the password of your server
• Create a database called “elgg” in your phpmyadmin panel
• Now download Elgg.
Unzip
C:\xampp\htdocs\sites\elgg
it
and
extract
to
• Create the Elgg data folder as C:\xampp\htdocs\sites\data
• Go to http://localhost/sites/elgg
• You will be taken to the Elgg installation steps. Install it and enjoy.
A note on XAMPP 1.7.4 and eAccelerator
Elgg is compatible with opcode caches and it is highly recommended
that you enable a PHP opcode caching tool for a faster experience.
XAMPP comes with support for eAccelerator out of the box, but unfortunately, the 1.7.4 build of XAMPP leaves out the DLL that’s required. To get eAccelerator working, follow these steps:
• Download the DLL from http://eac.qme.nl/eAccelerator_v1_0_svn427_for_v5_3_5VC6.zip
• Copy eAccelerator_ts.dll to C:\xampp\php\ext\php_eaccelerator.dll
• Uncomment this line in C:\xampp\php\php.ini:
;zend_extension = "C:\xampp\php\ext\php_eaccelerator.dll"
• Restart apache
To verify that it is on:
• Go to localhost/xampp
• Click on phpinfo() from the left sidebar
• Ctrl+F for eaccelerator. If you get no results, eAccelerator is not active
EasyPHP
• Assuming no MySQL, PHP or Apache installations exist already.
• Best run as a development/test server
1. Stop IIS running if installed
2. Download
and
install
the
latest
http://www.easyphp.org (16MB download)
Easy
PHP
from
3. Set up the database and point the web server to your Elgg folder (all
done from the EasyPHP tray icon) - Right click EasyPHP tray icon,
select “Administration” - A new tab is created in your browser for
1.4. Installation
19
Elgg Documentation, Release master
managing Easy PHP - Add your Elgg folder to Apache in “Alias” section - Click “Manage MySQL with PhpMyAdmin”, create a database
and account for Elgg
4. (Ignore this step for v5.3 or later) From the tray icon go Configuration/Apache and uncomment this line:
#LoadModule rewrite_module modules/mod_rewrite.so
5. (Ignore this step for v5.3 or later) Change AllowOverride None
to AllowOverride All in the relevant directory entry in Configuration/Apache
6. (Ignore this step for v5.3 or later) From the tray icon fo Configuration/PHP and uncomment this line:
;extension=php_curl.dll
7. A reboot is best Elgg should run via http://127.0.0.1
Ubuntu Linux
• Install the dependencies:
sudo
sudo
sudo
sudo
sudo
apt-get
apt-get
apt-get
apt-get
a2enmod
install
install
install
install
rewrite
apache2
mysql-server
php5 libapache2-mod-php5 php5-mysql
phpmyadmin
• Edit /etc/apache2/sites_available/default to enable
.htaccess processing (set AllowOverride to All)
• Restart Apache: sudo /etc/init.d/apache2 restart
• Follow the standard installation instructions above
Cloud9IDE
1. Create a c9 workspace
• Go to http://c9.io
• Login with GitHub
• On the Dashboard, click “Create new workspace” => “Create a new
workspace”
• Choose a project name (e.g. “elgg”)
• Choose “PHP” for project type
• Click “Create”
• Wait... (~1 min for c9 workspace to be ready)
• Click “Start editing” for the workspace
2. Set up the workspace for Elgg
Run the following in cloud9’s terminal:
20
Chapter 1. Getting Started
Elgg Documentation, Release master
rm -rf * # Clear out the c9 hello-world stuff
git clone https://github.com/Elgg/Elgg . # the hotness
cp htaccess_dist .htaccess
cp engine/settings.example.php engine/settings.php
mysql-ctl start # start c9’s local mysql server
mkdir ../elgg-data # setup data dir for Elgg
Configure engine/settings.php to be like so:
// Must set timezone explicitly!
date_default_timezone_set(’America/Los_Angeles’);
$CONFIG->dbuser = ’your_username’; // Your c9 username
$CONFIG->dbpass = ’’;
$CONFIG->dbname = ’c9’;
$CONFIG->dbhost = $_SERVER[’SERVER_ADDR’];
$CONFIG->dbprefix = ’elgg_’;
3. Complete the install process from Elgg’s UI
• Hit “Run” at the top of the page to start Apache.
• Go to http://your-workspace.your-username.c9.io/install.php?step=database
• Change Site URL to http://your-workspace.your-username.c9.io/
• Put in the data directory path.
Should be something like
/var/..../app-root/data/elgg-data/.
• Click “Next”
• Create the admin account
• Click “Go to site”
• You may have to manually visit http://your-workspace.yourusername.c9.io/ and login with the admin credentials you just configured.
1.4.4 Troubleshooting
Help! I’m having trouble installing Elgg
First:
• Recheck that your server meets the technical requirements for Elgg.
• Follow the environment-specific instructions if need be
• Have you verified that mod_rewrite is being loaded?
• Is the mysql apache being loaded?
Keep notes on steps that you take to fix the install. Sometimes changing some setting or file to try to fix a problem may cause some other
problem later on. If you need to start over, just delete all the files, drop
your database, and begin again.
1.4. Installation
21
Elgg Documentation, Release master
I can’t save my settings on installation (I get a 404 error
when saving settings)
Elgg relies on the mod_rewrite Apache extension in order to simulate certain URLs. For example, whenever you perform an action in
Elgg, or when you visit a user’s profile, the URL is translated by the
server into something Elgg understands internally. This is done using
rules defined in an .htaccess file, which is Apache’s standard way
of defining extra configuration for a site.
This error suggests that the mod_rewrite rules aren’t being picked
up correctly. This may be for several reasons. If you’re not comfortable implementing the solutions provided below, we strongly recommend that you contact your system administrator or technical support
and forward this page to them.
The .htaccess, if not generated automatically (that happens
when you have problem with mod_rewrite), you can create it
by renaming htaccess_dist file you find with elgg package to
.htaccess. Also if you find a .htaccess file inside the installation path, but you are still getting 404 error, make sure the contents of
.htaccess are same as that of htaccess_dist.
‘‘mod_rewrite‘‘ isn’t installed.
Check your httpd.conf to make sure that this module is being
loaded by Apache. You may have to restart Apache to get it to pick up
any changes in configuration. You can also use PHP info to check to
see if the module is being loaded.
The rules in ‘‘.htaccess‘‘ aren’t being obeyed.
In your virtual host configuration settings (which may be contained
within httpd.conf), change the AllowOverride setting so that it
reads:
AllowOverride all
This will tell Apache to pick up the mod_rewrite rules from
.htaccess.
Elgg is not installed in the root of your web directory (ex:
http://example.org/elgg/ instead of http://example.org/)
The install script redirects me to “action” when it should be
“actions”
This is a problem with your mod_rewrite setup. DO NOT, REPEAT, DO NOT change any directory names!
I installed in a subdirectory and my install action isn’t working!
If you installed Elgg so that it is reached with an address like
http://example.org/mysite/ rather than http://example.org/, there is a
small chance that the rewrite rules in .htaccess will not be processed
22
Chapter 1. Getting Started
Elgg Documentation, Release master
correctly. This is usually due to using an alias with Apache. You may
need to give mod_rewrite a pointer to where your Elgg installation is.
• Open up .htaccess in a text editor
• Where
prompted,
add
a
line
like
/path/to/your/elgg/installation/
the trailing slash)
RewriteBase
(Don’t
forget
• Save the file and refresh your browser.
Please note that the path you are using is the web path, minus the host.
For example, if you reach your elgg install at http://example.org/elgg/,
you would set the base like this:
RewriteBase /elgg/
Please note that installing in a subdirectory does not require using
RewriteBase. There are only some rare circumstances when it is
needed due to the set up of the server.
I did everything! mod_rewrite is working fine, but still the
404 error
Maybe there is a problem with the file .htaccess. Sometimes the elgg
install routine is unable to create one and unable to tell you that. If you
are on this point and tried everything that is written above:
• check if it is really the elgg-created .htaccess (not only a dummy provided from the server provider)
• if it is not the elgg provided htaccess file, use the htaccess_dist (rename
it to .htaccess)
I get an error message that the rewrite test failed after the
requirements check page
I get the following messages after the requirements check step (step 2)
of the install:
We think your server is running the Apache web server.
The rewrite test failed and the most likely cause is that AllowOverride is not set to All for Elgg’s directory. This prevents Apache from
processing the .htaccess file which contains the rewrite rules.
A less likely cause is Apache is configured with an alias for your Elgg
directory and you need to set the RewriteBase in your .htaccess. There
are further instructions in the .htaccess file in your Elgg directory.
After this error, everinteraction with the web interface results in a error
500 (Internal Server Error)
This is likely caused by not loading the “filter module by uncommenting the
#LoadModule filter_module modules/mod_filter.so
1.4. Installation
23
Elgg Documentation, Release master
line in the “httpd.conf” file.
the Apache “error.log” file will contain an entry similar to:
... .htaccess: Invalid command ‘AddOutputFilterByType’, perhaps
misspelled or defined by a module not included in the server configuration
There is a white page after I submit my database settings
Check that the Apache mysql module is installed and is being loaded.
I’m getting a 404 error with a really long url
If
you
see
a
404
error
during
the
install
or
on
the
creation
of
the
first
user
with
a
url
like:
http://example.com/homepages/26/d147515119/htdocs/elgg/action/register
that means your site url is incorrect in your sites_entity table in your
database. This was set by you on the second page of the install. Elgg tries to guess the correct value but has difficulty
with shared hosting sites. Use phpMyAdmin to edit this value to the correct base url.
I am having trouble setting my data path
This is highly server specific so it is difficult to give specific advice. If
you have created a directory for uploading data, make sure your http
server can access it. The easiest (but least secure) way to do this is
give it permissions 777. It is better to give the web server ownership
of the directory and limit the permissions.
The top cause of this issue is PHP configured to prevent access to
most directories using open_basedir. You may want to check with
your hosting provider on this.
Make sure the path is correct and ends with a /. You can check the
path in your database in the datalists table.
If you only have ftp access to your server and created a directory but
do not know the path of it, you might be able to figure it out from
the www file path set in your datalists database table. Asking for help
from your hosting help team is recommended at this stage.
I can’t validate my admin account because I don’t have an
email server!
While it’s true that normal accounts (aside from those created from
the admin panel) require their email address to be authenticated before
they can log in, the admin account does not.
Once you have registered your first account you will be able to log in
using the credentials you have provided!
24
Chapter 1. Getting Started
Elgg Documentation, Release master
I have tried all of these suggestions and I still cannot install
Elgg
It is possible that during the process of debugging your install you
have broken something else. Try doing a clean install:
• drop your elgg database
• delete your data directory
• delete the Elgg source files
• start over
If that fails, seek the help of the Elgg community. Be sure to mention
what version of Elgg you are installing, details of your server platform,
and any error messages that you may have received including ones in
the error log of your server.
1.5 Developer Overview
This is a quick developer introduction to Elgg. It covers the basic
approach to working with Elgg as a framework, and mentions some of
the terms and technologies used.
See the Developer Guides for tutorials or the Design Docs for in-depth
discussion on design.
1.5.1 Database and Persistence
Elgg uses MySQL 5.5 or higher for data persistence, and maps
database values into Entities (a representation of an atomic unit of
information) and Extenders (additional information and descriptions
about Entities). Elgg supports additional information such as relationships between Entities, activity streams, and various types of settings.
1.5.2 Plugins
Plugins change the behavior or appearance of Elgg by overriding
views, or by handling events and plugin hooks. All changes to an
Elgg site should be implemented through plugins to ensure upgrading
core is easy.
1.5.3 Actions
Actions are the primary way users interact with an Elgg site. Actions
are registered by plugins.
1.5. Developer Overview
25
Elgg Documentation, Release master
1.5.4 Events and Plugin Hooks
Events and Plugin Hooks are used in Elgg Plugins to interact with the
Elgg engine under certain circumstances. Events and hooks are triggered at strategic times throughout Elgg’s boot and execution process,
and allows plugins to modify or cancel the default behavior.
1.5.5 Views
Views are the primary presentation layer for Elgg. Views can be overridden or extended by Plugins. Views are categories into a Viewtype,
which hints at what sort of output should be expected by the view.
1.5.6 JavaScript
Elgg uses an AMD-compatible JavaScript system provided by require.js. Bundled with Elgg are jQuery 1.11.0, jQuery UI 1.10.4,
jQuery Form v20140304, jQuery jeditable, and jQuery UI Autocomplete.
Plugins can load their own JS libs.
1.5.7 Internationalization
Elgg’s interface supports multiple languages, and uses Transifex for
translation.
1.5.8 Caching
Elgg uses two caches to improve performance: a system cache and
SimpleCache.
26
Chapter 1. Getting Started
CHAPTER 2
Administrator Guides
Best practices for effectively managing an Elgg-based site.
2.1 Getting Started
You have installed Elgg and worked through any potential initial issues. What now? Here are some suggestions on
how to to familiarize yourself with Elgg.
2.1.1 Focus first on core functionality
When you’re new to Elgg, it’s best to explore the stock features in core and its bundled plugins before installing any
third party plugins. It’s tempting install every interesting plugin from the community site, but exploring the core
features builds a familiarity with Elgg’s expected behavior, and prevents introducing any confusing bugs from third
party plugin into your new Elgg network.
Elgg installs with a basic set of social network plugins activated: blogs, social bookmarking, files, groups, likes,
message boards, wiki-like pages, user profiles, and microblogging. To change the plugins that are activated, log in as
an admin user, then use the topbar to browse to Administration, then to Plugins on the right sidebar.
Note: The user you create during installation is an admin user.
2.1.2 Create test users
Users can be created two ways in stock Elgg:
1. Complete the signup process using a different email address and username. (Logout first or use a different
browser!)
2. Add a user through the Admin section by browsing to Administration -> Users -> Add New User.
Note: Users that self-register must validate their account through email before they can log in. Users that an admin
creates are already validated.
27
Elgg Documentation, Release master
2.1.3 Explore user functionality
Use your test users to create blogs, add widgets to your profile or dashboard, post to the Wire (microblogging), and
create pages (wiki-like page creation). Investigate the Settings on the topbar. This is where a user sets notification
settings and configures tools (which will be blank because none of the default plugins add controls here).
2.1.4 Explore admin functionality
All of the admin controls are found by clicking Administration in the topbar. The has a dashboard with a widget that
explains the various sections. Change options in the Configure menu to change how Elgg looks and acts.
2.1.5 Extending Elgg
After exploring what Elgg can do out of the box, install some themes and plugins. You can find many plugins and
themes at the community site that have been developed by third parties. These plugins do everything from changing
language strings, to adding chat, to completely redesigning Elgg’s interface. Because these plugins are not official, be
certain to check the comments to make sure you only install well-written plugins by high quality developers.
2.2 Upgrading Elgg
Switch a live site to a new version of Elgg.
If you’ve written custom plugins, you should also read the developer guides for information on upgrading plugin code
for the latest version of Elgg.
2.2.1 Advice
• Back up your database and code
• Mind any version-specific comments below
• Upgrade only one minor version at a time (1.6 => 1.7, then 1.7 => 1.8)
• Try out the new version on a test site before doing an upgrade
• Report any problems in plugins to the plugin authors
• If you are a plugin author you can report any backwards-compatibility issues to GitHub
2.2.2 Basic instructions
1. Back up your database, data directory and code
2. Download the new version of Elgg from http://elgg.org
3. Update the files
• If doing a patch upgrade (1.9.x), overwrite your existing files with the new version of Elgg
• If doing a minor upgrade (1.x), replace the existing core files completely
4. Merge any new changes from htaccess_dist into .htaccess
5. Merge any new changes from settings.example.php into settings.php
28
Chapter 2. Administrator Guides
Elgg Documentation, Release master
6. Visit http://your-elgg-site.com/upgrade.php
Note: Any modifications should have been written within plugins, so that they are not lost on overwriting. If this is
not the case, take care to maintain your modifications.
Note: If you modified the default .htaccess, be sure to port your modifications over to the new one.
2.2.3 From 1.8 to 1.9
Elgg 1.9 is a much lighter upgrade than 1.8 was.
Breaking changes
Plugins and themes written for 1.8 are expected to be compatible with 1.9 except as it pertains to comments, discussion
replies, and notifications. Please report any backwards compatibility issues besides those just listed.
Upgrade steps
There are several data migrations involved, so it is especially important that you back up your database and data
directory before performing the upgrade.
Download the new version and copy these files from the existing 1.8 site:
• .htaccess
• engine/settings.php
• any 3rd-party plugin folders in the mod directory
Then replace the old installation directory with the new one. This way you are guaranteed to get rid of obsolete files
which might cause problems if left behind.
Follow the basic instructions listed above.
After you’ve visited upgrade.php, go to the admin area of your site. You should see a notification that you have
pending upgrades. Click the link in the notification bar to view and run the upgrades.
The new notifications system delivers messages via a minutely cron handler. If you haven’t done so yet, you will need
to install and configure crontab on your server. If cron jobs are already configured, note that the scope of available
cron periods may have changed and you may need to update your current crontab to reflect these changes.
Time commitment
Running all of the listed upgrades took about 1 hour and 15 minutes on the Elgg community site which at the time had
to migrate:
• ~75,000 discussion replies
• ~75,000 comments
• ~75,000 data directories
You should take this only as a ballpark estimate for your own upgrade. How long it takes will depend on how large
your site is and how powerful your servers are.
2.2. Upgrading Elgg
29
Elgg Documentation, Release master
2.2.4 From 1.7 to 1.8
Elgg 1.8 is the biggest leap forward in the development of Elgg since version 1.0. As such, there is more work to
update core and plugins than with previous upgrades.
Updating core
Delete the following core directories (same level as _graphics and engine):
• _css
• account
• admin
• dashboard
• entities
• friends
• search
• settings
• simplecache
• views
Warning: If you do not delete these directories before an upgrade, you will have problems!
2.3 Plugins
Plugins can modify the behavior of and add new features to Elgg.
Contents
• Where to get plugins
• The Elgg Community
– Finding Plugins
– Evaluating Plugins
• Types of plugins
– Themes
– Language Packs
• Installation
• Plugin order
• Pre-1.8 notes
2.3.1 Where to get plugins
Plugins can be obtained from:
• The Elgg Community
• Github
30
Chapter 2. Administrator Guides
Elgg Documentation, Release master
• Third-party sites (typically for a price)
If no existing plugins meet your needs, you can hire a developer or create your own.
2.3.2 The Elgg Community
Finding Plugins
Sort based on most popular
On the community plugin page, you can sort by date uploaded (Filter: Newest) or number of downloads (Filter: Most
downloads). Sorting by the number of downloads is a good idea if you are new to Elgg and want to see which plugins
are frequently used by other administrators. These will often (but not always) be higher quality plugins that provide
significant capabilities.
Use the plugin tag search
Next to the filtering control on the plugin page is a search box. It enables you to search by tags. Plugins authors choose
the tags.
Look for particular plugin authors
The quality of plugins varies substantially. If you find a plugin that works well on your site, you can check what else
that plugin author has developed by clicking on their name when viewing a plugin.
Evaluating Plugins
Look at the comments and ratings
Before downloading and using a plugin, it is always a good idea to read through the comments that others have left.
If you see people complaining that the plugin does not work or makes their site unstable, you probably want to stay
away from that plugin. The caveat to that is that sometimes users ignore installation instructions or incorrectly install
a plugin and then leave negative feedback. Further, some plugin authors have chosen to not allow comments.
Install on a test site
If you are trying out a plugin for the first time, it is a bad idea to install it on your production site. You should maintain
a separate test site for evaluating plugins. It is a good idea to slowly roll out new plugins to your production site even
after they pass your evaluation on your test site. This enables you to isolate problems introduced by a new plugin.
2.3.3 Types of plugins
Themes
Themes are plugins that modify the look-and-feel of your site. They generally include stylesheets, client-side scripts
and views that alter the default presentation and behavior of Elgg.
2.3. Plugins
31
Elgg Documentation, Release master
Language Packs
Language packs are plugins that provide support for other languages.
Language packs can extend and include translations for language strings found in the core, core plugins and/or thirdparty plugins.
Some of the language packs are already included in the core, and can be found in languages directory off Elgg’s
root directory. Individual plugins tend to include their translations under the languages directory within the plugin’s
root.
This structure makes it easy to create new language packs that supercede existing language strings or add support for
new languages.
2.3.4 Installation
All plugins reside in the mod directory of your Elgg installation.
To install a new plugin:
• extract (unzip) contents of the plugin distribution package
• copy/FTP the extracted folder into the mod directory of your Elgg installation, making sure that
manifest.xml and start.php are directly under the plugin directory (e.g. if you were
to install a plugin called my_elgg_plugin, plugin’s manifest would need to be found at
mod/my_elgg_plugin/manifest.xml)
• activate the plugin from your admin panel
To activate a plugin:
• Log in to your Elgg site with your administrator account
• Go to Administration -> Configure -> Plugins
• Find your plugin in the list of installed plugins and click on the ‘enable’ button.
2.3.5 Plugin order
Plugins are loaded according to the order they are listed on the Plugins page. The initial ordering after an install is
more or less random. As more plugins are added by an administrator, they are placed at the bottom of the list.
Some general rules for ordering plugins:
• A theme plugin should be last or at least near the bottom
• A plugin that modifies the behavior of another plugin should be lower in the plugin list
2.3.6 Pre-1.8 notes
In Elgg 1.7 and below, the interface for managing installed plugins is located at Administration -> Tool Administration.
2.4 Performance
Make your site run as smoothly and responsively as possible.
32
Chapter 2. Administrator Guides
Elgg Documentation, Release master
Contents
•
•
•
•
Can Elgg scale to X million users?
Measure first
Tune MySQL
Enable caching
– Simplecache
– System cache
– Database query cache
– Etags and Expires headers
– Memcache
– Squid
– Bytecode caching
• Hosting
– Memory, CPU and bandwidth
– Configuration
• Check for poorly-behaved plugins
• Use client-rendered HTML
2.4.1 Can Elgg scale to X million users?
People often ask whether Elgg can scale to large installations.
First, we might stop and ask, “where are you planning to get all those users?” Seriously, though, this is a really
interesting problem. Making Elgg scale is, if anything, an issue of technical engineering. It’s interesting but more
or less a solved problem. Computer science doesn’t work differently for Elgg than for Google, for example. Getting
millions of users? That’s like the Holy Grail of the entire tech industry.
Second, as with most things in life, the answer is “it depends”:
• How active are your users?
• What hardware is Elgg running on?
• Are your plugins behaving well?
Improving the efficiency of the Elgg engine is an ongoing project, although there are limits to the amount that any
script can do.
If you are serious about scalability you will probably want to look at a number of things yourself.
2.4.2 Measure first
There is no point in throwing resources at a problem if you don’t know:
• what the problem is
• what resources the problem needs
• where those resources are needed
Invest in some kind of profiling to tell you where your bottleneck is, especially if you’re considering throwing significant money at a problem.
2.4. Performance
33
Elgg Documentation, Release master
2.4.3 Tune MySQL
Elgg makes extensive use of the back end database, making many trips on each pageload. This is perfectly normal and
a well configured database server will be able to cope with thousands of requests per second.
Here are some configuration tips that might help:
• Make sure that MySQL is configured to use an appropriate my.cnf for the size of your website.
• Increase the amount of memory available to PHP and MySQL (you will have to increase the amount of memory
available to the php process in any case)
2.4.4 Enable caching
Generally, if a program is slow, that is because it is repeatedly performing an expensive computation or operation.
Caching allows the system to avoid doing that work over and over again by using memory to store the results so that
you can skip all the work on subsequent requests. Below we discuss several generally-available caching solutions
relevant to Elgg.
Simplecache
By default, views are cached in the Elgg data directory for a given period of time. This removes the need for a view to
be regenerated on every page load.
This can be disabled by setting $CONFIG->simplecache_enabled = false; For best performance, make
sure this value is set to true.
This does lead to artifacts during development if you are editing themes in your plugin as the cached version will be
used in preference to the one provided by your plugin.
The simple cache can be disabled via the administration menu. It is recommended that you do this on your development
platform if you are writing Elgg plugins.
This cache is automatically flushed when a plugin is enabled, disabled or reordered, or when upgrade.php is executed.
System cache
The location of views are cached so that they do not have to be discovered (profiling indicated that page load took a
non-linear amount of time the more plugins were enabled due to view discovery). Elgg also caches information like
the language mapping and class map.
This can be disabled by setting $CONFIG->system_cache_enabled = false; For best performance, make
sure this value is set to true.
This is currently stored in files in your dataroot (although later versions of Elgg may use memcache). As with the
simple cache it is flushed when a plugin is enabled, disabled or reordered, or when upgrade.php is executed.
The system cache can be disabled via the administration menu, and it is recommended that you do this on your
development platform if you are writing Elgg plugins.
Database query cache
For the lifetime of a given page’s execution, a cache of all SELECT queries is kept. This means that for a given page
load a given select query will only ever go out to the database once, even if it is executed multiple times. Any write
to the database will flush this cache, so it is advised that on complicated pages you postpone database writes until the
34
Chapter 2. Administrator Guides
Elgg Documentation, Release master
end of the page or use the execute_delayed_* functionality. This cache will be automatically cleared at the end
of a page load.
You may experience memory problems if you use the Elgg framework as a library in a PHP CLI script. This can be
disabled by setting $CONFIG->db_disable_query_cache = true;
Etags and Expires headers
These technologies tell your users’ browsers to cache static assets (CSS, JS, images) locally. Having these enabled
greatly reduces server load and improves user-perceived performance.
Use the Firefox yslow plugin or Chrome DevTools Audits to confirm which technologies are currently running on
your site.
If the static assets aren’t being cached:
• Verify that you have these extensions installed and enabled on your host
• Update your .htaccess file, if you are upgrading from a previous version of Elgg
• Enable Simplecache, which turns select views into browser-cacheable assets
Memcache
Memcache is a generic caching technology developed by Brad Fitzpatrick for LiveJournal.
Warning: SUPPORT FOR MEMCACHE IS EXPERIMENTAL AND MAY BE CHANGED.
Installation requirements:
‘‘ * php5-memcache‘‘
‘‘ * memcached‘‘
Configuration:
Uncomment and populate the following sections in settings.php
$CONFIG->memcache = true;
$CONFIG->memcache_servers = array (
array(’server1’, 11211),
array(’server2’, 11211)
);
Squid
We have had good results by using Squid to cache images for us.
Bytecode caching
There are numerous PHP code caches available on the market. These speed up your site by caching the compiled byte
code from your script meaning that your server doesn’t have to compile the PHP code each time it is executed.
2.4. Performance
35
Elgg Documentation, Release master
2.4.5 Hosting
Don’t expect to run a site catering for millions of users on a cheap shared host. You will need to have your own host
hardware and access over the configuration, as well as lots of bandwidth and memory available.
Memory, CPU and bandwidth
Due to the nature of caching, all caching solutions will require memory. It is a fairly cheap return to throw memory
and CPU at the problem.
On advanced hardware it is likely that bandwidth is going to be your bottleneck before the server itself. Ensure that
your host can support the load you are suggesting.
Configuration
Lastly, take a look at your configuration as there are a few gotchas that can catch people.
For example, out of the box, Apache can handle quite a high load. However, most distros of Linux come with mysql
configured for small sites. This can result in Apache processes getting stalled waiting to talk to one very overloaded
MySQL process.
2.4.6 Check for poorly-behaved plugins
Plugins can be programmed in a very naive way and this can cause your whole site to feel slow.
Try disabling some plugins to see if that noticeably improves performance. Once you’ve found a likely offender, go to
the original plugin author and report your findings.
2.4.7 Use client-rendered HTML
We’ve found that at a certain point, much of the time spent on the server is simply building the HTML of the page
with Elgg’s views system.
It’s very difficult to cache the output of templates since they can generally take arbitrary inputs. Instead of trying to
cache the HTML output of certain pages or views, the suggestion is to switch to an HTML-based templating system so
that the user’s browser can cache the templates themselves. Then have the user’s computer do the work of generating
the output by applying JSON data to those templates.
This can be very effective, but has the downside of being significant extra development cost. The Elgg team is looking
to integrate this strategy into Elgg directly, since it is so effective especially on pages with repeated or hidden content.
2.5 Cron
Cron is a program available on Unix-based operating systems that enables users to run commands and scripts at set
intervals or at specific times.
Elgg’s cron handler allows administrators and plugin developers to setup jobs that need to be executed at set intervals.
Most common examples of cron jobs in Elgg include:
• sending out queued notifications
• rotating the system log in the database
36
Chapter 2. Administrator Guides
Elgg Documentation, Release master
• collecting garbage in the database (compacting the database by removing entries that are no longer required)
Currently, Elgg supports the following hooks:
• minute - Run every minute
• fiveminute - Run every 5 minutes
• fifteenmin - Run every 15 minutes
• halfhour - Run every 30 minutes
• hourly - Run every hour
• daily - Run every day
• weekly - Run every week
• monthly - Run every month
• yearly - Run every year
Note: reboot cron hook has been deprecated and should not be used
2.5.1 How does it work?
Elgg activates its cron handler when particular cron pages are loaded.
As an example, loading
http://example.com/cron/hourly/ in a web browser activates the hourly hook. To automate this, cron jobs are setup
to hit those pages at certain times. This is done by setting up a crontab which is a configuration file that determines
what cron jobs do and at what interval.
2.5.2 Installation
The crontab needs to specify a script or command that will hit the Elgg cron pages. Two commonly available
programs for this are GET and wget. You will need to determine the location of one of these on your server. Your
crontab also needs to specify the location of your website.
#
#
#
#
#
#
#
#
Crontab example.
This file is an example of triggering Elgg cron events. It hits a URL to
trigger the events. For testing, you can simulate the cronjob by loading the
URL in a browser.
See http://learn.elgg.org/en/stable/admin/cron.html for more information
# Location of your site (don’t forget the trailing slash!)
ELGG=’http://www.example.com/’
# Location of lwp-request
LWPR=’/usr/bin/lwp-request’
# Make GET request and discard content
GET="$LWPR -m GET -d"
# The crontab
# Don’t edit below this line unless you know what you are doing
* * * * * $GET ${ELGG}cron/minute/
*/5 * * * * $GET ${ELGG}cron/fiveminute/
2.5. Cron
37
Elgg Documentation, Release master
15,30,45,59 * * * * $GET ${ELGG}cron/fifteenmin/
30,59 * * * * $GET ${ELGG}cron/halfhour/
@hourly $GET ${ELGG}cron/hourly/
@daily $GET ${ELGG}cron/daily/
@weekly $GET ${ELGG}cron/weekly/
@monthly $GET ${ELGG}cron/monthly/
@yearly $GET ${ELGG}cron/yearly/
# reboot is deprecated and probably doesn’t work
@reboot $GET ${ELGG}cron/reboot/
In the above example, change the ELGG and GET variables to match you server setup. If you have SSH access to
your Linux servers, type crontab -e and add your crontab configuration. If you already have a crontab configured,
you will have to merge Elgg information into it. If you don’t have SSH access, you will have to use a web-based
configuration tool. This will vary depending on hosting provider.
If you choose the wget utility, you might want to consider these flags:
• --output-document or -O to specify the location of the concatenated output file. For example, under
Debian: /usr/bin/wget --output-document=/dev/null. If you don’t do that, a new file will be
created for each cron page load in the home directory of the cron user.
• --spider to prevent the cron page from being downloaded.
On Windows servers, there is a number of cron emulators available.
For information on setting up cron jobs using cPanel see cPanel Docs.
In the command field, enter the appropriate link of the cron page. For example, for a weekly cron job, enter the
command as http://www.example.com/cron/weekly/.
To see if your cron jobs are running, visit Statistics > Cron in your Elgg admin panel.
2.6 Backup and Restore
Contents
• Introduction
– Why
– What
– Assumptions
• Creating a usable backup - automatically
– Customize the backup script
– Configure the backup Cron job
– Configure the cleanup Cron job
• Restoring from backup
– Prepare your backup files
– Restore the files
– Restore the MySQL Database
– Edit the MySQL backup
– Create the new database
– Restore the production database
– Bringing it all together
– Finalizing the new installation
• Congratulations!
• Related
38
Chapter 2. Administrator Guides
Elgg Documentation, Release master
2.6.1 Introduction
Why
Shared hosting providers typically don’t provide an automated way to backup your Elgg installation. This article will
address a method of accomplishing this task.
In IT there are often many ways to accomplish the same thing. Keep that in mind. This article will explain one method
to backup and restore your Elgg installation on a shared hosting provider that uses the CPanel application. However,
the ideas presented here can be tailored to other applications as well. The following are typical situations that might
require a procedure such as this:
• Disaster Recovery
• Moving your Elgg site to a new host
• Duplicating an installation
What
Topics covered:
• Full backups of the Elgg directories and MySQL databases are performed daily (automated)
• The backups are sent to an off-site location via FTP (automated)
• The local backups are deleted after successful transfer to the off-site location (automatic)
• Five days of backups will be maintained (automated)
• Restoration of data to the new host (manual)
This process was composed with assistance from previous articles in the Elgg documentation wiki.
Assumptions
The following assumptions have been made:
• The Elgg program directory is /home/userx/public_html
• The Elgg data directory is /home/userx/elggdata
• You’ve created a local directory for your backups at /home/userx/sitebackups
• You have an off-site FTP server to send the backup files to
• The directory that you will be saving the off-site backups to is /home/usery/sitebackups/
• You will be restoring the site to a second shared hosting provider in the /home/usery/public_html
directory
Important: Be sure to replace userx, usery, http://mynewdomain.com and all passwords with values that
reflect your actual installation!
2.6.2 Creating a usable backup - automatically
Customize the backup script
The script that you will use can be found here .
2.6. Backup and Restore
39
Elgg Documentation, Release master
Just copy the script to a text file and name the file with a .pl extension. You can use any text editor to update the file.
Change the following to reflect your directory structure:
# ENTER THE PATH TO THE DIRECTORY YOU WANT TO BACKUP, NO TRAILING SLASH
$directory_to_backup = ’/home/userx/public_html’;
$directory_to_backup2 = ’/home/userx/elggdata’;
# ENTER THE PATH TO THE DIRECTORY YOU WISH TO SAVE THE BACKUP FILE TO, NO TRAILING SLASH
$backup_dest_dir = ’/home/userx/sitebackups’;
Change the following to reflect your database parameters:
# MYSQL BACKUP PARAMETERS
$dbhost = ’localhost’;
$dbuser = ’userx_elgg’;
$dbpwd = ’dbpassword’;
# ENTER DATABASE NAME
$database_names_elgg = ’userx_elgg’;
Change the following to reflect your off-site FTP server parameters:
# FTP PARAMETERS
$ftp_host = "FTP HOSTNAME/IP";
$ftp_user = "ftpuser";
$ftp_pwd = "ftppassword";
$ftp_dir = "/";
Save the file with the .pl extension (for the purposes of this article we will name the file:
elgg-ftp-backup-script.pl) and upload it to the following directory /home/userx/sitebackups
Be aware that you can turn off FTP and flip a bit in the script so that it does not delete the local backup file in the event
that you don’t want to use off-site storage for your backups.
Configure the backup Cron job
Login to your CPanel application and click on the “Cron Jobs” link.
In the Common Settings
dropdown choose “Once a day” and type the following in the command field /usr/bin/perl
/home/userx/sitebackups/elgg-ftp-backup-script.pl
Click on the “Add New Cron Job” button. Daily full backups are now scheduled and will be transferred off-site.
Configure the cleanup Cron job
If you are sending your backups, via FTP, to another shared hosting provider that uses the CPanel application or you’ve
turned off FTP altogether you can configure your data retention as follows.
Login to your CPanel application for your FTP site, or locally if you’re not using FTP, and click on the “Cron Jobs”
link. In the Common Settings dropdown choose “Once a day” and type the following in the command field find
/home/usery/sitebackups/full_* -mtime +4 -exec rm {} \;
The -mtime X parameter will set the number of days to retain backups. All files older than x number of days will
be deleted. Click on the “Add New Cron Job” button. You have now configured your backup retention time.
40
Chapter 2. Administrator Guides
Elgg Documentation, Release master
2.6.3 Restoring from backup
Prepare your backup files
The assumption is that you’re restoring your site to another shared hosting provider with CPanel.
When the script backed the files up the original directory structure was maintained in the zip file. We need to do a little
cleanup. Perform the following:
• Download the backup file that you wish to restore from
• Extract the contents of the backup file
• Drill down and you will find your site backup and SQL backup. Extract both of these. You will then have:
– a MySQL dump file with a .sql extension
– another directory structure with the contents of:
* /home/userx/public_html
* /home/userx/elggdata
• Repackage the contents of the /home/userx/public_html directory as a zip file so that the files are in the root of the
– The reason for doing this is simple. It’s much more efficient to upload one zip file than it is to ftp the
contents of the /home/userx/public_html directory to your new host.
• Repackage the contents of the /home/userx/elggdata directory as a zip file so that the files are in the root of the
zip file
You should now have the following files:
• the .sql file
• the zip file with the contents of /home/userx/public_html in the root
• the zip file with the contents of /home/userx/elggdata in the root
Restore the files
This is written with the assumption that you’re restoring to a different host but maintaining the original directory
structure. Perform the following:
• Login to the CPanel application on the host that you wish to restore the site to and open the File Manager.
• Navigate to /home/usery/public_html
– Upload the zip file that contains the /home/userx/public_html files
– Extract the zip file You should now see all of the files in /home/usery/public_html
– Delete the zip file
• Navigate to /home/usery/elggdata
– Upload the zip file that contains the /home/userx/elggdata files
– Extract the zip file You should now see all of the files in /home/usery/elggdata
– Delete the zip file
Program and data file restoration is complete
2.6. Backup and Restore
41
Elgg Documentation, Release master
Restore the MySQL Database
Note: Again, the assumption here is that you’re restoring your Elgg installation to a second shared hosting provider.
Each shared hosting provider prepends the account holder’s name to the databases associated with that account. For
example, the username for our primary host is userx so the host will prepend userx_ to give us a database name
of userx_elgg. When we restore to our second shared hosting provider we’re doing so with a username of usery
so our database name will be usery_elgg. The hosting providers don’t allow you to modify this behavior. So the
process here isn’t as simple as just restoring the database from backup to the usery account. However, having said
that, it’s not terribly difficult either.
Edit the MySQL backup
Open the .sql file that you extracted from your backup in your favorite text editor. Comment out the following lines
with a hash mark:
#CREATE DATABASE /*!32312 IF NOT EXISTS*/ ‘userx_elgg‘ /*!40100 DEFAULT CHARACTER SET latin1 */;
#USE ‘userx_elgg‘;
Save the file.
Create the new database
Perform the following:
• Login to the CPanel application on the new host and click on the “MySQL Databases” icon
– Fill in the database name and click the “create” button. For our example we are going to stick with
elgg which will give us a database name of usery_elgg
– You can associate an existing user with the new database, but to create a new user you will need to:
* Go to the “Add New User” section of the “MySQL Databases” page
* Enter the username and password. For our example we’re going to keep it simple and use elgg
once again. This will give us a username of usery_elgg
– Associate the new user with the new database
* Go to the “Add User To Database” section of the “MySQL Databases” page. Add the
usery_elgg user to the usery_elgg database
* Select “All Privileges” and click the “Make Changes” button
Restore the production database
Now it’s time to restore the MySQL backup file by importing it into our new database named “usery_elgg”.
• Login to the CPanel application on the new host and click on the “phpMyAdmin icon
– Choose the usery_elgg database in the left hand column
– Click on the “import” tab at the top of the page
– Browse to the .sql backup on your local computer and select it
– Click the “Go” button on the bottom right side of the page
You should now see a message stating that the operation was successful
42
Chapter 2. Administrator Guides
Elgg Documentation, Release master
Bringing it all together
The restored elgg installation knows nothing about the new database name, database username, directory structure,
etc. That’s what we’re going to address here.
Edit /public_html/engine/settings.php on the new hosting provider to reflect the database information
for the database that you just created.
// Database username
$CONFIG->dbuser = ’usery_elgg’;
// Database password
$CONFIG->dbpass = ’dbpassword’;
// Database name
$CONFIG->dbname = ’usery_elgg’;
// Database server
// (For most configurations, you can leave this as ’localhost’)
$CONFIG->dbhost = ’localhost’;
Upload the settings.php file back to the new host - overwriting the existing file.
Open the phpMyAdmin tool on the new host from the CPanel. Select the usery_elgg database on the left and click
the SQL tab on the top of the page. Run the following SQL queries against the usery_elgg database:
Change the installation path
UPDATE ‘elgg_datalists‘ SET ‘value‘ = "/home/usery/public_html/grid/" WHERE ‘name‘ = "path";
Change the data directory
UPDATE ‘elgg_datalists‘ SET ‘value‘ = "/home/usery/elggdata/" WHERE ‘name‘ = "dataroot";
Change the site URL (if this has changed)
UPDATE ‘elgg_sites_entity‘ SET ‘url‘ = "http://mynewdomain.com";
Change the filestore data directory
UPDATE elgg_metastrings set string = ’/home/usery/elggdata/’ WHERE id = (SELECT value_id from elgg_me
Finalizing the new installation
Run the upgrade script by visiting the following URL: http://mynewdomain.com/upgrade.php . Do this
step twice - back to back.
Update your DNS records so that your host name resolves to the new host’s IP address if this is a permanent move.
2.6.4 Congratulations!
If you followed the steps outlined here you should now have a fully functional copy of your primary Elgg installation.
2.6. Backup and Restore
43
Elgg Documentation, Release master
2.6.5 Related
FTP backup script
Here is an automated script for backing up an Elgg installation.
#!/usr/bin/perl -w
# FTP Backup
use Net::FTP;
# DELETE BACKUP AFTER FTP UPLOAD (0 = no, 1 = yes)
$delete_backup = 1;
# ENTER THE PATH TO THE DIRECTORY YOU WANT TO BACKUP, NO TRAILING SLASH
$directory_to_backup = ’/home/userx/public_html’;
$directory_to_backup2 = ’/home/userx/elggdata’;
# ENTER THE PATH TO THE DIRECTORY YOU WISH TO SAVE THE BACKUP FILE TO, NO TRAILING SLASH
$backup_dest_dir = ’/home/userx/sitebackups’;
# BACKUP FILE NAME OPTIONS
($a,$d,$d,$day,$month,$yearoffset,$r,$u,$o) = localtime();
$year = 1900 + $yearoffset;
$site_backup_file = "$backup_dest_dir/site_backup-$day-$month-$year.tar.gz";
$full_backup_file = "$backup_dest_dir/full_site_backup-$day-$month-$year.tar.gz";
# MYSQL BACKUP PARAMETERS
$dbhost = ’localhost’;
$dbuser = ’userx_elgg’;
$dbpwd = ’dbpassword’;
$mysql_backup_file_elgg = "$backup_dest_dir/mysql_elgg-$day-$month-$year.sql.gz";
# ENTER DATABASE NAME
$database_names_elgg = ’userx_elgg’;
# FTP PARAMETERS
$ftp_backup = 1;
$ftp_host = "FTP HOSTNAME/IP";
$ftp_user = "ftpuser";
$ftp_pwd = "ftppassword";
$ftp_dir = "/";
# SYSTEM COMMANDS
$cmd_mysqldump = ’/usr/bin/mysqldump’;
$cmd_gzip = ’/usr/bin/gzip’;
# CURRENT DATE / TIME
($a,$d,$d,$day,$month,$yearoffset,$r,$u,$o) = localtime();
$year = 1900 + $yearoffset;
# BACKUP FILES
$syscmd = "tar --exclude $backup_dest_dir" . "/* -czf $site_backup_file $directory_to_backup $directo
# elgg DATABASE BACKUP
system($syscmd);
$syscmd = "$cmd_mysqldump --host=$dbhost --user=$dbuser --password=$dbpwd --add-drop-table --database
44
Chapter 2. Administrator Guides
Elgg Documentation, Release master
system($syscmd);
# CREATING FULL SITE BACKUP FILE
$syscmd = "tar -czf $full_backup_file $mysql_backup_file_elgg $site_backup_file";
system($syscmd);
# DELETING SITE AND MYSQL BACKUP FILES
unlink($mysql_backup_file_elgg);
unlink($site_backup_file);
# UPLOADING FULL SITE BACKUP TO REMOTE FTP SERVER
if($ftp_backup == 1)
{
my $ftp = Net::FTP->new($ftp_host, Debug => 0)
or die "Cannot connect to server: $@";
$ftp->login($ftp_user, $ftp_pwd)
or die "Cannot login ", $ftp->message;
$ftp->cwd($ftp_dir)
or die "Can’t CWD to remote FTP directory ", $ftp->message;
$ftp->binary();
$ftp->put($full_backup_file)
or warn "Upload failed ", $ftp->message;
$ftp->quit();
}
# DELETING FULL SITE BACKUP
if($delete_backup = 1)
{
unlink($full_backup_file);
}
Duplicate Installation
2.6. Backup and Restore
45
Elgg Documentation, Release master
Contents
• Introduction
– Why Duplicate an Elgg Installation?
– What Is Not Covered in This Tutorial
– Before You Start
• Copy Elgg Code to the Test Server
• Copy Data to the Test Server
• Edit engine/settings.php
• Copy Elgg Database
• Database Entries
– Change the installation path
– Change the data directory
– Change the site URL
– Change the filestore data directory
• Check .htaccess
• Update Webserver Config
• Run upgrade.php
• Tips
• Related
Introduction
Why Duplicate an Elgg Installation? There are many reasons you may want to duplicate an Elgg installation:
moving the site to another server, creating a test or development server, and creating functional backups are the most
common. To create a successful duplicate of an Elgg site, 3 things need to be copied:
• Database
• Data from the data directory
• Code
Also at least 5 pieces of information must be changed from the copied installation:
• engine/settings.php file
• .htaccess file
• database entry for your site entity
• database entry for the installation path
• database entry for the data path
What Is Not Covered in This Tutorial This tutorial expects a basic knowledge of Apache, MySQL, and Linux
commands. As such, a few things will not be covered in this tutorial. These include:
• How to backup and restore MySQL databases
• How to configure Apache to work with Elgg
• How to transfer files to and from your production server
Before You Start Before you start, make sure the Elgg installation you want to duplicate is fully functional. You
will also need the following items:
• A backup of the live Elgg database
46
Chapter 2. Administrator Guides
Elgg Documentation, Release master
• A place to copy the live database
• A server suitable for installing duplicate Elgg site (This can be the same server as your production Elgg installation.)
Backups of the database can be obtained various ways, including phpMyAdmin, the MySQL official GUI, and the
command line. Talk to your host for information on how to backup and restore databases or use Google to find
information on this.
During this tutorial, we will make these assumptions about the production Elgg site:
• The URL is http://www.myelgg.org/
• The installation path is /var/www/elgg/
• The data directory is /var/data/elgg/
• The database host is localhost
• The database name is production_elgg
• The database user is db_user
• The database password is db_password
• The database prefix is elgg
At the end of the tutorial, our test Elgg installation details will be:
• The URL is http://test.myelgg.org/
• The installation path is /var/www/elgg_test/
• The data directory is /var/data/elgg_test/
• The database host is localhost
• The database name is test_elgg
• The database user is db_user
• The database password is db_password
• The database prefix is elgg
Copy Elgg Code to the Test Server
The very first step is to duplicate the production Elgg code.
/var/www/elgg/ to /var/www/elgg_test/.
In our example, this is as simple as copying
cp -a /var/www/elgg/ /var/www/elgg_test/
Copy Data to the Test Server
In this example, this is as simple as copying /var/data/elgg/ to /var/data/elgg_test/.
cp -a /var/data/elgg/ /var/data/elgg_test/
If you don’t have shell access to your server and have to ftp the data, you may need to change ownership and permissions on the files.
Note: You also need to delete the views cache on the test server after the copy process. This is a directory called
views_simplecache in your data directory and the directory called system_cache .
2.6. Backup and Restore
47
Elgg Documentation, Release master
Edit engine/settings.php
The engine/settings.php file contains the database configuration details. These need to be adjusted for your
new test Elgg installation. In our example, we’ll look in /var/www/elgg_test/engine/settings.php and
find the lines that look like this:
// Database username
$CONFIG->dbuser = ’db_user’;
// Database password
$CONFIG->dbpass = ’db_password’;
// Database name
$CONFIG->dbname = ’elgg_production’;
// Database server
// (For most configurations, you can leave this as ’localhost’)
$CONFIG->dbhost = ’localhost’;
// Database table prefix
// If you’re sharing a database with other applications, you will want to use this
// to differentiate Elgg’s tables.
$CONFIG->dbprefix = ’elgg’;
We need to change these lines to match our new installation:
// Database username
$CONFIG->dbuser = ’db_user’;
// Database password
$CONFIG->dbpass = ’db_password’;
// Database name
$CONFIG->dbname = ’elgg_test’;
// Database server
// (For most configurations, you can leave this as ’localhost’)
$CONFIG->dbhost = ’localhost’;
// Database table prefix
// If you’re sharing a database with other applications, you will want to use this
// to differentiate Elgg’s tables.
$CONFIG->dbprefix = ’elgg’;
Note: Notice the $CONFIG->dbname has changed to reflect our new database.
Copy Elgg Database
Now the database must be copied from elgg_production to elgg_test. See your favorite MySQL manager’s
documentation for how to make a duplicate database. You will generally export the current database tables to a file,
create the new database, and then import the tables that you previously exported.
You have two options on updating the values in the database. You could change the values in the export file or you
could import the file and change the values with database queries. One advantage of modifying the dump file is that
48
Chapter 2. Administrator Guides
Elgg Documentation, Release master
you can also change links that people have created to content within your site. For example, if people have bookmarked
pages using the bookmark plugin, the bookmarks will point to the old site unless your update their URLs.
Database Entries
We must now change 4 entries in the database. This is easily accomplished with 4 simple SQL commands:
Change the installation path
UPDATE ‘elgg_datalists‘ SET ‘value‘ = "/var/www/elgg_test/" WHERE ‘name‘ = "path";
Change the data directory
UPDATE ‘elgg_datalists‘ SET ‘value‘ = "/var/data/elgg_test/" WHERE ‘name‘ = "dataroot";
Change the site URL
UPDATE ‘elgg_sites_entity‘ SET ‘url‘ = "http://test.myelgg.org/";
Change the filestore data directory
UPDATE elgg_metastrings SET string = ’/var/data/elgg_test/’
WHERE id = (
SELECT value_id
FROM elgg_metadata
WHERE name_id = (
SELECT *
FROM (
SELECT id
FROM elgg_metastrings
WHERE string = ’filestore::dir_root’
) as ms2
)
LIMIT 1
);
Warning: Only change the first path here!!
Check .htaccess
If you have made changes to .htaccess that modify any paths, make sure you update them in the test installation.
Update Webserver Config
For this example, you must edit the Apache config to enable a subdomain with a document root of
/var/www/elgg_test/. If you plan to install into a subdirectory of your document root, this step is unnecessary.
Run upgrade.php
To regenerate cached data, make sure to run http://test.myelgg.org/upgrade.php
2.6. Backup and Restore
49
Elgg Documentation, Release master
Tips
It is a good idea to keep a test server around to experiment with installing new mods and doing development work. If
you automate restorations to the elgg_test database, changing the $CONFIG values and adding the follow lines to
the end of the elgg_test/engine/settings.php file will allow seamless re-writing of the MySQL database
entries.
$con = mysql_connect($CONFIG->dbhost, $CONFIG->dbuser, $CONFIG->dbpass);
mysql_select_db($CONFIG->dbname, $con);
$sql = "UPDATE {$CONFIG->dbprefix}datalists
SET value = ’/var/www/test_elgg/’
WHERE name = ’path’";
mysql_query($sql);
print mysql_error();
$sql = "UPDATE {$CONFIG->dbprefix}datalists
SET value = ’/var/data/test_elgg/’
WHERE name = ’dataroot’";
mysql_query($sql);
print mysql_error();
$sql = "UPDATE {$CONFIG->dbprefix}sites_entity
SET url = ’http://test.myelgg.org/’";
mysql_query($sql);
$sql = "UPDATE {$CONFIG->dbprefix}metastrings
SET string = ’/var/data/elgg_test/’
WHERE id = (
SELECT value_id
FROM {$CONFIG->dbprefix}metadata
WHERE name_id = (
SELECT *
FROM (
SELECT id
FROM {$CONFIG->dbprefix}metastrings
WHERE string = ’filestore::dir_root’
) as ms2
)
LIMIT 1
)";
mysql_query($sql);
print mysql_error();
Related
See also:
Backup and Restore
2.7 Duplicate Installation
50
Chapter 2. Administrator Guides
Elgg Documentation, Release master
Contents
• Introduction
– Why Duplicate an Elgg Installation?
– What Is Not Covered in This Tutorial
– Before You Start
• Copy Elgg Code to the Test Server
• Copy Data to the Test Server
• Edit engine/settings.php
• Copy Elgg Database
• Database Entries
– Change the installation path
– Change the data directory
– Change the site URL
– Change the filestore data directory
• Check .htaccess
• Update Webserver Config
• Run upgrade.php
• Tips
• Related
2.7.1 Introduction
Why Duplicate an Elgg Installation?
There are many reasons you may want to duplicate an Elgg installation: moving the site to another server, creating a
test or development server, and creating functional backups are the most common. To create a successful duplicate of
an Elgg site, 3 things need to be copied:
• Database
• Data from the data directory
• Code
Also at least 5 pieces of information must be changed from the copied installation:
• engine/settings.php file
• .htaccess file
• database entry for your site entity
• database entry for the installation path
• database entry for the data path
What Is Not Covered in This Tutorial
This tutorial expects a basic knowledge of Apache, MySQL, and Linux commands. As such, a few things will not be
covered in this tutorial. These include:
• How to backup and restore MySQL databases
• How to configure Apache to work with Elgg
• How to transfer files to and from your production server
2.7. Duplicate Installation
51
Elgg Documentation, Release master
Before You Start
Before you start, make sure the Elgg installation you want to duplicate is fully functional. You will also need the
following items:
• A backup of the live Elgg database
• A place to copy the live database
• A server suitable for installing duplicate Elgg site (This can be the same server as your production Elgg installation.)
Backups of the database can be obtained various ways, including phpMyAdmin, the MySQL official GUI, and the
command line. Talk to your host for information on how to backup and restore databases or use Google to find
information on this.
During this tutorial, we will make these assumptions about the production Elgg site:
• The URL is http://www.myelgg.org/
• The installation path is /var/www/elgg/
• The data directory is /var/data/elgg/
• The database host is localhost
• The database name is production_elgg
• The database user is db_user
• The database password is db_password
• The database prefix is elgg
At the end of the tutorial, our test Elgg installation details will be:
• The URL is http://test.myelgg.org/
• The installation path is /var/www/elgg_test/
• The data directory is /var/data/elgg_test/
• The database host is localhost
• The database name is test_elgg
• The database user is db_user
• The database password is db_password
• The database prefix is elgg
2.7.2 Copy Elgg Code to the Test Server
The very first step is to duplicate the production Elgg code.
/var/www/elgg/ to /var/www/elgg_test/.
In our example, this is as simple as copying
cp -a /var/www/elgg/ /var/www/elgg_test/
2.7.3 Copy Data to the Test Server
In this example, this is as simple as copying /var/data/elgg/ to /var/data/elgg_test/.
52
Chapter 2. Administrator Guides
Elgg Documentation, Release master
cp -a /var/data/elgg/ /var/data/elgg_test/
If you don’t have shell access to your server and have to ftp the data, you may need to change ownership and permissions on the files.
Note: You also need to delete the views cache on the test server after the copy process. This is a directory called
views_simplecache in your data directory and the directory called system_cache .
2.7.4 Edit engine/settings.php
The engine/settings.php file contains the database configuration details. These need to be adjusted for your
new test Elgg installation. In our example, we’ll look in /var/www/elgg_test/engine/settings.php and
find the lines that look like this:
// Database username
$CONFIG->dbuser = ’db_user’;
// Database password
$CONFIG->dbpass = ’db_password’;
// Database name
$CONFIG->dbname = ’elgg_production’;
// Database server
// (For most configurations, you can leave this as ’localhost’)
$CONFIG->dbhost = ’localhost’;
// Database table prefix
// If you’re sharing a database with other applications, you will want to use this
// to differentiate Elgg’s tables.
$CONFIG->dbprefix = ’elgg’;
We need to change these lines to match our new installation:
// Database username
$CONFIG->dbuser = ’db_user’;
// Database password
$CONFIG->dbpass = ’db_password’;
// Database name
$CONFIG->dbname = ’elgg_test’;
// Database server
// (For most configurations, you can leave this as ’localhost’)
$CONFIG->dbhost = ’localhost’;
// Database table prefix
// If you’re sharing a database with other applications, you will want to use this
// to differentiate Elgg’s tables.
$CONFIG->dbprefix = ’elgg’;
Note: Notice the $CONFIG->dbname has changed to reflect our new database.
2.7. Duplicate Installation
53
Elgg Documentation, Release master
2.7.5 Copy Elgg Database
Now the database must be copied from elgg_production to elgg_test. See your favorite MySQL manager’s
documentation for how to make a duplicate database. You will generally export the current database tables to a file,
create the new database, and then import the tables that you previously exported.
You have two options on updating the values in the database. You could change the values in the export file or you
could import the file and change the values with database queries. One advantage of modifying the dump file is that
you can also change links that people have created to content within your site. For example, if people have bookmarked
pages using the bookmark plugin, the bookmarks will point to the old site unless your update their URLs.
2.7.6 Database Entries
We must now change 4 entries in the database. This is easily accomplished with 4 simple SQL commands:
Change the installation path
UPDATE ‘elgg_datalists‘ SET ‘value‘ = "/var/www/elgg_test/" WHERE ‘name‘ = "path";
Change the data directory
UPDATE ‘elgg_datalists‘ SET ‘value‘ = "/var/data/elgg_test/" WHERE ‘name‘ = "dataroot";
Change the site URL
UPDATE ‘elgg_sites_entity‘ SET ‘url‘ = "http://test.myelgg.org/";
Change the filestore data directory
UPDATE elgg_metastrings SET string = ’/var/data/elgg_test/’
WHERE id = (
SELECT value_id
FROM elgg_metadata
WHERE name_id = (
SELECT *
FROM (
SELECT id
FROM elgg_metastrings
WHERE string = ’filestore::dir_root’
) as ms2
)
LIMIT 1
);
Warning: Only change the first path here!!
2.7.7 Check .htaccess
If you have made changes to .htaccess that modify any paths, make sure you update them in the test installation.
54
Chapter 2. Administrator Guides
Elgg Documentation, Release master
2.7.8 Update Webserver Config
For this example, you must edit the Apache config to enable a subdomain with a document root of
/var/www/elgg_test/. If you plan to install into a subdirectory of your document root, this step is unnecessary.
2.7.9 Run upgrade.php
To regenerate cached data, make sure to run http://test.myelgg.org/upgrade.php
2.7.10 Tips
It is a good idea to keep a test server around to experiment with installing new mods and doing development work. If
you automate restorations to the elgg_test database, changing the $CONFIG values and adding the follow lines to
the end of the elgg_test/engine/settings.php file will allow seamless re-writing of the MySQL database
entries.
$con = mysql_connect($CONFIG->dbhost, $CONFIG->dbuser, $CONFIG->dbpass);
mysql_select_db($CONFIG->dbname, $con);
$sql = "UPDATE {$CONFIG->dbprefix}datalists
SET value = ’/var/www/test_elgg/’
WHERE name = ’path’";
mysql_query($sql);
print mysql_error();
$sql = "UPDATE {$CONFIG->dbprefix}datalists
SET value = ’/var/data/test_elgg/’
WHERE name = ’dataroot’";
mysql_query($sql);
print mysql_error();
$sql = "UPDATE {$CONFIG->dbprefix}sites_entity
SET url = ’http://test.myelgg.org/’";
mysql_query($sql);
$sql = "UPDATE {$CONFIG->dbprefix}metastrings
SET string = ’/var/data/elgg_test/’
WHERE id = (
SELECT value_id
FROM {$CONFIG->dbprefix}metadata
WHERE name_id = (
SELECT *
FROM (
SELECT id
FROM {$CONFIG->dbprefix}metastrings
WHERE string = ’filestore::dir_root’
) as ms2
)
LIMIT 1
)";
mysql_query($sql);
print mysql_error();
2.7. Duplicate Installation
55
Elgg Documentation, Release master
2.7.11 Related
See also:
Backup and Restore
2.8 Getting Help
Having a problem with Elgg? The best way to get help is to ask at the Community Site. This site is community
supported by a large group of volunteers. Here are a few tips to help you get the help you need.
Contents
• Getting help
• Guidelines
• Good Ideas
2.8.1 Getting help
Don’t be a Help Vampire
We were all newbies at one time, but we can all learn. Not showing that you are making attempts to learn on your own
or do your own research is off putting for those helping. Also, very generic questions like “How do I build a forum?”
are almost impossible to answer.
Search first
Be sure to search the documentation (this site), the Community Site, and Google before asking a question. New users
to Elgg frequently have the same questions, so please search. People are less inclined to reply to a post that has been
answered many other times or that can be answered easily by Googling.
Ask once
Posting the same questions in multiple places makes it hard to answer you. Ask your question in one place only.
Duplicate questions may be moderated.
Include Elgg Version
Different versions of Elgg have different features (and different bugs). Including the version of Elgg that you are using
will help those helping you.
Have a reasonable profile
Profiles that look like spam or have silly names will often be ignored. Joviality is fine, but people are more likely to
help Michael than 1337elggHax0r.
56
Chapter 2. Administrator Guides
Elgg Documentation, Release master
Post in the appropriate forum
Check to make sure you’re posting in the right forum. If you have a question about creating a plugin, don’t post to the
Elgg Feedback forum. If you need help installing Elgg, post to Technical Support instead of the Theming group.
Use a descriptive topic title
Good topic titles concisely describe your problem or question. Bad topic titles are vague, contain all capital letters,
and excessive punctuation.
Good title: “White screen after upgrading to 1.7.4.”
Bad title: “URGENT!!!!! site broke ;-( losing money help!!!!!!!!!!!”
Be detailed
Include as many details about your problem as possible. If you have a live site, include a link. Be forthcoming if
community members might ask for more information. We can’t help you if you won’t give any details!
Keep it public
This is a public forum for the good of the Elgg project. Keep posts public. There’s no reason for anyone to ask you to
send a private message or email. Likewise, there’s no reason to ask anyone to send a private email to you. Post in the
public.
2.8.2 Guidelines
In addition to the site-wide Terms and Policies, following these guidelines keeps our community site useful and safe
for everyone.
Content
All content must be safe for work: PG in the US and UK. If your Elgg site has adult content and you have been asked
to post a link, please mark it NSFW (Not Safe For Work) so people know.
Excessive swearing in any language will not be tolerated.
Mood
Working with technical problems can be frustrating. Please keep the community site free of frustration. If you’re feeling anxious, take a step away and do something else. Threatening or attacking community members, core developers,
or plugin developers will not help solve your problem and will likely get you banned.
Advertising
Advertising is not allowed. Posts with any sort of advertising will be moderated.
2.8. Getting Help
57
Elgg Documentation, Release master
Asking for money / Offering to pay
Don’t ask for money on the community site. Likewise, don’t offer to pay for answers. If you are looking for custom
development, post to the Professional Services group. Posts asking for money or recommending a commercial plugin
may be moderated.
Links
If you’re having a problem with a live site, please provide a link to it.
That said, the community site is not a back linking service or SEO tool. Excessive linking will be moderated and your
account may be banned.
Signatures
There’s a reason Elgg doesn’t have an option for signatures: they cause clutter and distract from the conversation.
Users are discouraged from using signatures on the community site, and signatures with links or advertising will be
removed.
Bumping, +1, me too
Don’t do it. If your question hasn’t been answered, see the top of this document for tips. These types of post add
nothing to the conversation and may be moderated.
Posting Code
Long bits of code are confusing to read through in a forums context. Please use http://elgg.pastebin.com to post long
bits of code and provide the Paste Bin link instead of directly posting the code.
2.8.3 Good Ideas
Not policies, but good ideas.
Say thanks
Did someone help you? Be sure to thank them! The community site is run by volunteers. No one has to help you with
your problem. Be sure to show your appreciation!
Give back
Have a tip for Elgg? See someone with a similar problem you had? You’ve been there and can help them out, so give
them a hand!
58
Chapter 2. Administrator Guides
CHAPTER 3
Developer Guides
Customize Elgg’s behavior with plugins.
3.1 Don’t Modify Core
Warning: Don’t modify any non-config files that come with Elgg.
Instead, create a custom plugin and alter behavior through the rich Elgg plugin API.
Here are the main reasons not to modify the core of Elgg, or of any other third party software that offers better
extensibility routes through plugins.
3.1.1 It makes it hard to get help
When you don’t share the same codebase as everyone else, it’s impossible for others to know what is going on in your
system and whether your changes are to blame. This can frustrate those who offer help because it can add considerable
noise to the support process.
3.1.2 It makes upgrading tricky and potentially disastrous
You will certainly want or need to upgrade Elgg to take advantage of security patches, new features, new plugin APIs,
new stability and performance improvements. If you’ve modified core files, then you must be very careful when
upgrading that your changes are not overwritten and that they are compatible with the new Elgg code. If your changes
are lost or incompatible, then the upgrade may remove features you’ve added or even completely break your site.
This can also be a slippery slope. Lots of modifications can lead you to an upgrade process so complex that it’s
practically impossible. There are lots of sites stuck running old versions software due to taking this path.
3.1.3 It may break plugins
You may not realize until much later that your “quick fix” broke seemingly unrelated functionality that plugins depended on.
59
Elgg Documentation, Release master
3.1.4 Summary
• Resist the temptation Editing existing files is quick and easy, but doing so heavily risks the maintainability,
security, and stability of your site.
• When receiving advice, consider if the person telling you to modify core will be around to rescue you if you run
into trouble later!
• Apply these principle to software in general. If you can avoid it, don’t modify third party plugins either, for
many of the same reasons: Plugin authors release new versions, too, and you will want those updates.
3.2 Plugins
Plugins must provide a start.php and manifest.xml file in the plugin root in order to be recognized by Elgg.
3.2.1 start.php
The start.php file bootstraps plugin by registering event listeners and plugin hooks.
3.2.2 activate.php, deactivate.php
The activate.php and deactivate.php files contain procedural code that will run upon plugin activation and deactivation.
Use these files to perform one-time events such as registering a persistent admin notice, registering subtypes, or
performing garbage collection when deactivated.
3.2.3 manifest.xml
Elgg plugins are required to have a manifest.xml file in the root of a plugin.
The manifest.xml file includes information about the plugin itself, requirements to run the plugin, and optional
information including where to display the plugin in the admin area and what APIs the plugin provides.
Syntax
The manifest file is a standard XML file in UTF-8. Everything is a child of the <plugin_manifest> element.
<?xml version="1.0" encoding="UTF-8" ?>
<plugin_manifest xmlns="http://www.elgg.org/plugin_manifest/1.8">
The manifest syntax is as follows:
<name>value</name>
Many elements can contain children attributes:
<parent_name>
<child_name>value</child_name>
<child_name_2>value_2</child_name_2>
</parent_name>
60
Chapter 3. Developer Guides
Elgg Documentation, Release master
Required Elements
All plugins are required to define the following elements in their manifest files:
• id - This has the name as the directory that the plugin uses.
• name - The display name of the plugin.
• author - The name of the author who wrote the plugin.
• version - The version of the plugin.
• description - A description of the what the plugin provides, its features, and other relevant information
• requires - Each plugin must specify the release of Elgg it was developed for. See the plugin Dependencies page
for more information.
Available Elements
In addition to the require elements above, the follow elements are available to use:
• blurb - A short description of the plugin.
• category - The category of the plugin. It is recommended to follow the [[Plugin_Guidelines|plugin guidelines]]
and use one of the defined categories. There can be multiple entries.
• conflicts - Specifies that the plugin conflicts with a certain system configuration.
• copyright - The plugin’s copyright information.
• license - The plugin’s license information.
• provides - Specifies that this plugin provides the same functionality as another Elgg plugin or a PHP extension.
• screenshot - Screenshots of the plugin. There can be multiple entries. See the advanced example for syntax.
• suggests - Parallels the requires system, but doesn’t affect if the plugin can be enabled. Used to suggest other
plugins that interact or build on the plugin.
• website - A link to the website for the plugin.
See also:
Plugin Dependencies
Simple Example
This manifest file is the bare minimum a plugin must have.
<?xml version="1.0" encoding="UTF-8"?>
<plugin_manifest xmlns="http://www.elgg.org/plugin_manifest/1.8">
<name>Example Manifest</name>
<author>Elgg</author>
<version>1.0</version>
<description>This is a simple example of a manifest file. In this example, there are not scre
<requires>
<type>elgg_release</type>
<version>1.9</version>
</requires>
</plugin_manifest>
3.2. Plugins
61
Elgg Documentation, Release master
Advanced example
This example uses all of the available elements:
<?xml version="1.0" encoding="UTF-8"?>
<plugin_manifest xmlns="http://www.elgg.org/plugin_manifest/1.8">
<name>Example Manifest</name>
<author>Brett Profitt</author>
<version>1.0</version>
<blurb>This is an example manifest file.</blurb>
<description>This is a simple example of a manifest file. In this example, there are many opt
<website>http://www.elgg.org/</website>
<copyright>(C) Brett Profitt 2014</copyright>
<license>GNU Public License version 2</license>
<category>3rd_party_integration</category>
<requires>
<type>elgg_release</type>
<version>1.9.1</version>
</requires>
<!-- The path is relative to the plugin’s root. -->
<screenshot>
<description>Elgg profile.</description>
<path>screenshots/profile.png</path>
</screenshot>
<provides>
<type>plugin</type>
<name>example_plugin</name>
<version>1.5</version>
</provides>
<suggests>
<type>plugin</type>
<name>twitter</name>
<version>1.0</version>
</suggests>
</plugin_manifest>
3.2.4 Related
Plugin skeleton
The following is the standard for plugin structure in Elgg as of Elgg 1.8. Plugins written for Elgg 1.7 and down are
strongly encouraged to use this structure as well, though some of the benefits are not as apparent as when used in 1.8.
Example Structure
The following is an example of a plugin with standard structure. For further explanation of this structure, see the
details in the following sections. Your plugin may not need all the files listed
The following files for plugin example would go in /mod/example/
62
Chapter 3. Developer Guides
Elgg Documentation, Release master
actions/
example/
action.php
other_action.php
classes/
ExampleClass.php
graphics/
example.png
js/
example.js
languages/
en.php
lib/
example.php
pages/
example/
all.php
owner.php
vendors/
example_3rd_party_lib/
views/
default/
example/
css.php
forms/
example/
action.php
other_action.php
js/
example.php
object/
example.php
example/
context1.php
context2.php
plugins/
example/
settings.php
usersettings.php
widgets/
example_widget/
content.php
edit.php
activate.php
deactivate.php
CHANGES.txt
COPYRIGHT.txt
INSTALL.txt
LICENSE.txt
manifest.xml
README.txt
start.php
Required Files
Plugins must provide a start.php and manifest.xml file in the plugin root in order to be recognized by Elgg.
3.2. Plugins
63
Elgg Documentation, Release master
Therefore the following is the minimally compliant structure:
mod/example/
start.php
manifest.xml
Actions
Plugins should place scripts for actions an actions/ directory, and furthermore should use the name of the action
to determine the location within that directory.
For example, the action my/example/action would go in my_plugin/actions/my/example/action.php.
This makes it very obvious which script is associated with which action.
Similarly,
the body of the form that submits to this action should be located in
forms/my/example/action.php. Not only does this make the connection b/w action handler, form
code, and action name obvious, but it allows you to use the new (as of Elgg 1.8) elgg_view_form() function
easily.
Text Files
Plugins may provide various *.txt as additional documentation for the plugin. These files must be in Markdown syntax
and will generate links on the plugin management sections.
README.txt should provide additional information about the plugin of an unspecified nature
COPYRIGHT.txt If included, must provide an explanation of the plugin’s copyright, besides what is included in
manifest.xml
LICENSE.txt If included, must provide the text of the license that the plugin is released under.
INSTALL.txt If included, must provide additional instructions for installing the plugin if the process is sufficiently
complicated (e.g. if it requires installing third party libraries on the host machine, or requires acquiring an API
key from a third party).
CHANGES.txt If included, must provide a list of changes for their plugin, grouped by version number, with the most
recent version at the top.
Plugins may include additional *.txt files besides these, but no interface is given for reading them.
Pages
Plugins should put page-generating scripts in a pages/ directory inside their plugin root.
Furthermore, plugins should put page-generating scripts under a directory named for their handler.
For
example, the script for page yoursite.com/my_handler/view/1234 should be located at
mod/my_plugin/pages/my_handler/view.php.
In the past, these scripts were included directly in the plugin root. Plugins should not do this anymore, and if any core
plugins are found to do this, that is a bug if not present solely for the sake of backwards compatibility.
Note: The reason we encourage this structure is
• To form a logical relationship between urls and scripts, so that people examining the code can have an idea of
what it does just by examining the structure.
• To clean up the root plugin directory, which historically has quickly gotten cluttered with the page handling
scripts.
64
Chapter 3. Developer Guides
Elgg Documentation, Release master
Classes
All classes that your plugin defines should be included in a classes/ directory. This directory has special meaning
to Elgg. Classes placed in this directory are autoloaded on demand, and do not need to be included explicitly.
Warning: Each file must have exactly one class defined inside it. The file name must match the name of the one
class that the file defines (except for the ”.php” suffix).
Note: Files with a ”.class.php” extension will not be recognized by Elgg.
Vendors
Included third-party libraries of any kind should be included in the vendors/ folder in the plugin root. Though this
folder has no special significance to the Elgg engine, this has historically been the location where Elgg core stores its
third-party libraries, so we encourage the same format for the sake of consistency and familiarity.
Lib
Procedural code defined by your plugin should be placed in the lib/ directory. Though this folder has no special
significance to the Elgg engine, this has historically been the location where Elgg core stores its procedural code, so
we encourage the same format for the sake of consistency and familiarity.
Views
In order to override core views, a plugin’s views must be placed in a views/. This directory has special meaning to
Elgg as views defined here automatically override Elgg core’s version of those views. For more info, see Views.
Javascript
Javascript that will be included on every page should be put in the plugin/js view and your plugin should extend
js/elgg with this view. Javascript that does not need to be included on every page should be put in a static javascript
file under the js/ directory. For more information on Javascript in Elgg, see JavaScript.
activate.php and deactivate.php
The activate.php and deactivate.php files contain procedural code that will run respectively upon plugin
activation or deactivation. Use these files to perform one-time events such as registering a persistent admin notice,
registering subtypes, or performing garbage collection when deactivated.
Plugin Dependencies
In Elgg 1.8 a plugin dependencies system was introduced to prevent plugins from being used on incompatible systems.
3.2. Plugins
65
Elgg Documentation, Release master
Contents
• Overview
• Verbs
– Requires
– Mandatory requires: elgg_version and elgg_release
– Suggests
– Conflicts
– Provides
• Types
– elgg_version and elgg_release
– plugin
– priority
– php_extension
– php_ini
• Comparison Operators
• Quick Examples
– Requires Elgg 1.8.2 or higher
– Requires the Groups plugin is active
– Requires to be after the Profile plugin if Profile is active
– Conflicts with The Wire plugin
– Requires at least 256 MB memory in PHP
– Suggest the TidyPics plugin is loaded
Overview
The dependencies system is controlled through a plugin’s manifest.xml file. Plugin authors can specify that a
plugin:
• Requires certain Elgg versions, Elgg plugins, PHP extensions, and PHP settings.
• Suggests certain Elgg versions, Elgg plugins, PHP extensions, and PHP settings.
• Conflicts with certain Elgg versions or Elgg plugins.
• Provides the equivalent of another Elgg plugin or PHP extension.
The dependency system uses the four verbs above (requires, suggests, conflicts, and provides) as parent
elements to indicate what type of dependency is described by its children. All dependencies have a similar format with
similar options:
<verb>
<type>type</type>
<noun>value</noun>
<noun2>value2</noun2>
</verb>
Note: type is always required
Verbs
With the exception of provides, all verbs use the same six types with differing effects, and the type options are the
same among the verbs. provides only supports plugin and php_extension.
66
Chapter 3. Developer Guides
Elgg Documentation, Release master
Requires Using a requires dependency means that the plugin cannot be enabled unless the dependency is exactly
met.
Mandatory requires: elgg_version and elgg_release Every plugin must have at least one requires: the version of
Elgg the plugin is developed for. This is specified either by the Elgg API version (2011010401) or the release
(1.8). The default comparison >=, but you can specify your own by passing the <comparison> element.
Using elgg_version:
<requires>
<type>elgg_version</type>
<version>2011010401</version>
</requires>
Using elgg_release:
<requires>
<type>elgg_release</type>
<version>1.8</version>
</requires>
Suggests suggests dependencies signify that the plugin author suggests a specific system configuration, but it is
not required to use the plugin. The suggestions can also be another plugin itself which could interact, extend, or be
extended by this plugin, but is not required for it to function.
Suggest another plugin:
<suggests>
<type>plugin</type>
<name>twitter_api</name>
<version>1.0</version>
</suggests>
Suggest a certain PHP setting:
<suggests>
<type>php_ini</type>
<name>memory_limit</name>
<value>64M</value>
<comparison>ge</comparison>
</suggests>
Conflicts conflicts dependencies mean the plugin cannot be used under a specific system configuration.
Conflict with any version of the profile plugin:
<conflicts>
<type>plugin</type>
<name>profile</name>
</conflicts>
Conflict with a specific version of Elgg:
<conflicts>
<type>elgg_version</type>
<version>2010112301</version>
<comparison>==</comparison>
</conflicts>
3.2. Plugins
67
Elgg Documentation, Release master
Provides provides dependencies tell Elgg that this plugin is providing the functionality of another plugin or PHP
extension. Unlike the other verbs, it only supports two types: plugin and php_extension.
The purpose of this is to provide interchangeable APIs implemented by different plugins. For example, the twitter_services plugin provides an API for other plugins to Tweet on behalf of the user via curl and Oauth. A plugin
author could write a compatible plugin for servers without curl support that uses sockets streams and specify that it
provides twitter_services. Any plugins that suggest or require twitter_services would then know they can work.
<provides>
<type>plugin</type>
<name>twitter_services</name>
<version>1.8</version>
</provides>
Note: All plugins provide themselves as their plugin id (directory name) at the version defined in the their manifest.
Types
Every dependency verb has a mandatory <type> element that must be one of the following six values:
1. elgg_version - The API version of Elgg (2011010401)
2. elgg_release - The release version of Elgg (1.8)
3. plugin - An Elgg plugin
4. priority - A plugin load priority
5. php_extension - A PHP extension
6. php_ini - A PHP setting
Note: provides only supports plugin and php_extension types.
Every type is defined with a dependency verb as the parent element. Additional option elements are at the same level
as the type element:
<verb>
<type>type</type>
<option_1>value_1</option_1>
<option_2>value_2</option_2>
</verb>
elgg_version and elgg_release These concern the API and release versions of Elgg and requires the following option
element:
• version - The API or release version
The following option element is supported, but not required:
• comparison - The comparison operator to use. Defaults to >= if not passed
plugin Specifies an Elgg plugin by its ID (directory name). This requires the following option element:
• name - The ID of the plugin
The following option elements are supported, but not required:
68
Chapter 3. Developer Guides
Elgg Documentation, Release master
• version - The version of the plugin
• comparison - The comparison operator to use. Defaults to >= if not passed
priority This requires the plugin to be loaded before or after another plugin, if that plugin exists. requires should
be used to require that a plugin exists. The following option elements are required:
• plugin - The plugin ID to base the load order on
• priority - The load order: ‘before’ or ‘after’
php_extension This checks PHP extensions. The follow option element is required:
• name - The name of the PHP extension
The following option elements are supported, but not required:
• version - The version of the extension
• comparison - The comparison operator to use. Defaults to ==
Note: The format of extension versions varies greatly among PHP extensions and is sometimes not even set. This is
generally worthless to check.
php_ini This checks PHP settings. The following option elements are required:
• name - The name of the setting to check
• value - The value of the setting to compare against
The following options are supported, but not required:
• comparison - The comparison operator to use. Defaults to ==
Comparison Operators
Dependencies that check versions support passing a custom operator via the <comparison> element.
The follow are valid comparison operators:
• < or lt
• <= or le
• =, ==, or eq
• !=, <>, or ne
• > or gt
• >= or ge
If <comparison> is not passed, the follow are used as defaults, depending upon the dependency type:
• requires->elgg_version and elgg_release: >=
• requires->plugin: >=
• requires->php_extension: =
• requires->php_ini: =
3.2. Plugins
69
Elgg Documentation, Release master
• all conflicts: =
Note: You must escape < and > to > and <. For comparisons that use these values, it is recommended you
use the string equivalents instead!
Quick Examples
Requires Elgg 1.8.2 or higher
<requires>
<type>elgg_release</type>
<version>1.8.2</version>
</requires>
Requires the Groups plugin is active
<requires>
<type>plugin</type>
<name>groups</name>
</requires>
Requires to be after the Profile plugin if Profile is active
<requires>
<type>priority</type>
<priority>after</priority>
<plugin>profile</plugin>
</requires>
Conflicts with The Wire plugin
<conflicts>
<type>plugin</type>
<name>thewire</name>
</conflicts>
Requires at least 256 MB memory in PHP
<requires>
<type>php_ini</type>
<name>memory_limit</name>
<value>256M</value>
<comparison>ge</comparison>
</requires>
Suggest the TidyPics plugin is loaded
<suggests>
<type>plugin</type>
<name>tidypics</name>
</suggests>
70
Chapter 3. Developer Guides
Elgg Documentation, Release master
3.3 Plugin coding guidelines
In addition to the Elgg Coding Standards, these are guidelines for creating plugins. Core plugins are being updated to
this format and all plugin authors should follow these guidelines in their own plugins.
See also:
Be sure to follow the Plugin skeleton for your plugin’s layout.
Warning: Don’t Modify Core
Contents
•
•
•
•
•
•
Use standardized routing with page handlers
Use standardized page handlers and scripts
The object/<subtype> view
Actions
Directly calling a file
Recommended
3.3.1 Use standardized routing with page handlers
• Example: Bookmarks plugin
• Page handlers should accept the following standard URLs:
Purpose
All
User
User friends’
Single entity
Add
Edit
Group list
URL
page_handler/all
page_handler/owner/<username>
page_handler/friends/<username>
page_handler/view/<guid>/<title>
page_handler/add/<container_guid>
page_handler/edit/<guid>
page_handler/group/<guid>/owner
• Include page handler scripts from the page handler. Almost every page handler should have a page handler
script. (Example: bookmarks/all => mod/bookmarks/pages/bookmarks/all.php)
• Call set_input() for entity guids in the page handler and use get_input() in the page handler scripts.
• Call elgg_gatekeeper() and elgg_admin_gatekeeper() in the page handler function if required.
• The group URL should use the pages/<handler>/owner.php script.
• Page handlers should not contain HTML.
• If upgrading a 1.7 plugin, update the URLs throughout the plugin. (Don’t forget to remove /pg/!)
3.3.2 Use standardized page handlers and scripts
• Example: Bookmarks plugin
• Store page handler scripts in mod/<plugin>/pages/<page_handler>/<page_name>
• Use the content page layout in page handler scripts: $content = elgg_view_layout(’content’,
$options);
• Page handler scripts should not contain HTML
3.3. Plugin coding guidelines
71
Elgg Documentation, Release master
• Call elgg_push_breadcrumb() in the page handler scripts.
• No need to worry about setting the page owner if the URLs are in the standardized format
• For group content, check the container_guid by using elgg_get_page_owner_entity()
3.3.3 The object/<subtype> view
• Example: Bookmarks plugin
• Make sure there are views for $vars[‘full’] == true and $vars[‘full’] == false
• Check for the object in $vars[‘entity’] . Use elgg_instance_of() to make sure it’s the type entity
you want. Return true to short circuit the view if the entity is missing or wrong.
• Use the new list body and list metadata views to help format. You should use almost no markup in these views.
• Update action structure - Example: Bookmarks plugin.
• Namespace action files and action names (example:
action/blog/save)
• Use the following action URLs:
Purpose
Add
Edit
Delete
mod/blog/actions/blog/save.php =>
URL
action/plugin/save
action/plugin/save
action/plugin/delete
• Make the delete action accept action/<handler>/delete?guid=<guid> so the metadata entity menu
has the correct URL by default
• If updating a 1.7 plugin, replace calls to functions deprecated in 1.7 because these will produce visible errors on
every load in 1.8
3.3.4 Actions
Actions are transient states to perform an action such as updating the database or sending a notification to a user. Used
correctly, actions are secure and prevent against CSRF and XSS attacks.
Note: As of Elgg 1.7 all actions require action tokens.
Action best practices
Never call an action directly by saying:
...href="/mod/mymod/actions/myaction.php"
This circumvents the security systems in Elgg.
There is no need to include the engine/start.php file in your actions. Actions should never be called directly,
so the engine will be started automatically when called correctly.
Because actions are time-sensitive they are not suitable for links in emails or other delayed notifications. An example
of this would be invitations to join a group. The clean way to create an invitation link is to create a page handler for
invitations and email that link to the user. It is then the page handler’s responsibility to create the action links for a
user to join or ignore the invitation request.
72
Chapter 3. Developer Guides
Elgg Documentation, Release master
3.3.5 Directly calling a file
This is an easy one: Don’t do it. With the exception of 3rd party application integration, there is not a reason to
directly call a file in mods directory.
3.3.6 Recommended
These points are good ideas, but are not yet in the official guidelines. Following these suggestions will help to keep
your plugin consistent with Elgg core.
• Update the widget views (see the blog or file widgets)
• Update the group profile “widget” using blog or file plugins as example
• Update the forms
– Move form bodies to /forms/<handler>/<action> to use Evan’s new elgg_view_form()
– Use input views in form bodies rather than html
– Add a function that prepares the form (see mod/file/lib/file.php for example)
– Integrate sticky forms (see the file plugin’s upload action and form prepare function)
• Clean up CSS/HTML
– Should be able to remove almost all CSS (look for patterns that can be moved into core if you need
CSS)
• Use hyphens rather than underscores in classes/ids
• Update the manifest.xml file to the 1.8 format. Use http://el.gg/manifest17to18 to automate this
• Do not use the bundled category with your plugins. That is for plugins distributed with Elgg
• Update functions deprecated in 1.8.
– Many registration functions simply added an elgg_ prefix for consistency
– See /engine/lib/deprecated-1.8.php for the full list. You can also set the debug level to
warning to get visual reminders of deprecated functions
3.4 Accessibility Guidelines
This page aims to list and document accessibility rules and best practices, to help core and plugins developpers to
make Elgg the most accessible social engine framework that everyone dreams of.
Note: This is an ongoing work, please contribute on Github if you have some skills in this field!
3.4.1 Resources + references
• Official WCAG Accessibility Guidelines Overview
• Official WCAG Accessibility Guidelines
• Resources for planning and implementing for accessibility
• Practical tips from the W3C for improving accessibility
3.4. Accessibility Guidelines
73
Elgg Documentation, Release master
• Preliminary review of websites for accessibility
• Tools for checking the accessibility of websites
• List of practical techniques for implementing accessibility (It would be great if someone could go through this
and filter out all the ones that are relevant to Elgg)
3.4.2 Tips for implementing accessibility
• All accessibility-related tickets reported to trac should be tagged with “a11y”, short for “accessibility”
• Use core views such as output/*, and input/* to generate markup, since we can bake a11y concerns into
these views
• All images should have a descriptive alt attribute. Spacer or purely decorative graphics should have blank alt
attributes
• All <a> tags should have text or an accessible image inside. Otherwise screen readers will have to read the
URL, which is a poor experience <a> tags should contain descriptive text, if possible, as opposed to generic
text like “Click here”
• Markup should be valid
• Themes should not reset “outline” to nothing. :focus deserves a special visual treatment so that handicapped
users can know where they are
3.4.3 Tips for testing accessibility
• Use the tools linked to from the resources section. Example report for community.elgg.org on June 16, 2012
• Try different font-size/zoom settings in your browser and make sure the theme remains usable
• Turn off css to make sure the sequential order of the page makes sense
3.4.4 Documentation objectives and principles
• Main accessibility rules
• collect and document best practices
• Provide code examples
• Keep the document simple and usable
• Make it usable for both beginner developpers and experts (from most common and easiest changes to elaborate
techniques)
3.5 Helper functions
3.5.1 Input and output
• get_input($name) Grabs information from a form field (or any variable passed using GET or POST). Also
sanitises input, stripping Javascript etc.
• set_input($name, $value) Forces a value to a particular variable for subsequent retrieval by
get_input()
74
Chapter 3. Developer Guides
Elgg Documentation, Release master
3.5.2 Entity methods
• $entity->getURL() Returns the URL of any entity in the system
• $entity->getGUID() Returns the GUID of any entity in the system
• $entity->canEdit() Returns whether or not the current user can edit the entity
• $entity->getOwnerEntity() Returns the ElggUser owner of a particular entity
3.5.3 Entity and context retrieval
• elgg_get_loggedin_user_entity() Returns the ElggUser for the current user
• elgg_get_loggedin_user_guid() Returns the GUID of the current user
• elgg_is_logged_in() Is the viewer logged in
• elgg_is_admin_logged_in() Is the view an admin and logged in
• elgg_gatekeeper() Shorthand for checking if a user is logged in. Forwards user to front page if not
• elgg_admin_gatekeeper() Shorthand for checking the user is logged in and is an admin. Forwards user
to front page if not
• get_user($user_guid) Given a GUID, returns a full ElggUser entity
• elgg_get_page_owner_guid() Returns the GUID of the current page owner, if there is one
• elgg_get_page_owner_entity() Like elgg_get_page_owner_guid() but returns the full entity
• get_context() Returns the current page’s context - eg “blog” for the blog plugin, “thewire” for the wire,
etc. Returns “main” as default
• set_context($context) Forces the context to be a particular value
• elgg_push_context($context) Adds a context to the stack
• elgg_pop_context() Removes the top context from the stack
• elgg_in_context($context) Checks if you’re in a context (this checks the complete stack, eg. ‘widget’
in ‘groups’)
3.5.4 Plugins
• elgg_is_active_plugin($plugin_id) Check if a plugin is installed and enabled
3.5.5 Interface and annotations
• elgg_view_image_block($icon, $info) Return the result in a formatted list
• elgg_view_comments($entity) Returns any comments associated with the given entity
• elgg_get_friendly_time($unix_timestamp) Returns a date formatted in a friendlier way - “18
minutes ago”, “2 days ago”, etc.
• You can pass ’use_hover’ => false to the user icon view if you don’t want the avatar drop down menu
to appear e.g.
elgg_view_entity_icon($user, ’small’, array(’use_hover’ => false));
3.5. Helper functions
75
Elgg Documentation, Release master
3.6 Forms + Actions
Create, update, or delete content.
Elgg forms submit to actions. Actions define the behavior for form submission.
This guide assumes basic familiarity with:
• Plugins
• Views
• Internationalization
Contents
• Registering actions
– Permissions
– Writing action files
– Customizing actions
• Files and images
• Sticky forms
– Helper functions
– Overview
– Example: User registration
– Example: Bookmarks
• Ajax
• Security
3.6.1 Registering actions
Actions must be registered before use. Use elgg_register_action for this:
elgg_register_action("example", __DIR__ . "/actions/example.php");
The mod/example/actions/example.php script will now be run whenever a form is submitted to
http://localhost/elgg/action/example.
Warning: A stumbling point for many new developers is the URL for actions. The URL always uses /action/
(singular) and never /actions/ (plural). However, action script files are usually saved under the directory
/actions/ (plural) and always have an extension.
Permissions
By default, actions are only available to logged in users.
To make an action available to logged out users, pass "public" as the third parameter:
elgg_register_action("example", $filepath, "public");
To restrict an action to only administrators, pass "admin" for the last parameter:
elgg_register_action("example", $filepath, "admin");
76
Chapter 3. Developer Guides
Elgg Documentation, Release master
Writing action files
Use the get_input function to get access to request parameters:
$field = get_input(’input_field_name’, ’default_value’);
You can then use the Database api to load entities and perform actions on them accordingly.
To redirect the page once you’ve completed your actions, use the forward function:
forward(’url/to/forward/to’);
For example, to forward to the user’s profile:
$user = elgg_get_logged_in_user_entity();
forward($user->getURL());
URLs can be relative to the Elgg root:
$user = elgg_get_logged_in_user_entity();
forward("/example/$user->username");
Redirect to the referring page by using the REFERRER constant:
forward(REFERRER);
forward(REFERER); // equivalent
Give feedback to the user about the status of the action by using system_message for positive feedback or
register_error for warnings and errors:
if ($success) {
system_message(elgg_echo(‘actions:example:success’));
} else {
register_error(elgg_echo(‘actions:example:error’));
}
Customizing actions
Before executing any action, Elgg triggers a hook:
$result = elgg_trigger_plugin_hook(’action’, $action, null, true);
Where $action is the action being called. If the hook returns false then the action will not be executed.
Example: Captcha
The captcha module uses this to intercept the register and user/requestnewpassword actions and redirect
them to a function which checks the captcha code. This check returns true if valid or false if not (which prevents
the associated action from executing).
This is done as follows:
elgg_register_plugin_hook_handler("action", "register", "captcha_verify_action_hook");
elgg_register_plugin_hook_handler("action", "user/requestnewpassword", "captcha_verify_action_hook");
...
function captcha_verify_action_hook($hook, $entity_type, $returnvalue, $params) {
3.6. Forms + Actions
77
Elgg Documentation, Release master
$token = get_input(’captcha_token’);
$input = get_input(’captcha_input’);
if (($token) && (captcha_verify_captcha($input, $token))) {
return true;
}
register_error(elgg_echo(’captcha:captchafail’));
return false;
}
This lets a plugin extend an existing action without the need to replace the whole action. In the case of the captcha
plugin it allows the plugin to provide captcha support in a very loosely coupled way.
To output a form, use the elgg_view_form function like so:
echo elgg_view_form(’example’);
Doing this generates something like the following markup:
<form action="http://localhost/elgg/action/example">
<fieldset>
<input type="hidden" name="__elgg_ts" value="1234567890" />
<input type="hidden" name="__elgg_token" value="3874acfc283d90e34" />
</fieldset>
</form>
Elgg does some things automatically for you when you generate forms this way:
1. It sets the action to the appropriate URL based on the name of the action you pass to it
2. It adds some anti-csrf tokens (__elgg_ts and __elgg_token) to help keep your actions secure
3. It automatically looks for the body of the form in the forms/example view.
Put the content of your form in your plugin’s forms/example view:
// /mod/example/views/default/forms/example.php
echo elgg_view(’input/text’, array(’name’ => ’example’));
echo elgg_view(’input/submit’);
Now when you call elgg_view_form(’example’), Elgg will produce:
<form action="http://localhost/elgg/action/example">
<fieldset>
<input type="hidden" name="__elgg_ts" value="...">
<input type="hidden" name="__elgg_token" value="...">
<input type="text" class="elgg-input-text" name="example">
<input type="submit" class="elgg-button elgg-button-submit" value="Submit">
</fieldset>
</form>
3.6.2 Files and images
Use the input/file view in your form’s content view.
// /mod/example/views/default/forms/example.php
echo elgg_view(‘input/file’, array(‘name’ => ‘icon’));
78
Chapter 3. Developer Guides
Elgg Documentation, Release master
Set the enctype of the form to multipart/form-data:
echo elgg_view_form(‘example’, array(
‘enctype’ => ‘multipart/form-data’
));
In your action file, use the $_FILES global to access the uploaded file:
$icon = $_FILES[‘icon’]
3.6.3 Sticky forms
Sticky forms are forms that retain user input if saving fails. They are “sticky” because the user’s data “sticks” in
the form after submitting, though it was never saved to the database. This greatly improves the user experience by
minimizing data loss. Elgg 1.8 includes helper functions so you can make any form sticky.
Helper functions
Sticky forms are implemented in Elgg 1.8 by the following functions:
elgg_make_sticky_form($name) Tells the engine to make all input on a form sticky.
elgg_clear_sticky_form($name) Tells the engine to discard all sticky input on a form.
elgg_is_sticky_form($name) Checks if $name is a valid sticky form.
elgg_get_sticky_values($name) Returns all sticky values saved for $name by elgg_make_sticky_form().
Overview
The basic flow of using sticky forms is: Call elgg_make_sticky_form($name) at the top of actions for forms
you want to be sticky. Use elgg_is_sticky_form($name) and elgg_get_sticky_values($name) to
get sticky values when rendering a form view. Call elgg_clear_sticky_form($name) after the action has
completed successfully or after data has been loaded by elgg_get_sticky_values($name).
Example: User registration
Simple sticky forms require little logic to determine the input values for the form. This logic is placed at the top of the
form body view itself.
The registration form view first sets default values for inputs, then checks if there are sticky values. If so, it loads the
sticky values before clearing the sticky form:
// views/default/forms/register.php
$password = $password2 = ’’;
$username = get_input(’u’);
$email = get_input(’e’);
$name = get_input(’n’);
if (elgg_is_sticky_form(’register’)) {
extract(elgg_get_sticky_values(’register’));
elgg_clear_sticky_form(’register’);
}
The registration action sets creates the sticky form and clears it once the action is completed:
3.6. Forms + Actions
79
Elgg Documentation, Release master
// actions/register.php
elgg_make_sticky_form(’register’);
...
$guid = register_user($username, $password, $name, $email, false, $friend_guid, $invitecode);
if ($guid) {
elgg_clear_sticky_form(’register’);
....
}
Example: Bookmarks
The bundled plugin Bookmarks’ save form and action is an example of a complex sticky form.
The form view for the save bookmark action uses elgg_extract() to pull values from the $vars array:
// mod/bookmarks/views/default/forms/bookmarks/save.php
$title = elgg_extract(’title’, $vars, ’’);
$desc = elgg_extract(’description’, $vars, ’’);
$address = elgg_extract(’address’, $vars, ’’);
$tags = elgg_extract(’tags’, $vars, ’’);
$access_id = elgg_extract(’access_id’, $vars, ACCESS_DEFAULT);
$container_guid = elgg_extract(’container_guid’, $vars);
$guid = elgg_extract(’guid’, $vars, null);
$shares = elgg_extract(’shares’, $vars, array());
The page handler scripts prepares the form variables and calls elgg_view_form() passing the correct values:
// mod/bookmarks/pages/add.php
$vars = bookmarks_prepare_form_vars();
$content = elgg_view_form(’bookmarks/save’, array(), $vars);
Similarly, mod/bookmarks/pages/edit.php uses the same function, but passes the entity that is being edited
as an argument:
$bookmark_guid = get_input(’guid’);
$bookmark = get_entity($bookmark_guid);
...
$vars = bookmarks_prepare_form_vars($bookmark);
$content = elgg_view_form(’bookmarks/save’, array(), $vars);
The library file defines bookmarks_prepare_form_vars(). This function accepts an ElggEntity as an
argument and does 3 things:
1. Defines the input names and default values for form inputs.
2. Extracts the values from a bookmark object if it’s passed.
3. Extracts the values from a sticky form if it exists.
TODO: Include directly from lib/bookmarks.php
// mod/bookmarks/lib/bookmarks.php
function bookmarks_prepare_form_vars($bookmark = null) {
// input names => defaults
$values = array(
80
Chapter 3. Developer Guides
Elgg Documentation, Release master
’title’ => get_input(’title’, ’’), // bookmarklet support
’address’ => get_input(’address’, ’’),
’description’ => ’’,
’access_id’ => ACCESS_DEFAULT,
’tags’ => ’’,
’shares’ => array(),
’container_guid’ => elgg_get_page_owner_guid(),
’guid’ => null,
’entity’ => $bookmark,
);
if ($bookmark) {
foreach (array_keys($values) as $field) {
if (isset($bookmark->$field)) {
$values[$field] = $bookmark->$field;
}
}
}
if (elgg_is_sticky_form(’bookmarks’)) {
$sticky_values = elgg_get_sticky_values(’bookmarks’);
foreach ($sticky_values as $key => $value) {
$values[$key] = $value;
}
}
elgg_clear_sticky_form(’bookmarks’);
return $values;
}
The save action checks the input, then clears the sticky form upon success:
// mod/bookmarks/actions/bookmarks/save.php
elgg_make_sticky_form(’bookmarks’);
...
if ($bookmark->save()) {
elgg_clear_sticky_form(’bookmarks’);
}
3.6.4 Ajax
To call an action via JavaScript without actually submitting a form, use elgg.action:
elgg.action(‘example’, { param: 12345 });
This does a few things under the hood:
1. Automatically normalizes the request URL to http://localhost/elgg/action/example.
2. Adds XSRF tokens to the request body for security
3. If the action emits any system messages or errors, they will automatically be displayed when the response comes
back.
Often you’ll want to do something in response to a successful action:
3.6. Forms + Actions
81
Elgg Documentation, Release master
elgg.action(‘example’, {
data: { param: 12345 },
success: function() {
// Do something once action completes
}
});
3.6.5 Security
For enhanced security, all actions require an XSRF token. Calls to action URLs that do not include security tokens
will be ignored and a warning will be generated.
A few views and functions automatically generate security tokens:
elgg_view(’output/url’, array(’is_action’ => TRUE));
elgg_view(’input/securitytoken’);
$url = elgg_add_action_tokens_to_url("http://localhost/elgg/action/example");
In rare cases, you may need to generate tokens manually:
$__elgg_ts = time();
$__elgg_token = generate_action_token($__elgg_ts);
You can also access the tokens from javascript:
elgg.security.token.__elgg_ts;
elgg.security.token.__elgg_token;
These are refreshed periodically so should always be up-to-date.
3.7 Database
Persist user-generated content and settings with Elgg’s generic storage API.
Contents
• Entities
– Creating an object
– Loading an object
– Displaying entities
– Adding, reading and deleting annotations
– Extending ElggEntity
– Advanced features
– Pre-1.8 Notes
• Custom database functionality
– Example: Run SQL script on plugin activation
• Systemlog
– System log storage
– Creating your own system log
82
Chapter 3. Developer Guides
Elgg Documentation, Release master
3.7.1 Entities
Creating an object
To create an object in your code, you need to instantiate an ElggObject. Setting data is simply a matter of adding
instance variables or properties. The built-in properties are:
• ‘‘guid‘‘ The entity’s GUID; set automatically
• ‘‘owner_guid‘‘ The owning user’s GUID
• ‘‘site_guid‘‘ The owning site’s GUID. This is set automatically when an instance of ElggObject gets created)
• ‘‘subtype‘‘ A single-word arbitrary string that defines what kind of object it is, for example blog
• ‘‘access_id‘‘ An integer representing the access level of the object
• ‘‘title‘‘ The title of the object
• ‘‘description‘‘ The description of the object
The object subtype is a special property. This is an arbitrary string that describes what the object is. For example,
if you were writing a blog plugin, your subtype string might be blog. It’s a good idea to make this unique, so that
other plugins don’t accidentally try and use the same subtype. For the purposes of this document, let’s assume we’re
building a simple forum. Therefore, the subtype will be forum:
$object = new ElggObject();
$object->subtype = "forum";
$object->access_id = 2;
$object->save();
access_id is another important property. If you don’t set this, your object will be private, and only the creator user
will be able to see it. Elgg defines constants for the special values of access_id:
• ACCESS_PRIVATE Only the owner can see it
• ACCESS_FRIENDS Only the owner and his/her friends can see it
• ACCESS_LOGGED_IN Any logged in user can see it
• ACCESS_PUBLIC Even visitors not logged in can see it
Saving the object will automatically populate the $object->guid property if successful. If you change any more
base properties, you can call $object->save() again, and it will update the database for you.
You can set metadata on an object just like a standard property. Let’s say we want to set the SKU of a product:
$object->SKU = 62784;
If you assign an array, all the values will be set for that metadata. This is how, for example, you set tags.
Metadata cannot be persisted to the database until the entity has been saved, but for convenience, ElggEntity can cache
it internally and save it when saving the entity.
Loading an object
By GUID
$entity = get_entity($guid);
if (!$entity) {
// The entity does not exist or you’re not allowed to access it.
}
3.7. Database
83
Elgg Documentation, Release master
But what if you don’t know the GUID? There are several options.
By user, subtype or site
If you know the user ID you want to get objects for, or the subtype, or the site, you have several options. The easiest
is probably to call the procedural function elgg_get_entities:
$entities = elgg_get_entities(array(
’type’ => $entity_type,
’subtype’ => $subtype,
’owner_guid’ => $owner_guid,
));
This will return an array of ElggEntity objects that you can iterate through. elgg_get_entities paginates
by default, with a limit of 10; and offset 0.
You can leave out owner_guid to get all objects and leave out subtype or type to get objects of all types/subtypes.
If you already have an ElggUser – e.g. elgg_get_logged_in_user_entity, which always has the current
user’s object when you’re logged in – you can simply use:
$objects = $user->getObjects($subtype, $limit, $offset)
But what about getting objects with a particular piece of metadata?
By metadata
The function elgg_get_entities_from_metadata allows fetching entities with metadata in a variety of
ways.
By annotation
The function elgg_get_entities_from_annotations allows fetching entities with metadata in a variety of
ways.
Note: As of Elgg 1.10 the default behaviour of elgg_get_entities_from_annotations was brought inline with the rest
of the elgg_get_entities* functions.
Pre Elgg 1.10 the sorting of the entities was based on the latest addition of an annotation (in $options your could add
$options[’order_by’] = ‘maxtime ASC’ or $options[’order_by’] = ‘maxtime DESC’. As of Elgg 1.10 this was changed
to the creation time of the entity, just like the rest of the elgg_get_entities* functions. To get the old behaviour back
add the following to your $options:
$options[’selects’] = array(’MAX(n_table.time_created) AS maxtime’);
$options[’group_by’] = ’n_table.entity_guid’;
$options[’order_by’] = ’maxtime ASC’
or
$options[’order_by’] = ’maxtime DESC’
84
Chapter 3. Developer Guides
Elgg Documentation, Release master
Displaying entities
In order for entities to be displayed in listing functions you need to provide a view for the entity in the views system.
To display an entity, create a view EntityType/subtype where EntityType is one of the following:
object: for entities derived from ElggObject user: for entities derived from ElggUser site: for entities derived from
ElggSite group: for entities derived from ElggGroup
A default view for all entities has already been created, this is called EntityType/default.
Entity Icons
Every entity can be assigned an icon which is retrieved using the ElggEntity::getIconURL($size)
method. This method accepts a $size argument that can be either of the configured icon sizes. Use
elgg_get_config(’icon_sizes’) to get all possible values. The following sizes exist by default: ’large’,
’medium’, ’small’, ’tiny’, and ’topbar’. The method triggers the entity:icon:url hook.
Use elgg_view_entity_icon($entity, $size, $vars) to render an icon. This will scan the following
locations for a view and include the first match.
1. views/$viewtype/icon/$type/$subtype.php
2. views/$viewtype/icon/$type/default.php
3. views/$viewtype/icon/default.php
Where
$viewtype Type of view, e.g. ’default’ or ’json’.
$type Type of entity, e.g. ’group’ or ’user’.
$subtype Entity subtype, e.g. ’blog’ or ’page’.
By convention entities that have an uploaded avatar or icon will have the icontime property assigned. This means
that you can use $entity->icontime to check if an icon exists for the given entity.
Adding, reading and deleting annotations
Annotations could be used, for example, to track ratings. To annotate an entity you can use the object’s annotate()
method. For example, to give a blog post a rating of 5, you could use:
$blog_post->annotate(’rating’, 5);
To retrieve the ratings on the blog post, use $blogpost->getAnnotations(’rating’) and if you want to
delete an annotation, you can operate on the ElggAnnotation class, eg $annotation->delete().
Retrieving a single annotation can be done with get_annotation() if you have the annotation’s ID. If you delete
an ElggEntity of any kind, all its metadata, annotations, and relationships will be automatically deleted as well.
Extending ElggEntity
If you derive from one of the Elgg core classes, you’ll need to tell Elgg how to properly instantiate the new type of
object so that get_entity() et al. will return the appropriate PHP class. For example, if I customize ElggGroup in a
class called “Committee”, I need to make Elgg aware of the new mapping. Following is an example class extension:
3.7. Database
85
Elgg Documentation, Release master
// Class source
class Committee extends ElggGroup {
protected function initializeAttributes() {
parent::initializeAttributes();
$this->attributes[’subtype’] = ’committee’;
}
// more customizations here
}
function committee_init() {
register_entity_type(’group’, ’committee’);
// Tell Elgg that group subtype "committee" should be loaded using the Committee class
// If you ever change the name of the class, use update_subtype() to change it
add_subtype(’group’, ’committee’, ’Committee’);
}
register_elgg_event_handler(’init’, ’system’, ’committee_init’);
Now if you invoke get_entity() with the GUID of a committee object, you’ll get back an object of type Committee.
This template was extracted from the definition of ElggFile.
Advanced features
Entity URLs
Entity urls are provided by the getURL() interface and provide the Elgg framework with a common way of directing
users to the appropriate display handler for any given object.
For example, a profile page in the case of users.
The url is set using the elgg\_register\_entity\_url\_handler() function. The function you register
must return the appropriate url for the given type - this itself can be an address set up by a page handler.
The default handler is to use the default export interface.
Entity loading performance
elgg_get_entities has a couple options that can sometimes be useful to improve performance.
• preload_owners: If the entities fetched will be displayed in a list with the owner information, you can set this
option to true to efficiently load the owner users of the fetched entities.
• preload_containers: If the entities fetched will be displayed in a list using info from their containers, you can
set this option to true to efficiently load them.
• distinct: When Elgg fetches entities using an SQL query, Elgg must be sure that each entity row appears only
once in the result set. By default it includes a DISTINCT modifier on the GUID column to enforce this, but
some queries naturally return unique entities. Setting the distinct option to false will remove this modifier,
and rely on the query to enforce its own uniqueness.
The internals of Elgg entity queries is a complex subject and it’s recommended to seek help on the Elgg Community
site before using the distinct option.
86
Chapter 3. Developer Guides
Elgg Documentation, Release master
Pre-1.8 Notes
update_subtype(): This function is new in 1.8. In prior versions, you would need to edit the database by hand if you
updated the class name associated with a given subtype.
elgg_register_entity_url_handler(): This function is new in 1.8. It deprecates register_entity_url_handler(), which you
should use if developing for a pre-1.8 version of Elgg.
elgg_get_entities_from_metadata(): This function is new in 1.8. It deprecates get_entities_from_metadata(), which
you should use if developing for a pre-1.8 version of Elgg.
3.7.2 Custom database functionality
It is strongly recommended to use entities wherever possible. However, Elgg supports custom SQL queries using the
database API.
Example: Run SQL script on plugin activation
This example shows how you can populate your database on plugin activation.
my_plugin/activate.php:
if (!elgg_get_plugin_setting(’database_version’, ’my_plugin’) {
run_sql_script(__DIR__ . ’/sql/activate.sql’);
elgg_set_plugin_setting(’database_version’, 1, ’my_plugin’);
}
my_plugin/sql/activate.sql:
-- Create some table
CREATE TABLE prefix_custom_table(
id INTEGER AUTO_INCREMENT,
name VARCHAR(32),
description VARCHAR(32),
PRIMARY KEY (id)
);
-- Insert initial values for table
INSERT INTO prefix_custom_table (name, description)
VALUES (’Peter’, ’Some guy’), (’Lisa’, ’Some girl’);
Note that Elgg execute statements through PHPs built-in functions and have limited support for comments. I.e. only
single line comments are supported and must be prefixed by “– ” or “# ”. A comment must start at the very beginning
of a line.
3.7.3 Systemlog
Note: This section need some attention and will contain outdated information
The default Elgg system log is a simple way of recording what happens within an Elgg system. It’s viewable and
searchable directly from the administration panel.
3.7. Database
87
Elgg Documentation, Release master
System log storage
A system log row is stored whenever an event concerning an object whose class implements the Loggable interface
is triggered. ElggEntity and ElggExtender implement Loggable, so a system log row is created whenever an
event is performed on all objects, users, groups, sites, metadata and annotations.
Common events include:
• create
• update
• delete
• login
Creating your own system log
There are some reasons why you might want to create your own system log. For example, you might need to store
a full copy of entities when they are updated or deleted, for auditing purposes. You might also need to notify an
administrator when certain types of events occur.
To do this, you can create a function that listens to all events for all types of object:
register_elgg_event_handler(’all’,’all’,’your_function_name’);
Your function can then be defined as:
function your_function_name($object, $event) {
if ($object instanceof Loggable) {
...
}
}
You can then use the extra methods defined by Loggable to extract the information you need.
3.8 Internationalization
Make your UI translatable into many different languages.
If you’d like to contribute translations to Elgg, see the contributors’ guide.
3.8.1 Overview
Translations are stored in PHP files in the /languages directory of your plugin. Each file corresponds to a language.
The format is /languages/{language-code}.php where {language-code} is the ISO 639-1 short code
for the language. For example:
<?php
// mod/example/languages/en.php
return array(
‘example:text’ => ‘Some example text’,
);
88
Chapter 3. Developer Guides
Elgg Documentation, Release master
The default language is “en” for English.
To change the wording of any phrase, provide a new mapping in your plugin’s {language}.php file for the associated key:
<?php
return array(
‘example:text’ => ‘This is an example’,
);
Note: Unless you are overriding core’s or another plugin’s language strings, it is good practice for the language keys
to start with your plugin name. For example: “yourplugin:success,” “yourplugin:title,” etc. This helps avoid conflicts
with other language keys.
3.8.2 Server-side API
elgg_echo($key, $args, $language)
Output the translation of the key in the current language.
Example:
echo elgg_echo(‘example:text’);
It also supports variable replacement using sprintf syntax:
// ‘welcome’ => ‘Welcome to %s, %s!’
echo elgg_echo(‘welcome’, array(
elgg_get_config(‘sitename’),
elgg_get_logged_in_user_entity()->name,
));
To force which language should be used for translation, set the third parameter:
echo elgg_echo(‘welcome’, array(), ‘es’);
3.8.3 Javascript API
elgg.echo(key, args, language)
This function is the exact counterpart to elgg_echo in PHP.
Client-side translations are loaded asynchronously. Ensure translations are available by requiring the “elgg” AMD
module:
define(function(require) {
var elgg = require("elgg");
alert(elgg.echo(’my_key’));
});
Translations are also available after the init, system JavaScript event.
3.8. Internationalization
89
Elgg Documentation, Release master
3.9 Menus
Elgg contains helper code to build menus throughout the site.
Every single menu requires a name, as does every single menu item. These are required in order to allow easy
overriding and manipulation, as well as to provide hooks for theming.
Contents
•
•
•
•
Basic usage
Advanced usage
Creating a new menu
Theming
3.9.1 Basic usage
Basic functionalities can be achieved through these two functions:
• elgg_register_menu_item() to add an item to a menu
• elgg_unregister_menu_item() to remove an item from a menu
You normally want to call them from your plugin’s init function.
Examples
// Add a new menu item to the site main menu
elgg_register_menu_item(’site’, array(
’name’ => ’itemname’,
’text’ => ’This is text of the item’,
’href’ => ’/item/url’,
));
// Remove the "Elgg" logo from the topbar menu
elgg_unregister_menu_item(’topbar’, ’elgg_logo’);
3.9.2 Advanced usage
You can get more control over menus by using plugin hooks and the public methods provided by the ElggMenuItem
class.
There are two hooks that can be used to modify a menu:
• ’register’, ’menu:<menu name>’ to add or modify items (especially in dynamic menus)
• ’prepare’, ’menu:<menu name>’ to modify the structure of the menu before it is displayed
When you register a plugin hook handler, replace the <menu name> part with the internal name of the menu.
The third parameter passed into a menu handler contains all the menu items that have been registered so far by Elgg
core and other enabled plugins. In the handler we can loop through the menu items and use the class methods to
interact with the properties of the menu item.
90
Chapter 3. Developer Guides
Elgg Documentation, Release master
Examples
Example 1: Change the URL for menu item called “albums” in the owner_block menu:
/**
* Initialize the plugin
*/
function my_plugin_init() {
// Register a plugin hook handler for the owner_block menu
elgg_register_plugin_hook_handler(’register’, ’menu:owner_block’, ’my_owner_block_menu_handle
}
/**
* Change the URL of the "Albums" menu item in the owner_block menu
*/
function my_owner_block_menu_handler($hook, $type, $menu, $return) {
$owner = $params[’entity’];
// Owner can be either user or a group, so we
// need to take both URLs into consideration:
switch ($owner->getType()) {
case ’user’:
$url = "album/owner/{$owner->guid}";
break;
case ’group’:
$url = "album/group/{$owner->guid}:
break;
}
foreach ($menu as $key => $item) {
if ($item->getName() == ’albums’) {
// Set the new URL
$item->setURL($url);
break;
}
}
return $menu;
}
Example 2: Modify the entity menu for the ElggBlog objects
• Remove the thumb icon
• Change the “Edit” text into a custom icon
/**
* Initialize the plugin
*/
function my_plugin_init() {
// Register a plugin hook handler for the entity menu
elgg_register_plugin_hook_handler(’register’, ’menu:entity’, ’my_entity_menu_handler’);
}
/**
* Customize the entity menu for ElggBlog objects
*/
function my_entity_menu_handler($hook, $type, $menu, $params) {
// The entity can be found from the $params parameter
$entity = $params[’entity’];
3.9. Menus
91
Elgg Documentation, Release master
// We want to modify only the ElggBlog objects, so we
// return immediately if the entity is something else
if (!$entity intanceof ElggBlog) {
return $menu;
}
foreach ($menu as $key => $item) {
switch ($item->getName()) {
case ’likes’:
// Remove the "likes" menu item
unset($menu[$key]);
break;
case ’edit’:
// Change the "Edit" text into a custom icon
$item->setText(elgg_view_icon(’pencil’));
break;
}
}
return $menu;
}
3.9.3 Creating a new menu
Elgg provides multiple different menus by default. Sometimes you may however need some menu items that don’t
fit in any of the existing menus. If this is the case, you can create your very own menu with the elgg_view_menu()
function. You must call the function from the view, where you want to menu to be displayed.
Example: Display a menu called “my_menu” that displays it’s menu items in alphapetical order:
echo elgg_view_menu(’my_menu’, array(’sort_by’ => ’title’));
You can now add new items to the menu like this:
elgg_register_menu_item(’my_menu’, array(
’name’ => ’my_page’,
’href’ => ’path/to/my_page’,
’text’ => elgg_echo(’my_plugin:my_page’),
));
Furthermore it is now possible to modify the menu using the hooks ’register’, ’menu:my_menu’ and
’prepare’, ’menu:my_menu’.
3.9.4 Theming
The menu name, section names, and item names are all embedded into the HTML as CSS classes (normalized to
contain only hyphens, rather that underscores or colons). This increases the size of the markup slightly but provides
themers with a high degree of control and flexibility when styling the site.
Example: The following would be the output of the foo menu with sections alt and default containing items
baz and bar respectively.
<ul class="elgg-menu elgg-menu-foo elgg-menu-foo-alt">
<li class="elgg-menu-item elgg-menu-item-baz"></li>
</ul>
<ul class="elgg-menu elgg-menu-foo elgg-menu-foo-default">
92
Chapter 3. Developer Guides
Elgg Documentation, Release master
<li class="elgg-menu-item elgg-menu-item-bar"></li>
</ul>
3.10 Notifications
There are two ways to send notifications in Elgg:
• Instant notifications
• Event-based notifications send using a notifications queue
Contents
•
•
•
•
•
Instant notifications
Enqueued notifications
Registering a new notification method
Sending the notifications using your own method
Subscriptions
3.10.1 Instant notifications
The generic method to send a notification to a user is via the function notify_user(). It is normally used when we want
to notify only a single user. Notification like this might for example inform that someone has liked or commented the
user’s post.
The function usually gets called in an action file.
Example:
In this example a user ($user) is triggering an action to rate a post created by another user ($owner). After saving
the rating (ElggAnnotation $rating) to database, we could use the following code to send a notification about
the new rating to the owner.
// Subject of the notification
$subject = elgg_echo(’ratings:notification:subject’, array(), $owner->language);
// Summary of the notification
$summary = elgg_echo(’ratings:notification:summary’, array($user->name), $owner->language);
// Body of the notification message
$subject = elgg_echo(’ratings:notification:body’, array(
$user->name,
$owner->name,
$rating->getValue() // A value between 1-5
), $owner->language);
$params = array(
’object’ => $rating,
’action’ => ’create’,
’summary’ => $summary
);
3.10. Notifications
93
Elgg Documentation, Release master
// Send the notification
notify_user($user->guid, $owner->guid, $subject, $body, $params);
Note: The language used by the recipient isn’t necessarily the same as the language of the person who triggers
the notification. Therefore you must always remember to pass the recipient’s language as the third parameter to
elgg_echo().
Note: The ’summary’ parameter is meant for notification plugins that only want to display a short message instead
of both the subject and the body. Therefore the summary should be terse but still contain all necessary information.
3.10.2 Enqueued notifications
On large sites there may be many users who have subscribed to receive notifications about a particular event. Sending
notifications immediately when a user triggers such an event might remarkably slow down page loading speed. This
is why sending of such notifications shoud be left for Elgg’s notification queue.
New notification events can be registered with the elgg_register_notification_event() function. Notifications about
registered events will be sent automatically to all subscribed users.
Example
Tell Elgg to send notifications when a new object of subtype “photo” is created:
/**
* Initialize the photos plugin
*/
function photos_init() {
elgg_register_notification_event(’object’, ’photo’, array(’create’));
}
Note: In order to send the event-based notifications you must have the one-minute CRON interval configured.
Contents
of
the
notification
message
can
be
’notification:[action]:[type]:[subtype]’ hook.
defined
with
the
’prepare’,
Example
Tell Elgg to use the function photos_prepare_notification() to format the contents of the notification
when a new objects of subtype ‘photo’ is created:
/**
* Initialize the photos plugin
*/
function photos_init() {
elgg_register_notification_event(’object’, ’photo’, array(’create’));
elgg_register_plugin_hook_handler(’prepare’, ’notification:create:object:photo’, ’photos_prepare_
}
/**
* Prepare a notification message about a new photo
*
$hook
* @param string
94
Hook name
Chapter 3. Developer Guides
Elgg Documentation, Release master
$type
Hook type
* @param string
* @param Elgg_Notifications_Notification $notification The notification to prepare
$params
Hook parameters
* @param array
* @return Elgg_Notifications_Notification
*/
function photos_prepare_notification($hook, $type, $notification, $params) {
$entity = $params[’event’]->getObject();
$owner = $params[’event’]->getActor();
$recipient = $params[’recipient’];
$language = $params[’language’];
$method = $params[’method’];
// Title for the notification
$notification->subject = elgg_echo(’photos:notify:subject’, array($entity->title), $language);
// Message body for the notification
$notification->body = elgg_echo(’photos:notify:body’, array(
$owner->name,
$entity->title,
$entity->getExcerpt(),
$entity->getURL()
), $language);
// Short summary about the notification
$notification->summary = elgg_echo(’photos:notify:summary’, array($entity->title), $language);
return $notification;
}
Note: Make sure the notification will be in the correct language by passing the reciepient’s language into the
elgg_echo() function.
3.10.3 Registering a new notification method
By default Elgg has two notification methods: email and the bundled site_notifications plugin. You can register a new
notification method with the elgg_register_notification_method() function.
Example:
Register a handler that will send the notifications via SMS.
/**
* Initialize the plugin
*/
function sms_notifications_init () {
elgg_register_notification_method(’sms’);
}
After registering the new method,
it will appear to the
www.example.com/notifications/personal/[username].
3.10. Notifications
notification
settings
page
at
95
Elgg Documentation, Release master
3.10.4 Sending the notifications using your own method
Besides registering the notification method, you also need to register a handler that takes care of actually sending the
SMS notifications. This happens with the ’send’, ’notification:[method]’ hook.
Example:
/**
* Initialize the plugin
*/
function sms_notifications_init () {
elgg_register_notification_method(’sms’);
elgg_register_plugin_hook_handler(’send’, ’notification:sms’, ’sms_notifications_send’);
}
/**
* Send an SMS notification
*
Hook name
* @param string $hook
Hook type
* @param string $type
$result Has anyone sent a message yet?
* @param bool
* @param array $params Hook parameters
* @return bool
* @access private
*/
function sms_notifications_send($hook, $type, $result, $params) {
/* @var Elgg_Notifications_Notification $message */
$message = $params[’notification’];
$recipient = $message->getRecipient();
if (!$recipient || !$recipient->mobile) {
return false;
}
// (A pseudo SMS API class)
$sms = new SmsApi();
return $sms->send($recipient->mobile, $message->body);
}
3.10.5 Subscriptions
In most cases Elgg core takes care of handling the subscriptions, so notification plugins don’t usually have to alter
them.
Subscriptions can however be:
• Added using the elgg_add_subscription() function
• Removed using the elgg_remove_subscription() function
It’s possible to modify the recipients of a notification dynamically with the ’get’, ’subscriptions’ hook.
96
Chapter 3. Developer Guides
Elgg Documentation, Release master
Example:
/**
* Initialize the plugin
*/
function discussion_init() {
elgg_register_plugin_hook_handler(’get’, ’subscriptions’, ’discussion_get_subscriptions’);
}
/**
* Get subscriptions for group notifications
*
’get’
* @param string $hook
@param
string
$type
’subscriptions’
*
* @param array $subscriptions Array containing subscriptions in the form
<user guid> => array(’email’, ’site’, etc.)
*
Hook parameters
* @param array $params
@return
array
*
*/
function discussion_get_subscriptions($hook, $type, $subscriptions, $params) {
$reply = $params[’event’]->getObject();
if (!elgg_instanceof($reply, ’object’, ’discussion_reply’, ’ElggDiscussionReply’)) {
return $subscriptions;
}
$group_guid = $reply->getContainerEntity()->container_guid;
$group_subscribers = elgg_get_subscriptions_for_container($group_guid);
return ($subscriptions + $group_subscribers);
}
3.11 River
Elgg natively supports the “river”, an activity stream containing descriptions of activities performed by site members.
This page gives an overview of adding events to the river in an Elgg plugin.
3.11.1 Pushing river items
Items are pushed to the activity river through a function call, which you must include in your plugins for the items to
appear.
Here we add a river item telling that a user has created a new blog post:
<?php
elgg_create_river_item(array(
’view’ => ’river/object/blog/create’,
’action_type’ => ’create’,
’subject_guid’ => $blog->owner_guid,
’object_guid’ => $blog->getGUID(),
));
All available parameters:
• view => STR The view that will handle the river item (must exist)
3.11. River
97
Elgg Documentation, Release master
• action_type => STR An arbitrary string to define the action (e.g. ‘create’, ‘update’, ‘vote’, ‘review’, etc)
• subject_guid => INT The GUID of the entity doing the action
• object_guid => INT The GUID of the entity being acted upon
• target_guid => INT The GUID of the the object entity’s container (optional)
• access_id => INT The access ID of the river item (default: same as the object)
• posted => INT The UNIX epoch timestamp of the river item (default: now)
• annotation_id => INT The annotation ID associated with this river entry (optional)
When an item is deleted or changed, the river item will be updated automatically.
3.11.2 River views
In order for events to appear in the river you need to provide a corresponding view with the name specified in the
function above.
We recommend /river/{type}/{subtype}/{action}, where:
• {type} is the entity type of the content we’re interested in (object for objects, user for users, etc)
• {subtype} is the entity subtype of the content we’re interested in (blog for blogs, photo_album for albums,
etc)
• {action} is the action that took place (‘’create’‘, ‘’update’‘, etc)
River item information will be passed in an object called $vars[’item’], which contains the following important
parameters:
• $vars[’item’]->subject_guid The GUID of the user performing the action
• $vars[’item’]->object_guid The GUID of the entity being acted upon
Timestamps etc will be generated for you.
For example, the blog plugin uses the following code for its river view:
<?php
$object = $vars[’item’]->getObjectEntity();
$excerpt = $object->excerpt ? $object->excerpt : $object->description;
$excerpt = strip_tags($excerpt);
$excerpt = elgg_get_excerpt($excerpt);
echo elgg_view(’river/elements/layout’, array(
’item’ => $vars[’item’],
’message’ => $excerpt,
));
3.12 Page handler
Elgg offers a facility to manage your plugin pages via a page handler, enabling custom urls like
http://yoursite/your_plugin/section. To add a page handler to a plugin, a handler function needs
to be registered in the plugin’s start.php file with elgg_register_page_handler():
98
Chapter 3. Developer Guides
Elgg Documentation, Release master
elgg_register_page_handler(’your_plugin’, ’your_plugin_page_handler’);
The plugin’s page handler is passed two parameters:
• an array containing the sections of the URL exploded by ‘/’. With this information the handler will be able to
apply any logic necessary, for example loading the appropriate view and returning its contents.
• the handler, this is the handler that is currently used (in our example your_plugin). If you don’t register
multiple page handlers to the same function you’ll never need this.
3.12.1 Code flow
Pages in plugins should be served only through page handlers, stored in pages/ of your plugin’s directory and do
not need to include or require Elgg’s engine/start.php file. The purpose of these files are to knit together
output from different views to form the page that the user sees. The program flow is something like this:
1. A user requests /plugin_name/section/entity
2. Elgg checks if plugin_name is registered to a page handler and calls that function, passing
array(’section’, ’entity’) as the first argument
3. The page handler function determines which page to display, optionally sets some values, and then includes the
correct page under plugin_name/pages/plugin_name/
4. The included file combines many separate views, calls formatting functions like elgg_view_layout() and
elgg_view_page(), and then echos the final output
5. The user sees a fully rendered page
There is no syntax enforced on the URLs, but Elgg’s coding standards suggests a certain format.
3.13 Routing
Add new pages and customize URLs.
3.14 Page ownership
One recurring task of any plugin will be to determine the page ownership in order to decide which actions
are allowed or not. Elgg has a number of functions related to page ownership and also offers plugin developers flexibility by letting the plugin handle page ownership requests as well. Determining the owner of a
page can be determined with elgg_get_page_owner_guid(), which will return the GUID of the owner.
Alternatively, elgg_get_page_owner_entity() will retrieve the whole page owner entity. If the page
already knows who the page owner is, but the system doesn’t, the it be can set by passing the GUID to
elgg_set_page_owner_guid($guid).
3.14.1 Custom page owner handlers
Plugin developers can create page owner handlers, which could be necessary in certain cases, for
example when integrating third party functionality.
The handler will be a function which will
need to get registered with elgg_register_plugin_hook_handler(’page_owner’, ’system’,
’your_page_owner_function_name’); . The handler will only need to return a value (an integer GUID)
when it knows for certain who the page owner is.
3.13. Routing
99
Elgg Documentation, Release master
By default, the system determines the page_owner from the following elements:
• The username URL parameter
• The owner_guid URL parameter
It then passes off to any page owner handlers defined using the plugin hook. If no page owner can be determined, the
page owner is set to 0, which is the same as the logged out user.
3.15 Gatekeeper
Gatekeeper functions allow you to manage how code gets executed by applying access control rules.
3.15.1 elgg_gatekeeper()
This function will forward a user to the front page if the current viewing user is not logged in.
This can be used in your plugin’s pages to protect them from being viewed by non-logged in users.
Note: In versions of Elgg prior to 1.9 this function was called gatekeeper()
3.15.2 elgg_admin_gatekeeper()
Same as elgg_gatekeeper() , but ensures that only admin users can view the page.
Note: In versions of Elgg prior to 1.9 this function was called admin_gatekeeper()
3.15.3 action_gatekeeper()
This function should be used in Forms + Actions , and helps protect the action from certain forms of attack.
Note: As of Elgg version 1.8 this function is called for all registered actions. There is no longer a need to call this
function in your own actions. If you wish to protect other pages with action tokens then you can call this function.
3.16 Widgets
Widgets are content areas that users can drag around their page to customize the layout. They can typically be
customized by their owner to show more/less content and determine who sees the widget. By default Elgg provides
plugins for customizing the profile page and dashboard via widgets.
TODO: Screenshot
100
Chapter 3. Developer Guides
Elgg Documentation, Release master
Contents
•
•
•
•
•
•
Structure
Initialise the widget
Multiple widgets
Elgg 1.8: Default widgets
Simple Example
How to restrict where widgets can be used
– Find where the plugin registers the widget
– Changing the function’s parameters
3.16.1 Structure
To create a widget, create two views:
• widgets/widget/edit
• widgets/widget/content
content.php is responsible for all the content that will output within the widget. The edit.php file contains any
extra edit functions you wish to present to the user. You do not need to add access level as this comes as part of the
widget framework.
Note: Using HTML checkboxes to set widget flags is problematic because if unchecked, the checkbox input is
omitted from form submission. The effect is that you can only set and not clear flags. The “input/checkboxes” view
will not work properly in a widget’s edit panel.
3.16.2 Initialise the widget
Once you have created your edit and view pages, you need to initialize the plugin widget. This is done within the
plugins init() function.
// Add generic new file widget
add_widget_type(’filerepo’, elgg_echo("file:widget"), elgg_echo("file:widget:description"));
Note: It is possible to add multiple widgets for a plugin. You just initialize as many widget directories as you need.
// Add generic new file widget
add_widget_type(’filerepo’, elgg_echo("file:widget"), elgg_echo("file:widget:description"));
// Add a second file widget
add_widget_type(’filerepo2’, elgg_echo("file:widget2"), elgg_echo("file:widget:description2"));
// Add a third file widget
add_widget_type(’filerepo3’, elgg_echo("file:widget3"), elgg_echo("file:widget:description3"));
3.16.3 Multiple widgets
Make sure you have the corrosponding directories within your plugin views structure:
3.16. Widgets
101
Elgg Documentation, Release master
’Plugin’
/views
/default
/widgets
/filerepo
/edit.php
/contents.php
/filerepo2
/edit.php
/contents.php
/filerepo3
/edit.php
/contents.php
3.16.4 Elgg 1.8: Default widgets
If your plugin uses the widget canvas, you can register default widget support with Elgg core, which will handle
everything else.
To announce default widget support in your plugin, register for the get_list, default_widgets plugin hook:
elgg_register_plugin_hook_handler(’get_list’, ’default_widgets’, ’my_plugin_default_widgets’);
In the plugin hook handler, push an array into the return value defining your default widget support and when to create
default widgets. Arrays require the following keys to be defined:
• name - The name of the widgets page. This is displayed on the tab in the admin interface.
• widget_context - The context the widgets page is called from. (If not explicitly set, this is your plugin’s id.)
• widget_columns - How many columns the widgets page will use.
• event - The Elgg event to create new widgets for. This is usually create.
• entity_type - The entity type to create new widgets for.
• entity_subtype - The entity subtype to create new widgets for. The can be ELGG_ENTITIES_ANY_VALUE to
create for all entity types.
When an object triggers an event that matches the event, entity_type, and entity_subtype parameters passed, Elgg
core will look for default widgets that match the widget_context and will copy them to that object’s owner_guid and
container_guid. All widget settings will also be copied.
function my_plugin_default_widgets_hook($hook, $type, $return, $params) {
$return[] = array(
’name’ => elgg_echo(’my_plugin’),
’widget_context’ => ’my_plugin’,
’widget_columns’ => 3,
’event’ => ’create’,
’entity_type’ => ’user’,
’entity_subtype’ => ELGG_ENTITIES_ANY_VALUE,
);
return $return;
}
102
Chapter 3. Developer Guides
Elgg Documentation, Release master
3.16.5 Simple Example
Here is a simple Flickr widget that uses Flickr’s JSON output.
Widget edit page:
<p>
<?php echo elgg_echo("flickr:id"); ?>
<input type="text" name="params[title]" value="<?php echo htmlentities($vars[’entity’]->title); ?
</p>
<p><?php echo elgg_echo("flickr:whatisid"); ?></p>
Widget view page:
<?php
//some required params
$flickr_id = $vars[’entity’]->title;
// if the flickr id is empty, then do not show any photos
if($flickr_id){
?>
<!-- this script uses the jquery cycle plugin -->
<script type="text/javascript" src="<?php echo $vars[’url’]; ?>mod/flickr/views/default/flickr/js/cyc
<!-- the Flickr JSON script -->
<script>
$.getJSON("http://api.flickr.com/services/feeds/photos_public.gne?id=
<?php echo $flickr_id;?>&lang=en-us&format=json&jsoncallback=?", function(data){
$.each(data.items, function(i,item){
$("<img/>").attr("src", item.media.m).appendTo("#images")
.wrap("<a href=’" + item.link + "’></a>");
});
$(’#images’).cycle({
fx:
’fade’,
speed:
’slow’,
timeout: 0,
next:
’#next’,
prev:
’#prev’
});
});
</script>
<!-- some css for display -->
<style type="text/css">
#images {
height: 180px;
width: 100%;
padding:0;
margin:0 0 10px 0;
overflow: hidden;
}
#images img {
border:none;
3.16. Widgets
103
Elgg Documentation, Release master
}
</style>
<!-- div where the images will display -->
<div id="title"></div>
<div id="images" align="center"></div>
<!-- next and prev nav -->
<div class="flickrNav" align="center">
<a id="prev" href="#">« Prev</a> <a id="next" href="#">Next »</a>
</div>
<?php
}else{
//this should go through elgg_echo() - it was taken out for this demo
echo "You have not yet entered your Flickr ID which is required to display your photos.";
}
?>
3.16.6 How to restrict where widgets can be used
Any plugin that has a widget must register that widget with Elgg. The widget can specify the context that it can be
used in (all, just profile, just dashboard, etc.). If you want to change where your users can use a widget, you can make
a quick edit to the plugin’s source.
Find where the plugin registers the widget
The function you are looking for is add_widget_type(). It is typically used in an init function in start.php.
You should be able to go to /mod/<plugin name>/, open start.php in a text editor, and find the string
add_widget_type.
Changing the function’s parameters
Let’s use the friends plugin as an example. We want to restrict it so that it can only be used on a user’s profile.
Currently, the function call looks like this:
Warning: Keep in mind Don’t Modify Core
add_widget_type(’friends’,elgg_echo("friends"),elgg_echo(’friends:widget:description’));
To restrict it to the profile, change it to this:
add_widget_type(’friends’,elgg_echo("friends"),elgg_echo(’friends:widget:description’), "profile");
Notice that the context was not specified originally (there were only 3 parameters and we added a 4th). That means
it defaulted to the “all” context. Besides “all” and “profile”, the only other context available in default Elgg is “dashboard”.
104
Chapter 3. Developer Guides
Elgg Documentation, Release master
3.17 Views
Contents
•
•
•
•
•
•
•
•
•
•
•
•
•
Introduction
Using views
Views as templates
Overriding views in plugins
Viewtypes
Extending views
Post processing views
Post pocessing view example
Displaying entities
Full and partial entity views
Listing entities
Using a different templating system
Related
3.17.1 Introduction
Elgg follows a MVC pattern and Views are the V in MVC. Views are responsible for creating the output. Generally,
this will be HTML sent to a web browser, but it could also be RSS, JSON or any number of other data formats.
The Views system handles everything from the layout of pages and chunks of presentation output (like a footer or a
toolbar) down to individual links and form inputs. It also allows for advanced features like automatic RSS generation,
a swift-to-develop mobile interface, and the alternative interfaces suggested below.
3.17.2 Using views
At their most basic level, the default views are just PHP files with snippets of html. For example:
<h1>Hello, World!</h1>
Assuming this view is located at /views/default/hello.php, we could output it like so:
echo elgg_view(’hello’);
For your convenience, Elgg comes with quite a lot of views by default. In order to keep things manageable, they are
organized into subdirectories. Elgg handles this situation quite nicely. For example, our simple view might live in
/views/default/hello/world.php, in which case it would be called like so:
echo elgg_view(’hello/world’);
Well that’s easy enough to remember! The name of the view simply reflects the location of the view in the views
directory.
3.17.3 Views as templates
Views would be pretty useless if they could only contain static information. Fortunately, you can pass arbitrary data to
a view via the $vars array. Our hello/world view might be modified to accept a variable like so:
3.17. Views
105
Elgg Documentation, Release master
<h1>Hello, <?php echo $vars[’name’]; ?>!</h1>
In this case, we can pass an arbitrary name parameter to the view like so:
echo elgg_view(’hello/world’, array(’name’ => ’World’));
which would produce the following output:
<h1>Hello, World!</h1>
3.17.4 Overriding views in plugins
You may want to change the output or rendering strategy of a view that Elgg provides by default. Fortunately, Elgg’s
plugin system makes this easy. Each plugin may have its own /views directory, with its own viewtypes. Views in
plugin directories always override views in the core directory, so this allows you to customize the behavior of any
number of views without touching Elgg core.
For example, if we wanted to customize the hello/world view to use an h2 instead of an h1, we could create a
file at /mod/example/views/default/hello/world.php like this:
<h2>Hello, <?php echo $vars[’name’]; ?></h2>
While it is not recommended, one could alternatively force the location of a view using the set_view_location
function:
set_view_location($view_name, $full_path_to_view_file);
Again, the best way to override views is to place them in the appropriate place in the views hierarchy.
Note: When considering long-term maintenance, overriding views in the core and bundled plugins has a cost: Upgrades may bring changes in views, and if you have overridden them, you will not get those changes. You may want
to use post processing if the change you’re making can be easily made with string replacement methods.
Note: Elgg caches view locations. This means that you should disable the system cache while working with views.
When you install the changes to a production environment you mush flush the caches.
3.17.5 Viewtypes
You might be wondering, “what’s with the ‘default’ in the directory structure?
hello/world view at /views/hello/world.php?”.
Why don’t we just put the
Great question.
This subdirectory (the one under /views) determines the viewtype of the views below it. It’s possible that you might
want your Elgg site to have several sets of interface pages. For example:
• Standard HTML for desktop browsing (This is the default view)
• HTML optimized for Mobile devices (iPhone, Android, Blackberry, etc.)
• HTML optimized Tablet devices (iPad, etc.)
• RSS
• Atom
• JSON
106
Chapter 3. Developer Guides
Elgg Documentation, Release master
• etc...
In Elgg, one set of these interface pages is called a viewtype. You can force Elgg to use a particular viewtype to render
the page simply by setting the $view input variable. For example, to get an RSS version of the home page, you would
access http://localhost/elgg/?view=rss.
You could also write a plugin to set this automatically using the set_input() function. For example, your plugin
might detect that the page was accessed with an iPhone’s browser string, and set the viewtype to handheld by calling:
set_input(’view’, ’handheld’);
The plugin would presumably also supply a set of views optimized for handheld devices.
3.17.6 Extending views
There may be other situations in which you don’t want to override the whole view, you just want to add some more
content to the end of it. In Elgg this is called extending a view.
For example, instead of overriding the hello/world view, we could extend it like so:
elgg_extend_view(’hello/world’, ’hello/greeting’);
If the contents of /views/default/hello/greeting.php is:
<h2>How are you today?</h2>
Then every time we call elgg_view(’hello/world’);, we’ll get:
<h1>Hello, World!</h1>
<h2>How are you today?</h2>
You can also optionally prepend views as well by passing a value to the 3rd parameter that is less than 500:
//appends ’hello/greeting’ to every occurrence of ’hello/world’
elgg_extend_view(’hello/world’, ’hello/greeting’);
//prepends ’hello/greeting’ to every occurrence of ’hello/world’
elgg_extend_view(’hello/world’, ’hello/greeting’, 450);
Note that if you extend the core css view like this:
elgg_extend_view(’css’, ’custom/css’);
You must do so within code that is executed by engine/start.php (normally this would mean your plugin’s init code).
Because the core css view is loaded separately via a <link> tag, any extensions you add will not have the same
context as the rest of your page.
3.17.7 Post processing views
Sometimes it is preferable to process or rewrite the output of a view instead of overriding it.
The output of each view is run through the plugin hook [view, view_name] before being returned by
elgg_view(). Each registered handler function is passed these arguments:
• $hook - the string "view"
• $type - the view name being rendered (the first argument passed to elgg_view())
• $returnvalue - the rendered output of the view (or the return value of the last handler)
3.17. Views
107
Elgg Documentation, Release master
• $params - an array containing the key viewtype with value being the viewtype being rendered
To alter the view output, the handler just needs to alter $returnvalue and return a new string.
3.17.8 Post pocessing view example
Here we’ll eliminate breadcrumbs that don’t have at least one link.
// inside myplugin_init()
elgg_register_plugin_hook_handler(’view’, ’navigation/breadcrumbs’, ’myplugin_alter_breadcrumb’);
function myplugin_alter_breadcrumb($hook, $type, $returnvalue, $params) {
// we only want to alter when viewtype is "default"
if ($params[’viewtype’] !== ’default’) {
return $returnvalue;
}
// output nothing if the content doesn’t have a single link
if (false === strpos($returnvalue, ’<a ’)) {
return ’’;
}
}
3.17.9 Displaying entities
If you don’t know what an entity is, check this page out first.
The following code will automatically display the entity in $entity:
echo elgg_view_entity($entity);
As you’ll know from the data model introduction, all entities have a type (object, site, user or group), and optionally
a subtype (which could be anything - ‘blog’, ‘forumpost’, ‘banana’). elgg_view_entity will automatically look
for a view called type/subtype; if there’s no subtype, it will look for type/type. Failing that, before it gives up
completely it tries type/default. (RSS feeds in Elgg generally work by outputting the object/default view
in the ‘rss’ viewtype.)
So for example, the view to display a blogpost might be object/blog. The view to display a user is user/user.
3.17.10 Full and partial entity views
elgg_view_entity actually has a number of parameters, although only the very first one is required. The first
three are:
• $entity - The entity to display
• $viewtype - The viewtype to display in (defaults to the one we’re currently in, but it can be forced - eg to
display a snippet of RSS within an HTML page)
• $full_view - Whether to display a full version of the entity. (Defaults to false.)
This last parameter is passed to the view as $vars[’full_view’]. It’s up to you what you do with it; the usual
behaviour is to only display comments and similar information if this is set to true.
108
Chapter 3. Developer Guides
Elgg Documentation, Release master
3.17.11 Listing entities
This is then used in the provided listing functions. To automatically display a list of blog posts (see the full tutorial),
you can call:
echo elgg_list_entities(array(
’type’ => ’object’,
’subtype’ => ’blog’,
));
This function checks to see if there are any entities; if there are, it first displays the navigation/pagination
view in order to display a way to move from page to page. It then repeatedly calls elgg_view_entity on each
entity, before returning the result.
Because it does this, Elgg knows that it can automatically supply an RSS feed - it extends the metatags view (which
is called by the header) in order to provide RSS autodiscovery, which is why you can see the orange RSS icon on those
pages.
If your entity list will display the entity owners, you can improve performance a bit by preloading all owner entities:
echo elgg_list_entities(array(
’type’ => ’object’,
’subtype’ => ’blog’,
// enable owner preloading
’preload_owners’ => true,
));
See also check this page out first.
3.17.12 Using a different templating system
You can write your own templating system if you want to.
Before going through the motions of drawing views, Elgg checks the $CONFIG->template_handler variable
to see if it contains the name of a callable function. If it does, the function will be passed the view name and template
vars, and the return value of this function will be returned instead of the standard output:
return $template_handler($view, $vars);
3.17.13 Related
Page structure best practice
Elgg pages have an overall pageshell and a main content area. In Elgg 1.0+, we’ve marked out a space “the canvas”
for items to write to the page. This means the user always has a very consistent experience, while giving maximum
flexibility to plugin authors for laying out their functionality.
Think of the canvas area as a big rectangle that you can do what you like in. We’ve created a couple of standard
canvases for you:
• one column
• two column
• content
• widgets
3.17. Views
109
Elgg Documentation, Release master
are the main ones. You can access these with the function:
$canvas_area = elgg_view_layout($canvas_name, array(
’content’ => $content,
’section’ => $section
));
The content sections are passed as an array in the second parameter. The array keys correspond to sections in the
layout, the choice of layout will determine which sections to pass. The array values contain the html that should be
displayed in those areas. Examples of two common layouts:
$canvas_area = elgg_view_layout(’one_column’, array(
’content’ => $content
));
$canvas_area = elgg_view_layout(’one_sidebar’, array(
’content’ => $content,
’sidebar’ => $sidebar
));
You can then, ultimately, pass this into the elgg_view_page function:
echo elgg_view_page($title, $canvas_area);
You may also have noticed that we’ve started including a standard title area at the top of each plugin page (or at least,
most plugin pages). This is created using the following wrapper function, and should usually be included at the top of
the plugin content:
$start_of_plugin_content = elgg_view_title($title_text);
This will also display any submenu items that exist (unless you set the second, optional parameter to false). So how
do you add submenu items?
In your plugin_init function, include the following call:
if (elgg_get_context() == "your_plugin") {
// add a site navigation item
$item = new ElggMenuItem(’identifier’, elgg_echo(’your_plugin:link’), $url);
elgg_register_menu_item(’page’, $item);
}
The submenu will then automatically display when your page is rendered. The ‘identifier’ is a machine name for the
link, it should be unique per menu.
Simplecache
See also:
• Performance
• Views
The Simplecache is a mechanism designed to alleviate the need for certain views to be regenerated dynamically.
Instead, they are generated once, saved as a static file, and served in a way that entirely bypasses the Elgg engine.
If Simplecache is turned off (which can be done from the administration panel), these views will be served as normal,
with the exception of site CSS.
The criteria for whether a view is suitable for the Simplecache is as follows:
• The view must not change depending on who or when it is being looked at
110
Chapter 3. Developer Guides
Elgg Documentation, Release master
• The view must not depend on variables fed to it (except for global variables like site URL that never change)
Regenerating the Simplecache
You can regenerate the Simplecache at any time by:
• Loading /upgrade.php, even if you have nothing to upgrade
• In the admin panel click on ‘Flush the caches’
• Enabling or disabling a plugin
• Reordering your plugins
Using the Simplecache in your plugins
Registering views with the Simplecache
You can register a view with the Simplecache with the following function at init-time:
elgg_register_simplecache_view($viewname);
Accessing the cached view
If you registered a JavaScript or CSS file with Simplecache and put in in the view folder js/your_view or
css/your_view you can very easily the the url to this cached view by calling
$url = elgg_get_simplecache_url($type, $view)
Where:
• $type is js or css
• $view the view name after css/ or js/
3.18 Context
Within the Elgg framework, context can be used to by your plugin’s functions to determine if they should run or not.
You will be registering callbacks to be executed when particular events are triggered. Sometimes the events are generic
and you only want to run your callback when your plugin caused the event to be triggered. In that case, you can use
the page’s context.
You can explicitly set the context with set_context(). The context is a string and typically you set it to the
name of your plugin. You can retrieve the context with the function get_context(). It’s however better to use
elgg_push_context($string) to add a context to the stack. You can check if the context you want in in the
current stack by calling elgg_in_context($context). Don’t forget to pop (with elgg_pop_context())
the context after you push one and don’t need it anymore.
If you don’t set it, Elgg tries to guess the context. If the page was called through the page handler, the context is set to
the name of the handler which was set in elgg_register_page_handler(). If the page wasn’t called through
the page handler, it uses the name of your plugin directory. If it cannot determine that, it returns main as the default
context.
Sometimes a view will return different HTML depending on the context. A plugin can take advantage of that by setting
the context before calling elgg_view() on the view and then setting the context back. This is frequently done with
the search context.
3.18. Context
111
Elgg Documentation, Release master
3.19 Themes
Customize the look and feel of Elgg.
A theme is a type of plugin that overrides display aspects of Elgg.
This guide assumes you are familiar with:
• Plugins
• Views
Contents
• Create your plugin
• Customize the CSS
– View extension
– View overloading
• Tools
• Customizing the front page
3.19.1 Create your plugin
Create your plugin as described in the developer guide.
• Create a new directory under mod/
• Create a new start.php
• Create a manifest.xml file describing your theme.
3.19.2 Customize the CSS
As of Elgg 1.8, the css is split into several files based on what aspects of the site you’re theming. This allows you to
tackle them one at a time, giving you a chance to make real progress without getting overwhelmed.
Here is a list of the existing CSS views:
• css/elements/buttons: Provides a way to style all the different kinds of buttons your site will use. There are 5
kinds of buttons that plugins will expect to be available: action, cancel, delete, submit, and special.
• css/elements/chrome: This file has some miscellaneous look-and-feel classes.
• css/elements/components: This file contains many “css objects” that are used all over the site: media block, list,
gallery, table, owner block, system messages, river, tags, photo, and comments.
• css/elements/forms: This file determines what your forms and input elements will look like.
• css/elements/icons: Contains styles for the sprite icons and avatars used on your site.
• css/elements/layout: Determines what your page layout will look like: sidebars, page wrapper, main body,
header, footer, etc.
• css/elements/modules: Lots of content in Elgg is displayed in boxes with a title and a content body. We called
these modules. There are a few kinds: info, aside, featured, dropdown, popup, widget. Widget styles are
included in this file too, since they are a subset of modules.
• css/elements/navigation: This file determines what all your menus will look like.
112
Chapter 3. Developer Guides
Elgg Documentation, Release master
• css/elements/typography: This file determines what the content and headings of your site will look like.
• css/rtl: Custom rules for users viewing your site in a right-to-left language.
• css/admin: A completely separate theme for the admin area (usually not overridden).
• css/elgg: Compiles all the core css/elements/* files into one file (DO NOT OVERRIDE).
• css/elements/core: Contains base styles for the more complicated “css objects”. If you find yourself wanting to
override this, you probably need to report a bug to Elgg core instead (DO NOT OVERRIDE).
• css/elements/reset: Contains a reset stylesheet that forces elements to have the same default
View extension
There are two ways you can modify views:
The first way is to add extra stuff to an existing view via the extend view function from within your start.php’s
initialization function.
For example, the following start.php will add mytheme/css to Elgg’s core css file:
<?php
function mytheme_init() {
elgg_extend_view(’css/elgg’, ’mytheme/css’);
}
elgg_register_event_handler(’init’, ’system’, ’mytheme_init’);
?>
View overloading
Plugins can have a view hierarchy, any file that exists here will replace any files in the existing core view hierarchy...
so for example, if my plugin has a file:
/mod/myplugin/views/default/css/elements/typography.php
it will replace:
/views/default/css/elements/typography.php
But only when the plugin is active.
This gives you total control over the way Elgg looks and behaves. It gives you the option to either slightly modify or
totally replace existing views.
3.19.3 Tools
Starting in Elgg 1.8, we’ve provided you with some development tools to help you with theming: Turn on the “Developers” plugin and go to the “Theme Preview” page to start tracking your theme’s progress.
3.19.4 Customizing the front page
The main Elgg index page runs a plugin hook called ‘index,system’. If this returns true, it assumes that another front
page has been drawn and doesn’t display the default page.
3.19. Themes
113
Elgg Documentation, Release master
Therefore, you can override it by registering a function to the ‘index,system’ plugin hook and then returning true from
that function.
Here’s a quick overview:
• Create your new plugin
• In the start.php you will need something like the following:
<?php
function pluginname_init() {
// Replace the default index page
elgg_register_plugin_hook_handler(’index’, ’system’, ’new_index’);
}
function new_index() {
if (!include_once(dirname(dirname(__FILE__)) . "/pluginname/pages/index.php"))
return false;
return true;
}
// register for the init, system event when our plugin start.php is loaded
elgg_register_event_handler(’init’, ’system’, ’pluginname_init’);
?>
• Then, create an index page (/pluginname/pages/index.php) and use that to put the content you would like on the
front page of your Elgg site.
3.20 JavaScript
As of Elgg 1.9, we encourage all developers to adopt the AMD (Asynchronous Module Definition) standard for writing
JavaScript code in Elgg. The 1.8 version is still functional and is described below.
Contents
• AMD
– 1. Define your module as asynchronous JavaScript
– 2. Tell Elgg to asynchronously execute your module in the current page
• Migrating JS from Elgg 1.8 to AMD / 1.9
• Traditional JavaScript (1.8)
• Core functions available in JS
– Ajax helper functions
– Hooks
3.20.1 AMD
Defining and loading a module in Elgg 1.9 takes two steps:
1. Define your module as asynchronous JavaScript.
2. Tell Elgg to asynchronously execute your module in the current page.
114
Chapter 3. Developer Guides
Elgg Documentation, Release master
1. Define your module as asynchronous JavaScript
You can define a module by creating a view or registering a URL.
Defining modules as a view
Modules defined by creating views are immediately available for use and require no registration. To register a module
named my/module, create the view views/default/js/my/module.js.
A basic module could look like this:
define(function(require) {
var elgg = require("elgg");
var $ = require("jquery");
return function() {
// Some logic in here
};
});
Define your module via a URL
You can define an existing AMD module using elgg_define_js(). Traditional (browser-globals) JavaScript files
can also be defined as AMD modules if you shim them by setting exports and optionally deps.
Warning: Calls to elgg_define_js() must be in an init, system event handler.
<?php
elgg_register_event_handler(’init’, ’system’, ’amd_init’);
function amd_init() {
// AMD module as the view js/backbone
elgg_define_js(’backbone’);
// AMD module with a different path
elgg_define_js(’backbone’, array(
’src’ => ’/vendors/backbone/backbone.js’,
));
// Shimmed AMD module
elgg_define_js(’jquery.form’, array(
’src’ => ’/vendors/jquery/jquery.form.js’,
’deps’ => array(’jquery’),
’exports’ => ’jQuery.fn.ajaxForm’,
));
}
Some things to note
1. Do not use elgg.provide() or elgg.require() anymore. They are fully replaced by define() and
require() respectively.
2. Return the value of the module instead of adding to a global variable.
3.20. JavaScript
115
Elgg Documentation, Release master
3. Static views (.css, .js) are automatically minified and cached by Elgg’s simplecache system.
2. Tell Elgg to asynchronously execute your module in the current page
Once an AMD module is defined, you can use require(["my/module"]) from JavaScript to access its “exported” value.
Also, calling elgg_require_js("my/module") from PHP tells Elgg to execute the module code on the current
page.
3.20.2 Migrating JS from Elgg 1.8 to AMD / 1.9
Current 1.8 JavaScript modules will continue to work with Elgg.
We do not anticipate any backwards compatibility issues with this new direction and will fix any issues that do come
up. The old system will still be functional in Elgg 1.9, but developers are encouraged to begin looking to AMD as the
future of JS in Elgg.
3.20.3 Traditional JavaScript (1.8)
Register third-party libraries with elgg_register_js:
elgg_register_js(’jquery’, $cdnjs_url);
This will override any URLs previously registered under this name.
Load a library on the current page with elgg_load_js:
elgg_load_js(’jquery’);
This will include and execute the linked code.
Tip:
Using inline scripts is strongly discouraged because:
• They are not testable (maintainability)
• They are not cacheable (performance)
• Doing so forces some scripts to be loaded in <head> (performance)
Inline scripts in core or bundled plugins are considered legacy bugs.
3.20.4 Core functions available in JS
elgg.echo()
Translate interface text
elgg.echo(’example:text’, [’arg1’]);
elgg.system_message()
Display a status message to the user.
116
Chapter 3. Developer Guides
Elgg Documentation, Release master
elgg.system_message(elgg.echo(’success’));
elgg.register_error()
Display an error message to the user.
elgg.register_error(elgg.echo(’error’));
elgg.forward()
elgg.normalize_url()
Normalize a URL relative to the elgg root:
// "http://localhost/elgg/blog"
elgg.normalize_url(’/blog’);
Redirect to a new page.
elgg.forward(’/blog’);
This function automatically normalizes the URL.
elgg.parse_url()
Parse a URL into its component parts:
// returns {
//
fragment: "fragment",
//
host: "community.elgg.org",
//
path: "/file.php",
//
query: "arg=val"
// }
elgg.parse_url(
’http://community.elgg.org/file.php?arg=val#fragment’);
elgg.get_page_owner_guid()
Get the GUID of the current page’s owner.
elgg.register_hook_handler()
Register a hook handler with the event system.
// old initialization style
elgg.register_hook_handler(’init’, ’system’, my_plugin.init);
// new: AMD module
define(function (require) {
var elgg = require(’elgg’);
// [init, system] has fired
});
elgg.trigger_hook()
Emit a hook event in the event system.
// allow other plugins to alter value
value = elgg.trigger_hook(’my_plugin:filter’, ’value’, {}, value);
elgg.security.refreshToken()
Force a refresh of all XSRF tokens on the page.
3.20. JavaScript
117
Elgg Documentation, Release master
This is automatically called every 5 minutes by default.
This requires a valid security token in 1.8, but not in 1.9.
The user will be warned if their session has expired.
elgg.security.addToken()
Add a security token to an object, URL, or query string:
// returns {
//
__elgg_token: "1468dc44c5b437f34423e2d55acfdd87",
//
__elgg_ts: 1328143779,
//
other: "data"
// }
elgg.security.addToken({’other’: ’data’});
// returns: "action/add?__elgg_ts=1328144079&__elgg_token=55fd9c2d7f5075d11e722358afd5fde2"
elgg.security.addToken("action/add");
// returns "?arg=val&__elgg_ts=1328144079&__elgg_token=55fd9c2d7f5075d11e722358afd5fde2"
elgg.security.addToken("?arg=val");
elgg.get_logged_in_user_entity()
Returns the logged in user as an JS ElggUser object.
elgg.get_logged_in_user_guid()
Returns the logged in user’s guid.
elgg.is_logged_in()
True if the user is logged in.
elgg.is_admin_logged_in()
True if the user is logged in and is an admin.
elgg.config.get_language()
Get the current page’s language.
There are a number of configuration values set in the elgg object:
// The root of the website.
elgg.config.wwwroot;
// The default site language.
elgg.config.language;
// The current page’s viewtype
elgg.config.viewtype;
// The Elgg version (YYYYMMDDXX).
elgg.config.version;
// The Elgg release (X.Y.Z).
elgg.config.release;
Ajax helper functions
The JS engine includes many features related to AJAX. Some are specific to Elgg, and some extend jQuery’s native
AJAX features.
elgg.get()
Wrapper for jQuery’s $.ajax(), but forces GET and does URL normalization. Accepts all standard jQuery options.
118
Chapter 3. Developer Guides
Elgg Documentation, Release master
// normalizes the url to the current <site_url>/activity
elgg.get(’/activity’, {
success: function(resultText, success, xhr) {
console.log(resultText);
}
});
elgg.post()
Wrapper for jQuery’s $.ajax(), but forces POST and does URL normalization. Accepts all standard jQuery options.
elgg.action()
Calls an Elgg action with the data passed. This handles outputting of system messages and errors.
elgg.action(’friend/add’, {
data: {
friend: 1234
},
success: function(json) {
// do something
}
});
Hooks
The JS engine has a hooks system similar to the PHP engine’s plugin hooks: hooks are triggered and plugins can
register callbacks to react or alter information. There is no concept of Elgg events in the JS engine; everything in the
JS engine is implemented as a hook.
Registering a callback to a hook
Callbacks are registered using elgg.register_hook_handler(). Multiple callbacks can be registered for the
same hook.
The following example registers the elgg.ui.initDatePicker callback for the init, system event. Note
that a difference in the JS engine is that instead of passing a string you pass the function itself to
elgg.register_hook_handler() as the callback.
elgg.provide(’elgg.ui.initDatePicker’);
elgg.ui.initDatePicker = function() { ... }
elgg.register_hook_handler(’init’, ’system’, elgg.ui.initDatePicker);
The callback
The callback accepts 4 arguments:
• hook - The hook name
• type - The hook type
• params - An object or set of parameters specific to the hook
• value - The current value
The value will be passed through each hook. Depending on the hook, callbacks can simply react or alter data.
3.20. JavaScript
119
Elgg Documentation, Release master
Triggering custom hooks
Plugins can trigger their own hooks:
elgg.hook.trigger_hook(’name’, ’type’, {params}, "value");
Available hooks
init, system This hook is fired when the JS system is ready. Plugins should register their init functions for this hook.
ready, system This hook is fired when the system has fully booted.
getOptions, ui.popup This hook is fired for pop up displays (“rel”=”popup”) and allows for customized placement
options.
3.21 Plugin settings
You need to perform some extra steps if your plugin needs settings to be saved and controlled via the administration
panel:
• Create a file in your plugin’s default view folder called plugins/your_plugin/settings.php, where
your_plugin is the name of your plugin’s directory in the mod hierarchy
• Fill this file with the form elements you want to display together with internationalised text labels
• Set the name attribute in your form components to param[‘varname‘] where varname is the name of
the variable. These will be saved as private settings attached to a plugin entity. So, if your variable is called
param[myparameter] your plugin (which is also passed to this view as $vars[’entity’]) will be
called $vars[’entity’]->myparameter
An example settings.php would look like:
<p>
<?php echo elgg_echo(’myplugin:settings:limit’); ?>
<select name="params[limit]">
<option value="5" <?php if ($vars[’entity’]->limit == 5) echo " selected=\"yes\" "; ?>>5</optio
<option value="8" <?php if ((!$vars[’entity’]->limit) || ($vars[’entity’]->limit == 8)) echo "
<option value="12" <?php if ($vars[’entity’]->limit == 12) echo " selected=\"yes\" "; ?>>12</op
<option value="15" <?php if ($vars[’entity’]->limit == 15) echo " selected=\"yes\" "; ?>>15</op
</select>
</p>
Note: You don’t need to add a save button or the form, this will be handled by the framework.
Note: You cannot use form components that send no value when “off.” These include radio inputs and check boxes.
3.21.1 User settings
Your plugin might need to store per user settings too, and you would like to have your plugin’s options to appear in the
user’s settings page. This is also easy to do and follows the same pattern as setting up the global plugin configuration
explained earlier. The only difference is that instead of using a settings file you will use usersettings. So,
the path to the user edit view for your plugin would be plugins/your_plugin/usersettings.php.
120
Chapter 3. Developer Guides
Elgg Documentation, Release master
3.21.2 Retrieving settings in your code
To retrieve settings from your code use:
$setting = elgg_get_plugin_setting($name, $plugin_id);
or for user settings
$user_setting = elgg_get_plugin_user_setting($name, $user_guid, $plugin_id);
where:
• $name Is the value you want to retrieve
• $user_guid Is the user you want to retrieve these for (defaults to the currently logged in user)
• $plugin_name Is the name of the plugin (detected if run from within a plugin)
3.21.3 Setting values while in code
Values may also be set from within your plugin code, to do this use one of the following functions:
elgg_set_plugin_setting($name, $value, $plugin_id);
or
elgg_set_plugin_user_setting($name, $value, $user_guid, $plugin_id);
Warning: The $plugin_id needs to be provided when setting plugin (user)settings.
3.22 Permissions Check
Warning: As stated in the page, this method works only for granting write access to entities. You cannot use
this method to retrieve or view entities for which the user does not have read access.
Elgg provides a mechanism of overriding write permissions check through the permissions_check plugin hook . This
is useful for allowing plugin write to all accessible entities regardless of access settings. Entities that are hidden,
however, will still be unavailable to the plugin.
3.22.1 Hooking permissions_check
In your plugin, you must register the plugin hook for permissions_check.
elgg_register_plugin_hook_handler(’permissions_check’, ’all’, ’myplugin_permissions_check’);
3.22.2 The override function
Now create the function that will be called by the permissions check hook. In this function we determine if the entity
(in parameters) has write access. Since it is important to keep Elgg secure, write access should be given only after
checking a variety of situations including page context, logged in user, etc. Note that this function can return 3 values:
true if the entity has write access, false if the entity does not, and null if this plugin doesn’t care and the security system
should consult other plugins.
3.22. Permissions Check
121
Elgg Documentation, Release master
function myplugin_permissions_check($hook_name, $entity_type, $return_value, $parameters) {
$has_access = determine_access_somehow();
if ($has_access === true) {
return true;
} else if ($has_access === false) {
return false;
}
return null;
}
3.22.3 Full Example
This is a full example using the context to determine if the entity has write access.
<?php
function myaccess_init() {
// Register cron hook
if (!elgg_get_plugin_setting(’period’, ’myaccess’)) {
elgg_set_plugin_setting(’period’, ’fiveminute’, ’myaccess’);
}
// override permissions for the myaccess context
elgg_register_plugin_hook_handler(’permissions_check’, ’all’, ’myaccess_permissions_check’);
elgg_register_plugin_hook_handler(’cron’, elgg_get_plugin_setting(’period’, ’myaccess’), ’myaccess
}
/**
* Hook for cron event.
*/
function myaccess_cron($event, $object_type, $object) {
elgg_push_context(’myaccess_cron’);
// returns all entities regardless of access permissions.
// will NOT return hidden entities.
$entities = get_entities();
elgg_pop_context();
}
/**
* Overrides default permissions for the myaccess context
*/
function myaccess_permissions_check($hook_name, $entity_type, $return_value, $parameters) {
if (elgg_in_context(’myaccess_cron’)) {
return true;
}
return null;
}
// Initialise plugin
register_elgg_event_handler(’init’, ’system’, ’myaccess_init’);
122
Chapter 3. Developer Guides
Elgg Documentation, Release master
?>
3.23 Authentication
3.23.1 Pluggable Authentication Modules
Elgg has support for pluggable authentication modules (PAM), which enables you to write your own authentication
handlers. Whenever a request needs to get authenticated the system will call elgg_authenticate() which probes
the registered PAM handlers until one returns success.
The preferred approach is to create a separate Elgg plugin which will have one simple task: to process an authentication
request. This involves setting up an authentication handler in the plugin’s start.php file, and to register it with the PAM
module so it will get processed whenever the system needs to authenticate a request.
The authentication handler is a function and takes a single parameter. Registering the handler is being done by
register_pam_handler() which takes the name of the authentication handler, the importance and the policy as
parameters. It is advised to register the handler in the plugin’s init function, for example:
function your_plugin_init() {
// Register the authentication handler
register_pam_handler(’your_plugin_auth_handler’);
}
function your_plugin_auth_handler($credentials) {
// do things ...
}
// Add the plugin’s init function to the system’s init event
elgg_register_elgg_event_handler(’init’, ’system’, ’your_plugin_init’);
3.23.2 Importance
By default an authentication module is registered with an importance of sufficient.
In a list of authentication modules; if any one marked sufficient returns true, pam_authenticate() will also
return true. The exception to this is when an authentication module is registered with an importance of required. All
required modules must return true for pam_authenticate() to return true, regardless of whether all sufficient
modules return true.
3.23.3 Passed credentials
The format of the credentials passed to the handler can vary, depending on the originating request. For example, a
regular login via the login form will create a named array, with the keys username and password. If a request was
made for example via XML-RPC then the credentials will be set in the HTTP header, so in this case nothing will get
passed to the authentication handler and the handler will need to perform steps on its own to authenticate the request.
3.23.4 Return value
The authentication handle should return a boolean, indicating if the request could be authenticated or not. One
caveat is that in case of a regular user login where credentials are available as username and password the user will get
logged in. In case of the XML-RPC example the authentication handler will need to perform this step itself since the
3.23. Authentication
123
Elgg Documentation, Release master
rest of the system will not have any idea of either possible formats of credentials passed nor its contents. Logging in a
user is quite simple and is being done by login(), which expects an ElggUser object.
3.24 Walled Garden
Elgg supports a “Walled Garden” mode. In this mode, almost all pages are restricted to logged in users. This is useful
for sites that don’t allow public registration.
3.24.1 Activating Walled Garden mode
To activate Walled Garden mode in Elgg 1.8, go to the Administration section. On the right sidebar menu, under the
“Configure” section, expand “Settings,” then click on “Advanced.”
From the Advanced Settings page, find the option labelled “Restrict pages to logged-in users.” Enable this option, then
click “Save” to switch your site into Walled Garden mode.
3.24.2 Exposing pages through Walled Gardens
Many plugins extend Elgg by adding pages. Walled Garden mode will prevent these pages from being viewed by
logged out users. Elgg uses plugin hook to manage which pages are visible through the Walled Garden.
Plugin authors must register pages as public if they should be viewable through Walled Gardens by responding to the
public_pages, walled_garden plugin hook.
The returned value is an array of regexp expressions for public pages.
The following code shows how to expose http://example.org/my_plugin/public_page through a Walled Garden. This
assumes the plugin has registered a Page handler for my_plugin.
elgg_register_plugin_hook_handler(’public_pages’, ’walled_garden’, ’my_plugin_walled_garden_public_pa
function my_plugin_walled_garden_public_pages($hook, $type, $pages) {
$pages[] = ’my_plugin/public_page’;
return $pages;
}
3.25 Web services
Build an HTTP API for your site.
Elgg provides a powerful framework for building web services. This allows developers to expose functionality to other
web sites and desktop applications along with doing integrations with third-party web applications. While we call the
API RESTful, it is actually a REST/RPC hybrid similar to the APIs provided by sites like Flickr and Twitter.
To create an API for your Elgg site, you need to do 4 things:
• enable the web services plugin
• expose methods
• setup API authentication
• setup user authentication
Additionally, you may want to control what types of authentication are available on your site. This will also be covered.
124
Chapter 3. Developer Guides
Elgg Documentation, Release master
Contents
• Exposing methods
– Response formats
• API authentication
– Key-based authentication
– Signature-based authentication
– OAuth
• User authentication
• Building out your API
• Determining the authentication available
• Related
3.25.1 Exposing methods
The function to use to expose a method is elgg_ws_expose_function(). As an example, let’s assume you
want to expose a function that echos text back to the calling application. The function could look like this
function my_echo($string) {
return $string;
}
Since we are providing this function to allow developers to test their API clients, we will require neither API authentication nor user authentication. This call registers the function with the web services API framework:
elgg_ws_expose_function("test.echo",
"my_echo",
array("string" => array(’type’ => ’string’)),
’A testing method which echos back a string’,
’GET’,
false,
false
);
If you add this code to a plugin and then go to http://yoursite.com/services/api/rest/xml/?method=system.api.list, you
should now see your test.echo method listed as an API call. Further, to test the exposed method from a web browser,
you could hit the url: http://yoursite.com/services/api/rest/xml/?method=test.echo&string=testing and you should see
xml data like this:
<elgg>
<status>0</status>
<result>testing</result>
</elgg>
Response formats
The web services API framework provides three different response formats by default: xml, json, and serialized php.
You can request the different formats for substituting “json” or “php” for “xml” in the above URLs. You can also add
additional response formats by defining new viewtypes.
3.25. Web services
125
Elgg Documentation, Release master
3.25.2 API authentication
You may want to control access to some of the functions that you expose. Perhaps you are exposing functions in order
to integrate Elgg with another open source platform on the same server. In that case, you only want to allow that other
application access to these methods. Another possibility is that you want to limit what external developers have access
to your API. Or maybe you want to limit how many calls a developer can make against your API in a single day.
In all of these cases, you can use Elgg’s API authentication functions to control access. Elgg provides two builtin methods to perform API authentication: key based and HMAC signature based. You can also add your own
authentication methods. The key based approach is very similar to what Google, Flickr, or Twitter. Developers
can request a key (a random string) and pass that key with all calls that require API authentication. The keys are
stored in the database and if an API call is made without a key or a bad key, the call is denied and an error message is
returned.
Key-based authentication
As an example, let’s write a function that returns the number of users that have viewed the site in the last x minutes.
function count_active_users($minutes=10) {
$seconds = 60 * $minutes;
$count = count(find_active_users($seconds, 9999));
return $count;
}
Now, let’s expose it and make the number of minutes an optional parameter:
elgg_ws_expose_function("users.active",
"count_active_users",
array("minutes" => array(’type’ => ’int’,
’required’ => false)),
’Number of users who have used the site in the past x minutes’,
’GET’,
true,
false
);
This function is now available and if you check system.api.list, you will see that it requires API authentication. If you hit the method with a web browser, it will return an error message about failing the API
authentication. To test this method, you need an API key. Fortunately, there is a plugin called apiadmin that
creates keys for you. It is available in the Elgg plugin repository. It will return a public and private key and you
will use the public key for this kind of API authentication. Grab a key and then do a GET request with your
browser on this API method passing in the key string as the parameter api_key. It might look something like this:
http://yoursite.com/services/api/rest/xml/?method=users.active&api_key=1140321cb56c71710c38feefdf72bc462938f59f.
Signature-based authentication
The HMAC Authentication is similar to what is used with OAuth or Amazon’s S3 service. This involves both the
public and private key. If you want to be very sure that the API calls are coming from the developer you think they
are coming from and you want to make sure the data is not being tampered with during transmission, you would use
this authentication method. Be aware that it is much more involved and could turn off developers when there are other
sites out there with key-based authentication.
126
Chapter 3. Developer Guides
Elgg Documentation, Release master
OAuth
With the addition of the OAuth plugin, Elgg also fully supports the OAuth 1.0a authorization standard. Clients can
then use standard OAuth libraries to make any API calls to the site.
3.25.3 User authentication
So far you have been allowing developers to pull data out of your Elgg site. Now we’ll move on to pushing data into
Elgg. In this case, it is going to be done by a user. Maybe you have created a desktop application that allows your
Users to post to the wire without going to the site. You need to expose a method for posting to the wire and you
need to make sure that a user cannot post using someone else’s account. Elgg provides a token-based approach for
user authentication. It allows a user to submit their username and password in exchange for a token using the method
auth.gettoken. This token can then be used for some amount of time to authenticate all calls to the API before it
expires by passing it as the parameter auth_token. If you do not want to have your users trusting their passwords
to 3rd-party applications, you can also extend the current capability to use an approach like OAuth.
Let’s write our wire posting function:
function my_post_to_wire($text) {
$text = substr($text, 0, 140);
$access = ACCESS_PUBLIC;
// returns guid of wire post
return thewire_save_post($text, $access, "api");
}
Exposing this function is the same as the previous except we require user authentication and we’re going to make this
use POST rather than GET HTTP requests.
elgg_ws_expose_function("thewire.post",
"my_post_to_wire",
array("text" => array(’type’ => ’string’)),
’Post to the wire. 140 characters or less’,
’POST’,
true,
true
);
Please note that you will not be able to test this using a web browser as you did with the other methods. You need to
write some client code to do this. There is some example client code in /engine/lib/api.php. Take a look at
send_api_post_call(). You can also do a search for clients that have been written for the APIs of Flickr or Twitter or
any other similar API. You will find a wide variety written in almost any language you can think of.
3.25.4 Building out your API
As soon as you feel comfortable with Elgg’s web services API framework, you will want to step back and design your
API. What sort of data are you trying to expose? Who or what will be API users? How do you want them to get
access to authentication keys? How are you going to document your API? Be sure to take a look at the APIs created
by popular Web 2.0 sites for inspiration. If you are looking for 3rd party developers to build applications using your
API, you will probably want to provide one or more language-specific clients.
3.25. Web services
127
Elgg Documentation, Release master
3.25.5 Determining the authentication available
Elgg’s web services API uses a type of pluggable authentication module (PAM) architecture to manage how users and
developers are authenticated. This provides you the flexibility to add and remove authentication modules. Do you
want to not use the default user authentication PAM but would prefer using OAuth? You can do this.
The first step is registering a callback function for the rest, init plugin hook:
register_plugin_hook(’rest’, ’init’, ’rest_plugin_setup_pams’);
Then in the callback function, you register the PAMs that you want to use:
function rest_plugin_setup_pams() {
// user token can also be used for user authentication
register_pam_handler(’pam_auth_usertoken’);
// simple API key check
register_pam_handler(’api_auth_key’, "sufficient", "api");
// override the default pams
return true;
}
When testing, you may find it useful to register the pam_auth_session PAM so that you can easily test your
methods from the browser. Be careful not to use this PAM on a production site because it could open up your users to
a CSRF attack.
Right now, the only other PAMs publicly available besides those provided by the Elgg core are the OAuth PAMs. See
Justin Richer’s OAuth plugin for more detail.
3.25.6 Related
HMAC Authentication
Elgg’s RESTful API framework provides functions to support a HMAC signature scheme for API authentication. The
client must send the HMAC signature together with a set of special HTTP headers when making a call that requires
API authentication. This ensures that the API call is being made from the stated client and that the data has not been
tampered with.
The HMAC must be constructed over the following data:
• The public API key identifying you to the Elgg api server as provided by the APIAdmin plugin
• The private API Key provided by Elgg (that is companion to the public key)
• The current unix time in seconds
• A nonce to guarantee two requests the same second have different signatures
• URL encoded string representation of any GET variable parameters, eg method=test.test&foo=bar
• If you are sending post data, the hash of this data
Some extra information must be added to the HTTP header in order for this data to be correctly processed:
• X-Elgg-apikey - The public API key
• X-Elgg-time - Unix time used in the HMAC calculation
• X-Elgg-none - a random string
• X-Elgg-hmac - The HMAC as base64 encoded
128
Chapter 3. Developer Guides
Elgg Documentation, Release master
• X-Elgg-hmac-algo - The algorithm used in the HMAC calculation - eg, sha1, md5 etc.
If you are sending POST data you must also send:
• X-Elgg-posthash - The hash of the POST data
• X-Elgg-posthash-algo - The algorithm used to produce the POST data hash - eg, md5
• Content-type - The content type of the data you are sending (if in doubt use application/octet-stream)
• Content-Length - The length in bytes of your POST data
Elgg provides a sample API client that implements this HMAC signature: send_api_call(). It serves as a good reference
on how to implement it.
3.26 Upgrading Plugins
Prepare your plugin for the next version of Elgg.
See the administrator guides for how to upgrade a live site.
Contents
• From 1.11 to 2.0
– Breadcrumbs
– Plugin Messages
• From 1.10 to 1.11
• From 1.9 to 1.10
– File uploads
• From 1.8 to 1.9
– The manifest file
– $CONFIG and $vars[’config’]
– Language files
– Notifications
– Adding items to the Activity listing
– Entity URL handlers
– Web services
• From 1.7 to 1.8
– Updating core
– Updating plugins
3.26.1 From 1.11 to 2.0
Breadcrumbs
Breadcrumb display now removes the last item if it does not contain a link. To restore the previous behavior, replace
the plugin hook handler elgg_prepare_breadcrumbs with your own:
elgg_unregister_plugin_hook_handler(’prepare’, ’breadcrumbs’, ’elgg_prepare_breadcrumbs’);
elgg_register_plugin_hook_handler(’prepare’, ’breadcrumbs’, ’myplugin_prepare_breadcrumbs’);
function myplugin_prepare_breadcrumbs($hook, $type, $breadcrumbs, $params) {
// just apply excerpt to titles
foreach (array_keys($breadcrumbs) as $i) {
3.26. Upgrading Plugins
129
Elgg Documentation, Release master
$breadcrumbs[$i][’title’] = elgg_get_excerpt($breadcrumbs[$i][’title’], 100);
}
return $breadcrumbs;
}
Plugin Messages
Messages will no longer get the metadata ‘msg’ for newly created messages. This means you can not rely on that
metadata to exist.
3.26.2 From 1.10 to 1.11
3.26.3 From 1.9 to 1.10
File uploads
If your plugin is using a snippet copied from the file/upload action to fix detected mime types for Microsoft
zipped formats, it can now be safely removed.
If your upload action performs other manipulations on detected mime and simple types, it is recommended to make
use of available plugin hooks:
• ’mime_type’,’file’ for filtering detected mime types
• ’simple_type’,’file’ for filtering parsed simple types
3.26.4 From 1.8 to 1.9
In the examples we are upgrading an imaginary “Photos” plugin.
Only the key changes are included. For example some of the deprecated functions are not mentioned here separately.
Each section will include information whether the change is backwards compatible with Elgg 1.8.
The manifest file
No changes are needed if your plugin is compatible with 1.8.
It’s however recommended to add the <id> tag. It’s value should be the name of the directory where the plugin is
located inside the mod/ directory.
If you make changes that break BC, you must update the plugin version and the required Elgg release.
Example of (shortened) old version:
<?xml version="1.0" encoding="UTF-8"?>
<plugin_manifest xmlns="http://www.elgg.org/plugin_manifest/1.8">
<name>Photos</name>
<author>John Doe</author>
<version>1.0</version>
<description>Adds possibility to upload photos and arrange them into albums.</description>
<requires>
<type>elgg_release</type>
<version>1.8</version>
130
Chapter 3. Developer Guides
Elgg Documentation, Release master
</requires>
</plugin_manifest>
Example of (shortened) new version:
<?xml version="1.0" encoding="UTF-8"?>
<plugin_manifest xmlns="http://www.elgg.org/plugin_manifest/1.8">
<name>Photos</name>
<id>photos</id>
<author>John Doe</author>
<version>2.0</version>
<description>Adds possibility to upload photos and arrange them into albums.</description>
<requires>
<type>elgg_release</type>
<version>1.9</version>
</requires>
</plugin_manifest>
$CONFIG and $vars[’config’]
Both the global $CONFIG variable and the $vars[’config’] parameter have been deprecated. They should be
replaced with the elgg_get_config() function.
Example of old code:
// Using the global $CONFIG variable:
global $CONFIG;
$plugins_path = $CONFIG->plugins_path
// Using the $vars view parameter:
$plugins_path = $vars[’plugins_path’];
Example of new code:
$plugins_path = elgg_get_config(’plugins_path’);
Note: Compatible with 1.8
Note: See how the community_plugins plugin was updated: https://github.com/Elgg/community_plugins/commit/f233999bbd1478a200
Language files
In Elgg 1.8 the language files needed to use the add_translation() function. In 1.9 it is enough to just return
the array that was previously passed to the function as a parameter. Elgg core will use the file name (e.g. en.php) to
tell which language the file contains.
Example of the old way in languages/en.php:
$english = array(
’photos:all’ => ’All photos’,
);
add_translation(’en’, $english);
Example of new way:
3.26. Upgrading Plugins
131
Elgg Documentation, Release master
return array(
’photos:all’ => ’All photos’,
);
Warning: Not compatible with 1.8
Notifications
One of the biggest changes in Elgg 1.9 is the notifications system. The new system allows more flexible and scalable
way of sending notifications.
Example of the old way:
function photos_init() {
// Tell core that we want to send notifications about new photos
register_notification_object(’object’, ’photo’, elgg_echo(’photo:new’));
// Register a handler that creates the notification message
elgg_register_plugin_hook_handler(’notify:entity:message’, ’object’, ’photos_notify_message’);
}
/**
* Set the notification message body
*
Hook name
* @param string $hook
Hook type
* @param string $type
* @param string $message The current message body
* @param array $params Parameters about the photo
* @return string
*/
function photos_notify_message($hook, $type, $message, $params) {
$entity = $params[’entity’];
$to_entity = $params[’to_entity’];
$method = $params[’method’];
if (elgg_instanceof($entity, ’object’, ’photo’)) {
$descr = $entity->excerpt;
$title = $entity->title;
$owner = $entity->getOwnerEntity();
return elgg_echo(’photos:notification’, array(
$owner->name,
$title,
$descr,
$entity->getURL()
));
}
return null;
}
Example of the new way:
function photos_init() {
elgg_register_notification_event(’object’, ’photo’, array(’create’));
elgg_register_plugin_hook_handler(’prepare’, ’notification:publish:object:photo’, ’photos_prepare
}
/**
* Prepare a notification message about a new photo
132
Chapter 3. Developer Guides
Elgg Documentation, Release master
*
$hook
Hook name
* @param string
$type
Hook type
* @param string
* @param Elgg_Notifications_Notification $notification The notification to prepare
$params
Hook parameters
* @param array
* @return Elgg_Notifications_Notification
*/
function photos_prepare_notification($hook, $type, $notification, $params) {
$entity = $params[’event’]->getObject();
$owner = $params[’event’]->getActor();
$recipient = $params[’recipient’];
$language = $params[’language’];
$method = $params[’method’];
// Title for the notification
$notification->subject = elgg_echo(’photos:notify:subject’, array($entity->title), $language);
// Message body for the notification
$notification->body = elgg_echo(’photos:notify:body’, array(
$owner->name,
$entity->title,
$entity->getExcerpt(),
$entity->getURL()
), $language);
// The summary text is used e.g. by the site_notifications plugin
$notification->summary = elgg_echo(’photos:notify:summary’, array($entity->title), $language);
return $notification;
}
Warning: Not compatible with 1.8
Note:
See how the community_plugins plugin was updated to use the
https://github.com/Elgg/community_plugins/commit/bfa356cfe8fb99ebbca4109a1b8a1383b70ff123
new
system:
Notifications can also be sent with the notify_user() function.
It has however been updated to support three new optional parameters passed inside an array as the fifth parameter.
The parameters give notification plugins more control over the notifications, so they should be included whenever
possible. For example the bundled site_notifications plugin won’t work properly if the parameters are missing.
Parameters:
• object The object that we are notifying about (e.g. ElggEntity or ElggAnnotation). This is needed so that
notification plugins can provide a link to the object.
• action String that describes the action that triggered the notification (e.g. “create”, “update”, etc).
• summary String that contains a summary of the notification. (It should be more informative than the notification
subject but less informative than the notification body.)
Example of the old way:
// Notify $owner that $user has added a $rating to an $entity created by him
$subject = elgg_echo(’rating:notify:subject’);
$body = elgg_echo(’rating:notify:body’, array(
3.26. Upgrading Plugins
133
Elgg Documentation, Release master
$owner->name,
$user->name,
$entity->title,
$entity->getURL(),
));
notify_user($owner->guid,
$user->guid,
$subject,
$body
);
Example of the new way:
// Notify $owner that $user has added a $rating to an $entity created by him
$subject = elgg_echo(’rating:notify:subject’);
$summary = elgg_echo(’rating:notify:summary’, array($entity->title));
$body = elgg_echo(’rating:notify:body’, array(
$owner->name,
$user->name,
$entity->title,
$entity->getURL(),
));
$params = array(
’object’ => $rating,
’action’ => ’create’,
’summary’ => $summary,
);
notify_user($owner->guid,
$user->guid,
$subject,
$body,
$params
);
Note: Compatible with 1.8
Adding items to the Activity listing
add_to_river(’river/object/photo/create’, ’create’, $user_guid, $photo_guid);
elgg_create_river_item(array(
’view’ => ’river/object/photo/create’,
’action_type’ => ’create’,
’subject_guid’ => $user_guid,
’object_guid’ => $photo_guid,
));
You can also add the optional target_guid parameter which tells the target of the create action.
If the photo would had been added for example into a photo album, we could add it by passing in also:
134
Chapter 3. Developer Guides
Elgg Documentation, Release master
’target_guid’ => $album_guid,
Warning: Not compatible with 1.8
Entity URL handlers
The elgg_register_entity_url_handler() function has been deprecated. In 1.9 you should use the
’entity:url’, ’object’ plugin hook instead.
Example of the old way:
/**
* Initialize the photo plugin
*/
my_plugin_init() {
elgg_register_entity_url_handler(’object’, ’photo’, ’photo_url_handler’);
}
/**
* Returns the URL from a photo entity
*
* @param ElggEntity $entity
* @return string
*/
function photo_url_handler($entity) {
return "photo/view/{$entity->guid}";
}
Example of the new way:
/**
* Initialize the photo plugin
*/
my_plugin_init() {
elgg_register_plugin_hook_handler(’entity:url’, ’object’, ’photo_url_handler’);
}
/**
* Returns the URL from a photo entity
*
’entity:url’
* @param string $hook
’object’
* @param string $type
The current URL
* @param string $url
* @param array $params Hook parameters
* @return string
*/
function photo_url_handler($hook, $type, $url, $params) {
$entity = $params[’entity’];
// Check that the entity is a photo object
if ($entity->getSubtype() !== ’photo’) {
// This is not a photo object, so there’s no need to go further
return;
}
return "photo/view/{$entity->guid}";
}
3.26. Upgrading Plugins
135
Elgg Documentation, Release master
Warning: Not compatible with 1.8
Web services
In Elgg 1.8 the web services API was included in core and methods were exposed using expose_function().
To enable the same functionality for Elgg 1.9, enable the “Web services 1.9” plugin and replace all calls to
expose_function() with elgg_ws_expose_function().
3.26.5 From 1.7 to 1.8
Elgg 1.8 is the biggest leap forward in the development of Elgg since version 1.0. As such, there is more work to
update core and plugins than with previous upgrades. There were a small number of API changes and following our
standard practice, the methods we deprecated have been updated to work with the new API. The biggest changes are
in the standardization of plugins and in the views system.
Updating core
Delete the following core directories (same level as _graphics and engine):
• _css
• account
• admin
• dashboard
• entities
• friends
• search
• settings
• simplecache
• views
Warning: If you do not delete these directories before an upgrade, you will have problems!
Updating plugins
Use standardized routing with page handlers
• All: /page_handler/all
• User’s content: /page_handler/owner/:username
• User’s friends’ content: /page_handler/friends/:username
• Single entity: /page_handler/view/:guid/:title
• Added: /page_handler/add/:container_guid
• Editing: /page_handler/edit/:guid
136
Chapter 3. Developer Guides
Elgg Documentation, Release master
• Group list: /page_handler/group/:guid/all
Include page handler scripts from the page handler
Almost every page handler should have a page handler script.
mod/bookmarks/pages/bookmarks/all.php)
(Example:
bookmarks/all =>
• Call set_input() for entity guids in the page handler and use get_input() in the page handler scripts.
• Call gatekeeper() and admin_gatekeeper() in the page handler function if required.
• The group URL should use the pages/:handler/owner.php script.
• Page handlers should not contain HTML.
• Update the URLs throughout the plugin. (Don’t forget to remove /pg/!)
Use standardized page handlers and scripts
• Store page handler scripts in mod/:plugin/pages/:page_handler/:page_name.php
• Use the content page layout in page handler scripts:
$content = elgg_view_layout(’content’, $options);
• Page handler scripts should not contain HTML.
• Call elgg_push_breadcrumb() in the page handler scripts.
• No need to set page owner if the URLs are in the standardized format.
• For group content, check the container_guid by using elgg_get_page_owner_entity().
The object/:subtype view
• Make sure there are views for $vars[’full_view’] == true and $vars[’full_view’] ==
false. $vars[’full_view’] replaced $vars[’full].
• Check for the object in $vars[’entity’]. Use elgg_instance_of() to make sure it’s the type of
entity you want.
• Return true to short circuit the view if the entity is missing or wrong.
• Use elgg_view(‘object/elements/summary’, array(‘entity’ => $entity)); and
elgg_view_menu(‘entity’, array(‘entity’ => $entity)); to help format. You should use
very little markup in these views.
Update action structure
• Namespace action files and action names (example:
action/blog/save)
mod/blog/actions/blog/save.php =>
• Use the following action URLs:
– Add: action/:plugin/save
– Edit: action/:plugin/save
– Delete: action/:plugin/delete
3.26. Upgrading Plugins
137
Elgg Documentation, Release master
• Make the delete action accept action/:handler/delete?guid=:guid so the metadata entity menu
has the correct URL by default.
Update deprecated functions
• Functions deprecated in 1.7 will produce visible errors in 1.8.
– See /engine/lib/deprecated-1.7.php for the full list.
• You can also update functions deprecated in 1.8.
– Many registration functions simply added an elgg_ prefix for consistency, and should be easy to update.
– See /engine/lib/deprecated-1.8.php for the full list.
– You can set the debug level to “warning” to get visual reminders of deprecated functions.
Update the widget views
See the blog or file widgets for examples.
Update the group profile module
Use the blog or file plugins for examples. This will help with making your plugin themeable by the new CSS framework.
Update forms
• Move form bodies to the forms/:action view to use Evan’s new elgg_view_form.
• Use input views in form bodies rather than html. This helps with theming and future-proofing.
• Add a function that prepares the form (see mod/file/lib/file.php for an example)
• Make your forms sticky (see the file plugin’s upload action and form prepare function).
The forms API is discussed in more detail in Forms + Actions.
Clean up CSS/HTML
We have added many CSS patterns to the base CSS file (modules, image block, spacing primitives). We encourage
you to use these patterns and classes wherever possible. Doing so should:
1. Reduce maintenance costs, since you can delete most custom CSS.
2. Make your plugin more compatible with community themes.
Look for patterns that can be moved into core if you need significant CSS.
We use hyphens rather than underscores in classes/ids and encourage you do the same for consistency.
If you do need your own CSS, you should use your own namespace, rather than elgg-.
138
Chapter 3. Developer Guides
Elgg Documentation, Release master
Update manifest.xml
• Use http://el.gg/manifest17to18 to automate this.
• Don’t use the “bundled” category with your plugins. That is only for plugins distributed with Elgg.
Update settings and user settings views
• The view for settings is now plugins/:plugin/settings (previously settings/:plugin/edit).
• The view for user settings is
usersettings/:plugin/edit).
now
plugins/:plugin/usersettings
(previously
3.27 List of events in core
Contents
•
•
•
•
•
•
•
•
System events
User events
Relationship events
Entity events
Metadata events
Annotation events
River events
Notes
3.27.1 System events
boot, system First event triggered. Triggered before plugins have been loaded.
plugins_boot, system Triggered just after the plugins are loaded. Rarely used. init, system is used instead.
init, system Plugins tend to use this event for initialization (extending views, registering callbacks, etc.)
ready, system Triggered after the init, system event. All plugins are fully loaded and the engine is ready to
serve pages.
pagesetup, system Called just before the first content is produced. Is triggered by elgg_view().
shutdown, system Triggered after the page has been sent to the user. Expensive operations could be done here and
not make the user wait.
Note: Depending upon your server configuration the PHP output might not be shown until after the process is
completed. This means that any long-running processes will still delay the page load.
log, systemlog Called for all triggered events. Used internally by system_log_default_logger() to populate
the system_log table.
upgrade, system Triggered after a system upgrade has finished. All upgrade scripts have run, but the caches are not
cleared.
upgrade, upgrade
3.27. List of events in core
139
Elgg Documentation, Release master
A single upgrade script finished executing. Handlers are passed a stdClass object with the properties
• from - The version of Elgg upgrading from.
• to - The version just upgraded to.
activate, plugin Return false to prevent activation of the plugin.
deactivate, plugin Return false to prevent deactivation of the plugin.
init:cookie, <name> Return false to override setting a cookie.
3.27.2 User events
login:before, user Triggered during login. Returning false prevents the user from logging
login:after, user Triggered after the user logs in.
logout:before, user Triggered during logout. Returning false should prevent the user from logging out.
logout:after, user Triggered after the user logouts.
validate, user When a user registers, the user’s account is disabled. This event is triggered to allow a plugin to
determine how the user should be validated (for example, through an email with a validation link).
profileupdate, user User has changed profile
profileiconupdate, user User has changed profile icon
ban, user Triggered before a user is banned. Return false to prevent.
unban, user Triggered before a user is unbanned. Return false to prevent.
make_admin, user Triggered before a user is promoted to an admin. Return false to prevent.
remove_admin, user Triggered before a user is demoted from an admin. Return false to prevent.
3.27.3 Relationship events
create, <relationship> Triggered after a relationship has been created. Returning false deletes the relationship that
was just created.
delete, <relationship> Triggered before a relationship is deleted. Return false to prevent it from being deleted.
join, group Triggered after the user $params[’user’] has joined the group $params[’group’].
leave, group Triggered before the user $params[’user’] has left the group $params[’group’].
3.27.4 Entity events
create, <entity type> Triggered for user, group, object, and site entities after creation. Return false to delete entity.
update, <entity type> Triggered before an update for the user, group, object, and site entities. Return false to prevent
update.
delete, <entity type> Triggered before entity deletion. Return false to prevent deletion.
disable, <entity type> Triggered before the entity is disabled. Return false to prevent disabling.
disable:after, <entity type> Triggered after the entity is disabled.
enable, <entity type> Return false to prevent enabling.
140
Chapter 3. Developer Guides
Elgg Documentation, Release master
enable:after, <entity type> Triggered after the entity is enabled.
3.27.5 Metadata events
create, metadata Called after the metadata has been created. Return false to delete the metadata that was just created.
update, metadata Called after the metadata has been updated. Return false to delete the metadata.
delete, metadata Called before metadata is deleted. Return false to prevent deletion.
enable, metadata Called when enabling metadata. Return false to prevent enabling.
disable, metadata Called when disabling metadata. Return false to prevent disabling.
3.27.6 Annotation events
annotate, <entity type> Called before the annotation has been created. Return false to prevent annotation of this
entity.
create, annotation Called after the annotation has been created. Return false to delete the annotation.
update, annotation Called after the annotation has been updated. Return false to delete the annotation.
delete, annotation Called before annotation is deleted. Return false to prevent deletion.
enable, annotation Called when enabling annotations. Return false to prevent enabling.
disable, annotations Called when disabling annotations. Return false to prevent disabling.
3.27.7 River events
created, river Called after a river item is created.
3.27.8 Notes
Because of bugs in the Elgg core, some events may be thrown more than once on the same action. For example,
update, object is thrown twice.
3.28 List of plugin hooks in core
Contents
•
•
•
•
•
•
•
•
•
System hooks
User hooks
Object hooks
Action hooks
Permission hooks
Views
Files
Other
Plugins
3.28. List of plugin hooks in core
141
Elgg Documentation, Release master
3.28.1 System hooks
email, system Triggered when sending email. $params contains:
• to
• from
• subject
• body
• headers
• params
page_owner, system Filter the page_owner for the current page. No options are passed.
siteid, system
gc, system Allows plugins to run garbage collection for $params[’period’].
unit_test, system Add a Simple Test test. (Deprecated.)
diagnostics:report, system Filter the output for the diagnostics report download.
search_types, get_types
cron, <period> Triggered by cron for each period.
validate, input Filter GET and POST input. This is used by get_input() to sanitize user input.
geocode, location Deprecated as of 1.9.
diagnostics:report, system Filters the output for a diagnostic report.
debug, log Triggered by the Logger. Return false to stop the default logging method. $params includes:
• level - The debug level. One of:
– Elgg_Logger::OFF
– Elgg_Logger::ERROR
– Elgg_Logger::WARNING
– Elgg_Logger::NOTICE
– Elgg_Logger::INFO
• msg - The message
• display - Should this message be displayed?
format, friendly:title Formats the “friendly” title for strings. This is used for generating URLs.
format, friendly:time Formats the “friendly” time for the timestamp $params[’time’].
format, strip_tags Filters a string to
$params[’original_string’]
$params[’allowed_tags’].
remove tags.
and an optional
The original string
set of allowed tags
is
is
passed
passed
as
as
output:before, page In elgg_view_page(), this filters $vars before it’s passed to the page shell
view (page/<page_shell>). To stop sending the X-Frame-Options header, unregister the handler
_elgg_views_send_header_x_frame_options() from this hook.
output, page In elgg_view_page(), this filters the output return value.
output:before, layout In elgg_view_layout(), filters $params before it’s passed to the layout view.
142
Chapter 3. Developer Guides
Elgg Documentation, Release master
output:after, layout In elgg_view_layout(), filters the return value of the layout view.
output, ajax Triggered in the ajax forward hook that is called for ajax requests. Allows plugins to alter the output
returned, including the forward URL, system messages, and errors.
register, menu:<menu_name> Triggered by elgg_view_menu(). Used to add dynamic menu items.
prepare, menu:<menu_name> Trigger by elgg_view_menu(). Used to sort, add, remove, and modify menu
items.
creating, river Triggered before a river item is created. Return false to prevent river item from being created.
simplecache:generate, <view> Triggered when generating the cached content of a view.
get, subscriptions Filter
notification
subscriptions
$params[’event’]. Return an array like:
for
users
for
the
Elgg_Notifications_Event
array(
<user guid> => array(’subscription’, ’types’),
<user_guid2> => array(’email’, ’sms’, ’ajax’)
);
prepare, breadcrumbs In elgg_get_breadcrumbs(), this filters the registered breadcrumbs before returning them,
allowing a plugin to alter breadcrumb strategy site-wide.
add, river
3.28.2 User hooks
usersettings:save, user Triggered in the aggregate action to save user settings. Return false prevent sticky forms from
being cleared.
access:collections:write, user Filters an array of access permissions that the user $params[’user_id’] is allowed to save content with. Permissions returned are of the form (id => ‘Human Readable Name’).
registeruser:validate:username, all Return boolean for if the string in $params[’username’] is valid for a
username.
registeruser:validate:password, all Return boolean for if the string in $params[’password’] is valid for a
password.
registeruser:validate:email, all Return boolean for if the string in $params[’email’] is valid for an email address.
register, user Triggered after user registers. Return false to delete the user.
login:forward, user Filters the URL to which the user will be forwarded after login.
find_active_users, system Return the number of active users.
status, user Triggered by The Wire when adding a post.
username:character_blacklist, user Filters the string of blacklisted characters used to validate username during
registration. The return value should be a string consisting of the disallowed characters. The default string can
be found from $params[’blacklist’].
3.28.3 Object hooks
comments, <entity_type> Triggered in elgg_view_comments().
page/elements/comments view.
If returning content, this overrides the
comments:count, <entity_type> Return the number of comments on $params[’entity’].
3.28. List of plugin hooks in core
143
Elgg Documentation, Release master
likes:count, <entity_type> Return the number of likes for $params[’entity’].
3.28.4 Action hooks
action, <action> Triggered before executing action scripts. Return false to abort action.
action_gatekeeper:permissions:check, all Triggered after a CSRF token is validated. Return false to prevent validation.
action_gatekeeper:upload_exceeded_msg, all Triggered when a POST exceeds the max size allowed by the server.
Return an error message to display.
forward, <reason> Filter the URL to forward a user to when forward($url, $reason) is called.
3.28.5 Permission hooks
container_permissions_check, <entity_type> Return boolean for if the user $params[’user’] can use
the entity $params[’container’] as a container for an entity of <entity_type> and subtype
$params[’subtype’].
permissions_check, <entity_type> Return boolean for if the user $params[’user’] can edit the entity
$params[’entity’].
permissions_check, widget_layout Return boolean for if $params[’user’] can edit the widgets in the context
passed as $params[’context’] and with a page owner of $params[’page_owner’].
permissions_check:metadata, <entity_type> Return boolean for if the user $params[’user’] can edit the
metadata $params[’metadata’] on the entity $params[’entity’].
permissions_check:comment, <entity_type> Return boolean for if the user $params[’user’] can comment on
the entity $params[’entity’].
permissions_check:annotate Return boolean for if the user $params[’user’] can create an annotation with the
name $params[’annotation’] on the entity $params[’entity’].
Warning: This is functions differently than the permissions_check:metadata hook by passing the
annotation name instead of the metadata object.
permissions_check:annotation Return boolean for if the user in $params[’user’] can edit the annotation
$params[’annotation’] on the entity $params[’entity’]. The user can be null.
fail, auth Return the failure message if authentication failed. An array of previous PAM failure methods is passed as
$params.
api_key, use Triggered by api_auth_key(). Returning false prevents the key from being authenticated.
access:collections:read, user Filters an array of access IDs that the user $params[’user_id’] can see.
Warning: The handler needs to either not use parts of the API that use the access system (triggering the
hook again) or to ignore the second call. Otherwise, an infinite loop will be created.
access:collections:write, user Filters an array of access IDs that the user $params[’user_id’] can write to.
In get_write_access_array(), this hook filters the return value, so it can be used to alter the available options
in the input/access view. For core plugins, the value “input_params” has the keys “entity” (ElggEntity|false),
“entity_type” (string), “entity_subtype” (string), “container_guid” (int) are provided. An empty entity value
generally means the form is to create a new object.
144
Chapter 3. Developer Guides
Elgg Documentation, Release master
Warning: The handler needs to either not use parts of the API that use the access system (triggering the
hook again) or to ignore the second call. Otherwise, an infinite loop will be created.
access:collections:addcollection, collection Triggered after an access collection $params[’collection_id’]
is created.
access:collections:deletecollection, collection Triggered
before
an
$params[’collection_id’] is deleted. Return false to prevent deletion.
access
collection
access:collections:add_user, collection Triggered before adding user $params[’user_id’] to collection
$params[’collection_id’]. Return false to prevent adding.
access:collections:remove_user, collection Triggered before removing user $params[’user_id’] to collection
$params[’collection_id’]. Return false to prevent removal.
get_sql, access Filters the SQL clauses used in _elgg_get_access_where_sql().
3.28.6 Views
view, <view_name> Filters the returned content of views
layout, page In elgg_view_layout(), filters the layout name
shell, page In elgg_view_page(), filters the page shell name
head, page In elgg_view_page(), filters $vars[’head’]
3.28.7 Files
mime_type, file Return the mimetype for the filename $params[’filename’] with original filename $params[’original_filename’] and with the default detected mimetype of
$params[’default’].
simple_type, file In elgg_get_file_simple_type(), filters the return value.
The hook uses
$params[’mime_type’] (e.g. application/pdf or image/jpeg) and determines an overall
category like document or image. The bundled file plugin and other-third party plugins usually store
simpletype metadata on file entities and make use of it when serving icons and constructing ege* filters
and menus.
3.28.8 Other
default, access In get_default_access(), this hook filters the return value, so it can be used to alter the default value
in the input/access view. For core plugins, the value “input_params” has the keys “entity” (ElggEntity|false),
“entity_type” (string), “entity_subtype” (string), “container_guid” (int) are provided. An empty entity value
generally means the form is to create a new object.
entity:icon:url, <entity_type> Triggered when entity icon URL is requested, see entity icons. Callback should return
URL for the icon of size $params[’size’] for the entity $params[’entity’]. Following parameters
are available through the $params array:
entity Entity for which icon url is requested.
viewtype The type of view e.g. ’default’ or ’json’.
size Size requested, see entity icons for possible values.
Example on how one could default to a Gravatar icon for users that have not yet uploaded an avatar:
3.28. List of plugin hooks in core
145
Elgg Documentation, Release master
// Priority 600 so that handler is triggered after avatar handler
elgg_register_plugin_hook_handler(’entity:icon:url’, ’user’, ’gravatar_icon_handler’, 600);
/**
* Default to icon from gravatar for users without avatar.
*/
function gravatar_icon_handler($hook, $type, $url, $params) {
// Allow users to upload avatars
if ($params[’entity’]->icontime) {
return $url;
}
// Generate gravatar hash for user email
$hash = md5(strtolower(trim($params[’entity’]->email)));
// Default icon size
$size = ’150x150’;
// Use configured size if possible
$config = elgg_get_config(’icon_sizes’);
$key = $params[’size’];
if (isset($config[$key])) {
$size = $config[$key][’w’] . ’x’ . $config[$key][’h’];
}
// Produce URL used to retrieve icon
return "http://www.gravatar.com/avatar/$hash?s=$size";
}
entity:url, <entity_type> Return the URL for the entity $params[’entity’]. Note: Generally it is better to
override the getUrl() method of ElggEntity. This hook should be used when it’s not possible to subclass
(like if you want to extend a bundled plugin without overriding many views).
to:object, <entity_type|metadata|annotation|relationship|river_item> Converts
the
entity
$params[’entity’] to a StdClass object. This is used mostly for exporting entity properties for
portable data formats like JSON and XML.
extender:url, <annotation|metadata> Return
$params[’extender’].
the
URL
for
the
annotation
or
metadatum
file:icon:url, override Override a file icon URL.
is_member, group Return boolean for if the user $params[’user’] is a member of the group
$params[’group’].
entity:annotate, <entity_type> Triggered in elgg_view_entity_annotations(), which is called by
elgg_view_entity(). Can be used to add annotations to all full entity views.
usersetting, plugin Filter user settings for plugins. $params contains:
• user - An ElggUser instance
• plugin - An ElggPlugin instance
• plugin_id - The plugin ID
• name - The name of the setting
• value - The value to set
setting, plugin Filter plugin settings. $params contains:
146
Chapter 3. Developer Guides
Elgg Documentation, Release master
• plugin - An ElggPlugin instance
• plugin_id - The plugin ID
• name - The name of the setting
• value - The value to set
relationship:url, <relationship_name> Filter
$params[’relationship’].
the
URL
for
the
relationship
object
profile:fields, group Filter an array of profile fields. The result should be returned as an array in the format name
=> input view name. For example:
array(
’about’ => ’longtext’
);
profile:fields, profile Filter an array of profile fields. The result should be returned as an array in the format name
=> input view name. For example:
array(
’about’ => ’longtext’
);
widget_settings, <widget_handler> Triggered when saving a widget settings $params[’params’] for widget
$params[’widget’]. If handling saving the settings, the handler should return true to prevent the default
code from running.
get_list, default_widgets Filters a list of default widgets to add for newly registered users. The list is an array of
arrays in the format:
array(
’event’ => $event,
’entity_type’ => $entity_type,
’entity_subtype’ => $entity_subtype,
’widget_context’ => $widget_context
)
rest, init Triggered by the web services rest handler. Plugins can set up their own authentication handlers, then return
true to prevent the default handlers from being registered.
public_pages, walled_garden Filter the URLs that are can be seen by logged out users if Walled Garden is enabled.
$value is an array of regex strings that will allow access if matched.
volatile, metadata Triggered when exporting an entity through the export handler. This is rare. This allows handler
to handle any volatile (non-persisted) metadata on the entity. It’s preferred to use the to:object, <type>
hook.
maintenance:allow, url
Return boolean if the URL $params[’current_url’] and the path $params[’current_path’]
is allowed during maintenance mode.
robots.txt, site Filter the robots.txt values for $params[’site’].
3.28.9 Plugins
Embed
embed_get_items, <active_section>
3.28. List of plugin hooks in core
147
Elgg Documentation, Release master
embed_get_sections, all
embed_get_upload_sections, all
HTMLawed
allowed_styles, htmlawed Filter the HTMLawed allowed style array.
config, htmlawed Filter the HTMLawed config array.
Members
members:list, <page_segment> To handle the page /members/$page_segment, register for this hook and return the HTML of the list.
members:config, tabs This hook is used to assemble an array of tabs to be passed to the navigation/tabs view for the
members pages.
Twitter API
authorize, twitter_api Triggered when a user is authorizes Twitter for a login. $params[’token’] contains the
Twitter authorization token.
Reported Content
reportedcontent:add, system Triggered after adding the reported content object $params[’report’]. Return
false to delete report.
reportedcontent:archive, system Triggered before archiving the reported content object $params[’report’].
Return false to prevent archiving.
reportedcontent:delete, system Triggered before deleting the reported content object $params[’report’]. Return false to prevent deleting.
Search
search, <type>:<subtype> Filter more granular search results than searching by type alone. Must return an array
with count as the total count of results and entities an array of ElggUser entities.
search, tags
search, <type> Filter the search for entities for type $type. Must return an array with count as the total count of
results and entities an array of ElggUser entities.
search_types, get_types Filter an array of search types. This allows plugins to add custom types that don’t correspond
directly to entities.
search_types, get_queries Before a search this filters the types queried. This can be used to reorder the display of
search results.
148
Chapter 3. Developer Guides
CHAPTER 4
Plugin Tutorials
Walk through all the required steps in order to create your own plugins.
The instructions are detailed enough that you don’t need much previous experience on plugin development.
4.1 Hello world
This tutorial shows you how to build a simple plugin that adds a new page and prints the text “Hello world” on it.
In this tutorial we will use the address http://www.mysite.com/ as an example. While developing the plugin
you should use the address of your own site instead of the example address.
4.1.1 Required files
First of all you need a directory that will hold all the files required by the plugin. Go to the mod directory of your Elgg
site and create there a directory with the name hello_world.
Go to the hello_world directory and create these two files inside it:
• start.php
• manifest.xml
Copy this to the manifest.xml file:
<?xml version="1.0" encoding="UTF-8"?>
<plugin_manifest xmlns="http://www.elgg.org/plugin_manifest/1.8">
<name>Hello world</name>
<id>hello_world</id>
<author>Your name here</author>
<version>1.0</version>
<description>Adds a page that prints "Hello world".</description>
<requires>
<type>elgg_release</type>
<version>1.9</version>
</requires>
</plugin_manifest>
Add your name to the <author></author> element.
149
Elgg Documentation, Release master
The plugin has now the minimum requirements for your site to recognize it. Log in to your site as an administrator
and access the plugins page at the administration panel. By default the plugin is at the bottom of the plugins list. Click
the “Activate” button to start it.
Figure 4.1: The Hello world plugin has appeared to the bottom of the plugin list
4.1.2 Initializing the plugin
The next step is to add some actual features. Open the start.php and copy this to it:
<?php
elgg_register_event_handler(’init’, ’system’, ’hello_world_init’);
function hello_world_init() {
}
This piece of code tells Elgg that it should call the function hello_world_init() when the Elgg core system is
initiated.
4.1.3 Registering a page handler
The next step is to register a page handler which has the purpose of handling request that users make to the URL
http://www.mysite.com/hello/.
Update the start.php to look like this:
<?php
elgg_register_event_handler(’init’, ’system’, ’hello_world_init’);
function hello_world_init() {
elgg_register_page_handler(’hello’, ’hello_world_page_handler’);
}
function hello_world_page_handler() {
$params = array(
’title’ => ’Hello world!’,
’content’ => ’This is my first plugin.’,
’filter’ => ’’,
);
$body = elgg_view_layout(’content’, $params);
echo elgg_view_page(’Hello’, $body);
}
150
Chapter 4. Plugin Tutorials
Elgg Documentation, Release master
The call to elgg_register_page_handler() tells Elgg that it should call the
hello_world_page_handler() when user goes to your site and has “hello” at the end of the URL.
function
The hello_world_page_handler() makes it possible for the users to access the actual page. Inside the function we first give an array of parameters to the elgg_view_layout() function.
The parameters include:
• The title of the page
• The contents of the page
• Filter which is left empty because there’s currently nothing to filter
This creates the basic layout for the page. The layout is then run through elgg_view_page() which assembles
and outputs the full page.
You can now go to the address http://www.mysite.com/hello/ and you should see the page.
Figure 4.2: Elgg is now routing the URL http://www.mysite.com/hello/ to the page you created.
4.2 Customizing the Home Page
Overwrite the default index page on your Elgg install.
4.2.1 start.php
Register a function for the plugin hook called index, system that returns true. This tells Elgg to assume that
another front page has been drawn so it doesn’t display the default page.
Inside start.php you will need something like the following:
<?php
function pluginname_init() {
// Replace the default index page
elgg_register_plugin_hook_handler(’index’, ’system’, ’new_index’);
}
function new_index() {
return !include_once(dirname(__FILE__) . "/pages/index.php");
}
// register for the init, system event when our plugin start.php is loaded
elgg_register_event_handler(’init’, ’system’, ’pluginname_init’);
4.2. Customizing the Home Page
151
Elgg Documentation, Release master
4.2.2 pages/index.php
Then implement the page handler script (/pluginname/pages/index.php) to generate the desired output. Anything
output from this script will become your new home page.
4.3 Building a Blog Plugin
Build a simple blogging plugin using Elgg.
This duplicates features in the bundled blog plugin, so be sure to disable that while working on your own version.
Contents
•
•
•
•
•
•
•
•
•
•
•
Create the plugin skeleton
Create a page for composing the blogs
Create the form for creating a new my_blog post
The action file
The object view
Plugin start.php
Registering a page handler
Trying it out
Displaying list of my_blogs
A user’s blog page
The end
4.3.1 Create the plugin skeleton
The name of the directory under “mod” becomes the id of your plugin:
/mod/my_blog/pages/my_blog/
/mod/my_blog/actions/my_blog/
/mod/my_blog/views/default/my_blog/
You’ll need to add a manifest file in /mod/my_blog/manifest.xml. This file stores basic information about the
plugin. See Plugins for the template. You can also just copy the manifest file from another plugin and then change the
values to fit your new plugin. Be sure to change the author and website, and remove the “bundled” category!
4.3.2 Create a page for composing the blogs
Create the file add.php in /mod/my_blog/pages/my_blog/.
<?php
// make sure only logged in users can see this page
gatekeeper();
// set the title
// for distributed plugins, be sure to use elgg_echo() for internationalization
$title = "Create a new my_blog post";
// start building the main column of the page
$content = elgg_view_title($title);
152
Chapter 4. Plugin Tutorials
Elgg Documentation, Release master
// add the form to this section
$content .= elgg_view_form("my_blog/save");
// optionally, add the content for the sidebar
$sidebar = "";
// layout the page
$body = elgg_view_layout(’one_sidebar’, array(
’content’ => $content,
’sidebar’ => $sidebar
));
// draw the page
echo elgg_view_page($title, $body);
4.3.3 Create the form for creating a new my_blog post
Create a file at /mod/my_blog/views/default/forms/my_blog/save.php that contains the form body.
This corresponds to view that is called above: elgg_view_form("my_blog/save").
The form should have input fields for the title, body and tags. Because you used elgg_view_form(), you do not
need to include form tag markup. The view will be automatically wrapped with:
• a <form> tag and the necessary attributes
• anti-csrf tokens
The form’s action will be "<?php echo elgg_get_site_url() ?>action/my_blog/save", which we
will create in a moment. Here is the content of /mod/my_blog/views/default/forms/my_blog/save.php:
<div>
<label><?php echo elgg_echo("title"); ?></label><br />
<?php echo elgg_view(’input/text’,array(’name’ => ’title’)); ?>
</div>
<div>
<label><?php echo elgg_echo("body"); ?></label><br />
<?php echo elgg_view(’input/longtext’,array(’name’ => ’body’)); ?>
</div>
<div>
<label><?php echo elgg_echo("tags"); ?></label><br />
<?php echo elgg_view(’input/tags’,array(’name’ => ’tags’)); ?>
</div>
<div>
<?php echo elgg_view(’input/submit’, array(’value’ => elgg_echo(’save’))); ?>
</div>
Notice how the form is calling input views like input/longtext. These are built into Elgg and make it easy to
add form components. You can see a complete list of input views in the /views/default/input/ directory.
Warning: The above code is not accessibility-friendly.
4.3. Building a Blog Plugin
153
Elgg Documentation, Release master
4.3.4 The action file
Create the file /mod/my_blog/actions/my_blog/save.php. This will save the blog post to the database.
<?php
// get the form inputs
$title = get_input(’title’);
$body = get_input(’body’);
$tags = string_to_tag_array(get_input(’tags’));
// create a new my_blog object
$blog = new ElggObject();
$blog->subtype = "my_blog";
$blog->title = $title;
$blog->description = $body;
// for now make all my_blog posts public
$blog->access_id = ACCESS_PUBLIC;
// owner is logged in user
$blog->owner_guid = elgg_get_logged_in_user_guid();
// save tags as metadata
$blog->tags = $tags;
// save to database and get id of the new my_blog
$blog_guid = $blog->save();
// if the my_blog was saved, we want to display the new post
// otherwise, we want to register an error and forward back to the form
if ($blog_guid) {
system_message("Your blog post was saved");
forward($blog->getURL());
} else {
register_error("The blog post could not be saved");
forward(REFERER); // REFERER is a global variable that defines the previous page
}
A few fields are built into Elgg objects. Title and description are two of these. It makes sense to use description to
contain the my_blog text. Every entity can have a subtype and in this we are using "my_blog". The tags are stored
as metadata.
Every object in Elgg has a built-in URL automatically, although you can override this if you wish. The getURL()
method is called to get that unique URL.
4.3.5 The object view
Elgg will automatically call the object/my_blog view to view the my_blog post so we need to create the object
view.
Objects in Elgg are a subclass of something called an “entity”. Users, sites, and groups are also subclasses of entity.
All entities can (and should) have a subtype, which allows granular control for listing and displaying. Here, we have
used the subtype “my_blog” to identify a my_blog post, but any alphanumeric string can be a valid subtype. When
picking subtypes, be sure to pick ones that make sense for your plugin.
In /mod/my_blog/views/default/, create a folder /object/ and then create a file my_blog.php in it.
154
Chapter 4. Plugin Tutorials
Elgg Documentation, Release master
Each my_blog post will be passed to this PHP file as $vars[’entity’]. ($vars is an array used in the views
system to pass variables to a view.) The content of object/my_blog.php can just be something like:
<?php
echo elgg_view_title($vars[’entity’]->title);
echo elgg_view(’output/longtext’, array(’value’ => $vars[’entity’]->description));
echo elgg_view(’output/tags’, array(’tags’ => $vars[’entity’]->tags));
The last line takes the tags on the my_blog post and automatically displays them as a series of clickable links. Search
is handled automatically.
(If you’re wondering about the ‘default‘ in /views/default/, you can create alternative views. RSS, OpenDD,
FOAF, mobile and others are all valid view types.)
4.3.6 Plugin start.php
Every plugin has a start.php that initializes it. For this example, we just need to register the action file we created
earlier: Also see a related guide about Forms + Actions.
<?php
elgg_register_action("my_blog/save", elgg_get_plugins_path() . "my_blog/actions/my_blog/save.php");
The action will now be available as /action/my_blog/save. By default, all actions are available only to logged
in users. If you want to make an action available to only admins or open it up to unauthenticated users, you can pass
‘admin’ or ‘public’ as the third parameter of elgg_register_action(), respectively.
4.3.7 Registering a page handler
In order to be able to serve the page that generates the form, you’ll need to register a page handler. Add the following
to your start.php:
elgg_register_page_handler(’my_blog’, ’my_blog_page_handler’);
function my_blog_page_handler($segments) {
if ($segments[0] == ’add’) {
include elgg_get_plugins_path() . ’my_blog/pages/my_blog/add.php’;
return true;
}
return false;
}
Page handling functions need to return true or false. true means the page exists and has been handled by
the page handler. false means that the page does not exist and the user will be forwarded to the site’s 404 page
(requested page does not exist or not found). In this particular example, the URL must contain /my_blog/add for
the user to view a page with a form, otherwise the user will see a 404 page.
4.3.8 Trying it out
If you have not enabled the plugin yet, you will need to go to Administration => Configure => Plugins => Advanced.
Scroll to the bottom until you see your plugin. Click the Enable button.
The page to create a new my_blog post is accessible at http://yoursite/my_blog/add. Try it out.
4.3. Building a Blog Plugin
155
Elgg Documentation, Release master
4.3.9 Displaying list of my_blogs
Let’s also create a page that lists my_blog entries that have been created.
Create /mod/my_blog/pages/my_blog/all.php.
To grab the latest my_blog posts, we’ll use elgg_list_entities. Note that this function returns only the posts
that the user can see, so access restrictions are handled transparently:
$body = elgg_list_entities(array(
’type’ => ’object’,
’subtype’ => ’my_blog’,
));
The function ‘elgg_list_entities‘ (and its cousins) also transparently handle pagination, and even create an RSS feeds
for your my_blogs if you have defined these views.
Finally, we’ll draw the page:
$body = elgg_view_layout(’one_column’, array(’content’ => $body));
echo elgg_view_page("All Site Blogs", $body);
We will then need to modify our my_blog page handler to grab the new page when the URL is set to /my_blog/all.
So, your new my_blog_page_handler() function in start.php should look like:
function my_blog_page_handler($segments) {
switch ($segments[0]) {
case ’add’:
include elgg_get_plugins_path() . ’my_blog/pages/my_blog/add.php’;
break;
case ’all’:
default:
include elgg_get_plugins_path() . ’my_blog/pages/my_blog/all.php’;
break;
}
return true;
}
Now, if the URL contains just /my_blog or /my_blog/all, the user will see an “All Site Blogs” page.
4.3.10 A user’s blog page
If we grab the Global Unique IDentifier (GUID) of the logged in user, we can limit the my_blog posts to those posted
by specifying the owner_guid argument in the list function above.
echo elgg_list_entities(array(
’type’ => ’object’,
’subtype’ => ’my_blog’,
’owner_guid’ => elgg_get_logged_in_user_guid()
));
4.3.11 The end
There’s much more that could be done for this plugin, but hopefully this gives you a good idea of how to get started
with your own.
156
Chapter 4. Plugin Tutorials
Elgg Documentation, Release master
4.4 Integrating a Rich Text Editor
Build your own wysiwyg plugin.
Elgg is bundled with a plugin for CKEditor, and previously shipped with TinyMCE support. However, if you have a
wysiwyg that you prefer, you could use this tutorial to help you build your own.
All forms in Elgg should try to use the provided input views located in views/default/input. If these views
are used, then it is simple for plugin authors to replace a view, in this case longtext.php, with their wysiwyg.
4.4.1 Create your plugin skeleton
You will need to create your plugin and give it a start.php file where the plugin gets initialized, as well as a manifest.xml
file to tell the Elgg engine about your plugin.
Read more in the guide about Plugins.
4.4.2 Add the WYSIWYG library code
Now you need to upload TinyMCE into a directory in your plugin. We strongly encourage you to put third party
libraries in a “vendors” directory, as that is standard practice in Elgg plugins and will make your plugin much more
approachable by other developers:
mod/tinymce/vendors/tinymce/
4.4.3 Tell Elgg when and how to load TinyMCE
Now that you have:
• created your start file
• intialized the plugin
• uploaded the wysiwyg code
It is time to tell Elgg how to apply TinyMCE to longtext fields.
We’re going to do that by extending the input/longtext view and including some javascript.
tinymce/longtext and add the following code:
Create a view
<?php
/**
* Elgg long text input with the tinymce text editor intacts
* Displays a long text input field
*
* @package ElggTinyMCE
*
*
*/
?>
<!-- include tinymce -->
<script language="javascript" type="text/javascript" src="<?php echo $vars[’url’]; ?>mod/tinymce/tiny
<!-- intialise tinymce, you can find other configurations here http://wiki.moxiecode.com/examples/tin
<script language="javascript" type="text/javascript">
4.4. Integrating a Rich Text Editor
157
Elgg Documentation, Release master
tinyMCE.init({
mode : "textareas",
theme : "advanced",
theme_advanced_buttons1 : "bold,italic,underline,separator,strikethrough,justifyleft,justifycente
theme_advanced_buttons2 : "",
theme_advanced_buttons3 : "",
theme_advanced_toolbar_location : "top",
theme_advanced_toolbar_align : "left",
theme_advanced_statusbar_location : "bottom",
theme_advanced_resizing : true,
extended_valid_elements : "a[name|href|target|title|onclick],img[class|src|border=0|alt|title|hsp
hr[class|width|size|noshade],font[face|size|color|style],span[class|align|style]"
});
</script>
Then, in your plugin’s init function, extend the input/longtext view
function tinymce_init() {
elgg_extend_view(’input/longtext’, ’tinymce/longtext’);
}
That’s it! Now every time someone uses input/longtext, TinyMCE will be loaded and applied to that textarea.
4.5 Basic Widget
Create a widget that will display “Hello, World!” and optionally any text the user wants.
In Elgg, widgets are those components that you can drag onto your profile or admin dashboard.
This tutorial assumes you are familiar with basic Elgg concepts such as:
• Views
• Plugins
You should review those if you get confused along the way.
Contents
•
•
•
•
Registering your plugin
Adding the widget view code
Registering your widget
Allow user customization
4.5.1 Registering your plugin
Plugins are always placed in the /mod directory. Create a subdirectory there called hello. This will be the name of
your plugin and will show up in the Plugins Administration section of Elgg by this name.
In /mod/hello, create an empty file called start.php. If this file exists, Elgg will load your plugin. Otherwise,
you will see a misconfigured plugin error. Go to the admin section of your Elgg install and enable your plugin. Click
on the “more info” link under your plugin name. You will notice that nothing happens.
• Copy the manifest.xml file from one of the plugins in your elgg install into /mod/hello.
• Update its values so you are listed as the author and change the description to describe this new plugin.
158
Chapter 4. Plugin Tutorials
Elgg Documentation, Release master
• Reload the Tools Administration page in your browser and check “more info” again.
• It will now display the information that you’ve entered.
4.5.2 Adding the widget view code
Elgg automatically scans particular directories under plugins looking for particular files. Views make it easy to add
your display code or do other things like override default Elgg behavior. For now, we will just be adding the view code
for your widget. Create a file at /mod/hello/views/default/widgets/helloworld/content.php.
“helloworld” will be the name of your widget within the hello plugin. In this file add the code:
<?php
echo "Hello, world!";
This will add these words to the widget canvas when it is drawn. Elgg takes care of loading the widget.
4.5.3 Registering your widget
Elgg needs to be told explicitly that the plugin contains a widget so that it will scan the widget views directory. This
is done by calling the elgg_register_widget_type() function. Edit /mod/hello/start.php. In it add these lines:
<?php
function hello_init() {
elgg_register_widget_type(’helloworld’, ’Hello, world!’, ’The "Hello, world!" widget’);
}
elgg_register_event_handler(’init’, ’system’, ’hello_init’);
Now go to your profile page using a web browser and add the “hello, world” widget. It should display “Hello, world!”.
Note: For real widgets, it is always a good idea to support Internationalization.
4.5.4 Allow user customization
Click on the edit link on the toolbar of the widget that you’ve created. You will notice that the only control it gives
you by default is over access (over who can see the widget).
Suppose you want to allow the user to control what greeting is displayed in the widget. Just as Elgg automatically loads content.php when viewing a widget, it loads edit.php when a user attempts to edit a widget. In
/mod/hello/views/default/widgets/helloworld/, create a file named edit.php. In this file, add
the following code:
<div>
<label>Message:</label>
<?php
//This is an instance of the ElggWidget class that represents our widget.
$widget = $vars[’entity’];
// Give the user a plain text box to input a message
echo elgg_view(’input/text’, array(
’name’ => ’params[message]’,
’value’ => $widget->message,
’class’ => ’hello-input-text’,
4.5. Basic Widget
159
Elgg Documentation, Release master
));
?>
</div>
Notice the relationship between the values passed to the ‘name’ and the ‘value’ fields of input/text. The name of
the input text box is params[message] because Elgg will automatically handle widget variables put in the array
params. The actual php variable name will be message. If we wanted to use the field greeting instead of
message we would pass the values params[greeting] and $widget->greeting respectively.
The reason we set the ‘value’ option of the array is so that the edit view remembers what the user typed in the previous
time he changed the value of his message text.
Now to display the user’s message we need to modify content.php to use this message variable. Edit content.php and
change it to:
<?php
$widget = $vars[’entity’];
// Always use the corresponding output/* view for security!
echo elgg_view(’output/text’, array(’value’ => $widget->message));
You should now be able to enter a message in the text box and see it appear in the widget.
160
Chapter 4. Plugin Tutorials
CHAPTER 5
Design Docs
Gain a deep understanding of how Elgg works and why it’s built the way it is.
5.1 Actions
Actions are the primary way users interact with an Elgg site.
5.1.1 Overview
An action in Elgg is the code that runs to make changes to the database when a user does something. For example,
logging in, posting a comment, and making a blog post are actions. The action script processes input, makes the
appropriate modifications to the database, and provides feedback to the user about the action.
5.1.2 Action Handler
Actions are registered during the boot process by calling elgg_register_action(). All actions URLs start
with action/ and are served by Elgg’s front end controller through the action service. This approach is different
from traditional PHP applications that send information to a specific file. The action service performs CSRF security
checks, and calls the registered action script file, then optionally forwards the user to a new page. By using the action
service instead of a single script file, Elgg automatically provides increased security and extensibility.
In
Elgg
1.8
and
before,
actions
were
handled
by
an
action
handler
script
in
‘engine/handlers/action_handler.php. This required specific rewrite rules for URLs beginning
with /action/.
See Forms + Actions for details on how to register and construct an action. To look at the core actions, check out the
directory /actions.
5.2 Database
A thorough discussion of Elgg’s data model design and motivation.
161
Elgg Documentation, Release master
Contents
• Overview
• Datamodel
• Entities
– Users, Objects, Groups, Sites
– GUIDs
• ElggObject
• ElggUser
• ElggSite
• ElggGroup
– The Groups plugin
– Writing a group-aware plugin
• Ownership
• Containers
• Annotations
– Adding an annotation
– Reading annotations
– Useful helper functions
• Metadata
– The simple case
– Finer control
– Common mistakes
• Relationships
– Working with relationships
• Access Control
– Access controls in the data model
– How access affects data retrieval
– Write access
• Schema
– Main tables
5.2.1 Overview
In Elgg, everything runs on a unified data model based on atomic units of data called entities.
Plugins are discouraged from interacting directly with the database, which creates a more stable system and a better
user experience becase content created by different plugins can be mixed together in consistent ways. With this
approach, plugins are faster to develop, and are at the same time much more powerful.
Every entity in the system inherits the ElggEntity class. This class controls access permissions, ownership
You can extend entities with extra information in two ways:
Metadata: This is information describing the entity, usually added by the author of the entity when the entity is
created. For example, tags, an ISBN number, a file location, or source language is metadata.
Annotations: This is information about the entity, usually added by a third party after the entity is created. For
example, ratings, likes, and votes are annotations. (Comments were before 1.9.)
162
Chapter 5. Design Docs
Elgg Documentation, Release master
Figure 5.1: The Elgg data model diagram
5.2. Database
163
Elgg Documentation, Release master
5.2.2 Datamodel
5.2.3 Entities
ElggEntity is the base class for the Elgg data model.
Users, Objects, Groups, Sites
ElggEntity has four main specializations, which provide extra properties and methods to more easily handle different kinds of data.
ElggObject: content like blog posts, uploaded files and bookmarks ElggUser: a system user ElggSite: each
Elgg site within an Elgg installation ElggGroup: multi-user collaborative systems (called “Communities” in prior
versions of Elgg)
The benefit of such an approach is that, apart from modelling data with greater ease, a common set of functions is
available to handle objects, regardless of their (sub)type.
Each of these have their own properties that they bring to the table: ElggObjects have a title and description, ElggUsers
have a username and password, and so on. However, because they all inherit ElggEntity, they each have a number of
core properties and behaviours in common.
• A numeric Globally Unique IDentifier (See GUIDs).
• Access permissions. (When a plugin requests data, it never gets to touch data that the current user doesn’t have
permission to see.)
• An arbitrary subtype. For example, a blog post is an ElggObject with a subtype of “blog”. Subtypes aren’t
predefined; they can be any unique way to describe a particular kind of entity. “blog”, “forum”, “foo”, “bar”,
“loafofbread” and “pyjamas” are all valid subtypes.
• An owner.
• The site that the entity belongs to.
• A container, usually used to associate a group’s content with the group.
GUIDs
A GUID is an integer that uniquely identifies every entity in an Elgg installation (a Globally Unique IDentifier). It’s
assigned automatically when the entity is first saved and can never be changed.
Some Elgg API functions work with GUIDs instead of ElggEntity objects.
5.2.4 ElggObject
The ElggObject entity type represents arbitrary content within an Elgg install; things like blog posts, uploaded
files, etc.
Beyond the standard ElggEntity properties, ElggObjects also support:
• title The title of the object (HTML escaped text)
• description A description of the object (HTML)
Most other data about the object is generally stored via metadata.
164
Chapter 5. Design Docs
Elgg Documentation, Release master
5.2.5 ElggUser
The ElggUser entity type represents users within an Elgg install. These will be set to disabled until their accounts
have been activated (unless they were created from within the admin panel).
Beyond the standard ElggEntity properties, ElggUsers also support:
• name The user’s plain text name. e.g. “Hugh Jackman”
• username Their login name. E.g. “hjackman”
• password A hashed version of their password
• salt The salt that their password has been hashed with
• email Their email address
• language Their default language code.
• code Their session code (moved to a separate table in 1.9).
• last_action The UNIX timestamp of the last time they loaded a page
• prev_last_action The previous value of last_action
• last_login The UNIX timestamp of their last log in
• prev_last_login the previous value of last_login
5.2.6 ElggSite
The ElggSite entity type represents sites within your Elgg install. Most installs will have only one.
Beyond the standard ElggEntity properties, ElggSites also support:
• name The site name
• description A description of the site
• url The address of the site
5.2.7 ElggGroup
The ElggGroup entity type represents an association of Elgg users. Users can join, leave, and post content to groups.
Beyond the standard ElggEntity properties, ElggGroups also support:
• name The group’s name (HTML escaped text)
• description A description of the group (HTML)
ElggGroup has addition methods to manage content and membership.
The Groups plugin
Not to be confused with the entity type ElggGroup, Elgg comes with a plugin called “Groups” that provides a default
UI/UX for site users to interact with groups. Each group is given a discussion forum and a profile page linking users
to content within the group.
You can alter the user experience via the traditional means of extending plugins or completely replace the Groups
plugin with your own.
5.2. Database
165
Elgg Documentation, Release master
Because ElggGroup can be subtyped like all other ElggEntities, you can have multiple types of groups running on
the same site.
Writing a group-aware plugin
Plugin owners need not worry too much about writing group-aware functionality, but there are a few key points:
Adding content
By passing along the group as container_guid via a hidden input field, you can use a single form and action to
add both user and group content.
Use can_write_to_container to determine whether or not the current user has the right to add content to a group.
Be aware that you will then need to pass the container GUID or username to the page responsible for posting and
the accompanying value, so that this can then be stored in your form as a hidden input field, for easy passing to your
actions. Within a “create” action, you’ll need to take in this input field and save it as a property of your new element
(defaulting to the current user’s container):
$user = elgg_get_logged_in_user_entity();
$container_guid = (int)get_input(’container_guid’);
if ($container_guid) {
if (!can_write_to_container($user->guid, $container_guid)) {
// register error and forward
}
} else {
$container_guid = elgg_get_logged_in_user_guid();
}
$object = new ElggObject;
$object->container_guid = $container_guid;
...
$container = get_entity($container_guid);
forward($container->getURL());
Usernames and page ownership
Groups have a simulated username of the form group:GUID, which you can get the value of by checking
$group->username. If you pass this username to a page on the URL line as part of the username variable
(i.e., /yourpage?username=group:nnn), Elgg will automatically register that group as being the owner of the
page (unless overridden).
Juggling users and groups
In fact, [[Engine/DataModel/Entities/ElggGroup|ElggGroup]] simulates most of the methods of
[[Engine/DataModel/Entities/ElggUser|ElggUser]]. You can grab the icon, name etc using the
same calls, and if you ask for a group’s friends, you’ll get its members. This has been designed specifically for you to
alternate between groups and users in your code easily.
166
Chapter 5. Design Docs
Elgg Documentation, Release master
Menu options
*This section is deprecated as of Elgg 1.8*
The final piece of the puzzle, for default groups, is to add a link to your functionality from the group’s profile. Here
we’ll use the file plugin as an example.
This involves creating a view within your plugin - in this case file/menu - which will extend the group’s menu.
File/menu consists of a link within paragraph tags that points to the file repository of the page_owner():
<p>
<a href="<?php echo $vars[’url’]; ?>pg/file/<?php echo page_owner_entity()->username; ?>">
<?php echo elgg_echo("file"); ?>
</a>
</p>
You can then extend the group’s menu view with this one, within your plugin’s input function (in this case file_init):
extend_view(’groups/menu/links’, ’file/menu’);
5.2.8 Ownership
Entities have a owner_guid GUID property, which defines its owner. Typically this refers to the GUID of a user,
although sites and users themselves often have no owner (a value of 0).
The ownership of an entity dictates, in part, whether or not you can access or edit that entity.
5.2.9 Containers
In order to easily search content by group or by user, content is generally set to be “contained” by either the user who
posted it, or the group to which the user posted. This means the new object’s container_guid property will be set
to the GUID of the current ElggUser or the target ElggGroup.
E.g., three blog posts may be owned by different authors, but all be contained by the group they were posted to.
Note: This is not always true. Comment entities are contained by the object commented upon, and in some 3rd
party plugins the container may be used to model a parent-child relationship between entities (e.g. a “folder” object
containing a file object).
5.2.10 Annotations
Annotations are pieces of data attached to an entity that allow users to leave ratings, or other relevant feedback. A poll
plugin might register votes as annotations. Before Elgg 1.9, comments and group discussion replies were stored as
annotations.
Annotations are stored as instances of the ElggAnnotation class.
Each annotation has:
• An internal annotation type (like comment)
• A value (which can be a string or integer)
• An access permission distinct from the entity it’s attached to
• An owner
5.2. Database
167
Elgg Documentation, Release master
Adding an annotation
The easiest way to annotate is to use the annotate method on an entity, which is defined as:
public function annotate(
$name,
// The name of the annotation type (eg ’comment’)
$value,
// The value of the annotation
$access_id = 0, // The access level of the annotation
$owner_id = 0,
// The annotation owner, defaults to current user
$vartype = ""
// ’text’ or ’integer’
)
For example, to leave a rating on an entity, you might call:
$entity->annotate(’rating’, $rating_value, $entity->access_id);
Reading annotations
To retrieve annotations on an object, you can call the following method:
$annotations = $entity->getAnnotations(
$name,
// The type of annotation
$limit,
// The number to return
$offset, // Any indexing offset
$order,
// ’asc’ or ’desc’ (default ’asc’)
);
If your annotation type largely deals with integer values, a couple of useful mathematical functions are provided:
$averagevalue = $entity->getAnnotationsAvg($name);
$total = $entity->getAnnotationsSum($name);
$minvalue = $entity->getAnnotationsMin($name);
$maxvalue = $entity->getAnnotationsMax($name);
//
//
//
//
Get
Get
Get
Get
the
the
the
the
average value
total value
minimum value
maximum value
Useful helper functions
Comments
If you want to provide comment functionality on your plugin objects, the following function will provide the full
listing, form and actions:
function elgg_view_comments(ElggEntity $entity)
5.2.11 Metadata
Metadata in Elgg allows you to store extra data on an entity beyond the built-in fields that entity supports. For
example, ElggObjects only support the basic entity fields plus title and description, but you might want to include
tags or an ISBN number. Similarly, you might want users to be able to save a date of birth.
Under the hood, metadata is stored as an instance of the ElggMetadata class, but you don’t need to worry about
that in practice (although if you’re interested, see the ElggMetadata class reference). What you need to know is:
• Metadata has an owner and access ID, both of which may be different to the owner of the entity it’s attached to
• You can potentially have multiple items of each type of metadata attached to a single entity
168
Chapter 5. Design Docs
Elgg Documentation, Release master
The simple case
Adding metadata
To add a piece of metadata to an entity, just call:
$entity->metadata_name = $metadata_value;
For example, to add a date of birth to a user:
$user->dob = $dob_timestamp;
Or to add a couple of tags to an object:
$object->tags = array(’tag one’, ’tag two’, ’tag three’);
When adding metadata like this:
• The owner is set to the currently logged-in user
• Access permissions are inherited from the entity
• Reassigning a piece of metadata will overwrite the old value
This is suitable for most purposes. Be careful to note which attributes are metadata and which are built in to the entity
type that you are working with. You do not need to save an entity after adding or updating metadata. You do need
to save an entity if you have changed one of its built in attributes. As an example, if you changed the access id of an
ElggObject, you need to save it or the change isn’t pushed to the database.
Reading metadata
To retrieve metadata, treat it as a property of the entity:
$tags_value = $object->tags;
Note that this will return the absolute value of the metadata. To get metadata as an ElggMetadata object, you will need
to use the methods described in the finer control section below.
If you stored multiple values in this piece of metadata (as in the “tags” example above), you will get an array of all
those values back. If you stored only one value, you will get a string or integer back. Storing an array with only one
value will return a string back to you. E.g.
$object->tags = array(’tag’);
$tags = $object->tags;
// $tags will be the string "tag", NOT array(’tag’)
To always get an array back, simply cast to an array;
$tags = (array)$object->tags;
Finer control
Adding metadata
If you need more control, for example to assign an access ID other than the default, you can use the
create_metadata function, which is defined as follows:
5.2. Database
169
Elgg Documentation, Release master
function create_metadata(
$entity_guid,
$name,
$value,
$value_type,
$owner_guid,
$access_id = 0,
$allow_multiple = false
)
//
//
//
//
//
//
//
The GUID of the parent entity
The name of the metadata (eg ’tags’)
The metadata value
Currently either ’string’ or ’integer’
The owner of the metadata
The access restriction
Do we have more than one value?
For single values, you can therefore write metadata as follows (taking the example of a date of birth attached to a user):
create_metadata($user_guid, ’dob’, $dob_timestamp, ’integer’, $_SESSION[’guid’], $access_id);
For multiple values, you will need to iterate through and call create_metadata on each one. The following piece
of code comes from the profile save action:
$i = 0;
foreach ($value as $interval) {
$i++;
$multiple = ($i != 1);
create_metadata($user->guid, $shortname, $interval, ’text’, $user->guid, $access_id, $multiple);
}
Note that the allow multiple setting is set to false in the first iteration and true thereafter.
Reading metadata
elgg_get_metadata is the best function for retrieving metadata as ElggMetadata objects:
E.g., to retrieve a user’s DOB
elgg_get_metadata(array(
’metadata_name’ => ’dob’,
’metadata_owner_guid’ => $user_guid,
));
Or to get all metadata objects:
elgg_get_metadata(array(
’metadata_owner_guid’ => $user_guid,
’limit’ => 0,
));
Common mistakes
“Appending” metadata
Note that you cannot “append” values to metadata arrays as if they were normal php arrays. For example, the following
will not do what it looks like it should do.
$object->tags[] = "tag four";
170
Chapter 5. Design Docs
Elgg Documentation, Release master
Trying to store hashmaps
Elgg does not support storing ordered maps (name/value pairs) in metadata. For example, the following does not work
as you might first expect it to:
// Won’t work!! Only the array values are stored
$object->tags = array(’one’ => ’a’, ’two’ => ’b’, ’three’ => ’c’);
You can instead store the information like so:
$object->one = ’a’;
$object->two = ’b’;
$object->three = ’c’;
Storing GUIDs in metadata
Though there are some cases to store entity GUIDs in metadata, Relationships are a much better construct for relating
entities to each other.
5.2.12 Relationships
Relationships allow you to bind entities together. Examples: an artist has fans, a user is a member of an organization,
etc.
The class ElggRelationship models a directed relationship between two entities, making the statement:
“{subject} is a {noun} of {target}.”
API name
guid_one
relationship
guid_two
Models
The subject
The noun
The target
Represents
Which entity is being bound
The type of relationship
The entity to which the subject is bound
The type of relationship may alternately be a verb, making the statement:
“{subject} {verb} {target}.”
E.g. User A “likes” blog post B
Each relationship has direction. Imagine an archer shoots an arrow at a target; The arrow moves in one direction,
binding the subject (the archer) to the target.
A relationship does not imply reciprocity. A follows B does not imply that B follows A.
Relationships_ do not have access control. They’re never hidden from view and can be edited with code at any
privilege level, with the caveat that the entities in a relationship may be invisible due to access control!
Working with relationships
Creating a relationship
E.g. to establish that “$user is a fan of $artist” (user is the subject, artist is the target):
// option 1
$success = add_entity_relationship($user->guid, ’fan’, $artist->guid);
5.2. Database
171
Elgg Documentation, Release master
// option 2
$success = $user->addRelationship($artist->guid, ’fan’);
This triggers the event [create, relationship], passing in the created ElggRelationship object. If a handler returns
false, the relationship will not be created and $success will be false.
Verifying a relationship
E.g. to verify that “$user is a fan of $artist”:
if (check_entity_relationship($user->guid, ’fan’, $artist->guid)) {
// relationship exists
}
Note that, if the relationship exists, check_entity_relationship() returns an ElggRelationship object:
$relationship = check_entity_relationship($user->guid, ’fan’, $artist->guid);
if ($relationship) {
// use $relationship->id or $relationship->time_created
}
Deleting a relationship
E.g. to be able to assert that “$user is no longer a fan of $artist”:
$was_removed = remove_entity_relationship($user->guid, ’fan’, $artist->guid);
This triggers the event [delete, relationship], passing in the associated ElggRelationship object. If a handler
returns false, the relationship will remain, and $was_removed will be false.
Other useful functions:
• delete_relationship() : delete by ID
• remove_entity_relationships() : delete those relating to an entity (note: in versions before Elgg
1.9, this did not trigger delete events)
Finding relationships and related entities
Below are a few functions to fetch relationship objects and/or related entities. A few are listed below:
• get_entity_relationships() : fetch relationships by subject or target entity
• get_relationship() : get a relationship object by ID
• elgg_get_entities_from_relationship() : fetch entities in relationships in a variety of ways
E.g. retrieving users who joined your site in January 2014.
$entities = elgg_get_entities_from_relationship(array(
’relationship’ => ’member_of_site’,
’relationship_guid’ => elgg_get_site_entity()->guid,
’inverse_relationship’ => true,
’relationship_created_time_lower’ => 1388534400, // January 1st 2014
’relationship_created_time_upper’ => 1391212800, // February 1st 2014
));
172
Chapter 5. Design Docs
Elgg Documentation, Release master
5.2.13 Access Control
Granular access controls are one of the fundamental design principles in Elgg, and a feature that has been at the centre
of the system throughout its development. The idea is simple: a user should have full control over who sees an item
of data he or she creates.
Access controls in the data model
In order to achieve this, every entity, annotation and piece of metadata contains an access_id property, which in
turn corresponds to one of the pre-defined access controls or an entry in the access_collections database table.
Pre-defined access controls
• 0 Private.
• 1 Logged in users.
• 2 Public data.
User defined access controls
You may define additional access groups and assign them to an entity, annotation or metadata. A number of functions
have been defined to assist you; see the access library reference for more information.
How access affects data retrieval
All data retrieval functions above the database layer - for example get_entities and its cousins - will only return
items that the current user has access to see. It is not possible to retrieve items that the current user does not have
access to. This makes it very hard to create a security hole for retrieval.
Write access
The following rules govern write access:
• The owner of an entity can always edit it
• The owner of a container can edit anything therein (note that this does not mean that the owner of a group can
edit anything therein)
• Admins can edit anything
You can override this behaviour using a plugin hook called permissions_check, which passes the entity in
question to any function that has announced it wants to be referenced. Returning true will allow write access;
returning false will deny it. See the plugin hook reference for permissions_check for more details.
See also:
Access library reference
5.2. Database
173
Elgg Documentation, Release master
5.2.14 Schema
The database contains a number of primary tables and secondary tables.
/engine/schema/mysql.sql.
Its schema table is stored in
Each table is prefixed by “prefix_”, this is replaced by the Elgg framework during installation.
Main tables
This is a description of the main tables. Keep in mind that in a given Elgg installation, the tables will have a prefix
(typically “elgg_”).
Table: entities
This is the main Entities table containing Elgg users, sites, objects and groups. When you first install Elgg this is
automatically populated with your first site.
It contains the following fields:
• guid An auto-incrementing counter producing a GUID that uniquely identifies this entity in the system.
• type The type of entity - object, user, group or site
• subtype A link to the entity_subtypes table.
• owner_guid The GUID of the owner’s entity.
• site_guid The site the entity belongs to.
• container_guid The GUID this entity is contained by - either a user or a group.
• access_id Access controls on this entity.
• time_created Unix timestamp of when the entity is created.
• time_updated Unix timestamp of when the entity was updated.
• enabled If this is ‘yes’ an entity is accessible, if ‘no’ the entity has been disabled (Elgg treats it as if it were
deleted without actually removing it from the database).
Table: entity_subtypes
This table contains entity subtype information:
• id A counter.
• type The type of entity - object, user, group or site.
• subtype The subtype name as a string.
• class Optional class name if this subtype is linked with a class
Table: metadata
This table contains Metadata, extra information attached to an entity.
• id A counter.
• entity_guid The entity this is attached to.
174
Chapter 5. Design Docs
Elgg Documentation, Release master
• name_id A link to the metastrings table defining the name table.
• value_id A link to the metastrings table defining the value.
• value_type The value class, either text or an integer.
• owner_guid The owner GUID of the owner who set this item of metadata.
• access_id An Access controls on this item of metadata.
• time_created Unix timestamp of when the metadata is created.
• enabled If this is ‘yes’ an item is accessible, if ‘no’ the item has been deleted.
Table: annotations
This table contains Annotations, this is distinct from Metadata.
• id A counter.
• entity_guid The entity this is attached to.
• name_id A link to the metastrings table defining the type of annotation.
• value_id A link to the metastrings table defining the value.
• value_type The value class, either text or an integer.
• owner_guid The owner GUID of the owner who set this item of metadata.
• access_id An Access controls on this item of metadata.
• time_created Unix timestamp of when the metadata is created.
• enabled If this is ‘yes’ an item is accessible, if ‘no’ the item has been deleted.
Table: relationships
This table defines Relationships, these link one entity with another.
• guid_one The GUID of the subject entity.
• relationship The type of the relationship.
• guid_two The GUID of the target entity.
Table: objects_entity
Extra information specifically relating to objects. These are split in order to reduce load on the metadata table and
make an obvious difference between attributes and metadata.
Table: sites_entity
Extra information specifically relating to sites. These are split in order to reduce load on the metadata table and make
an obvious difference between attributes and metadata.
5.2. Database
175
Elgg Documentation, Release master
Table: users_entity
Extra information specifically relating to users. These are split in order to reduce load on the metadata table and make
an obvious difference between attributes and metadata.
Table: groups_entity
Extra information specifically relating to groups. These are split in order to reduce load on the metadata table and
make an obvious difference between attributes and metadata.
Table: metastrings
Metastrings contain the actual string of metadata which is linked to by the metadata and annotations tables.
This is to avoid duplicating strings, saving space and making database lookups more efficient.
Core developers will place schema upgrades in /engine/schema/upgrades/*.
5.3 Events and Plugin Hooks
Contents
• Overview
– Elgg Events vs. Plugin Hooks
• Elgg Events
– Before and After Events
– Elgg Event Handlers
– Register to handle an Elgg Event
– Trigger an Elgg Event
• Plugin Hooks
– Plugin Hook Handlers
– Register to handle a Plugin Hook
– Trigger a Plugin Hook
5.3.1 Overview
Elgg has an event system that can be used to replace or extend core functionality.
Plugins influence the system by creating handlers (callables such as functions and methods) and registering them to
handle two types of events: Elgg Events and Plugin Hooks.
When an event is triggered, a set of handlers is executed in order of priority. Each handler is passed arguments and
has a chance to influence the process. After execution, the “trigger” function returns a value based on the behavior of
the handlers.
Elgg Events vs. Plugin Hooks
The main differences between Elgg Events and Plugin Hooks are:
176
Chapter 5. Design Docs
Elgg Documentation, Release master
1. Most Elgg events can be cancelled; unless the event is an “after” event, a handler that returns false can cancel
the event, and no more handlers are called.
2. Plugin hooks cannot be cancelled; all handlers are always called.
3. Plugin hooks pass an arbitrary value through the handlers, giving each a chance to alter along the way.
5.3.2 Elgg Events
Elgg Events are triggered when an Elgg object is created, updated, or deleted; and at important milestones while the
Elgg framework is loading. Examples: a blog post being created or a user logging in.
Unlike Plugin Hooks, most Elgg events can be cancelled, halting the execution of the handlers, and possibly cancelling
an some action in the Elgg core.
Each Elgg event has a name and an object type (system, user, object, relationship name, annotation, group) describing
the type of object passed to the handlers.
Before and After Events
Some events are split into “before” and “after”. This avoids confusion around the state of the system while in flux.
E.g. Is the user logged in during the [login, user] event?
Before Events have names ending in ”:before” and are triggered before something happens. Like traditional events,
handlers can cancel the event by returning false.
After Events, with names ending in ”:after”, are triggered after something happens. Unlike traditional events, handlers
cannot cancel these events; all handlers will always be called.
Where before and after events are available, developers are encouraged to transition to them, though older events will
be supported for backwards compatibility.
Elgg Event Handlers
Elgg event handlers should have the following prototype:
/**
The name of the event
* @param string $event
* @param string $object_type The type of $object (e.g. "user", "group")
The object of the event
* @param mixed $object
*
* @return bool if false, the handler is requesting to cancel the event
*/
function event_handler($event, $object_type, $object) {
...
}
If the handler returns false, the event is cancelled, preventing execution of the other handlers. All other return values
are ignored.
Register to handle an Elgg Event
Register your handler to an event using elgg_register_event_handler:
elgg_register_event_handler($event, $object_type, $handler, $priority);
5.3. Events and Plugin Hooks
177
Elgg Documentation, Release master
Parameters:
• $event The event name.
• $object_type The object type (e.g. “user” or “object”) or ‘all’ for all types on which the event is fired.
• $handler The callback of the handler function.
• $priority The priority - 0 is first and the default is 500.
Object here does not refer to an ElggObject but rather a string describing any object in the framework: system,
user, object, relationship, annotation, group.
Example:
// Register the function myPlugin_handle_login() to handle the
// user login event with priority 400.
elgg_register_event_handler(’login’, ’user’, ’myPlugin_handle_login’, 400);
Trigger an Elgg Event
You can trigger a custom Elgg event using elgg_trigger_event:
if (elgg_trigger_event($event, $object_type, $object)) {
// Proceed with doing something.
} else {
// Event was cancelled. Roll back any progress made before the event.
}
For events with ambiguous states, like logging in a user, you should use Before and After Events by calling
elgg_trigger_before_event or elgg_trigger_after_event. This makes it clear for the event handler
what state to expect and which events can be cancelled.
// handlers for the user, login:before event know the user isn’t logged in yet.
if (!elgg_trigger_before_event(’login’, ’user’, $user)) {
return false;
}
// handlers for the user, login:after event know the user is logged in.
elgg_trigger_after_event(’login’, ’user’, $user);
Parameters:
• $event The event name.
• $object_type The object type (e.g. “user” or “object”).
• $object The object (e.g. an instance of ElggUser or ElggGroup)
The function will return false if any of the selected handlers returned false and the event is stoppable, otherwise
it will return true.
5.3.3 Plugin Hooks
Plugin Hooks provide a way for plugins to collaboratively determine or alter a value. For example, to decide whether
a user has permission to edit an entity or to add additional configuration options to a plugin.
A plugin hook has a value passed into the trigger function, and each handler has an opportunity to alter the value
before it’s passed to the next handler. After the last handler has completed, the final value is returned by the trigger.
178
Chapter 5. Design Docs
Elgg Documentation, Release master
Plugin Hook Handlers
Plugin hook handlers should have the following prototype:
/**
The name of the plugin hook
* @param string $hook
The type of the plugin hook
* @param string $type
The current value of the plugin hook
* @param mixed $value
* @param mixed $params Data passed from the trigger
*
* @return mixed if not null, this will be the new value of the plugin hook
*/
function plugin_hook_handler($hook, $type, $value, $params) {
...
}
If the handler returns no value (or null explicitly), the plugin hook value is not altered. Otherwise the return value
becomes the new value of the plugin hook. It will then be passed to the next handler as $value.
Register to handle a Plugin Hook
Register your handler to a plugin hook using elgg_register_plugin_hook_handler:
elgg_register_plugin_hook_handler($hook, $type, $handler, $priority);
Parameters:
• $hook The name of the plugin hook.
• $type The type of the hook or ‘all’ for all types.
• $handler The callback of the handler function.
• $priority The priority - 0 is first and the default is 500.
Type can vary in meaning. It may mean an Elgg entity type or something specific to the plugin hook name.
Example:
// Register the function myPlugin_hourly_job() to be called with priority 400.
elgg_register_plugin_hook_handler(’cron’, ’hourly’, ’myPlugin_hourly_job’, 400);
Trigger a Plugin Hook
You can trigger a custom plugin hook using elgg_trigger_plugin_hook:
// filter $value through the handlers
$value = elgg_trigger_plugin_hook($hook, $type, $params, $value);
Parameters:
• $hook The name of the plugin hook.
• $type The type of the hook or ‘all’ for all types.
• $params Arbitrary data passed from the trigger to the handlers.
• $value The initial value of the plugin hook.
5.3. Events and Plugin Hooks
179
Elgg Documentation, Release master
Warning: The $params and $value arguments are reversed between the plugin hook handlers and trigger functions!
5.4 Internationalization
Elgg 1.0+ departs from previous versions in that it uses a custom text array rather than gettext. This improves system
performance and reliability of the translation system.
TODO: more plz
5.5 AMD
5.5.1 Overview
There are two JavaScript system in Elgg: the deprecated 1.8 system, and the newer AMD (Asynchronous Module
Definition) compatible system introduced in 1.9.
This discusses the benefits of using AMD in Elgg.
5.5.2 Why AMD?
We have been working hard to make Elgg’s JavaScript more maintainable and useful. We made some strides in 1.8
with the introduction of the “elgg” JavaScript object and library, but have quickly realized the approach we were
taking was not scalable.
The size of JS on the web is growing quickly, and JS in Elgg is growing too. We want Elgg to be able to offer a
solution that makes JS development as productive and maintainable as possible going forward.
The reasons to choose AMD are plenteous and well-documented. Let’s highlight just a few of the most relevant reasons
as they relate to Elgg specifically.
1. Simplified dependency management
AMD modules load asynchronously and execute as soon as their dependencies are available, so this eliminates the need
to specify “priority” and “location” when registering JS libs in Elgg. Also, you don’t need to worry about explicitly
loading a module’s dependencies in PHP. The AMD loader (RequireJS in this case) takes care of all that hassle for
you. It’s also possible have text dependencies with the RequireJS text plugin, so client-side templating should be a
breeze.
2. AMD works in all browsers. Today.
Elgg developers are already writing lots of JavaScript. We know you want to write more. We cannot accept waiting
5-10 years for a native JS modules solution to be available in all browsers before we can organize our JavaScript in a
maintainable way.
180
Chapter 5. Design Docs
Elgg Documentation, Release master
3. You do not need a build step to develop in AMD.
We like the edit-refresh cycle of web development. We wanted to make sure everyone developing in Elgg could
continue experiencing that joy. Synchronous module formats like Closure or CommonJS just weren’t an option for us.
But even though AMD doesn’t require a build step, it is still very build-friendly. Because of the define() wrapper,
it’s possible to concatenate multiple modules into a single file and ship them all at once in a production environment. 1
AMD is a battle-tested and well thought out module loading system for the web today. We’re very thankful for the
work that has gone into it, and are excited to offer it as the standard solution for JavaScript development in Elgg
starting with Elgg 1.9.
5.6 Security
Elgg’s approach to the various security issues common to all web applications.
Tip: To report a potential vulnerability in Elgg, email [email protected].
Contents
• Passwords
– Password validation
– Password salting
– Password hashing
– Password storage
– Password throttling
– Password resetting
• Sessions
– Session fixation
– Session hijacking
– “Remember me” cookie
• Alternative authentication
• HTTPS
• XSS
• CSRF / XSRF
• SQL Injection
• Privacy
5.6.1 Passwords
Password validation
The only restriction that Elgg places on a password is that it must be at least 6 characters long by default, though
this may be changed in /engine/settings.php. Additional criteria can be added by a plugin by registering for the
registeruser:validate:password plugin hook.
1 This is not currently supported by Elgg core, but we’ll be looking into it since reducing round-trips is critical for a good first-view experience,
especially on mobile devices.
5.6. Security
181
Elgg Documentation, Release master
Password salting
Elgg salts passwords with a unique 8 character random string. The salt is generated each time the password is set. The main sec
• preventing anyone with access to the database from conducting a precomputed dictionary attack
• preventing a site administration from noting users with the same password.
Password hashing
The hashed password is computed using md5 from the user’s password text and the salt.
Password storage
The hashed password and the salt are stored in the users table. Neither are stored in any cookies on a user’s computer.
Password throttling
Elgg has a password throttling mechanism to make dictionary attacks from the outside very difficult. A user is only
allowed 5 login attempts over a 5 minute period.
Password resetting
If a user forgets his password, a new random password can be requested. After the request, an email is sent with a
unique URL. When the user visits that URL, a new random password is sent to the user through email.
5.6.2 Sessions
Elgg uses PHP’s session handling with custom handlers. Session data is stored in the database. The session cookie
contains the session id that links the user to the browser. The user’s metadata is stored in the session including GUID,
username, email address. The session’s lifetime is controlled through the server’s PHP configuration.
Session fixation
Elgg protects against session fixation by regenerating the session id when a user logs in.
Session hijacking
Warning: This section is questionable.
Besides protecting against session fixation attacks, Elgg also has a further check to try to defeat session hijacking if
the session identifier is compromised. Elgg stores a hash of the browser’s user agent and a site secret as a session
fingerprint. The use of the site secret is rather superfluous but checking the user agent might prevent some session
hijacking attempts.
182
Chapter 5. Design Docs
Elgg Documentation, Release master
“Remember me” cookie
To allow users to stay logged in for a longer period of time regardless of whether the browser has been closed, Elgg
uses a cookie (called elggperm) that contains what could be considered a super session identifier. This identifier is
stored in a cookies table. When a session is being initiated, Elgg checks for the presence of the elggperm cookie. If it
exists and the session code in the cookie matches the code in the cookies table, the corresponding user is automatically
logged in.
5.6.3 Alternative authentication
Note: This section is very hand-wavy
To replace Elgg’s default user authentication system, a plugin would have to replace the default action
with its own through register_action(). It would also have to register its own pam handler using
register_pam_handler().
Note: The pam_authenticate() function used to call the different modules has a bug related to the importance
variable.
5.6.4 HTTPS
Note: You must enable SSL support on your server for any of these techniques to work.
To make the login form submit over https, turn on login-over-ssl from Elgg’s admin panel.
You can also serve your whole site over SSL by simply changing the site URL to include “https” instead of just “http.”
5.6.5 XSS
Filtering is used in Elgg to make XSS attacks more difficult. The purpose of the filtering is to remove Javascript and
other dangerous input from users.
Filtering is performed through the function filter_tags(). This function takes in a string and returns a filtered
string. It triggers a validate, input plugin hook.
By default Elgg comes with the htmLawed filtering code as a plugin. Developers can drop in any additional or
replacement filtering code as a plugin.
The filter_tags() function is called on any user input as long as the input is obtained through a call to
get_input(). If for some reason a developer did not want to perform the default filtering on some user input,
the get_input() function has a parameter for turning off filtering.
5.6.6 CSRF / XSRF
Elgg generates security tokens to prevent cross-site request forgery. These are embedded in all forms and statemodifying AJAX requests as long as the correct API is used. Read more in the Forms + Actions developer guide.
5.6.7 SQL Injection
Elgg’s API sanitizes all input before issuing DB queries. Read more in the Database design doc.
5.6. Security
183
Elgg Documentation, Release master
5.6.8 Privacy
Elgg uses an ACL system to control which users have access to various pieces of content. Read more in the Database
design doc.
5.7 Loggable
Loggable is an interface inherited by any class that wants events relating to its member objects to be saved to the
system log. ElggEntity and ElggExtender both inherit Loggable.
Loggable defines several class methods that are used in saving to the default system log, and can be used to define
your own (as well as for other purposes):
• getSystemLogID() Return a unique identifier for the object for storage in the system log. This is likely to
be the object’s GUID
• getClassName() Return the class name of the object
• getType() Return the object type
• getSubtype() Get the object subtype
• getObjectFromID($id) For a given ID, return the object associated with it
• getObjectOwnerGUID() Return the GUID of the owner of this object
5.7.1 Database details
The default system log is stored in the system_log database table. It contains the following fields:
• id - A unique numeric row ID
• object_id - The GUID of the entity being acted upon
• object_class - The class of the entity being acted upon (eg ElggObject)
• object_type - The type of the entity being acted upon (eg object)
• object_subtype - The subtype of the entity being acted upon (eg blog)
• event - The event being logged (eg create or update)
• performed_by_guid - The GUID of the acting entity (the user performing the action)
• owner_guid - The GUID of the user which owns the entity being acted upon
• access_id - The access restriction associated with this log entry
• time_created - The UNIX epoch timestamp of the time the event took place
184
Chapter 5. Design Docs
CHAPTER 6
Contributor Guides
Participate in making Elgg even better.
Elgg is a community-driven project. It relies on the support of volunteers to succeed. Here are some ways you can
help:
6.1 Translations
Translations multiply the impact that Elgg can have by making it accessible to a larger percentage of the world.
The community will always be indebted to those of you who work hard to provide high quality translations for Elgg’s
UI and docs.
6.1.1 Transifex
All translation for the Elgg project is organized through Transifex.
https://www.transifex.com/organization/elgg
Plugin authors are encouraged to coordinate translations via Transifex as well so the whole community can be unified
and make it really easy for translators to contribute to any plugin in the Elgg ecosystem.
6.2 Reporting Issues
Report bugs and features requests to https://github.com/Elgg/Elgg/issues. See below for guidelines.
6.2.1 DISCLAIMERS
• SECURITY ISSUES SHOULD BE REPORTED TO security @ elgg . org! Please do not post any security
issues on github!!
• Support requests belong on the community site. Tickets with support requests will be closed.
• We cannot make any guarantees as to when your ticket will be resolved.
185
Elgg Documentation, Release master
6.2.2 Bug reports
Before submitting a bug report:
• Search for an existing ticket on the issue you’re having. Add any extra info there.
• Verify the problem is reproducible
– On the latest version of Elgg
– With all third-party plugins disabled
Good bug report checklist:
• Expected behavior and actual behavior
• Clear steps to reproduce the problem
• The version of Elgg you’re running
• Browsers affected by this problem
6.2.3 Feature requests
Before submitting a feature request:
• Check the community site for a plugin that has the features you need.
• Consider if you can develop a plugin that does what you need.
• Search through the closed tickets to see if someone else suggested the same feature, but got turned down. You’ll
need to be able to explain why your suggestion should be considered this time.
Good feature request checklist:
• Detailed explanation of the feature
• Real-life use-cases
• Proposed API
6.3 Writing Code
Understand Elgg’s standards and processes to get your changes accepted as quickly as possible.
Contents
•
•
•
•
•
License agreement
Pull requests
Testing
Coding best practices
Deprecating APIs
6.3.1 License agreement
By submitting a patch you are agreeing to license the code under a GPLv2 license and MIT license.
186
Chapter 6. Contributor Guides
Elgg Documentation, Release master
6.3.2 Pull requests
Pull requests (PRs) are the best way to get code contributed to Elgg core. The core development team uses them even
for the most trivial changes.
For new features, submit a feature request or talk to us first and make sure the core team approves of your direction
before spending lots of time on code.
Checklists
Use these markdown checklists for new PRs on github to ensure high-quality contributions and help everyone understand the status of open PRs.
Bugfix PRs:
-
[
[
[
[
[
]
]
]
]
]
Commit messages are in the standard format
Includes regression test
Includes documentation update (if applicable)
Is submitted against the correct branch
Has LGTM from at least one core developer
Feature PRs:
-
[
[
[
[
[
]
]
]
]
]
Commit messages are in the standard format
Includes tests
Includes documentation
Is submitted against the correct branch
Has LGTM from at least two core developers
Choosing a branch to submit to
The following table assumes the latest stable release is 1.9.
Type of change
Security fix
Bug fix
Deprecation
Minor feature
Major feature
Breaking
Branch to submit against
1.8 (Email [email protected] first!)
1.9
1.x
1.x
master
master
The difference between minor and major feature is subjective and up to the core team.
Commit message format
We require a particular format to allow releasing more often, and with improved changelogs and source history. Just
follow these steps:
1. Start with the type by selecting the last category which applies from this list:
• docs - only docs are being updated
• chore - this include refactoring, code style changes, adding missing tests, Travis stuff, etc.
• perf - the primary purpose is to improve performance
• fix - this fixes a bug
6.3. Writing Code
187
Elgg Documentation, Release master
• deprecate - the change deprecates any part of the API
• feature - this adds a new user-facing or developer feature
• security - the change affects a security issue in any way. Please do not push this commit to any public
repo. Instead contact [email protected].
E.g. if your commit refactors to fix a bug, it’s still a “fix”. If that bug is security-related, however, the type must
be “security” and you should email [email protected] before proceeding. When in doubt, make your best guess
and a reviewer will provide guidance.
2. In parenthesis, add the component, a short string which describes the subsystem being changed.
Some examples: “views”, “i18n”, “seo”, “a11y”, “cache”, “db”, “session”, “router”, “<plugin_name>”.
3. Add a colon, a space, and a brief summary of the changes, which will appear in the changelog.
No line may exceed 100 characters in length, so keep your summary concise.
Good summary
page owners see their own owner
blocks on pages
bar view no longer dies if ‘foo’ not
set
narrows river layout to fit iPhone
elgg_foo() handles arrays for $bar
removes link color from comments
header in river
requires non-empty title when
saving pages
Bad summary (problem)
bug fix (vague)
updates views/default/bar.php so bar view no longer... (redundant
info)
alters the river layout (vague)
in elgg_foo() you can now pass an array for $bar and the function
will... (move detail to description)
fixes db so that... (redundant info)
can save pages with no title (confusingly summarizes old behavior)
4. (recommended) Skip a line and add a description of the changes. Include the motivation for making them,
any info about back or forward compatibility, and any rationale of why the change had to be done a certain way.
Example:
We speed up the Remember Me table migration by using a single INSERT INTO ... SELECT query
instead of row-by-row. This migration takes place during the upgrade to 1.9.
Unless your change is trivial/obvious, a description is required.
5. If the commit resolves a GitHub issue, skip a line and add Fixes # followed by the issue number. E.g. Fixes
#1234. You can include multiple issues by separating with commas.
GitHub will auto-close the issue when the commit is merged. If you just want to reference an issue, use Refs
# instead.
When done, your commit message will have the format:
type(component): summary
Optional body
Details about the solution.
Opportunity to call out as breaking change.
Closes/Fixes/Refs #123, #456, #789
Here is an example of a good commit message:
perf(upgrade): speeds up migrating remember me codes
We speed up the Remember Me table migration by using a single INSERT INTO ... SELECT query instead of
188
Chapter 6. Contributor Guides
Elgg Documentation, Release master
This migration takes place during the upgrade to 1.9.
Fixes #6204
To validate commit messages locally, make sure .scripts/validate_commit_msg.php is executable, and
make a copy or symlink to it in the directory .git/hooks/commit-msg.
chmod u+x .scripts/validate_commit_msg.php
ln -s .scripts/validate_commit_msg.php .git/hooks/commit-msg/validate_commit_msg.php
Rewriting commit messages
If your PR does not conform to the standard commit message format, we’ll ask you to rewrite it.
To edit just the last commit:
1. Amend the commit: git commit --amend (git opens the message in a text editor).
2. Change the message and save/exit the editor.
3. Force push your branch: git push -f your_remote your_branch (your PR with be updated).
Otherwise you may need to perform an interactive rebase:
1. Rebase the last N commits: git rebase -i HEAD~N where N is a number. (Git will open the git-rebasetodo file for editing)
2. For the commits that need to change, change pick to r (for reword) and save/exit the editor.
3. Change the commit message(s), save/exit the editor (git will present a file for each commit that needs rewording).
4. git push -f your_remote your_branch to force push the branch (updating your PR).
6.3.3 Testing
Elgg has automated tests for both PHP and JavaScript functionality. All new contributions are required to come with
appropriate tests.
PHPUnit Tests
TODO
Jasmine Tests
Test files must be named *Test.js and should go in either js/tests/ or next to their source files in
views/default/js. Karma will automatically pick up on new *Test.js files and run those tests.
Test boilerplate
define(function(require) {
var elgg = require(’elgg’);
describe("This new test", function() {
it("fails automatically", function() {
expect(true).toBe(false);
6.3. Writing Code
189
Elgg Documentation, Release master
});
});
});
Running the tests
Elgg uses Karma with Jasmine to run JS unit tests.
You will need to have nodejs and npm installed.
First install all the development dependencies:
npm install
Run through the tests just once and then quit:
npm test
You can also run tests continuously during development so they run on each save:
karma start js/tests/karma.conf.js
6.3.4 Coding best practices
Make your code easier to read, easier to maintain, and easier to debug. Consistent use of these guidelines means less
guess work for developers, which means happier, more productive developers.
General coding
Don’t Repeat Yourself
If you are copy-pasting code a significant amount of code, consider whether there’s an opportunity to reduce duplication by introducing a function, an additional argument, a view, or a new component class.
E.g. If you find views that are identical except for a single value, refactor into a single view that takes an option.
Note: In a bugfix release, some duplication is preferrable to refactoring. Fix bugs in the simplest way possible and
refactor to reduce duplication in the next minor release branch.
Embrace SOLID and GRASP
Use these principles for OO design to solve problems using loosely coupled components, and try to make all components and integration code testable.
Whitespace is free
Don’t be afraid to use it to separate blocks of code. Use a single space to separate function params and string concatenation.
190
Chapter 6. Contributor Guides
Elgg Documentation, Release master
Variable names
Use self-documenting variable names. $group_guids is better than $array.
Avoid double-negatives. Prefer $enable = true to $disable = false.
Functions
Where possible, have functions/methods return a single type. Use empty values such as array(), “”, or 0 to indicate no
results.
Be careful where valid return values (like "0") could be interpreted as empty.
Functions not throwing an exception on error should return false upon failure.
Functions returning only boolean should be prefaced with is_ or has_ (eg, elgg_is_logged_in(),
elgg_has_access_to_entity()).
Ternary syntax
Acceptable only for single-line, non-embedded statements.
Minimize complexity
Minimize nested blocks and distinct execution paths through code. Use Return Early to reduce nesting levels and
cognitive load when reading code.
Use comments effectively
Good comments describe the “why.” Good code describes the “how.” E.g.:
Bad:
// increment $i only when the entity is marked as active.
foreach ($entities as $entity) {
if ($entity->active) {
$i++;
}
}
Good:
// find the next index for inserting a new active entity.
foreach ($entities as $entity) {
if ($entity->active) {
$i++;
}
}
Always include a comment if it’s not obvious that something must be done in a certain way. Other developers looking
at the code should be discouraged from refactoring in a way that would break the code.
6.3. Writing Code
191
Elgg Documentation, Release master
// Can’t use empty()/boolean: "0" is a valid value
if ($str === ’’) {
register_error(elgg_echo(’foo:string_cannot_be_empty’));
forward(REFERER);
}
Commit effectively
• Err on the side of atomic commits which are highly focused on changing one aspect of the system.
• Avoid mixing in unrelated changes or extensive whitespace changes. Commits with many changes are scary and
make pull requests difficult to review.
• Use visual git tools to craft highly precise and readable diffs.
Include tests When at all possible include unit tests for code you add or alter. We use:
• PHPUnit for PHP unit tests.
• SimpleTest for legacy PHP tests that require use of the database. Our long-term goal is to move all tests to
PHPUnit.
• Karma for JavaScript unit tests
Naming tests Break tests up by the behaviors you want to test and use names that describe the behavior. E.g.:
• Not so good: One big method testAdd().
• Better: Methods testAddingZeroChangesNothing and testAddingNegativeNumberSubtracts
Keep bugfixes simple Avoid the temptation to refactor code for a bugfix release. Doing so tends to introduce
regressions, breaking functionality in what should be a stable release.
PHP guidelines
These are the required coding standards for Elgg core and all bundled plugins. Plugin developers are strongly encouraged to adopt these standards.
Developers should first read the PSR-2 Coding Standard Guide.
Elgg’s standards extend PSR-2, but differ in the following ways:
• Indent using one tab character, not spaces.
• Opening braces for classes, methods, and functions must go on the same line.
• If a line reaches over 100 characters, consider refactoring (e.g. introduce variables).
• Compliance with PSR-1 is encouraged, but not strictly required.
Documentation
• Include PHPDoc comments on functions and classes (all methods; declared properties when appropriate), including types and descriptions of all parameters.
• In lists of @param declarations, the beginnings of variable names and descriptions must line up.
192
Chapter 6. Contributor Guides
Elgg Documentation, Release master
• Annotate classes, methods, properties, and functions with @access private unless they are intended for
public use, are already of limited visibility, or are within a class already marked as private.
• Use // or /* */ when commenting.
• Use only // comments inside function/method bodies.
Naming
• Use underscores to separate words in the names of functions, variables, and properties. Method names are
camelCase.
• Names of functions for public use must begin with elgg_.
• All other function names must begin with _elgg_.
• Name globals and constants in ALL_CAPS (ACCESS_FRIENDS, $CONFIG).
Miscellaneous
For PHP requirements, see composer.json.
Do not use PHP shortcut tags (<? or <?= or <%).
When creating strings with variables:
• use double-quoted strings
• wrap variables with braces only when necessary.
Bad (hard to read, misuse of quotes and {}s):
echo ’Hello, ’.$name."!
How is your {$time_of_day}?";
Good:
echo "Hello, $name!
How is your $time_of_day?";
Remove trailing whitespace at the end of lines. An easy way to do this before you commit is to run php
.scripts/fix_style.php from the installation root.
CSS guidelines
Use shorthand where possible
Bad:
background-color: #333333;
background-image: url(...);
background-repeat: repeat-x;
background-position: left 10px;
padding: 2px 9px 2px 9px;
Good:
background: #333 url(...) repeat-x left 10px;
padding: 2px 9px;
6.3. Writing Code
193
Elgg Documentation, Release master
Use hyphens, not underscores
Bad:
.example_class {}
Good:
.example-class {}
One property per line
Bad:
color: white;font-size: smaller;
Good:
color: white;
font-size: smaller;
Property declarations
These should be spaced like so: property: value;
Bad:
color:value;
color :value;
color : value;
Good:
color: value;
Vendor prefixes
• Group vendor-prefixes for the same property together
• Longest vendor-prefixed version first
• Always include non-vendor-prefixed version
• Put an extra newline between vendor-prefixed groups and other properties
Bad:
-moz-border-radius: 5px;
border: 1px solid #999999;
-webkit-border-radius: 5px;
width: auto;
Good:
194
Chapter 6. Contributor Guides
Elgg Documentation, Release master
border: 1px solid #999999;
-webkit-border-radius: 5px;
-moz-border-radius: 5px;
border-radius: 5px;
width: auto;
Group subproperties
Bad:
background-color: white;
color: #0054A7;
background-position: 2px -257px;
Good:
background-color: white;
background-position: 2px -257px;
color: #0054A7;
Javascript guidelines
Same formatting standards as PHP apply.
All functions should be in the elgg namespace.
Function expressions should end with a semi-colon.
elgg.ui.toggles = function(event) {
event.preventDefault();
$(target).slideToggle(’medium’);
};
6.3.5 Deprecating APIs
Occasionally, functions and classes must be deprecated in favor of newer replacements. Since 3rd party plugin authors
rely on a consistent API, backward compatibility must be maintained, but will not be maintained indefinitely as plugin
authors are expected to properly update their plugins. In order to maintain backward compatibility, deprecated APIs
will follow these guidelines:
• The first minor version (1.7) with a deprecated API must include a wrapper function/class (or otherwise appropriate means) to maintain backward compatibility, including any bugs in the original function/class. This
compatibility layer uses elgg_deprecated_notice(’...’, ’1.7’) to log that the function is deprecated.
• The following minor versions (1.8+) maintain the backward
elgg_deprecated_notice() will produce a visible warning.
compatibility
layer,
but
• The next major revision (2.0) removes the compatibility layer. Any use of the deprecated API should be corrected before this.
6.3. Writing Code
195
Elgg Documentation, Release master
6.4 Writing Documentation
New documentation should fit well with the rest of Elgg’s docs.
Contents
•
•
•
•
•
•
Follow the existing document organization
Use “Elgg” in a grammatically correct way
Avoid first person pronouns
Eliminate fluff
Prefer absolute dates over relative ones
Do not remind the reader to contribute
6.4.1 Follow the existing document organization
The current breakdown is not necessarily the One True Way to organize docs, but consistency is better than randomness.
intro/*
This is everything that brand new users need to know (installation, features, license, etc.)
admin/*
Guides for administrators. Task-oriented.
guides/*
API guides for plugin developers. Cookbook-style. Example heavy. Code snippet heavy. Broken down by services
(actions, i18n, routing, db, etc.). This should only discuss the public API and its behavior, not implementation details
or reasoning.
design/*
Design docs for people who want to get a better understanding of how/why core is built the way it is. This should
discuss internal implementation details of the various services, what tradeoffs were made, and the reasoning behind
the final decision. Should be useful for people who want to contribute and for communication b/w core devs.
contribute/*
Contributors guides for the various ways people can participate in the project.
appendix/*
More detailed/meta/background information about the project (history, roadmap, etc.)
196
Chapter 6. Contributor Guides
Elgg Documentation, Release master
6.4.2 Use “Elgg” in a grammatically correct way
Elgg is not an acronym, so writing it in all caps (ELGG or E-LGG) is incorrect. Please don’t do this.
In English, Elgg does not take an article when used as a noun. Here are some examples to emulate:
• “I’m using Elgg to run my website”
• “Install Elgg to get your community online”
When used as an adjective, the article applies to the main noun, so you should use one. For example:
• “Go to the Elgg community website to get help.”
• “I built an Elgg-based network yesterday”
This advice may not apply in languages other than English.
6.4.3 Avoid first person pronouns
Refer to the reader as “you.” Do not include yourself in the normal narrative.
Before:
When we’re done installing Elgg, we’ll look for some plugins!
After:
When you’re done installing Elgg, look for some plugins!
To refer to yourself (avoid this if possible), use your name and write in the third person. This clarifies to future
readers/editors whose opinions are being expressed.
Before:
I think the best way to do X is to use Y.
After:
Evan thinks the best way to do X is to use Y.
6.4.4 Eliminate fluff
Before:
If you want to use a third-party javascript library within the Elgg framework, you should take care to call
the elgg_register_js function to register it.
After:
To use a third-party javascript library, call elgg_register_js to register it.
6.4.5 Prefer absolute dates over relative ones
It is not easy to tell when a particular sentence or paragraph was written, so relative dates quickly become meaningless.
Absolute dates also give the reader a good indication of whether a project has been abandoned, or whether some advice
might be out of date.
Before:
Recently the foo was barred. Soon, the baz will be barred too.
6.4. Writing Documentation
197
Elgg Documentation, Release master
After:
Recently (as of September 2013), the foo was barred. The baz is expected to be barred by October 2013.
6.4.6 Do not remind the reader to contribute
Focus on addressing only the topic at hand. Constant solicitation for free work is annoying and makes the project look
needy. If people want to contribute to the project, they can visit the contributor guide.
6.5 Internationalizing documentation
When you change documentation, remember to update the documentation translation templates before you commit:
cd docs/
make gettext
For more information, see http://sphinx-doc.org/latest/intl.html#translating-with-sphinx-intl
6.6 Becoming a Financial Supporter
All funds raised via the Elgg supporters network go directly into:
• Elgg core development
• Infrastructure provision (elgg.org, github, etc.)
It is a great way to help with Elgg development!
6.6.1 Benefits
For only $50 per year for individuals or $150 per year for organizations, you can get listed as a supporter on our
supporters page. Elgg supporters are listed there unless they request not to be.
Supporters are able to put this official logo on their site if they wish:
6.6.2 Disclaimer
We operate a no refund policy on supporter subscriptions. If you would like to withdraw your support, go to PayPal
and cancel your subscription. You will not be billed the following year.
198
Chapter 6. Contributor Guides
Elgg Documentation, Release master
Being an Elgg Supporter does not give an individual or organization the right to impersonate, trade as or imply they
are connected to the Elgg project. They can, however, mention that they support the Elgg project.
If you have any questions about this disclaimer, email [email protected].
We reserve the right to remove or refuse a listing without any prior warning at our complete discretion. There is no
refund policy.
If there is no obvious use of Elgg, your site will be linked to with “nofollow” set.
6.6.3 Sign up
If you would like to become an Elgg supporter:
• read the disclaimer above
• on the supporters page, subscribe via PayPal
• send an email to [email protected] with:
– the date you subscribed
– your name (and organization name, if applicable)
– your website
– your Elgg community profile
Once all the details have been received, we will add you to the appropriate list. Thanks for your support!
6.7 Release Process Workflow
Release a new version of Elgg.
This is the process the core team follows for making a new Elgg release. We have published this information in the
spirit of openness, and to streamline onboarding of new team members.
Contents
•
•
•
•
•
Requirements
1. First new stable minor/major release
2. Prepare and tag the release
3. Update the website
4. Make the announcement
6.7.1 Requirements
• SSH access to elgg.org
• Commit access to http://github.com/Elgg/Elgg
• Author access to http://blog.elgg.org
• Access to Twitter account
• Access to G+ page
• Node.js and NPM installed
6.7. Release Process Workflow
199
Elgg Documentation, Release master
• Sphinx installed (easy_install sphinx)
• Transifex client installed (easy_install transifex-client)
• Transifex account with access to Elgg project
6.7.2 1. First new stable minor/major release
Make sure to update the Support policy document to include the new minor/major release date and fill in the blanks
for the previous release.
6.7.3 2. Prepare and tag the release
Make sure your local git clone is up to date!
Merge latest commits up from lowest supported branch. Visit https://github.com/Elgg/Elgg/compare/new...old and
submit the PR if there is anything that needs to be merged up.
Install the prerequisites:
npm install elgg-conventional-changelog
easy_install sphinx
easy_install transifex-client
Run the release.php script. For example, to release 1.9.1:
git checkout 1.9
php .scripts/release.php 1.9.1
This creates a release-1.9.1 branch in your local repo.
Next, submit a PR via Github:
git push your-remote-fork release-1.9.1
Once approved and merged, tag the release:
git checkout release-${version}
git tag -a ${version}
git push origin ${release}
Update Milestones on Github
• Mark release milestones as completed
• Move unresolved tickets in released milestones to later milestones
6.7.4 3. Update the website
The downloads need to point to the new releases.
Build Package
• ssh to elgg.org
• Clone https://github.com/Elgg/elgg-scripts
• Use elgg-scripts/build/build.sh to generate the .zip file.
200
Chapter 6. Contributor Guides
Elgg Documentation, Release master
Run without arguments to see usage. This also generates the ChangeLog.txt file.
Example:
./build.sh 1.8.5 1.8.5 /var/www/www.elgg.org/download/
MIT:
./build.sh 1.8.5 1.8.5-mit /var/www/www.elgg.org/download/
Update homepage, download, and previous download pages
• Clone https://github.com/Elgg/old-elgg-website
• Make changes, commit, push.
– index.php
– download.php
– previous.php
• Pull to live site
cd /var/www/www.elgg.org && sudo su deploy && git pull
• flush apc cache (via community admin panel)
6.7.5 4. Make the announcement
This should be the very last thing you do.
• Sign in at http://blog.elgg.org/pg/login and compose a blog on with HTML version of CHANGELOG.md.
• Add tags “release” and “elgg1.x” where x is whatever branch is being released.
• Tweet from the elgg Twitter account
• Post from the G+ page
6.7. Release Process Workflow
201
Elgg Documentation, Release master
202
Chapter 6. Contributor Guides
CHAPTER 7
Appendix
Miscellaneous information about the project.
7.1 FAQs and Other Troubleshooting
Below are some commonly asked questions about Elgg.
203
Elgg Documentation, Release master
Contents
• General
– “Plugin cannot start and has been deactivated” or “This plugin is invalid”
– White Page (WSOD)
– Page not found
– Login token mismatch
– Form is missing __token or __ts fields
– Maintenance mode
– Missing email
– Server logs
– How does registration work?
– User validation
– Manually add user
– I’m making or just installed a new theme, but graphics or other elements aren’t working
– Changing profile fields
– Changing registration
– How do I change PHP settings using .htaccess?
– HTTPS login turned on accidently
– Using a test site
– 500 - Internal Server Error
– When I upload a photo or change my profile picture I get a white screen
– CSS is missing
– Should I edit the database manually?
– Internet Explorer (IE) login problem
– Emails don’t support non-Latin characters
– Session length
– File is missing an owner
– No images
– Deprecation warnings
– Javascript not working
• Security
– Is upgrade.php a security concern?
– Should I delete install.php?
– Filtering
• Development
– What should I use to edit php code
– I don’t like the wording of something in Elgg. How do I change it?
– How do I find the code that does x?
– Debug mode
– What events are triggered on every page load?
– What variables are reserved by Elgg?
– Copy a plugin
7.1.1 General
See also:
Getting Help
204
Chapter 7. Appendix
Elgg Documentation, Release master
“Plugin cannot start and has been deactivated” or “This plugin is invalid”
This error is usually accompanied by more details explaining why the plugin is invalid. This is usually caused by an
incorrectly installed plugin.
If you are installing a plugin called “test”, there will be a test directory under mod. In that test directory there needs to
be a start.php file: /mod/test/start.php and a manifest.xml file /mod/test/manifest.xml.
If these files do not exist, it could be caused by:
• installing a plugin to the wrong directory
• creating a directory under /mod that does not contain a plugin
• a bad ftp transfer
• unzipping a plugin into an extra directory (myplugin.zip unzips to myplugin/myplugin)
If you are on a Unix-based host and the files exist in the correct directory, check the permissions. Elgg must have read
access to the files and read + execute access on the directories.
White Page (WSOD)
A blank, white page (often called a “white screen of death”) means there is a PHP syntax error. There are a few possible causes o
• corrupted file - try transfering the code again to your server
• a call to a php module that was not loaded - this can happen after you install a plugin that requires a specific
module.
• bad plugin - not all plugins have been written to the same quality so you should be careful which ones you
install.
To find where the error is occurring, change the .htaccess file to display errors to the browser. Set display_errors to
1 and load the same page again. You should see a PHP error in your browser. Change the setting back once you’ve
resolved the problem.
Note: If you are using the Developer’s Tools plugin, go to its settings page and make sure you have “Display fatal
PHP errors” enabled.
If the white screen is due to a bad plugin, remove the latest plugins that you have installed by deleting their directories
and then reload the page.
Note: You can temporarily disable all plugins by creating an empty file at mod/disabled. You can then disable
the offending module via the administrator tools panel.
If you are getting a WSOD when performing an action, like logging in or posting a blog, but there are no error
messages, it’s most likely caused by non-printable characters in plugin code. Check the plugin for white spaces/new
lines characters after finishing php tag (?>) and remove them.
Page not found
If you have recently installed your Elgg site, the most likely cause for a page not found error is that mod_rewrite is
not setup correctly on your server. There is information in the Install Troubleshooting page on fixing this. The second
most likely cause is that your site url in your database is incorrect.
7.1. FAQs and Other Troubleshooting
205
Elgg Documentation, Release master
If you’ve been running your site for a while and suddenly start getting page not found errors, you need to ask yourself
what has changed. Have you added any plugins? Did you change your server configuration?
To debug a page not found error:
• Confirm that the link leading to the missing page is correct. If not, how is that link being generated?
• Confirm that the .htaccess rewrite rules are being picked up.
Login token mismatch
If you have to log in twice to your site and the error message after the first attempt says there was a token mismatch
error, the URL in Elgg’s settings does not match the URL used to access it. The most common cause for this is adding
or removing the “www” when accessing the site. For example, www.elgg.org vs elgg.org. This causes a problem with
session handling because of the way that web browsers save cookies.
To fix this, you can add rewrite rules. To redirect from www.elgg.org to elgg.org in Apache, the rules might look like:
RewriteCond %{HTTP_HOST} .
RewriteCond %{HTTP_HOST} !^elgg\.org
RewriteRule (.*) http://elgg.org/$1 [R=301,L]
Redirecting from non-www to www could look like this:
RewriteCond %{HTTP_HOST} ^elgg\.org
RewriteRule ^(.*)$ http://www.elgg.org/$1 [R=301,L]
If you don’t know how to configure rewrite rules, ask your host for more information.
Form is missing __token or __ts fields
All Elgg actions require a security token, and this error occurs when that token is missing. This is either a problem
with your server configuration or with a 3rd party plugin.
If you experience this on a new installation, make sure that your server is properly configured and your rewrite rules
are correct. If you experience this on an upgrade, make sure you have updated your rewrite rules either in .htaccess
(Apache) or in the server configuration.
If you are experiencing this, disable all 3rd party plugins and try again. Very old plugins for Elgg don’t use security
tokens. If the problem goes away when plugins are disabled, it’s due to a plugin that should be updated by its author.
Maintenance mode
To take your site temporarily offline, go to Administration -> Utilities -> Maintenance Mode. Complete the form and
hit save to disable your site for everyone except admin users.
Missing email
If your users are reporting that validation emails are not showing up, have them check their spam folder. It is possible
that the emails coming from your server are being marked as spam. This depends on many factors such as whether
your hosting provider has a problem with spammers, how your PHP mail configuration is set up, what mail transport
agent your server is using, or your host limiting the number of email that you can send in an hour.
If no one gets email at all, it is quite likely your server is not configured properly for email. Your server needs a
program to send email (called a Mail Transfer Agent - MTA) and PHP must be configured to use the MTA.
To quickly check if PHP and an MTA are correctly configured, create a file on your server with the following content:
206
Chapter 7. Appendix
Elgg Documentation, Release master
<?php
$address = "your_email@your_host.com";
$subject = ’Test email.’;
$body = ’If you can read this, your email is working.’;
echo "Attempting to email $address...<br />";
if (mail($address, $subject, $body)) {
echo ’SUCCESS! PHP successfully delivered email to your MTA. If you don\’t see the email in
} else {
echo ’ERROR! PHP could not deliver email to your MTA. Check that your PHP settings are corr
}
Be sure to replace “your_email@your_host.com” with your actual email address. Take care to keep quotes around it!
When you access this page through your web browser, it will attempt to send a test email. This test will let you know
that PHP and your MTA are correctly configured. If it fails–either you get an error or you never receive the email–you
will need to do more investigating and possibly contact your service provider.
Fully configuring an MTA and PHP’s email functionality is beyond the scope of this FAQ and you should search the
Internet for more resources on this. Some basic information on php parameters can be found on PHP’s site
Server logs
Most likely you are using Apache as your web server. Warnings and errors are written to a log by the web server
and can be useful for debugging problems. You will commonly see two types of log files: access logs and error logs.
Information from PHP and Elgg is written to the server error log.
• Linux – The error log is probably in /var/log/httpd or /var/log/apache2.
• Windows - It is probably inside your Apache directory.
• Mac OS - The error log is probably in /var/log/apache2/error_log
If you are using shared hosting without ssh access, your hosting provider may provide a mechanism for obtaining
access to your server logs. You will need to ask them about this.
How does registration work?
With a default setup, this is how registration works:
1. User fills out registration form and submits it
2. User account is created and disabled until validated
3. Email is sent to user with a link to validate the account
4. When a user clicks on the link, the account is validated
5. The user can now log in
Failures during this process include the user entering an incorrect email address, the validation email being marked as
spam, or a user never bothering to validate the account.
7.1. FAQs and Other Troubleshooting
207
Elgg Documentation, Release master
User validation
By default, all users who self-register must validate their accounts through email. If a user has problems validating an
account, you can validate users manually by going to Administration -> Users -> Unvalidated.
You can remove this requirement by deactivating the User Validation by Email plugin.
Note: Removing validation has some consequences: There is no way to know that a user registered with a working
email address, and it may leave you system open to spammers.
Manually add user
To manually add a user, under the Administer controls go to Users. There you will see a link title “Add new User”.
After you fill out the information and submit the form, the new user will receive an email with username and password
and a reminder to change the password.
Note: Elgg does not force the user to change the password.
I’m making or just installed a new theme, but graphics or other elements aren’t working
Make sure the theme is at the bottom of the plugin list.
Clear your browser cache and reload the page. To lighten the load on the server, Elgg instructs the browser to rarely
load the CSS file. A new theme will completely change the CSS file and a refresh should cause the browser to request
the CSS file again.
If you’re building or modifying a theme, make sure you have disabled the simple and system caches. This can be
done by enabling the Developer Tools plugin, then browsing to Administration -> Develop -> Settings. Once you’re
satisfied with the changes, enable the caches or performance will suffer.
Changing profile fields
Within the Administration settings of Elgg is a page for replacing the default profile fields. Elgg by default gives the
administrator two choices:
• Use the default profile fields
• Replace the default with a set of custom profile fields
You cannot add new profile fields to the default ones. Adding a new profile field through the replace profile fields
option clears the default ones. Before letting in users, it is best to determine what profile fields you want, what field
types they should be, and the order they should appear. You cannot change the field type or order or delete fields after
they have been created without wiping the entire profile blank.
More flexibility can be gained through plugins. There is at least two plugins on the community site that enable you to
have more control over profile fields. The Profile Manager plugin has become quite popular in the Elgg community. It
lets you add new profile fields whenever you want, change the order, group profile fields, and add them to registration.
Changing registration
The registration process can be changed through a plugin. Everything about registration can be changed: the look and
feel, different registration fields, additional validation of the fields, additional steps and so on. These types of changes
require some basic knowledge of HTML, CSS, PHP.
208
Chapter 7. Appendix
Elgg Documentation, Release master
Another option is to use the Profile Manager plugin that lets you add fields to both user profiles and the registration
form.
Create the plugin skeleton Plugin skeleton
Changing registration display Override the account/forms/register view
Changing the registration action handler You can write your own action to create the user’s account
How do I change PHP settings using .htaccess?
You may want to change php settings in your .htaccess file. This is especially true if your hosting provider does
not give you access to the server’s php.ini file. The variables could be related to file upload size limits, security,
session length, or any number of other php attributes. For examples of how to do this, see the PHP documentation on
this.
HTTPS login turned on accidently
If you have turned on HTTPS login but do not have SSL configured, you are now locked out of your Elgg install. To
turn off this configuration parameter, you will need to edit your database. Use a tool like phpMyAdmin to view your
database. Select the config table and delete the row that has the name https_login.
Using a test site
It is recommended to always try out new releases or new plugins on a test site before running them on a production
site (a site with actual users). The easiest way to do this is to maintain a separate install of Elgg with dummy accounts.
When testing changes it is important to use dummy accounts that are not admins to test what your users will see.
A more realistic test is to mirror the content from your production site to your test site. Following the instructions for
duplicating a site. Then make sure you prevent emails from being sent to your users. You could write a small plugin
that redirects all email to your own account (be aware of plugins that include their own custom email sending code so
you’ll have to modify those plugins). After this is done you can view all of the content to make sure the upgrade or
new plugin is functioning as desired and is not breaking anything. If this process sounds overwhelming, please stick
with running a simple test site.
500 - Internal Server Error
What is it?
A 500 - Internal Server Error means the web server experienced a problem serving a request.
See also:
The Wikipedia page on HTTP status codes
Possible causes
Web server configuration The most common cause for this is an incorrectly configured server. If you edited the
.htaccess file and added something incorrect, Apache will send a 500 error.
Permissions on files It could also be a permissions problem on a file. Apache needs to be able to read Elgg’s files.
Using permissions 755 on directories and 644 on files will allow Apache to read the files.
7.1. FAQs and Other Troubleshooting
209
Elgg Documentation, Release master
When I upload a photo or change my profile picture I get a white screen
Most likely you don’t have the PHP GD library installed or configured properly. You may need assistance from the
administrator of your server.
CSS is missing
Wrong URL
Sometimes people install Elgg so that the base URL is localhost and then try to view the site using a hostname. In
this case, the browser won’t be able to load the CSS file. Try viewing the source of the web page and copying the link
for the CSS file. Paste that into your browser. If you get a 404 error, it is likely this is your problem. You will need to
change the base URL of your site.
Syntax error
Elgg stores its CSS as PHP code to provide flexibility and power. If there is a syntax error, the CSS file served to the
browser may be blank. Disabling non-bundled plugins is the recommended first step.
Rewrite rules errors
A bad .htaccess file could also result in a 404 error when requesting the CSS file. This could happen when doing
an upgrade and forgetting to also upgrade .htaccess.
Should I edit the database manually?
Warning: No, you should never manually edit the database!
Will editing the database manually break my site?
Yes.
Can I add extra fields to tables in the database?
(AKA: I don’t understand the Elgg data model so I’m going to add columns. Will you help?)
No, this is a bad idea. Learn the data model and you will see that unless it’s a very specific and highly customized
installation, you can do everything you need within Elgg’s current data model.
I want to remove users. Can’t I just delete them from the elgg_users_entity table?
No, it will corrupt your database. Delete them through the site.
I want to remove spam. Can’t I just search and delete it from the elgg_objects_entity table?
No, it will corrupt your database. Delete it through the site.
210
Chapter 7. Appendix
Elgg Documentation, Release master
Someone on the community site told me to edit the database manually. Should I?
Who was it? Is it someone experienced with Elgg, like one of the core developers or a well-known plugin author?
Did he or she give you clear and specific instructions on what to edit? If you don’t know who it is, or if you can’t
understand or aren’t comfortable following the instructions, do not edit the database manually.
I know PHP and MySQL and have a legitimate reason to edit the database. Is it okay to manually edit the
database?
Make sure you understand Elgg’s data model and schema first. Make a backup, edit carefully, then test copiously.
Internet Explorer (IE) login problem
Canonical URL
IE does not like working with sites that use both http://example.org and http://www.example.org. It stores multiple
cookies and this causes problems. Best to only use one base URL. For details on how to do this see Login token
mismatch error.
Chrome Frame
Using the chrome frame within IE can break the login process.
Emails don’t support non-Latin characters
In order to support non-Latin characters, (such as Cyrillic or Chinese) Elgg requires multibyte string support to be
compiled into PHP.
On many installs (e.g. Debian & Ubuntu) this is turned on by default. If it is not, you need to turn it on (or recompile
PHP to include it). To check whether your server supports multibyte strings, check phpinfo.
Session length
Session length is controlled by your php configuration. You will first need to locate your php.ini file. In that file
will be several session variables. A complete list and what they do can be found in the php manual.
File is missing an owner
There are three causes for this error. You could have an entity in your database that has an owner_guid of 0. This
should be extremely rare and may only occur if your database/server crashes during a write operation.
The second cause would be an entity where the owner no longer exists. This could occur if a plugin is turned off
that was involved in the creation of the entity and then the owner is deleted but the delete operation failed (because
the plugin is turned off). If you can figure out entity is causing this, look in your entities table and change the
owner_guid to your own and then you can delete the entity through Elgg.
Warning: Reed the section “Should I edit the database manually?”. Be very carefull when editing the database
directly. It can break your site. Always make a backup before doing this.
7.1. FAQs and Other Troubleshooting
211
Elgg Documentation, Release master
The third cause is a user not having a username. This also indicates a database problem as this should not be possible.
If it does occur, you could see this error when viewing a list of users (such as with the Members plugin). To fix, check
your users_entity table for users without a username and if so, create a fake a username for that person. You
should probably then delete the user through Elgg.
Fixes
Database Validator plugin will check your database for these causes and provide an option to fix them. Be sure to
backup the database before you try the fix option.
No images
If profile images, group images, or other files have stopped working on your site it is likely due to a misconfiguration,
especially if you have migrated to a new server.
These are the most common misconfigurations that cause images and other files to stop working.
Wrong path for data directory
Make sure the data directory’s path is correct in the Site Administration admin area. It should have a trailing slash.
Wrong permissions on the data directory
Check the permissions for the data directory. The data directory should be readable and writeable by the web server
user.
Different timezone
Note: This only applies to Elgg versions before 1.9
If you migrated servers or upgraded PHP, check that PHP’s timezone settings are the same between the old and the
new. If you cannot or don’t want to change the system-wide php.ini file, you can put the following at the top of
engine/settings.php:
date_default_timezone_set(’MY_TIME_ZONE’);
Where MY_TIME_ZONE is a valid PHP timezone.
Migrated installation with new data directory location
If you migrated an installation and need to change your data directory path, be sure to update the SQL for the filestore
location as documented in the Duplicate Installation instructions.
Deprecation warnings
If you are seeing many deprecation warnings that say things like
Deprecated in 1.7: extend_view() was deprecated by elgg_extend_view()!
212
Chapter 7. Appendix
Elgg Documentation, Release master
then you are using a plugin that was written for an older version of Elgg. This means the plugin is using functions
that are scheduled to be removed in a future version of Elgg. You can ask the plugin developer if the plugin will be
updated or you can update the plugin yourself. If neither of those are likely to happen, you should not use that plugin.
Javascript not working
If the user hover menu stops working or you cannot dismiss system messages, that means JavaScript is broken on
your site. This usually due to a plugin having bad JavaScript code. You should find the plugin causing the problem
and disable it. You can do this be disabling non-bundled plugins one at a time until the problem goes away. Another
approach is disabling all non-bundled plugins and then enabling them one by one until the problem occurs again.
Most web browsers will give you a hint as to what is breaking the JavaScript code. They often have a console for
JavaScript errors or an advanced mode for displaying errors. Once you see the error message, you may have an easier
time locating the problem.
7.1.2 Security
Is upgrade.php a security concern?
Upgrade.php is a file used to run code and database upgrades. It is in the root of the directory and doesn’t require a
logged in account to access. On a fully upgraded site, running the file will only reset the caches and exit, so this is not
a security concern.
If you are still concerned, you can either delete, move, or change permissions on the file until you need to upgrade.
Should I delete install.php?
This file is used to install Elgg and doesn’t need to be deleted. The file checks if Elgg is already installed and forwards
the user to the front page if it is.
Filtering
Filtering is used in Elgg to make XSS attacks more difficult. The purpose of the filtering is to remove Javascript and
other dangerous input from users.
Filtering is performed through the function filter_tags(). This function takes in a string and returns a filtered
string. It triggers a validate, input plugin hook. By default Elgg comes with the htmLawed filtering code as a plugin.
Developers can drop in any additional or replacement filtering code as a plugin.
The filter_tags() function is called on any user input as long as the input is obtained through a call to
get_input(). If for some reason a developer did not want to perform the default filtering on some user input,
the get_input() function has a parameter for turning off filtering.
7.1.3 Development
What should I use to edit php code
There are two main options: text editor or integrated development environment (IDE).
7.1. FAQs and Other Troubleshooting
213
Elgg Documentation, Release master
Text Editor
If you are new to software development or do not have much experience with IDEs, using a text editor will get you up
and running the quickest. At a minimum, you will want one that does syntax highlighting to make the code easier to
read. If you think you might submit patches to the bug tracker, you will want to make sure that your text editor does
not change line endings. If you are using Windows, Notepad++ is a good choice. If you are on a Mac, TextWrangler
is a popular choice. You could also give TextMate a try.
Integrated Development Environment
An IDE does just what it’s name implies: it includes a set of tools that you would normally use separately. Most
IDEs will include source code control which will allow you to directly commit and update your code from your cvs
repository. It may have an FTP client built into it to make the transfer of files to a remote server easier. It will have
syntax checking to catch errors before you try to execute the code on a server.
The two most popular free IDEs for PHP developers are Eclipse and NetBeans. Eclipse has two different plugins for
working with PHP code: PDT and PHPEclipse.
I don’t like the wording of something in Elgg. How do I change it?
The best way to do this is with a plugin.
Create the plugin skeleton
Plugin skeleton
Locate the string that you want to change
All the strings that a user sees should be in the /languages directory or in a plugin’s languages directory
(/mod/<plugin name>/languages). This is done so that it is easy to change what language Elgg uses. For
more information on this see the developer documentation on Internationalization .
To find the string use grep or a text editor that provides searching through files to locate the string. (A good text editor
for Windows is Notepad++ ) Let’s say we want to change the string “Add friend” to “Make a new friend”. The grep
command to find this string would be grep -r "Add friend" *. Using Notepad++ , you would use the “Find
in files” command. You would search for the string, set the filter to *.php, set the directory to the base directory of
Elgg, and make sure it searches all subdirectories. You might want to set it to be case sensitive also.
You should locate the string “Add friend” in /languages/en.php. You should see something like this in the file:
’friend:add’ => "Add friend",
This means every time Elgg sees friend:add it replaces it with “Add friend”. We want to change the definition of
friend:add.
Override the string
To override this definition, we will add a languages file to the plugin that we built in the first step.
1. Create a new directory: /mod/<your plugin name>/languages
2. Create a file in that directory called en.php
214
Chapter 7. Appendix
Elgg Documentation, Release master
3. Add these lines to that file
<?php
return array(
’friend:add’ => ’Make a new friend’,
);
Make sure that you do not have any spaces or newlines before the <?php.
You’re done now and should be able to enable the plugin and see the change. If you are override the language of a
plugin, make sure your plugin is loaded after the one you are trying to modify. The loading order is determined in
the Tools Administration page of the admin section. As you find more things that you’d like to change, you can keep
adding them to this plugin.
How do I find the code that does x?
The best way to find the code that does something that you would like to change is to use grep or a similar search tool.
If you do not have grep as a part of your operating system, you will want to install a grep tool or use a text-editor/IDE
that has good searching in files. Notepad++ is a good choice for Windows users. Eclipse with PHP and NetBeans are
good choices for any platform.
String Example
Let’s say that you want to find where the Log In box code is located. A string from the Log In box that
should be fairly unique is Remember me. Grep for that string. You will find that it is only used in
the en.php file in the /languages directory. There it is used to define the Internationalization string
user:persistent. Grep for that string now. You will find it in two places: the same en.php language file
and in /views/default/forms/login.php. The latter defines the html code that makes up the Log In box.
Action Example
Let’s say that you want to find the code that is run when a user clicks on the Save button when arranging widgets on
a profile page. View the Profile page for a test user. Use Firebug to drill down through the html of the page until you
come to the action of the edit widgets form. You’ll see the url from the base is action/widgets/move.
Grep on widgets/move and two files are returned.
One is the JavaScript code for the widgets :
/js/lib/ui.widgets.js. The other one, /engine/lib/widgets.php, is where the action is registered
using elgg_register_action(’widgets/reorder’). You may not be familiar with that function in which
case, you should look it up at the API reference. Do a search on the function and it returns the documentation on the
function. This tells you that the action is in the default location since a file location was not specified. The default
location for actions is /actions so you will find the file at /actions/widgets/move.php.
Debug mode
During the installation process you might have noticed a checkbox that controlled whether debug mode was turned
on or off. This setting can also be changed on the Site Administration page. Debug mode writes a lot of extra data to
your php log. For example, when running in this mode every query to the database is written to your logs. It may be
useful for debugging a problem though it can produce an overwhelming amount of data that may not be related to the
problem at all. You may want to experiment with this mode to understand what it does, but make sure you run Elgg in
normal mode on a production server.
7.1. FAQs and Other Troubleshooting
215
Elgg Documentation, Release master
Warning: Because of the amount of data being logged, don’t enable this on a production server as it can fill up
the log files really quick.
What goes into the log in debug mode?
• All database queries
• Database query profiling
• Page generation time
• Number of queries per page
• List of plugin language files
• Additional errors/warnings compared to normal mode (it’s very rare for these types of errors to be related to any
problem that you might be having)
What does the data look like?
[07-Mar-2009
[07-Mar-2009
[07-Mar-2009
[07-Mar-2009
[07-Mar-2009
[07-Mar-2009
[07-Mar-2009
[07-Mar-2009
[07-Mar-2009
[07-Mar-2009
[07-Mar-2009
[07-Mar-2009
[07-Mar-2009
[07-Mar-2009
[07-Mar-2009
[07-Mar-2009
[07-Mar-2009
...
[07-Mar-2009
[07-Mar-2009
[07-Mar-2009
[07-Mar-2009
[07-Mar-2009
[07-Mar-2009
[07-Mar-2009
[07-Mar-2009
14:27:20]
14:27:20]
14:27:20]
14:27:20]
14:27:20]
14:27:20]
14:27:20]
14:27:20]
14:27:20]
14:27:20]
14:27:20]
14:27:20]
14:27:20]
14:27:20]
14:27:20]
14:27:20]
14:27:20]
Query cache invalidated
** GUID:1 loaded from DB
SELECT * from elggentities where guid=1 and ( (1 = 1) and enabled=’yes’) resu
SELECT guid from elggsites_entity where guid = 1 results cached
Query cache invalidated
** GUID:1 loaded from DB
SELECT * from elggentities where guid=1 and ( (1 = 1) and enabled=’yes’) resu
** GUID:1 loaded from DB
SELECT * from elggentities where guid=1 and ( (1 = 1) and enabled=’yes’) resu
** Sub part of GUID:1 loaded from DB
SELECT * from elggsites_entity where guid=1 results cached
Query cache invalidated
DEBUG: 2009-03-07 14:27:20 (MST): "Undefined index: user" in file /var/www/el
DEBUG: 2009-03-07 14:27:20 (MST): "Undefined index: pass" in file /var/www/el
***************** DB PROFILING ********************
1 times: ’SELECT * from elggdatalists’
1 times: ’SELECT * from elggentities where guid=1 and ( (access_id in (2) or
14:27:20]
14:27:20]
14:27:20]
14:27:20]
14:27:20]
14:27:20]
14:27:20]
14:27:20]
2 times: ’update elggmetadata set access_id = 2 where entity_guid = 1’
1 times: ’UPDATE elggentities set owner_guid=’0’, access_id=’2’, container_gui
1 times: ’SELECT guid from elggsites_entity where guid = 1’
1 times: ’UPDATE elggsites_entity set name=’3124/944’, description=’’, url=’ht
1 times: ’UPDATE elggusers_entity set prev_last_action = last_action, last_act
DB Queries for this page: 56
***************************************************
Page /action/admin/site/update_basic generated in 0.36997294426 seconds
What events are triggered on every page load?
There are 5 Elgg events that are triggered on every page load:
1. boot, system
2. plugins_boot, system
3. init, system
216
Chapter 7. Appendix
Elgg Documentation, Release master
4. pagesetup, system
5. shutdown, system
The boot, system event is triggered before the plugins get loaded. There does not appear to be any difference between
the timing of the next two events: plugins_boot, system and init, system so plugins tend to use init, system. This event
is triggered just after the plugins are loaded near the end of the boot script (/engine/start.php). The pagesetup,
system event is thrown the first time elgg_view() is called. Some pages like the default index.php do not call
elgg_view() so it is not triggered for them. The shutdown, system event is triggered after the page has been sent
to the requester and is handled through the PHP function register_shutdown_function().
There are other events that are triggered by the Elgg core but they happen occasionally (such as when a user logs in).
What variables are reserved by Elgg?
• $CONFIG
• $vars
• $autofeed
• $_GET[’action’] / $_POST[’action’]
• $viewtype
Copy a plugin
There are many questions asked about how to copy a plugin. Let’s say you want to copy the blog plugin in order to
run one plugin called blog and another called poetry. This is not difficult but it does require a lot of work. You
would need to
• change the directory name
• change the names of every function (having two functions causes PHP to crash)
• change the name of every view (so as not to override the views on the original plugin)
• change any data model subtypes
• change the language file
• change anything else that was specific to the original plugin
Note: If you are trying to clone the groups plugin, you will have the additional difficulty that the group plugin does
not set a subtype.
7.1.4 General
See also:
Getting Help
“Plugin cannot start and has been deactivated” or “This plugin is invalid”
This error is usually accompanied by more details explaining why the plugin is invalid. This is usually caused by an
incorrectly installed plugin.
7.1. FAQs and Other Troubleshooting
217
Elgg Documentation, Release master
If you are installing a plugin called “test”, there will be a test directory under mod. In that test directory there needs to
be a start.php file: /mod/test/start.php and a manifest.xml file /mod/test/manifest.xml.
If these files do not exist, it could be caused by:
• installing a plugin to the wrong directory
• creating a directory under /mod that does not contain a plugin
• a bad ftp transfer
• unzipping a plugin into an extra directory (myplugin.zip unzips to myplugin/myplugin)
If you are on a Unix-based host and the files exist in the correct directory, check the permissions. Elgg must have read
access to the files and read + execute access on the directories.
White Page (WSOD)
A blank, white page (often called a “white screen of death”) means there is a PHP syntax error. There are a few possible causes o
• corrupted file - try transfering the code again to your server
• a call to a php module that was not loaded - this can happen after you install a plugin that requires a specific
module.
• bad plugin - not all plugins have been written to the same quality so you should be careful which ones you
install.
To find where the error is occurring, change the .htaccess file to display errors to the browser. Set display_errors to
1 and load the same page again. You should see a PHP error in your browser. Change the setting back once you’ve
resolved the problem.
Note: If you are using the Developer’s Tools plugin, go to its settings page and make sure you have “Display fatal
PHP errors” enabled.
If the white screen is due to a bad plugin, remove the latest plugins that you have installed by deleting their directories
and then reload the page.
Note: You can temporarily disable all plugins by creating an empty file at mod/disabled. You can then disable
the offending module via the administrator tools panel.
If you are getting a WSOD when performing an action, like logging in or posting a blog, but there are no error
messages, it’s most likely caused by non-printable characters in plugin code. Check the plugin for white spaces/new
lines characters after finishing php tag (?>) and remove them.
Page not found
If you have recently installed your Elgg site, the most likely cause for a page not found error is that mod_rewrite is
not setup correctly on your server. There is information in the Install Troubleshooting page on fixing this. The second
most likely cause is that your site url in your database is incorrect.
If you’ve been running your site for a while and suddenly start getting page not found errors, you need to ask yourself
what has changed. Have you added any plugins? Did you change your server configuration?
To debug a page not found error:
• Confirm that the link leading to the missing page is correct. If not, how is that link being generated?
218
Chapter 7. Appendix
Elgg Documentation, Release master
• Confirm that the .htaccess rewrite rules are being picked up.
Login token mismatch
If you have to log in twice to your site and the error message after the first attempt says there was a token mismatch
error, the URL in Elgg’s settings does not match the URL used to access it. The most common cause for this is adding
or removing the “www” when accessing the site. For example, www.elgg.org vs elgg.org. This causes a problem with
session handling because of the way that web browsers save cookies.
To fix this, you can add rewrite rules. To redirect from www.elgg.org to elgg.org in Apache, the rules might look like:
RewriteCond %{HTTP_HOST} .
RewriteCond %{HTTP_HOST} !^elgg\.org
RewriteRule (.*) http://elgg.org/$1 [R=301,L]
Redirecting from non-www to www could look like this:
RewriteCond %{HTTP_HOST} ^elgg\.org
RewriteRule ^(.*)$ http://www.elgg.org/$1 [R=301,L]
If you don’t know how to configure rewrite rules, ask your host for more information.
Form is missing __token or __ts fields
All Elgg actions require a security token, and this error occurs when that token is missing. This is either a problem
with your server configuration or with a 3rd party plugin.
If you experience this on a new installation, make sure that your server is properly configured and your rewrite rules
are correct. If you experience this on an upgrade, make sure you have updated your rewrite rules either in .htaccess
(Apache) or in the server configuration.
If you are experiencing this, disable all 3rd party plugins and try again. Very old plugins for Elgg don’t use security
tokens. If the problem goes away when plugins are disabled, it’s due to a plugin that should be updated by its author.
Maintenance mode
To take your site temporarily offline, go to Administration -> Utilities -> Maintenance Mode. Complete the form and
hit save to disable your site for everyone except admin users.
Missing email
If your users are reporting that validation emails are not showing up, have them check their spam folder. It is possible
that the emails coming from your server are being marked as spam. This depends on many factors such as whether
your hosting provider has a problem with spammers, how your PHP mail configuration is set up, what mail transport
agent your server is using, or your host limiting the number of email that you can send in an hour.
If no one gets email at all, it is quite likely your server is not configured properly for email. Your server needs a
program to send email (called a Mail Transfer Agent - MTA) and PHP must be configured to use the MTA.
To quickly check if PHP and an MTA are correctly configured, create a file on your server with the following content:
<?php
$address = "your_email@your_host.com";
$subject = ’Test email.’;
7.1. FAQs and Other Troubleshooting
219
Elgg Documentation, Release master
$body = ’If you can read this, your email is working.’;
echo "Attempting to email $address...<br />";
if (mail($address, $subject, $body)) {
echo ’SUCCESS! PHP successfully delivered email to your MTA. If you don\’t see the email in
} else {
echo ’ERROR! PHP could not deliver email to your MTA. Check that your PHP settings are corr
}
Be sure to replace “your_email@your_host.com” with your actual email address. Take care to keep quotes around it!
When you access this page through your web browser, it will attempt to send a test email. This test will let you know
that PHP and your MTA are correctly configured. If it fails–either you get an error or you never receive the email–you
will need to do more investigating and possibly contact your service provider.
Fully configuring an MTA and PHP’s email functionality is beyond the scope of this FAQ and you should search the
Internet for more resources on this. Some basic information on php parameters can be found on PHP’s site
Server logs
Most likely you are using Apache as your web server. Warnings and errors are written to a log by the web server
and can be useful for debugging problems. You will commonly see two types of log files: access logs and error logs.
Information from PHP and Elgg is written to the server error log.
• Linux – The error log is probably in /var/log/httpd or /var/log/apache2.
• Windows - It is probably inside your Apache directory.
• Mac OS - The error log is probably in /var/log/apache2/error_log
If you are using shared hosting without ssh access, your hosting provider may provide a mechanism for obtaining
access to your server logs. You will need to ask them about this.
How does registration work?
With a default setup, this is how registration works:
1. User fills out registration form and submits it
2. User account is created and disabled until validated
3. Email is sent to user with a link to validate the account
4. When a user clicks on the link, the account is validated
5. The user can now log in
Failures during this process include the user entering an incorrect email address, the validation email being marked as
spam, or a user never bothering to validate the account.
User validation
By default, all users who self-register must validate their accounts through email. If a user has problems validating an
account, you can validate users manually by going to Administration -> Users -> Unvalidated.
You can remove this requirement by deactivating the User Validation by Email plugin.
Note: Removing validation has some consequences: There is no way to know that a user registered with a working
email address, and it may leave you system open to spammers.
220
Chapter 7. Appendix
Elgg Documentation, Release master
Manually add user
To manually add a user, under the Administer controls go to Users. There you will see a link title “Add new User”.
After you fill out the information and submit the form, the new user will receive an email with username and password
and a reminder to change the password.
Note: Elgg does not force the user to change the password.
I’m making or just installed a new theme, but graphics or other elements aren’t working
Make sure the theme is at the bottom of the plugin list.
Clear your browser cache and reload the page. To lighten the load on the server, Elgg instructs the browser to rarely
load the CSS file. A new theme will completely change the CSS file and a refresh should cause the browser to request
the CSS file again.
If you’re building or modifying a theme, make sure you have disabled the simple and system caches. This can be
done by enabling the Developer Tools plugin, then browsing to Administration -> Develop -> Settings. Once you’re
satisfied with the changes, enable the caches or performance will suffer.
Changing profile fields
Within the Administration settings of Elgg is a page for replacing the default profile fields. Elgg by default gives the
administrator two choices:
• Use the default profile fields
• Replace the default with a set of custom profile fields
You cannot add new profile fields to the default ones. Adding a new profile field through the replace profile fields
option clears the default ones. Before letting in users, it is best to determine what profile fields you want, what field
types they should be, and the order they should appear. You cannot change the field type or order or delete fields after
they have been created without wiping the entire profile blank.
More flexibility can be gained through plugins. There is at least two plugins on the community site that enable you to
have more control over profile fields. The Profile Manager plugin has become quite popular in the Elgg community. It
lets you add new profile fields whenever you want, change the order, group profile fields, and add them to registration.
Changing registration
The registration process can be changed through a plugin. Everything about registration can be changed: the look and
feel, different registration fields, additional validation of the fields, additional steps and so on. These types of changes
require some basic knowledge of HTML, CSS, PHP.
Another option is to use the Profile Manager plugin that lets you add fields to both user profiles and the registration
form.
Create the plugin skeleton Plugin skeleton
Changing registration display Override the account/forms/register view
Changing the registration action handler You can write your own action to create the user’s account
7.1. FAQs and Other Troubleshooting
221
Elgg Documentation, Release master
How do I change PHP settings using .htaccess?
You may want to change php settings in your .htaccess file. This is especially true if your hosting provider does
not give you access to the server’s php.ini file. The variables could be related to file upload size limits, security,
session length, or any number of other php attributes. For examples of how to do this, see the PHP documentation on
this.
HTTPS login turned on accidently
If you have turned on HTTPS login but do not have SSL configured, you are now locked out of your Elgg install. To
turn off this configuration parameter, you will need to edit your database. Use a tool like phpMyAdmin to view your
database. Select the config table and delete the row that has the name https_login.
Using a test site
It is recommended to always try out new releases or new plugins on a test site before running them on a production
site (a site with actual users). The easiest way to do this is to maintain a separate install of Elgg with dummy accounts.
When testing changes it is important to use dummy accounts that are not admins to test what your users will see.
A more realistic test is to mirror the content from your production site to your test site. Following the instructions for
duplicating a site. Then make sure you prevent emails from being sent to your users. You could write a small plugin
that redirects all email to your own account (be aware of plugins that include their own custom email sending code so
you’ll have to modify those plugins). After this is done you can view all of the content to make sure the upgrade or
new plugin is functioning as desired and is not breaking anything. If this process sounds overwhelming, please stick
with running a simple test site.
500 - Internal Server Error
What is it?
A 500 - Internal Server Error means the web server experienced a problem serving a request.
See also:
The Wikipedia page on HTTP status codes
Possible causes
Web server configuration The most common cause for this is an incorrectly configured server. If you edited the
.htaccess file and added something incorrect, Apache will send a 500 error.
Permissions on files It could also be a permissions problem on a file. Apache needs to be able to read Elgg’s files.
Using permissions 755 on directories and 644 on files will allow Apache to read the files.
When I upload a photo or change my profile picture I get a white screen
Most likely you don’t have the PHP GD library installed or configured properly. You may need assistance from the
administrator of your server.
222
Chapter 7. Appendix
Elgg Documentation, Release master
CSS is missing
Wrong URL
Sometimes people install Elgg so that the base URL is localhost and then try to view the site using a hostname. In
this case, the browser won’t be able to load the CSS file. Try viewing the source of the web page and copying the link
for the CSS file. Paste that into your browser. If you get a 404 error, it is likely this is your problem. You will need to
change the base URL of your site.
Syntax error
Elgg stores its CSS as PHP code to provide flexibility and power. If there is a syntax error, the CSS file served to the
browser may be blank. Disabling non-bundled plugins is the recommended first step.
Rewrite rules errors
A bad .htaccess file could also result in a 404 error when requesting the CSS file. This could happen when doing
an upgrade and forgetting to also upgrade .htaccess.
Should I edit the database manually?
Warning: No, you should never manually edit the database!
Will editing the database manually break my site?
Yes.
Can I add extra fields to tables in the database?
(AKA: I don’t understand the Elgg data model so I’m going to add columns. Will you help?)
No, this is a bad idea. Learn the data model and you will see that unless it’s a very specific and highly customized
installation, you can do everything you need within Elgg’s current data model.
I want to remove users. Can’t I just delete them from the elgg_users_entity table?
No, it will corrupt your database. Delete them through the site.
I want to remove spam. Can’t I just search and delete it from the elgg_objects_entity table?
No, it will corrupt your database. Delete it through the site.
7.1. FAQs and Other Troubleshooting
223
Elgg Documentation, Release master
Someone on the community site told me to edit the database manually. Should I?
Who was it? Is it someone experienced with Elgg, like one of the core developers or a well-known plugin author?
Did he or she give you clear and specific instructions on what to edit? If you don’t know who it is, or if you can’t
understand or aren’t comfortable following the instructions, do not edit the database manually.
I know PHP and MySQL and have a legitimate reason to edit the database. Is it okay to manually edit the
database?
Make sure you understand Elgg’s data model and schema first. Make a backup, edit carefully, then test copiously.
Internet Explorer (IE) login problem
Canonical URL
IE does not like working with sites that use both http://example.org and http://www.example.org. It stores multiple
cookies and this causes problems. Best to only use one base URL. For details on how to do this see Login token
mismatch error.
Chrome Frame
Using the chrome frame within IE can break the login process.
Emails don’t support non-Latin characters
In order to support non-Latin characters, (such as Cyrillic or Chinese) Elgg requires multibyte string support to be
compiled into PHP.
On many installs (e.g. Debian & Ubuntu) this is turned on by default. If it is not, you need to turn it on (or recompile
PHP to include it). To check whether your server supports multibyte strings, check phpinfo.
Session length
Session length is controlled by your php configuration. You will first need to locate your php.ini file. In that file
will be several session variables. A complete list and what they do can be found in the php manual.
File is missing an owner
There are three causes for this error. You could have an entity in your database that has an owner_guid of 0. This
should be extremely rare and may only occur if your database/server crashes during a write operation.
The second cause would be an entity where the owner no longer exists. This could occur if a plugin is turned off
that was involved in the creation of the entity and then the owner is deleted but the delete operation failed (because
the plugin is turned off). If you can figure out entity is causing this, look in your entities table and change the
owner_guid to your own and then you can delete the entity through Elgg.
Warning: Reed the section “Should I edit the database manually?”. Be very carefull when editing the database
directly. It can break your site. Always make a backup before doing this.
224
Chapter 7. Appendix
Elgg Documentation, Release master
The third cause is a user not having a username. This also indicates a database problem as this should not be possible.
If it does occur, you could see this error when viewing a list of users (such as with the Members plugin). To fix, check
your users_entity table for users without a username and if so, create a fake a username for that person. You
should probably then delete the user through Elgg.
Fixes
Database Validator plugin will check your database for these causes and provide an option to fix them. Be sure to
backup the database before you try the fix option.
No images
If profile images, group images, or other files have stopped working on your site it is likely due to a misconfiguration,
especially if you have migrated to a new server.
These are the most common misconfigurations that cause images and other files to stop working.
Wrong path for data directory
Make sure the data directory’s path is correct in the Site Administration admin area. It should have a trailing slash.
Wrong permissions on the data directory
Check the permissions for the data directory. The data directory should be readable and writeable by the web server
user.
Different timezone
Note: This only applies to Elgg versions before 1.9
If you migrated servers or upgraded PHP, check that PHP’s timezone settings are the same between the old and the
new. If you cannot or don’t want to change the system-wide php.ini file, you can put the following at the top of
engine/settings.php:
date_default_timezone_set(’MY_TIME_ZONE’);
Where MY_TIME_ZONE is a valid PHP timezone.
Migrated installation with new data directory location
If you migrated an installation and need to change your data directory path, be sure to update the SQL for the filestore
location as documented in the Duplicate Installation instructions.
Deprecation warnings
If you are seeing many deprecation warnings that say things like
Deprecated in 1.7: extend_view() was deprecated by elgg_extend_view()!
7.1. FAQs and Other Troubleshooting
225
Elgg Documentation, Release master
then you are using a plugin that was written for an older version of Elgg. This means the plugin is using functions
that are scheduled to be removed in a future version of Elgg. You can ask the plugin developer if the plugin will be
updated or you can update the plugin yourself. If neither of those are likely to happen, you should not use that plugin.
Javascript not working
If the user hover menu stops working or you cannot dismiss system messages, that means JavaScript is broken on
your site. This usually due to a plugin having bad JavaScript code. You should find the plugin causing the problem
and disable it. You can do this be disabling non-bundled plugins one at a time until the problem goes away. Another
approach is disabling all non-bundled plugins and then enabling them one by one until the problem occurs again.
Most web browsers will give you a hint as to what is breaking the JavaScript code. They often have a console for
JavaScript errors or an advanced mode for displaying errors. Once you see the error message, you may have an easier
time locating the problem.
7.1.5 Security
Is upgrade.php a security concern?
Upgrade.php is a file used to run code and database upgrades. It is in the root of the directory and doesn’t require a
logged in account to access. On a fully upgraded site, running the file will only reset the caches and exit, so this is not
a security concern.
If you are still concerned, you can either delete, move, or change permissions on the file until you need to upgrade.
Should I delete install.php?
This file is used to install Elgg and doesn’t need to be deleted. The file checks if Elgg is already installed and forwards
the user to the front page if it is.
Filtering
Filtering is used in Elgg to make XSS attacks more difficult. The purpose of the filtering is to remove Javascript and
other dangerous input from users.
Filtering is performed through the function filter_tags(). This function takes in a string and returns a filtered
string. It triggers a validate, input plugin hook. By default Elgg comes with the htmLawed filtering code as a plugin.
Developers can drop in any additional or replacement filtering code as a plugin.
The filter_tags() function is called on any user input as long as the input is obtained through a call to
get_input(). If for some reason a developer did not want to perform the default filtering on some user input,
the get_input() function has a parameter for turning off filtering.
7.1.6 Development
What should I use to edit php code
There are two main options: text editor or integrated development environment (IDE).
226
Chapter 7. Appendix
Elgg Documentation, Release master
Text Editor
If you are new to software development or do not have much experience with IDEs, using a text editor will get you up
and running the quickest. At a minimum, you will want one that does syntax highlighting to make the code easier to
read. If you think you might submit patches to the bug tracker, you will want to make sure that your text editor does
not change line endings. If you are using Windows, Notepad++ is a good choice. If you are on a Mac, TextWrangler
is a popular choice. You could also give TextMate a try.
Integrated Development Environment
An IDE does just what it’s name implies: it includes a set of tools that you would normally use separately. Most
IDEs will include source code control which will allow you to directly commit and update your code from your cvs
repository. It may have an FTP client built into it to make the transfer of files to a remote server easier. It will have
syntax checking to catch errors before you try to execute the code on a server.
The two most popular free IDEs for PHP developers are Eclipse and NetBeans. Eclipse has two different plugins for
working with PHP code: PDT and PHPEclipse.
I don’t like the wording of something in Elgg. How do I change it?
The best way to do this is with a plugin.
Create the plugin skeleton
Plugin skeleton
Locate the string that you want to change
All the strings that a user sees should be in the /languages directory or in a plugin’s languages directory
(/mod/<plugin name>/languages). This is done so that it is easy to change what language Elgg uses. For
more information on this see the developer documentation on Internationalization .
To find the string use grep or a text editor that provides searching through files to locate the string. (A good text editor
for Windows is Notepad++ ) Let’s say we want to change the string “Add friend” to “Make a new friend”. The grep
command to find this string would be grep -r "Add friend" *. Using Notepad++ , you would use the “Find
in files” command. You would search for the string, set the filter to *.php, set the directory to the base directory of
Elgg, and make sure it searches all subdirectories. You might want to set it to be case sensitive also.
You should locate the string “Add friend” in /languages/en.php. You should see something like this in the file:
’friend:add’ => "Add friend",
This means every time Elgg sees friend:add it replaces it with “Add friend”. We want to change the definition of
friend:add.
Override the string
To override this definition, we will add a languages file to the plugin that we built in the first step.
1. Create a new directory: /mod/<your plugin name>/languages
2. Create a file in that directory called en.php
7.1. FAQs and Other Troubleshooting
227
Elgg Documentation, Release master
3. Add these lines to that file
<?php
return array(
’friend:add’ => ’Make a new friend’,
);
Make sure that you do not have any spaces or newlines before the <?php.
You’re done now and should be able to enable the plugin and see the change. If you are override the language of a
plugin, make sure your plugin is loaded after the one you are trying to modify. The loading order is determined in
the Tools Administration page of the admin section. As you find more things that you’d like to change, you can keep
adding them to this plugin.
How do I find the code that does x?
The best way to find the code that does something that you would like to change is to use grep or a similar search tool.
If you do not have grep as a part of your operating system, you will want to install a grep tool or use a text-editor/IDE
that has good searching in files. Notepad++ is a good choice for Windows users. Eclipse with PHP and NetBeans are
good choices for any platform.
String Example
Let’s say that you want to find where the Log In box code is located. A string from the Log In box that
should be fairly unique is Remember me. Grep for that string. You will find that it is only used in
the en.php file in the /languages directory. There it is used to define the Internationalization string
user:persistent. Grep for that string now. You will find it in two places: the same en.php language file
and in /views/default/forms/login.php. The latter defines the html code that makes up the Log In box.
Action Example
Let’s say that you want to find the code that is run when a user clicks on the Save button when arranging widgets on
a profile page. View the Profile page for a test user. Use Firebug to drill down through the html of the page until you
come to the action of the edit widgets form. You’ll see the url from the base is action/widgets/move.
Grep on widgets/move and two files are returned.
One is the JavaScript code for the widgets :
/js/lib/ui.widgets.js. The other one, /engine/lib/widgets.php, is where the action is registered
using elgg_register_action(’widgets/reorder’). You may not be familiar with that function in which
case, you should look it up at the API reference. Do a search on the function and it returns the documentation on the
function. This tells you that the action is in the default location since a file location was not specified. The default
location for actions is /actions so you will find the file at /actions/widgets/move.php.
Debug mode
During the installation process you might have noticed a checkbox that controlled whether debug mode was turned
on or off. This setting can also be changed on the Site Administration page. Debug mode writes a lot of extra data to
your php log. For example, when running in this mode every query to the database is written to your logs. It may be
useful for debugging a problem though it can produce an overwhelming amount of data that may not be related to the
problem at all. You may want to experiment with this mode to understand what it does, but make sure you run Elgg in
normal mode on a production server.
228
Chapter 7. Appendix
Elgg Documentation, Release master
Warning: Because of the amount of data being logged, don’t enable this on a production server as it can fill up
the log files really quick.
What goes into the log in debug mode?
• All database queries
• Database query profiling
• Page generation time
• Number of queries per page
• List of plugin language files
• Additional errors/warnings compared to normal mode (it’s very rare for these types of errors to be related to any
problem that you might be having)
What does the data look like?
[07-Mar-2009
[07-Mar-2009
[07-Mar-2009
[07-Mar-2009
[07-Mar-2009
[07-Mar-2009
[07-Mar-2009
[07-Mar-2009
[07-Mar-2009
[07-Mar-2009
[07-Mar-2009
[07-Mar-2009
[07-Mar-2009
[07-Mar-2009
[07-Mar-2009
[07-Mar-2009
[07-Mar-2009
...
[07-Mar-2009
[07-Mar-2009
[07-Mar-2009
[07-Mar-2009
[07-Mar-2009
[07-Mar-2009
[07-Mar-2009
[07-Mar-2009
14:27:20]
14:27:20]
14:27:20]
14:27:20]
14:27:20]
14:27:20]
14:27:20]
14:27:20]
14:27:20]
14:27:20]
14:27:20]
14:27:20]
14:27:20]
14:27:20]
14:27:20]
14:27:20]
14:27:20]
Query cache invalidated
** GUID:1 loaded from DB
SELECT * from elggentities where guid=1 and ( (1 = 1) and enabled=’yes’) resu
SELECT guid from elggsites_entity where guid = 1 results cached
Query cache invalidated
** GUID:1 loaded from DB
SELECT * from elggentities where guid=1 and ( (1 = 1) and enabled=’yes’) resu
** GUID:1 loaded from DB
SELECT * from elggentities where guid=1 and ( (1 = 1) and enabled=’yes’) resu
** Sub part of GUID:1 loaded from DB
SELECT * from elggsites_entity where guid=1 results cached
Query cache invalidated
DEBUG: 2009-03-07 14:27:20 (MST): "Undefined index: user" in file /var/www/el
DEBUG: 2009-03-07 14:27:20 (MST): "Undefined index: pass" in file /var/www/el
***************** DB PROFILING ********************
1 times: ’SELECT * from elggdatalists’
1 times: ’SELECT * from elggentities where guid=1 and ( (access_id in (2) or
14:27:20]
14:27:20]
14:27:20]
14:27:20]
14:27:20]
14:27:20]
14:27:20]
14:27:20]
2 times: ’update elggmetadata set access_id = 2 where entity_guid = 1’
1 times: ’UPDATE elggentities set owner_guid=’0’, access_id=’2’, container_gui
1 times: ’SELECT guid from elggsites_entity where guid = 1’
1 times: ’UPDATE elggsites_entity set name=’3124/944’, description=’’, url=’ht
1 times: ’UPDATE elggusers_entity set prev_last_action = last_action, last_act
DB Queries for this page: 56
***************************************************
Page /action/admin/site/update_basic generated in 0.36997294426 seconds
What events are triggered on every page load?
There are 5 Elgg events that are triggered on every page load:
1. boot, system
2. plugins_boot, system
3. init, system
7.1. FAQs and Other Troubleshooting
229
Elgg Documentation, Release master
4. pagesetup, system
5. shutdown, system
The boot, system event is triggered before the plugins get loaded. There does not appear to be any difference between
the timing of the next two events: plugins_boot, system and init, system so plugins tend to use init, system. This event
is triggered just after the plugins are loaded near the end of the boot script (/engine/start.php). The pagesetup,
system event is thrown the first time elgg_view() is called. Some pages like the default index.php do not call
elgg_view() so it is not triggered for them. The shutdown, system event is triggered after the page has been sent
to the requester and is handled through the PHP function register_shutdown_function().
There are other events that are triggered by the Elgg core but they happen occasionally (such as when a user logs in).
What variables are reserved by Elgg?
• $CONFIG
• $vars
• $autofeed
• $_GET[’action’] / $_POST[’action’]
• $viewtype
Copy a plugin
There are many questions asked about how to copy a plugin. Let’s say you want to copy the blog plugin in order to
run one plugin called blog and another called poetry. This is not difficult but it does require a lot of work. You
would need to
• change the directory name
• change the names of every function (having two functions causes PHP to crash)
• change the name of every view (so as not to override the views on the original plugin)
• change any data model subtypes
• change the language file
• change anything else that was specific to the original plugin
Note: If you are trying to clone the groups plugin, you will have the additional difficulty that the group plugin does
not set a subtype.
7.2 Roadmap
What direction is the project going? What exciting new features are coming soon?
We do not publish detailed roadmaps, but it’s possible to get a sense for our general direction by utilizing the following
resources:
• Our feedback and planning group is used to host early discussion about what will be worked on next.
• Our Github milestones represent a general direction for the future releases of Elgg. This is the closest thing to a
traditional roadmap that we have.
230
Chapter 7. Appendix
Elgg Documentation, Release master
• Github pull requests will give you a good idea of what’s currently being developed, but nothing is sure until the
PR is actually checked in.
• We use the developer blog to post announcements of features that have recently been checked in to our development branch, which gives the surest indication of what features will be available in the next release.
7.2.1 Values
We have several overarching goals/values that affect the direction of Elgg. Enhancements generally must promote
these values in order to be accepted.
Accessibility
Elgg-based sites should be usable by anyone anywhere. That means we’ll always strive to make Elgg:
• Device-agnostic – mobile, tablet, desktop, etc. friendly
• Language-agnostic – i18n, RTL, etc.
• Capability-agnostic – touch, keyboard, screen-reader friendly
Testability
We want to make manual testing unnecessary for core developers, plugin authors, and site administrators by promoting and enabling fast, automated testing at every level of the Elgg stack.
We think APIs are broken if they require plugin authors to write untestable code. We know there are a lot of violations
of this principle in core currently and are working to fix it.
We look forward to a world where the core developers do not need to do any manual testing to verify the correctness
of code contributed to Elgg. Similarly, we envision a world where site administrators can upgrade and install new
plugins with confidence that everything works well together.
TODO: other goals/values?
7.2.2 FAQ
When will feature X be implemented?
We cannot promise when features will get implemented because new features are checked into Elgg only when someone is motivated enough to implement the feature and submit a pull request. The best we can do is tell you to look out
for what features existing developers have expressed interest in working on.
The best way to ensure a feature gets implemented is to discuss it with the core team and implement it yourself. See
our Contributor Guides guide if you’re interested. We love new contributors!
Do not rely on future enhancements if you’re on the fence as to whether to use Elgg. Evaluate it given the current
feature set. Upcoming features will almost certainly not materialize within your timeline.
When is version X.Y.Z going to be released?
The next version will be released when the core team feels it’s ready and has time to cut the release.
http://github.com/Elgg/Elgg/issues/milestones will give you some rough ideas of timeline.
7.2. Roadmap
231
Elgg Documentation, Release master
7.3 Release Policy
What to expect when upgrading Elgg.
In general, we adhere to semantic versioning.
Follow the blog to stay up to date on the latest releases.
7.3.1 Bugfix Releases (1.9.x)
Every few weeks.
Bugfix releases are made regularly to make sure Elgg stays stable, secure, and bug-free. The higher the third digit, the
more tested and stable the release is. Since bugfix release focus on fixing bugs and not making major changes, themes
and plugins should work from bugfix release to bugfix release.
7.3.2 Feature Releases (1.x.0)
Every few months.
New features are introduced in Elgg every few months in minor new feature releases. These versions are identified
by the second digit (1.**8**.0). These releases aren’t as mature as bugfix release, but are considered stable and
useable. Though these releases try to be backward compatible, features are added, unused code removed, and overall
improvements are made, so plugins and themes might need to be updated to make use of the new and improved
features.
7.3.3 Major Releases (x.0.0)
Every few years.
Elgg, as all software, inevitably undergoes serious changes and a major new feature release is made. These releases
are opportunities for the core team to make dramatic improvements to the underlying platform. Themes and plugins
from older versions are not expected to work without modification on different major releases.
7.3.4 Release Candidates/Betas
Before feature releases and major releases, the core team will typically offer a release candidate or beta. These are
meant for testing only and should not be considered production quality. The core team makes these releases available
to get some real-world testing and feedback on the release. That said, the API in release candidates is considered
stable, so once a release candidate is made available, you should feel comfortable writing plugins against any new
APIs.
7.4 Support policy
As of Elgg 1.9, each minor release gets:
• Normal bugfixes every 2 weeks for 3 months, at which point the next minor release candidate is made
available.
• Security and critical (i.e. regression) bug fixes for 1 year from the date of the next stable minor release.
These will be released on an as-needed basis.
232
Chapter 7. Appendix
Elgg Documentation, Release master
See also:
Release Policy
Below is a table outlining the specifics for each release:
Version
1.8
1.9
First stable release
September 2011
September 2014
Bug fixes through
August 2014
Security fixes through
September 2015
We don’t have a support policy for major releases (x.0.0) yet because we’ve never done one.
7.5 History
The name comes from a town in Switzerland. It also means “elk” or “moose” in Danish.
Elgg’s initial funding was by a company called Curverider Ltd, which was started by David Tosh and Ben Werdmuller.
In 2010, Curverider was acquired by Thematic Networks and control of the open-source project was turned over to
The Elgg Foundation. Today, Elgg is a community-driven open source project and has a variety of contributors and
supporters.
7.5. History
233
© Copyright 2026 Paperzz