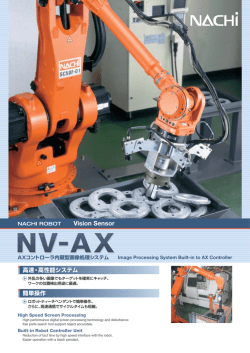
【1】安全に関する項目 ※ご使用の前に必ずお読みください 。
保証書
ご氏名
型 名
様
PM33a
製造 No.
この製品は厳密なる品質管理を経
てお届けするものです。
本保証書は所定項目をご記入の上
保管していただき、アフターサー
ビスの際ご提出ください。
※本保証書は再発行はいたしませ
んので大切に保管してくださ
い。
ご住所 〒
TEL
保証期間
本社 = 東京都千代田区外神田 2 − 4 − 4・ 電波ビル
郵便番号 =101-0021・ 電話 = 東京(03)3253 − 4871(代)
ご購入日 年 月より3 年間
保証規定
DIGITAL MULTIMETER
PM33a
取扱説明書
INSTRUCTION MANUAL
本社 = 東京都千代田区外神田 2 − 4 − 4・ 電波ビル
郵便番号 =101-0021・ 電話 = 東京(03)3253 − 4871 ㈹
大阪営業所 = 大 阪 市 浪 速 区 恵 美 須 西 2 − 7 − 2
郵便番号 =556-0003・ 電話 = 大阪(06)6631 − 7361 ㈹
SANWA ELECTRIC INSTRUMENT CO.,LTD.
保証期間中に正常な使用状態のもとで、万一故障が発生した場合には無償で修
理いたします。ただし下記事項に該当する場合は無償修理の対象から除外いた
します。
記
1.取扱説明書と異なる不適当な取扱いまたは使用による故障
2.当社サービスマン以外による不当な修理や改造に起因する故障
3.火災水害などの天災を始め故障の原因が本計器以外の事由による故障
4.電池の消耗による不動作
5.お買上げ後の輸送、移動、落下などによる故障および損傷
6.本保証書は日本国において有効です。
This warranty is valid only within Japan.
年 月 日
修理内容をご記入ください。
※無償の認定は当社において行わせていただきます。
Dempa Bldg., 4-4 Sotokanda2-Chome Chiyoda-Ku,Tokyo,Japan
03-1102 2040 6017
このたびはクランプセンサ付きデジタル・マルチメータ
PM33a 型をお買い上げいただき、誠にありがとうございます。
ご使用前にはこの取扱説明書をよくお読みいただき、正し
く安全にご使用ください。そして常にご覧いただけるように
製品と一緒に大切に保管してください。
本書で指定していない方法で使用すると、本製品の保護機
能が損なわれることがあります。
本文中の“ 警告”および“ 注意”の記載事項は、やけ
どや感電などの事故防止のため、必ずお守りください。
1-1 警告マークなどの記号説明
本器および『取扱説明書』に使用されている記号と意味について
:安全に使用するための特に重要な事項を示します。
・警告文はやけどや感電などの人身事故を防止するための
ものです。
・注意文は本器を壊すおそれのあるお取扱や測定についての
注意文です。
:直流(DC)
:グランド
∼:交流(AC)
:コンデンサ
Ω:抵抗
Hz:周波数
:ブザー
DUTY:デューティー比
:ダイオード
:二重絶縁または強化絶縁
+:プラス (テストリード赤)
−:マイナス (テストリード黒)
8. 測定中はテストプローブのつばよりテストピン側およ
びクランプセンサのバリアより先を持たないこと。
9. 測定中は他のファンクションまたは他のレンジに切り換
えないこと。
10. 測定ごとのファンクションおよびレンジ確認を確実に行
うこと。
11. 本器または手が水等でぬれた状態での使用はしないこと。
12. 電池交換を除く修理・改造は行なわないこと。
13. 始業点検および年 1 回以上の点検は必ず行うこと。
14. 屋内で使用すること。
ファンクション
DCV・ACV
入力端子
Hz/DUTY
(赤)
テストリード
テストピン
クランプセンサ
(収納時)
着脱式
テストピン
キャップ
Ω / / (黒)
つば
電池蓋
固定ネジ
電池蓋
未装着時
【3】各部の名称
3-1 本 体
テストプローブ
(赤)
テストプローブ
(黒)
表示器
着脱式テストピンキャップ
未装着時:CAT.Ⅱ 600V
装着時:CAT.Ⅲ 300V
テストリード
巻取り方向
MAX/MIN
ボタン
Hz/DUTY
ボタン
RANGE
ボタン
REL/ZERO
ボタン
SELECT
ボタン
DATAHOLD
ボタン
3-2 表示器
データホールド
動作表示
オートレンジモード
動作表示
電源&
ファンクション
スイッチ
ZEROセット
動作表示
ダイオードテスト
動作表示
導通チェック MAX/MINモード
動作表示
動作表示
直流測定
動作表示
交流測定
動作表示
マイナス
極性表示
オートパワーオフ
動作表示
電池消耗警告表示
− 3 −
4-7 DATA HOLD ボタン(全ファンクション)
DATA HOLD ボタンを押すと、表示器に が点灯しその時
点の表示値を維持します。測定入力が変動しても表示は変化
しません。再度ボタンを押すと、ホールド状態は解除され測
定状態に戻ります。
●ファンクションおよびレンジを切り替えると DATA HOLD
は解除されます。
4-8 オートパワーオフ:(APO)
電源 ON 時からスイッチや押しボタン操作が行われないと
き、約 30 分後に自動的に電源が切れ表示が消えます。測定中
にボタンを押したりファンクションスイッチを切り換えたり
するとオートパワーオフまでの時間がその操作時から 30 分間
延長されます。
オートパワーオフ状態から復帰する場合は、押しボタンを押
してください。復帰時はオートパワーオフした時点の値を
DATA HOLD 状態で表示します。この機能を解除するには、
SELECT、DATA HOLD 以外のボタンを押したままファン
クションスイッチを回し、電源を ON してください。
(表示器
消灯)
オートパワーオフ機能動作時は表示器に が点灯していま
す。
・オートパワーオフ時 消費電力は、電源 ON 状態の 1/100
以下になりますが測定終了後は、必ず電源スイッチを OFF
にしてください。
4-9 電池消耗警告表示
内蔵電池が消耗し電池電圧が約 2.3V 以下になった時、表示
器に が表示されます。このマークが点灯した時には、新し
い電池(2 本共に)と交換してください。
小数点
数値表示
4-3 RANGE ボタン:
(DCV・ACV・Ω・ ファンクション)
RANGE ボタンを押すと測定レンジがマニュアルモードとな
り、レンジが固定されます。
(表示器 消灯)
マニュアルモードになると、このボタンを押す度にレンジが移動
しますので、表示器の単位と小数点の位置を確認しながら適正レ
ンジを選択してください。オートレンジに復帰させる場合は、こ
のボタンを 1 秒以上長押してください。
(表示器 点灯)
● Hz/DUTY 測定時には使用出来ません。
4-4 MAX/MIN ボタン:
(DCV・ACV・Ω・ ・ ・ ・DCA・ACA ファンクション)
MAX/MIN ボタンを押すと MAX/MIN モードとなります。測
定レンジは固定されボタンを押す(→)ごとに以下のように切
り換わります。
・ MAX 値表示(表示器 点灯)→ MIN 値表示( 点灯)→現
在の測定値表示( 点滅)→ MAX 値表示( 点灯)
− 4 −
クランプ DC/AC100A
DC/AC100A
センサ部
電圧入力禁止
※交流電圧は正弦波交流の実効値での値。
【2】用途と特長
2-1 用 途
本器は弱電回路の測定用(CAT. Ⅱ 600V、CAT. Ⅲ 300V)
に設計された、クランプセンサ付きポケットタイプのデジタ
ル・マルチメータです。小型通信機器や家電製品、電灯線電
圧や各種電池などの測定はもちろん、付加機能を使って回路
分析などに威力を発揮します。
また DC/AC100A まで測定可能な電流クランプセンサを装
備しておりますので、自動車バッテリーや AC 電源を使用し
ている機器などの消費電流なども測定する電線のうち 1 本を
クランプするだけで測定することが可能です。
警 告
警 告
1. 電源スイッチを ON した時、電池消耗警告表示が点滅ま
たは点灯していないことを確認すること。点滅または
点灯しているときは、新しい電池と交換すること。
2. 本体およびテストリードが傷んでいたり、壊れていた
りしている場合は使用しないこと。
3. テストリードが断線していないことを確認すること。
※表示器に何も表示が出ない場合は、電池の全消耗が考えら
れます。
スタート
壊れている
本体およびテスト
リードは外観上壊れて
確認
いませんか?
壊れていない
②
テストリードの断線確認
1. 最大定格入力電圧を超えた入力信号を加えないこと。
2. 測定中はファンクションスイッチを切り換えないこと。
3. 測定中はテストプローブのつばよりテストピン側を持たない
こと。
ファンクション 最大定格入力
測定レンジ
DCV
DC600.0V
660.0mV, 6.600V, 66.00V, 600.0V
ACV
AC600.0V
660.0mV, 6.600V, 66.00V, 600.0V
1)測定対象
DCV :電池や直流回路の電圧を測定します。
ACV :電灯線電圧などの正弦波交流電圧を測定します。
2)測定方法
① ファンクションスイッチを V ポジションに設定し、
SELECT ボタンで DCV または ACV のいずれかを
選択します。
② 被測定回路に赤黒のテストピンを接触させます。
● DCV:被測定回路のマイナス電位側に黒のテストピ
ンを、プラス電位側に赤のテストピンを接触
させます。
● ACV:被測定回路に赤黒のテストピンをそれぞれ接触
させます。
③ 表示器の測定値を読み取ります。
④ 測定後は被測定物から赤黒のテストピンを離します。
④
①
乾電池
③
④
DCV測定
②
④
①
鳴らない
④
異常ありません。
測定可能です。
− 8 −
66.0M Ω
測定レンジ
660.0 Ω ,6.600k Ω ,66.00k Ω ,
660.0k Ω ,6.600M Ω ,66.0M Ω
1)測定対象:抵抗器や回路の抵抗を測定します。
2)測定方法
① ファンクションスイッチをΩ / / ポジションに設定し
ます。
② 被測定物に赤、黒のテストピンをそれぞれあてて測定
します。
③ 表示器の測定値を読み取ります。
④ 測定後は被測定物から赤黒のテストピンを離します。
例)DC3.000V 入力時に REL/ZERO ボタンを押した後の表示
REL 測定時の表示
DC 3.000V
DC 0.000V
DC-2.000V
●ファンクションおよびレンジを切り替えると REL 測定、
ZERO セットは解除されます。
コンセント
− 9 −
5-3 周波数(Hz)/DUTY(%)測定
警 告
1. 最大定格入力電圧を超えた入力信号を加えないこと。
2. 測定中はファンクションスイッチを切り換えないこと。
3. 測定中はテストプローブのつばよりテストピン側を持
たないこと。
②
④
③
④
⑤
②
①
⑤
④
④
⑥
⑥
ダイオード
⑥
②
◆入力端子間の開放電圧は、ほぼ電池電圧となります。
警 告
警 告
クランプセンサ部
中心位置
マーク
バリア
①
⑤
③
電流方向
② 【6】保守管理について
警 告
1. この項目は安全上重要です。本説明書をよく理解して管
理をおこなうこと。
2. 安全と確度維持のために 1 年に 1 回以上は校正、点検を
実施すること。
以上の項目に該当するものは、そのまま使用せず修理を依
頼してください。
また、テストリードが切れたりしていないことを【5】5-1
を参照して確認してください。
6-2 校正
校正、点検については三和電気計器(株)
・羽村工場サービス
部までお問い合わせください。
(
【7】
「送り先」参照)
警 告
1. 感電のおそれがあるため、測定端子、クランプセンサに
入力が加わった状態または測定状態で電池蓋をはずさな
いこと。
2. ファンクションスイッチが“OFF”になっていること
を確認してから電池交換作業をおこなうこと。
電池取り付けの際は、電池の極性を間違えないように注意して
ください。
① 電池蓋の固定ネジ(2 本)をはずします。
② 電池蓋を下にスライドさせてからはずします。
③ 電池ホルダ内の電池を 2 本共に新品と交換します。
④ 電池蓋固定ネジを元どおりネジ止めします。
●出荷時の電池について
工場出荷時に組み込まれている電池はモニター用電池ですので
電池寿命が新品電池より短い場合があります。モニター用電池
とは製品の機能や性能をチェックするための電池のことです。
①④
②
③
8-1 一般仕様
動作方式
表示
オーバー表示
レンジ切り換え
極性切り換え
電池消耗表示
サンプルレート
電流測定方式
最大クランプ導体径
交流検波方式
使用環境条件
二重積分方式
最大 6600 カウント
"OL" 表示
オートおよびマニュアル
自動切換え(−のみ表示)
内部電池消耗時
(約 2.3V 以下)
で表示
器に
「 」
マークが点灯または点滅
約3回/秒
CT クランプ
φ 10mm
平均値方式
高度 2000 m以下、屋内使用、環境汚
染度Ⅱ
23 ± 5℃、
80%RH 以下
(結露のないこと)
5 ∼ 40℃、
80%RH 以下
(結露のないこと)
-10∼50℃、80%RH 以下
(結露のないこと)
アルカリ単 4 電池(LR03)2 本
最終操作から約 30 分後に電源 OFF
約 7mW TYP.(DCV にて)
130(L)× 75(W)× 19.9(D)mm(突
起部含まず)
・約 160g(電池含む)
赤、黒共に約 60cm
IEC61010-1 CAT.Ⅲ 300V、CAT.Ⅱ 600V、
IEC61010-031:2008、IEC61010-2-032
IEC61326
取扱説明書
過電圧測定分類
過電圧測定分類(CAT Ⅰ)
: コンセントから電源変圧器
(トランス)
等を経由した機器内の二次側電路。
過電圧測定分類(CAT Ⅱ)
: コンセントに接続する電源コード
付き機器の一次側電路。
過電圧測定分類(CAT Ⅲ)
: 直接分電盤から電気を取り込む機
器の一次側および分岐部からコン
セントまでの電路。
− 20 −
注 意
1. パネル、ケース等は揮発性溶剤に弱いため、シンナー
やアルコールなどでふいたりしないでください。
2. パネル、ケース等は熱に弱いため、高熱を発するもの(は
んだこて等)の近くに置かないでください。
3. 振動の多い場所や落下のおそれのある場所に保管しな
いでください。
4. 直射日光下や高温または低温、多湿、結露のある場所で
の保管は避けてください。
5. 長期間使用されない場合は内蔵電池を必ず抜いておいて
ください。
【7】アフターサービス
7-1 保証期間について
本製品の保証期間は、お買い上げの日より 3 年間です。
ただし、日本国内で購入し日本国内でご使用いただく場合に
限ります。また、製品本体の確度は 1 年保証、製品付属の電池、
テストリード等は保証対象外とさせていただきます。
7-2 修理について
1)修理依頼の前にもう一度次の項目をご確認ください。
・内蔵電池の容量と電池装着時の極性をチェック。
・テストリードの断線をチェック。
2)保証期間中の修理
保証書の記載内容によって修理させていただきます。
3)保証期間経過後の修理
・修理によって本来の機能が維持できる場合、ご要望によ
り有料で修理させていただきます。
・修理費用や輸送費用が製品価格より高くなる場合もあ
りますので、事前にお問い合わせください。
・本品の補修用性能部品の最低保有期間は、製造打切後 6
年間です。この保有期間を修理可能期間とさせていただ
きます。ただし購買部品の入手が製造会社の製造中止等
により不可能になった場合は、保有期間が短くなる場合
もありますのでお含みおきください。
4)修理品の送り先
・製品の安全輸送のため、製品より 5 倍以上の容積の箱
に入れ、十分なクッションを詰めてお送りください。
− 18 −
8-2 測定範囲および確度
確度保証範囲:23 ± 5℃、80%RH 以下 結露のないこと
【8】仕 様
6-4 保管について
− 17 −
− 16 −
EMC 指令
付属品
− 19 −
− 14 −
6-1 保守点検
1)外観
●落下などにより、外観が壊れていませんか?
2)テストリード
●テストリードが傷んでいませんか?
●テストリードのどこかの箇所から芯線が露出していませ
んか?
安全規格
③
− 13 −
注 意
テストリード長
①
1. コンデンサ内の電荷は測定前に放電してください。
2. 本器は電流を被測定コンデンサに加える方式のため、漏
れ電流の大きい電解コンデンサなどの測定は誤差が大
きくなるために適しておりません。
3. 静電容量の大きいコンデンサでは測定時間が長くなり
ます。
バリア
◆DCA 測定時、本器の姿勢を変えると地磁気の影響で表示
が変動することがあります。
◆本器の交流検波方式は平均値方式のため、正弦波以外の
波形では測定値に誤差を生じます。
◆ACA 測定の確度保証周波数範囲は 40Hz ∼ 400Hz です。
◆インバーター電源回路の測定では誤動作することがあり
ます。
5-8 クランプ電流(CLAMP A)測定
1. 本器のクランプセンサは低電圧用です。クランプ電流
測定は 600V 以下の線路で使用すること。
2. 測定中はファンクションスイッチを切り換えないこと。
3. 測定中はクランプセンサのバリアより先を持たないこ
と。
4. 感電防止のため、テストプローブおよびテストリードは
所定の場所に必ず収納すること。
被測定
導体
(電線)
④
寸法・重量
②
注 意
6-3 内蔵電池交換
電流方向マーク
◆6.600nF,66.00nF レンジ使用時は REL モードを使用して
表示器に残っている数値を0(キャンセル)にしてから
測定をおこなってください。
◆周囲のノイズやテストリードの浮遊容量の影響で表示が
安定しないことがあります。
警 告
◆被測定回路抵抗が約 30 Ω以下でブザーが発音します。
◆入力端子間の開放電圧は約 0.78V です。
確度保証温湿度範囲
使用温湿度範囲
保存温湿度範囲
電源
オートパワーオフ
消費電力
⑤
④
①
5-7 静電容量(コンデンサ: )測定
延長コード
測定レンジ
DC100.0A
AC100.0A
7-3 お問い合わせ
三和電気計器株式会社
東京本社
:TEL(03)3253-4871
FAX(03)3251-7022
大阪営業所 :TEL(06)6631-7361
FAX(06)6644-3249
お客様計測相談室: 0120-51-3930
受付時間 9:30 ∼ 12:00 13:00 ∼ 17:00
(土日祭日を除く)
ホームページ:http://www.sanwa-meter.co.jp
コンデンサ
アノード
⑤
注 意
1. 被測定可能導体径はφ 10mm です。外径がφ 10mm よ
り太いケーブルをクランプセンサ部に無理やり入れな
いでください。また、クランプセンサ部に外部から力
を加えないでください。
2. 測定誤差を生じますので被測定導体は必ずクランプセ
ンサ矢印の中心位置に合わせてください。
3. 本器を大電流の流れている導体に近づけたり、強磁界
の場所に置くと、被測定導体を測定しなくても、電流
値を表示することがあります。(誤差を生じます。)本
器のクランプセンサはU字型のオープン型センサのた
めクローズ型のセンサに比べ、その影響が大きくなり
ます。
・箱の表面に「修理品在中」と明記してください。
・輸送にかかる往復の送料は、お客様のご負担とさせてい
ただきます。
[送り先] 三和電気計器株式会社・羽村工場サービス部
〒 205-8604 東京都羽村市神明台 4-7-15
TEL
(042)
554-0113 / FAX
(042)
555-9046
1)測定対象:フィルムコンデンサなどの漏れ電流の少ない
静電容量を測定します。
2)使用方法
① ファンクションスイッチを ポジションに設定します。
② 被測定コンデンサに赤、黒のテストピンをそれぞれ
あてて測定します。
③ 表示器の測定値を読み取ります。
④ 測定後は被測定物から赤黒のテストピンを離します。
③
− 12 −
1)測定対象
DCA:自動車バッテリーなどの消費電流を測定します。
ACA:電源設備など周波数 40Hz ∼ 400Hz の正弦波交
流の電流を測定します。
2)測定方法
① 本体のリア部分からクランプセンサを立ち上げます。
② ファンクションスイッチを CLAMP A ポジションに設
定し、SELECT ボタンで DCA または ACA のいずれか
を選択します。
● DCA:測定前に ZERO セット機能を使用して表示値
を「0.0A」にしてください。
● ACA:特にゼロ調整は必要ありません。
③ 被測定導体の1本をクランプセンサ矢印の中心位置に合
わせます。
● DCA:被測定電流の向きを電流方向マークと一致さ
せてください。逆向きでは極性表示“−”が
表示されます。
● ACA:被測定電流の向きは関係ありません。
④ 表示器の測定表示値を読み取ります。
⑤ 測定後は被測定導体をクランプセンサからはずします。
66.00mF
測定レンジ
6.600nF,66.00nF,660.0nF,
6.600 μ F,66.00 μ F ,660.0 μ F
6.600mF,66.00mF
③
入力端子には外部より電圧を絶対に加えないこと。
ファンクション 最大定格入力
DCA
DC100.0A
ACA
AC100.0A
ファンクション 最大定格入力
④
抵抗器
①
1)測定対象:回路等の周波数、デューティー比を測定します。
2)測定方法
① ファンクションスイッチを V ポジションに設定し、
SELECT ボタンで ACV を選択します。
② Hz/DUTY ボタンで、周波数 Hz 測定または DUTY
比測定に切り換えます。
③ 被測定回路に赤黒のテストピンをそれぞれ接触させ
ます。
④ 表示器の測定値を読み取ります。
⑤ 測定後は被測定物から赤黒のテストピンを離します。
⑤
③
カソード
②
①
5-6 ダイオード( )テスト
測定レンジ
ファンクション 最大定格入力
66.00kHz
660.0Hz,6.600kHz,66.00kHz
Hz/DUTY
(600Vrms 以下)20.0%∼ 80.0%(50/60Hz 時)
− 10 −
1)測定対象:配線の導通確認や選定に用います。
2)使用方法
① ファンクションスイッチをΩ / / ポジションに設定し
ます。
② SELECT ボタンで を選択します。
③ 被測定回路または導線の 2 点間に赤、黒のテストピ
ンをそれぞれあててチェックします。
④ ブザー音の有無で導通を確認します。
⑤ 測定後は被測定物から赤黒のテストピンを離します。
− 15 −
◆ACV 測定の確度保証周波数範囲:
660mV レンジ
40Hz ∼ 100Hz
660mV レンジ以外 40Hz ∼ 400Hz
◆AC660mV および AC6.6V レンジでは測定端子間をショ
ー ト し て も AC660mV レ ン ジ は 最 大 10 カ ウ ン ト、
AC6.6V レンジは最大 7 カウント表示が残ることがあり
ます。
◆インバーター電源回路の測定では誤動作することがあり
ます。
④
修理を依頼してください。
警 告
1)測定対象:ダイオードの良否をテストします。
2)使用方法
① ファンクションスイッチをΩ / / ポジションに設定し
ます。
② SELECT ボタンで を選択します。
③ ダイオードのカソード側に黒のテストピンをアノー
ド側に赤のテストピンを接続します。
④ 表示器にダイオードの順方向電圧降下が表示されて
いることを確認します。
⑤ 赤と黒のテストピンを入れ替えダイオードのカソード
側に赤のテストピン、アノード側に黒のテストピンを
接続します。
⑥ テストリード開放時の表示と同じになっていることを
確認します。
(OL 表示)
※ ④・⑤の確認が出来ればダイオードは正常です。
⑦ 測定後は被測定物から赤黒のテストピンを離します。
入力端子には外部より電圧を絶対に加えないこと。
ACV測定
◆テストリード開放時に表示が変動しますが、故障ではあ
りません。
◆本器の交流検波方式は平均値方式のため、正弦波以外
の波形では測定値に誤差が生じます。
鳴る
4-6 REL/ZERO ボタン:
(DCV・ACV・Ω・ ・ ・ ・DCA・ACA ファンクション)
DCV、ACV、Ω、
、
、
および ACA ファンクション時、
REL/ZERO ボタンを押すと、REL 測定になります。
(表示器 点灯)
測定レンジが固定され、ボタンを押した時点の入力値を基準と
し表示値をゼロにします。REL 測定を解除するには再度このボ
タンを押してください。
また DCA ファンクション時、REL/ZERO ボタンを押すと、表
示値が ZERO にセットされます。
(表示器 点灯)
ボタンを押した時点の数値をキャンセルし、表示は 0.0A となり
ます。
ZERO セット機能を解除するには再度ボタンを 1 秒以上長押し
てください。
− 6 −
5-2 電圧(V)測定
5-1 始業点検
ブザーが鳴りますか。
4-5 Hz/DUTY ボタン:
(ACV・ACA ファンクション)
Hz/DUTY 測定への切り換えに使用します。ACV および ACA
ファンクション時、Hz/DUTY ボタンを押すごとに以下のよう
に切り換わります。
ACV または ACA 測定→ Hz 測定→ DUTY 測定→ ACV または
ACA 測定
実際の入力値
DC 6.000V
DC 3.000V
DC 1.000V
5-5 導通( )チェック
− 11 −
MAX/MIN モードを解除する場合は、このボタンを 1 秒以上
長押してください。
●ファンクションおよびレンジを切り替えると MAX/MIN モー
ドは解除されます。
− 5 −
【5】測定方法
①測定ファンクション
を (導通チェック)
に設定します。
ファンクション 最大定格入力
測定単位表示
②赤黒のテストピンを
ショートさせます。
− 7 −
4-2 SELECT ボタン:
(V・Ω / / ・CLAMP A ポジション)
SELECT ボタンを押す(→)ごとにファンクションは以下の
ように切り換わります。
・ V ポジション:交流電圧( )→直流電圧( )→交流電
圧( )
・ Ω / / ポジション:抵抗測定(Ω)→導通チェック
( )
→ダイオードテスト( )→ 抵抗測定(Ω)
・ CLAMP A ポジション:交流電流( )→直流電流( )
→交流電流( )
・ MAX 値表示:MAX/MIN モード設定時から測定した最大値を表示。
・ MIN 値表示 : MAX/MIN モード設定時から測定した最小値を表示。
・ 現在の測定値表示:今の測定値を表示しながら最大値、最小
値を記憶します。最大値、最小値を確認する時は、ボタンを
押して MAX 値表示、MIN 値表示に切り換えます。
REL測定
動作表示
電圧・電流
入力禁止
DC/AC600V
【4】機能説明
4-1 電源スイッチ&ファンクションスイッチ:
(全ファンクション)
このスイッチを回して電源の ON/OFF および各測定ファンク
ションを切り換えます。
注 意
高抵抗を測定する場合、外部誘導により表示値が変動する
場合があります。
DC/AC600V
− 2 −
警 告
入力を印加したままでファンクションスイッチを回さないこと。
入力端子には外部より電圧を絶対に加えないこと。
Ω
− 1 −
2-2 特 長
・ コンパクト&軽量でしかも IEC61010-1 に準拠した安全設計。
・ DC/AC 100A まで測定可能な電流クランプセンサ付き。
・ クランプセンサは厚さ 7mm の薄型 U 字型センサを採用。
またセンサの傾斜角度を 0 ∼ 180°まで変えられますので測
定ケーブルに対して本体表示部を見やすい角度に調節が可能。
・ 測定に便利な RANGE ホールド機能、MAX/MIN ホールド
機能、REL/ZERO 機能、DATA HOLD 機能付き。
・ ACV、ACA ファンクション時に Hz/DUTY 測定機能を使用
すると測定している信号の周波数やデューティー比も測定す
ることが可能。
・ オートパワーオフ(約 30 分)機能付き。解除も可能。
・ テストリードおよびテストプローブの収納部は、巻取やす
く納め易いエラストマー素材を採用。
最大定格入力値 最大過負荷保護入力値
◆測定に際しノイズの影響を受ける場合は、被測定物を
COM 電位でシールドしてください。また、テストピン
に指を触れて測定すると、人体の抵抗の影響を受け誤差
を生じます。
◆入力端子間の開放電圧:660 Ωレンジ 約 0.78V
660 Ωレンジ以外 約 1.2V
◆電圧の加わっている部分の抵抗測定は出来ません。
入力端子には外部より電圧を絶対に加えないこと。
警 告
1-3 最大過負荷保護入力値
DCA・ACA
警 告
5-4 抵抗(Ω)測定
注 意
1. トランスや大電流路など強磁界の発生している近く、無
線機など電磁波の発生している近く、または帯電してい
るものの近くでは正常な測定ができない場合があります。
2. インバータ回路のような特殊な波形では、本器が誤動
作や正常な測定が出来ない場合があります。
1-2 安全使用のための警告文
以下の項目は、やけどや感電などの人身事故を防止するた
めのものです。本器をご使用する際には必ずお守りください。
1. 3.6kVA を超える電力ラインでは使用しないこと。
2. AC33Vrms
(46.7V peak)
または DC70V 以上の電圧は人
体に危険なため注意すること。
3. 本器のクランプセンサは低電圧用です。クランプ電流
測定は 600V 以下の線路で使用すること。
4. 最大定格入力値
(1-3 参照)
を超える信号は入力しないこと。
5. 最大過負荷入力値を超えるおそれがあるため、誘起電圧、サ
ージ電圧の発生する(モータ等)ラインの測定はしないこと。
6. 本体または、テストリードが傷んでいたり、壊れてい
る場合は使用しないこと。
7. ケースまたは電池蓋を外した状態では使用しないこと。
◆入力端子が開放状態の場合、表示が変動し一定しない
ことがありますが故障ではありません。
◆周波数測定範囲は20Hz∼66kHzです。
また、入力感度は
正弦波交流で 10Vrms ∼ 600Vrms です。
◆デューティー比測定の確度保証範囲は 50/60Hz、20.0
∼ 80.0%となります。また、
10.0%未満の場合は「UL」
表示、95.0%以上の場合は「OL」表示となります。
◆インバーター電源回路の測定では誤動作することがあ
ります。
◆DC 結合入力での測定は出来ません。
ファンクション
レンジ
6.600V
66.00V
600.0V
入力抵抗
約 100M Ω
±(1.1%rdg+3dgt)
以上
±(0.7%rdg+3dgt) 約 11M Ω
±(0.8%rdg+3dgt)
約 10M Ω
±(1.1%rdg+3dgt)
660.0mV
±(1.6%rdg+10dgt)
660.0mV
直流電圧
DCV 交流電圧
ACV
6.600V
66.00V
600.0V
抵抗Ω
確 度
備 考
・確度保証周
波数範囲:
40Hz ∼
100Hz
約 11M Ω ・確度保証周
波数範囲:
40Hz ∼
400Hz
±(1.4%rdg+6dgt)
約 10M Ω
・正弦波交流
における確
度
±(1.5%rdg+7dgt) ・開放電圧:約 1.2V
約 100M Ω
以上
660.0 Ω
6.600k Ω
・開放電圧:約 0.78V
66.00k Ω ±(0.9%rdg+3dgt)
・測定電流は被測定抵抗の
660.0k Ω
抵抗値によって変化しま
6.600M Ω ±(2.0%rdg+3dgt)
す。
66.0M Ω ±(4.0%rdg+3dgt)
ダイオード
・開放電圧:ほぼ電池電圧
テスト 導通チェック ・約 30 Ω未満で発音
・開放電圧:約 1.2 V
6.600nF
66.00nF
660.0nF
±(5.0%rdg+10dgt) ・表示されている値を REL
静電容量 6.600 μ F
機能によってキャンセル
66.00 μ F
した後の確度
660.0 μ F
6.600mF
±(7.0%rdg+10dgt)
66.00mF
− 21 −
周波数 Hz
DUTY
直流電流
DCA 交流電流
ACA 660.0Hz
6.600kHz
・測定範囲:20Hz ∼ 66kHz
・正弦波交流 10Vrms ∼
600Vrms の入力電圧感度
66.00kHz
での確度
・50/60Hz 矩形波
20.0 ∼
±(0.5%rdg+5dgt)
10Vpp ∼ 60Vpp での確度
80.0%
・表示されている値を ZERO
100.0A
±(2.0% rdg+5dgt) セット機能によってキャン
セルした後の確度
・確度保証周波数範囲:
100.0A
±(2.0% rdg+5dgt) 40Hz ∼ 400Hz
・正弦波交流における確度
±(0.5%rdg+3dgt)
rdg: reading(読み取り値)
dgt:digits(最下位桁)
※トランスや大電流路など強磁界の発生している近く、無線
機など強電界の発生している近くでは正常な測定ができない
場合があります。
確度計算方式
例)直流電圧測定(DCmV)
表示値:
100.0mV
レンジ確度:660mV レンジ…±(1.1%rdg+3dgt)
誤 差:
±(100.0mV × 1.1%+3dgt)= ± 1.4mV
真 値:
100.0mV ± 1.4mV(98.6 ∼ 101.4mV の範囲内)
※ 660mV レンジにおける 3dgt とは 0.3mV に相当します。
ここに掲載した製品の仕様や外観は改良等の理由により、
予告なしに変更することがありますのでご了承ください。
− 22 −
[1] SAFETY PRECAUTIONS
Before use, read the following safety precautions.
This instruction manual explains how to safely use your new
PM33a digital multimeter with clamp sensor. Before use, please
read this manual thoroughly. After reading it, keep it together
with the product so you can refer to it when necessary.
Using this product in ways not specified in this manual may
damage its protection function.
Instructions given under the “ WARNING” and “ CAUTION”
headings must be followed to prevent accidental burns or
electrical shock.
1-1 Explanation of Warning Symbols
The meanings of the symbols used in this manual and on the
product are as follows.
Very important instruction for safe use.
The warning messages are intended to prevent accidents
to operating personnel such as burn and electrical shock.
The caution messages are intended to prevent damage to
the instrument.
: Direct current (DC)
: Ground ∼ : Alternating current (AC)
: Capacitance
Ω : Resistance Hz : Frequency
: Continuity
DUTY : Duty cycle
: Double insulation (Protection Class II)
: Diode
: Plus input (Red)
: Minus input (Black)
1-2 Warning Instruction for Safe Use
and the clamp sensor barrier when making measurements.
9. Be sure to disconnect the test pins from the circuit when
changing the function.
10. Before starting measurement, make sure that the function
and range are properly set in accordance with the
measurement.
11. Never use meter with wet hands or in a damp environment.
12. Never open the instrument case except when replacing
batteries. Do not attempt any alteration of original specifications.
13. To ensure safety and maintain accuracy, calibrate and
check the instrument at least once a year.
14. The instrument is for indoor use only.
CAUTION
1. Correct measurement may not be possible in areas
exposed to strong magnetic fields generated by electrical
equipment such as a transformer or large current path,
electromagnetic waves generated by wireless equipment,
or areas where electrostatic charges are generated.
2. This instrument may malfunction or may not be able to
take correct measurements with special waveforms such
as those produced by an inverter circuit.
1-3 Overload Protections
Function
WARNING
DCV · ACV
To ensure the meter is used safely, be sure to observe the
instructions when using the instrument.
1. Never use meter on the electric circuits that Exceed 3.6 kVA.
2. Pay special attention when measuring voltages of AC 33
Vrms (46.7 V peak) or DC 70 V or more to avoid injury.
3. The clamp sensor provided with this instrument is
exclusively for low-voltage use. Perform clamp current
measurement with 600 V or less lines.
4. Never apply an input signal exceeding the maximum
rating input value.
5. Never use meter for measuring the line connected with
equipment (i.e. motors) that generates induced or surge
voltage since it may exceed the maximum allowable voltage.
6. Never use meter if the meter or test leads are damaged or broken.
7. Never use uncased meter.
8. Always keep your fingers behind the finger guards on the probe
Hz / DUTY
Ω/
[4] DESCRIPTION OF FUNCTIONS
WARNING
When canceling an operation, do not turn the function
switch during measurement.
4-1 Power Switch & Function Switch (All Functions):
Turn this switch to turn the power ON and OFF and to select
the measurement function.
4-2 SELECT Button (V · Ω/ / · CLAMP A positions):
As this button is pressed, the function switches in the order of
the arrows (J) as shown below.
• V position: AC voltage ( ) J DC voltage ( ) J AC voltage
( )
• Ω/ / position: Resistance measurement (Ω) J Continuity
check ( ) J Diode test ( ) J Resistance measurement (Ω)
• CLAMP A position: AC current ( ) J DC current ( ) J AC
current ( )
4-3 RANGE Button (DCV · ACV · Ω · · Functions)
Press this button to engage the manual mode and fix the
range (extinguished
).
When the manual mode is engaged, each press of this button
changes the range. Select an appropriate range while
confirming the unit and the position of the decimal point on
the display. To restore the auto range, keep this button
depressed for more than 1 second (lit
).
This button cannot be used when in Hz/DUTY
measurement.
4-4 MAX/MIN Button
(DCV · ACV · Ω · · · · DCA · ACA Functions):
Press this button to enter the MAX/MIN mode. As this button
is pressed, the measurement range switches in the order of
the arrows (J) as shown below.
• MAX value indication (lit
) J MIN value indication (lit
)
J Current measurement value indication (blinking
)J
MAX value indication (lit
)
• MAX value indication:
Displays the maximum value of the values measured since
the engagement of the MAX/MIN mode.
• MIN value indication:
Displays the minimum value of the values measured since the
engagement of the MAX/MIN mode.
(Red)
(Black)
DCA · ACA
Maximum rating Maximum overload
input value
protection input
DC/AC 600 V
600 V DC/AC
/
Clamp
sensor
section
[3] NAME OF COMPONENT UNITS
100 A DC/AC
2-1 Applications
This instrument is a pocket-type digital multimeter with clamp sensor
designed for measurement of weak current circuits (CAT. II 600 V,
CAT. III 300 V). It plays an important role in circuitry analysis using
RANGE
button
SELECT
button
1) Applications
DCV:Vo l t a g e o f t h e b a t t e r y a n d D C c i rc u i t a re
measured.
ACV: Sine wave AC voltage, such as lighting voltage, is
measured.
2) Measurement procedure
1 Set the function switch to the “V” position and select
either DCV or ACV with the SELECT button.
2 Apply the red and black test pins to the circuit to
measure.
• For measurement of DCV, apply the black test pin to
the negative potential side of the circuit to measure
and the red test pin to the positive potential side.
• For measurement of ACV, apply the red and black
test pins to the circuit to measure.
3 The reading of voltage is shown on the display.
4 After measurement, release the red and black test
pins from the object measured.
④
Battery
③
④
DCV
measurement
ACV
measurement
⑤
④
Outlet
Numerical indication
Capacitor
Diode
④
⑥
When the 6.600nF or 66.00nF range is used, use the
REL mode to set the values that remain on the
display to “0” (cancelled) before the measurement is
performed.
Readings are unstable because of stray capacitance
in test leads or noise.
)
WARNING
1. Make sure that no low battery indication appear in the
display.
2. Never use meter if the meter or test leads are damaged
or broken.
3. Check continuity of test leads.
Note: If there is no display, the batteries may be exhausted.
START
Main unit
and test leads
damaged?
Damaged
Check
No
damaged
②
Check continuity
of test leads.
1. This section is very important for safety. Read and
understand the following instructions fully and maintain
your instrument properly.
2. The instrument must be calibrated and inspected at
least once a year to maintain its safety and accuracy.
6-1 Maintenance and Inspection
1) Appearance
• Has the appearance been damaged by falling?
2) Test leads
• Is the test lead cord damaged?
• Is the core wire exposed at any place on the test
leads?
If the built-in fuse is blown, current measurement is
impossible. Make sure that the test leads are not cut,
referring to the section 5-1.
②Short the red and
black test pins.
No
Stop using it and
have it repaired.
CAUTION
Set the batteries with their polarities facing in the correct
directions.
1
2
Function
Max. rating input value
Ω
66.0MΩ
Measurement range
660.0Ω,6.600kΩ,66.00kΩ,
660.0kΩ,6.600MΩ,66.0MΩ
1) Applications: Measuring the resistance of resistors and
circuits.
2) Measurement procedure
1 Set the function switch to the Ω/ /
position.
2 Apply the red and black test pins to an object to
measure.
3 The reading is shown in the display.
4 After measurement, release the red and black test
pins from the object measured.
)
8-1 General Specifications
Measurement
Display
Over ranging indication
Range selection
Polarity selection
Never apply voltage to the input terminals.
1) Applications: Checking the continuity of wiring and
selecting wires.
2) How to use
1 Set the function switch to the Ω/ / position.
2 Select “ ” by pressing the SELECT button.
3 Apply the red and black test pins to a circuit or
conductor wire to measure.
4 The continuity can be judged by whether the buzzer
sounds or not.
5 After measurement, release the red and black test
pins from the object measured.
④
③
⑤
②
①
Sampling rate
Current measurement system
Max. clamp conductor
diameter
AC sensoring
Environmental condition
Accuracy-guaranteed
temperature/humidity range
Operating temperature/
humidity range
Storage temperature/
humidity range
Power supply
Auto power off
⑤
Extension cord
Power consumption
Dimensions & weight
④
Resistor
③
[8] SPECIFICATIONS
Low battery indication
WARNING
②
④
The buzzer sounds when the resistance of the circuit
to be measured is less than approx. 30 Ω.
The open circuit voltage between the input terminals
is approx. 0.78 V.
①
Test lead length
Safety standard
EMC directive
Accessories
− 11 −
CAUTION
− 12 −
1. The panel and the case are not resistant to volatile
solvent and must not be cleaned with thinner or alcohol.
2. The panel and the case are not resistant to heat. Do not
place the instrument near heat-generating devices (such
as a soldering iron).
3. Do not store the instrument, in a place where it may be
subjected to vibration or from where it may fall.
4. For storing the instrument, avoid hot, cold or humid
places or places under direct sunlight or where
condensation is anticipated.
5. When the instrument is not going to be used for
extended time, be sure to remove the batteries.
Double integral method
Max. 6600 count
“OL” mark indication
Auto and manual ranges
Automatic selection (–
display only)
Displayed when built-in
batteries are exhausted (to
2.3 V or less) with
lit or
blinking in display
Approx. 3 times/sec
CT clamp
10 mm
Average sensoring
Operating altitude <2000 m,
indoor use, pollution degree II
23 ± 5°C, <80% RH (without
condensation)
5 ~ 40°C, <80% RH (without
condensation)
–10 ~ 50°C, <80% RH
(without condensation)
Two LR03 alkaline batteries
Power off after approx. 30
minutes since last operation
Approx. 7 mW TYP (at DCV)
130 (L) x 75 (W) 19.9 (D) mm
(excluding protrusions),
approx. 160 g (including
batteries)
Approx. 60 cm for both red
and black
IEC61010-1, CAT. III 300 V, CAT.
II 600 V, IEC61010-031:2008,
IEC61010-2-032
IEC61326
Instruction manual
− 21 −
&ODPS6HQVRU
Center
position
marking
Barrier
⑤
①
③
④
Current direction
marking
Current
direction
[7] AFTER-SALE SERVICE
7-1 Warranty and Provision
Sanwa offers comprehensive warranty services to its end-users and
to its product resellers. Under Sanwa’s general warranty policy, each
instrument is warranted to be free from defects in workmanship or
material under normal use for the period of one (1) year from the
date of purchase.
This warranty policy is valid within the country of purchase only, and
applied only to the product purchased from Sanwa authorized agent
or distributor.
Sanwa reserves the right to inspect all warranty claims to determine
the extent to which the warranty policy shall apply. This warranty
shall not apply to fuses, disposables batteries, or any product or
parts, which have been subject to one of the following causes:
1. A failure due to improper handling or use that deviates
from the instruction manual.
2. A failure due to inadequate repair or modification by
people other than Sanwa service personnel.
3. A failure due to causes not attributable to this product
such as fire, flood and other natural disaster.
4. Non-operation due to a discharged battery.
5. A failure or damage due to transportation, relocation or
dropping after the purchase.
7-2 Repair
Customers are asked to provide the following information when
requesting services:
1. Customer name, address, and contact information
2. Description of problem
3. Description of product configuration
4. Model Number
5. Product Serial Number
6. Proof of Date-of-Purchase
7. Where you purchased the product
Please contact Sanwa authorized agent / distributor /
service provider, listed in our website, in your country with
above information. An instrument sent to Sanwa / agent /
distributor without those information will be returned to the
customer.
Note:
1) Prior to requesting repair, please check the following:
• Capacity and installation polarity of the built-in
batteries.
• Continuity of the test leads.
8-2 Measurement Range and Accuracy
Accuracy assurance range: 23 ± 5°C & less than 80% R.H.
No Condensation
Function
DCV
DC Voltage
Range
660.0 mV
6.600 V
66.00 V
600.0 VΩ
Accuracy
±(1.1%rdg+3dgt)
±(0.7%rdg+3dgt)
±(0.8%rdg+3dgt)
±(1.1%rdg+3dgt)
660.0 mV ±(1.6%rdg+10dgt)
ACV
AC Voltage
6.600 V
66.00 V
±(1.4%rdg+6dgt)
600.0 V
Resistance
Ω
Testing
Diode
Checking
Continuity
660.0 Ω
6.600 kΩ
66.00 kΩ
660.0 kΩ
6.600 MΩ
66.0 MΩ
±(1.5%rdg+7dgt)
±(0.9%rdg+3dgt)
±(2.0%rdg+3dgt)
±(4.0%rdg+3dgt)
Input impedance
≥100 MΩ
Approx. 11 MΩ
• Accuracyguaranteed
≥100 MΩ
range: 40 ~
100 Hz
Approx. 11 MΩ
• Accuracyguaranteed
range: 40 ~
400 Hz
Approx. 10 MΩ
• Accuracy
in the case
of sin wave
• Open voltage: Approx. 1.2 V
• Open voltage: Approx. 0.78 V
• The measuring current
changes according to the
resistance of the resistor to
measure.
• Buzzer sounds at less than 30 Ω
• Open voltage: Approx. 1.2 V
Hz
Frequency
Remarks
Approx. 10 MΩ
• Open voltage: Almost battery voltage
Capacitance
6.600 nF
66.00 nF
660.0 nF
±(5.0%rdg+10dgt)
6.600 µF
66.00 µF
660.0 µF
6.600 mF
±(7.0%rdg+10dgt)
66.00 mF
660.0 Hz
6.600 kHz
±(0.5%rdg+3dgt)
66.00 kHz
DUTY
20.0 ~
80.0%
±(0.5%rdg+5dgt)
DCA
Direct
Current
100.0 A
±(2.0%rdg+5dgt)
ACA
Alternating 100.0 A
Current
±(2.0%rdg+5dgt)
Barrier
When the position of this instrument is changed
during DCA measurement, the display may fluctuate
due to geomagnetism.
Because the AC sensoring system of this instrument
is an average value system, an error in the measured
value will occur with waveforms other than sine
waves.
Accuracy is guaranteed in ACA measurement
between 40 ~ 400 Hz.
Measurement of an inverter power supply circuit may
cause a malfunction.
− 16 −
2) Repair during the warranty period:
The failed meter will be repaired in accordance with the
conditions stipulated in “7-1 Warranty and Provision”.
3) Repair after the warranty period has expired:
In some cases, repair and transportation cost may
become higher than the price of the product. Please
contact Sanwa authorized agent / service provider in
advance. The minimum retention period of service
functional parts is 6 years after the discontinuation of
manufacture. This retention period is the repair warranty
period. Please note, however, if such functional parts
become unavailable for reasons of discontinuation of
manufacture, etc., the retention period may become
shorter accordingly.
4) Precautions when sending the product to be repaired
To e n s u r e t h e s a f e t y o f t h e p r o d u c t d u r i n g
transportation, place the product in a box that is larger
than the product 5 times or more in volume and fill
cushion materials fully and then clearly mark “Repair
Product Enclosed” on the box surface. The cost of
sending and returning the product shall be borne by
the customer.
7-3 SANWA Website
http://www.sanwa-meter.co.jp
E-mail: [email protected]
− 20 −
− 19 −
OVERVOLTAGE CATEGORY
CAT I: Secondary electrical circuits connected to an AC
electrical outlet through a transformer or similar
device.
CAT II: Primary electrical circuits in equipment connected to
an AC electrical outlet by a power cord.
CAT III: Primary electrical circuits of heavy equipment
connected directly to the distribution panel, and
feeders from the distribution panel to outlets.
• Accuracy was measured
after canceling display value
by the REL function.
• Measurement range: 20 Hz
~ 66 kHz
• Accuracy with input voltage
sensitivity of 10 ~ 600 Vrms
sin wave AC
• 50/60 Hz rectangular wave,
accuracy at 10 ~ 60 Vpp
• Accuracy was measured
after canceling display value
by the ZERO set function.
• Accuracy-guaranteed
range: 40 ~ 400 Hz
• Accuracy in the case of sin
wave
rdg: reading dgt: digits
Note: Correct measurement may not be possible in areas
exposed to strong magnetic fields generated by
electrical equipment such as a transformer or large
current path, electromagnetic waves generated by
wireless equipment, or areas where electrostatic
charges are generated.
Accuracy calculation
Ex.) Measurement of DC voltage (DCmV)
Display value:
100.0 mV
Range accuracy: 660 mV range … ± (1.1%rdg±3dgt)
Error:
± (100.0 mV x 1.1%±3dgt) = ±1.4
mV
True value:
100.0 mV ± 1.4 mV (in a range of
98.6 ~ 101.4 mV)
Note: 3 dgt in the 660 mV range corresponds to 0.3 mV.
Specifications and external appearance of the product
described above may be revised for modified without
prior notice.
− 22 −
− 23 −
Conductor to
be measured
(electrical wire)
② Measurement range
DC100.0A
AC100.0A
1) Applications
DCA: Measures the current consumption of devices
such as an automotive battery.
ACA: Measures the sine wave alternating current with
40 ~ 400 Hz frequency of power supply facilities.
2) Measurement procedure
1 Raise the clamp sensor from the rear of the main unit.
2 Set the function switch to the CLAMP A position, and
press the SELECT button to select DCA or ACA.
• DCA: Use the ZERO set function to set the display
value to “0.0A” before measurement.
− 18 −
− 17 −
If measurement is likely to be influenced by noise,
shield the object to measure with negative potential
(COM). If a finger touches a test pin during
measurement, measurement will be influenced by
the resistance in the human body, and that results in
measurement error.
Open circuit voltage: Approx. 0.78 V in 660 Ω range
Approx. 1.2 V in other range
Resistance cannot be measured when voltage is
present.
5-5 Checking Continuity (
CAUTION
③
R e m o v e t h e t w o f i x i n g s c re w s f ro m t h e b a t t e r y
compartment cover.
Slide the battery compartment cover downward to
remove it.
− 8 −
When high resistance is measured, the displayed value
may fluctuate due to external induction.
②
6-4 Storage
1. To avoid electric shock, do not remove the battery
compartment cover when input is applied to the
measurement terminal and clamp sensor or when
measurement is being performed.
2. Be sure to confirm that the function switch is set to “OFF”
before replacing the batteries.
①
Yes
WARNING
①④
WARNING
①Set the function at
“ ”.
When the input terminal is not connected, the display
may fluctuate and be unstable. This is not a
malfunction.
The frequency measurement range is 20 Hz ~ 66
kHz. The input sensitivity with sine wave alternating
current is 10 ~ 600 Vrms.
Measurement of an inverter power supply circuit may
cause a malfunction.
Measurement with DC-coupled input is not possible.
Replace both of the two batteries in the batter y
compartment with new ones.
4 Place the battery compartment cover and tighten the
fixing screws.
• About the batteries when shipped from the factory
The batteries incorporated when shipped from the
factory are monitor batteries, so their service life may be
shorter than that of brand-new batteries. A monitor
battery is a type of battery used to check the functions of
and performance of the product.
6-2 Calibration
The manufacturer may conduct calibration and inspection.
For more information, please contact your dealer.
6-3 Battery Replacement
Max. input rating value
DC100.0A
AC100.0A
− 15 −
3
WARNING
CAUTION
1. The measurable diameter of a conductor is 10 mm. Do
not force a cable with an outer diameter of more than 10
mm into the clamp sensor section. Also do not apply
external force to the clamp sensor section.
2. Make sure that the conductor to be measured is aligned
with the center of the arrows on the clamp sensor.
Otherwise, a measurement error will result.
3. Do not let this instrument come near a conductor in
which large current flows or place it on a strong
magnetic field. Such an environment may cause a
c u r re n t v a l u e t o b e d i s p l a y e d e v e n t h o u g h n o
measurement is made (an error may occur). Since the
clamp sensor of this instrument is a U-shaped open-type
sensor, it is more susceptible to such an environment
compared than a closed-type sensor.
− 14 −
− 13 −
[6] MAINTENANCE
1. The clamp sensor of this instrument is exclusively for low
voltage. Perform the clamp current measurement on a
line with 600 V or less.
2. Do not turn the function switch during measurement.
3. During measurement, do not hold the clamp sensor at
any point beyond the barrier.
4. To prevent electric shock, be sure to store the test probe
and test lead in their designated storage compartments.
Function
DCA
ACA
②
⑤
5-1 Start-Up Inspection
• ACA: No adjustment is necessary.
Align one line of the conductor to be measured with
the center of the arrows on the clamp sensor.
• DCA: Point the object to be measured in the same
direction as the current direction marking. If it
is pointed in the opposite direction, “–” will be
displayed.
• ACA: The current direction of the object to be
measured is irrelevant.
4 Read the measurement value in the display.
5 After measurement, remove the conductor from the
clamp sensor.
3
WARNING
①
Measurement
units
No problem. Start
measurement.
①
− 10 −
Anode
Never apply voltage to the input terminals.
Readings are unstable when test leads are opened.
Accuracy is guaranteed in the case of sine wave.
− 9 −
1) Applications: Measuring the capacitance of low leakage
condenser such as film condenser.
2) How to use
1 Set the function switch to the
position.
2 Apply the red and black test pins to a conductor to
measure.
3 Read the value on the display.
4 After measurement, release the red and black test
pins from the object measured.
The open voltage of the input terminals is almost the
same as the battery voltage.
[5] MEASUREMENT PROCEDURE
The buzzer
sounds?
⑤
②
⑥
ZERO set
MAX/MIN
mode
− 4 −
4-9 Low Battery Indication
When the built-in batteries are exhausted and the battery
voltage drops below about 2.3 V, the
will appear in the
display. If this icon is lit, replace the batteries with new ones
(two at the same time).
③
④
Continuity
check
5-7 Capacitance Measurement (
Never apply voltage to the input terminals.
1) Applications: Measuring the frequency and duty of any
circuit.
2) Measurement procedure
1 Set the function switch at the V position and press
the SELECT button to select ACV.
2 Press Hz/DUTY button to select the frequency (Hz)
measurement or DUTY ratio measurement.
3 Apply the red and black test pins to a conductor to
measure.
4 Read the value on the display.
5 After measurement, release the red and black test
pins from the object measured.
66.00mF
Measurement range
6.600nF,66.00nF,660.0nF,
6.600µF,66.00µF ,660.0µF
6.600mF,66.00mF
Decimal points
5-4 Resistance Measurement (Ω)
Measurement range
660.0Hz,6.600kHz,66.00kHz
20.0% ~ 80.0% at 50/60Hz
Max. input rating value
④
②
①
REL
measurement
4-8 Auto Power Off (APO):
The power and display will be turned off automatically when
no switch or button operation is made for about 30 minutes
after the power was turned on.
When a button is pressed or the function switch is turned
during measurement, the time until the Auto Power Off will be
extended an additional 30 minutes. To wake up from the Auto
Power Off mode, press the button again. When returned, the
value at the time of the Auto Power Off will be displayed using
the DATA HOLD mode. To disable this function, turn the
function switch while pressing any button (except the
SELECT or DATA HOLD button) to turn on the power (lit
).
When the Auto Power Off mode is engaged, the
is lit in
the display.
Although power consumption in the Auto Power Off mode
the is less than 1/100 of that of the turned-on status, be sure
to set the power switch to OFF as soon as measurement is
complete.
WARNING
③
Function
Auto power off
5-3 Frequency/DUTY Measurements (Hz/%)
Max. rating input value
66.00kHz
(600Vrms or less)
Cathode
Diode test
Low battery indication
The frequencies where accuracy is guaranteed in the
ACV measurement are 40 ~ 100 Hz in the 660 mV
range and 40 ~ 400 Hz in other ranges.
Although the terminals to be measured are shortcircuited in the AC 660 mV and AC 6.6 V ranges, up
to 10 counts may remain in the AC 660 mV range
and up to 7 counts may remain in the AC 6.6 V
range.
Measurement of an inverter power supply circuit may
cause a malfunction.
Function
Hz/DUTY
1) Applications: Testing the quality of diodes.
2) How to use
1 Set the function switch to the Ω/ /
position.
2 Select “ ” by pressing the SELECT button.
3 Apply the black test pins to the cathode of the diode
and the red test pin to the anode.
4 Make sure that the display shows a diode forward
voltage drop.
5 After replacing the red and black test pins, connect
the red test pin to the cathode of the diode and
connect the black test pin to the anode.
6 Make sure display is the same as when the test lead
is not connected (OL indication).
Note: Successful completion of steps 4 and 5
indicates that there is no problem with the
diode.
7 After measurement, release the red and black test
pins from the object measured.
④
⑥
− 7 −
1. Never apply an input signal exceeding the maximum
rating input value.
2. Do not turn the function switch during measurement.
3. Do not hold the test probe by a section closer to the test
pin side behind the finger guard.
Never apply voltage to the input terminals.
WARNING
Actual input value
Display in REL measurement
DC 6.000V
DC 3.000V
DC 3.000V
DC 0.000V
DC 1.000V
DC-2.000V
When the function or range is switched, the REL
measurement or ZERO set will be canceled.
②
④
Negative
polarity
Power
switch &
Function
switch
− 6 −
Max. rating input value
Measurement range
DC600.0V
660.0mV, 6.600V, 66.00V, 600.0V
AC600.0V
660.0mV, 6.600V, 66.00V, 600.0V
REL/ZERO
button
DATA HOLD
button
5-8 Clamp Current Measurement (CLAMP A)
CAUTION
1. Discharge the capacitance before measurement.
2. This is not suitable for measurement of electrolytic
condenser such as a large leakage condenser.
3. It takes a while to measure large capacitance.
③
AC
measurement
Ex.) Display after the REL/ZERO button is pressed during
DC3.000V input
1. Never apply an input signal exceeding the maximum
rating input value.
2. Be sure to disconnect the test pins from the circuit when
changing the function.
3. Always keep your fingers behind the finger guards on
the probe when making measurements.
Removable test pin covers
When not covered : CAT. Ⅱ 600V
When covered : CAT. Ⅲ 300V
Hz/DUTY
button
4-7 DATA HOLD Button (All Functions)
When this button is pressed, the will be lit in the display and
the value displayed at that time will be maintained. The
display will stay the same even if the measurement input
changes. Pressing this button again will cancel the DATA
HOLD mode and restore the measurement mode.
When the function or range is switched, the DATA HOLD
mode will be canceled.
WARNING
Finger guards
DC
measurement
• Current measurement value indication:
Holds in memory the maximum and minimum values while
displaying the current measurement value. Press this button
to confirm the maximum and minimum values by switching
between the MAX and MIN value indications.
To disengage the MAX/MIN mode, keep this button
depressed for more than 1 second.
When the function or range is switched, the MAX/MIN mode
will be canceled.
5-2 Voltage Measurement
When not
covered
Test probe (red)
Test probe (black)
Auto range mode
− 3 −
4-6 REL/ZERO Button
(DCV · ACV · Ω· · · · DCA · ACA Functions):
Press this button to enter the REL measurement mode when
the DCV, ACV, Ω, , , , or ACA function is activated
(lit
).
The measurement range will be fixed, and the displayed
value will be set to zero using the input value at the time of
pressing the button as the reference value. To cancel the REL
measurement, press this button again.
Pressing this button in the DCA mode sets the displayed
value to ZERO (lit
).
The value at the time the button is pressed will be canceled,
and the display will show 0.0A.
To deactivate the ZERO set function, press the button again
and keep it depressed for more than 1 second.
Battery
compartment
cover
Display
Winding
directions
of test leads
)
WARNING
Removable
test pin covers
Battery
compartment
cover fixing
screws
3-1 Multimeter
− 2 −
4-5 Hz/DUTY Button (ACV · ACA Functions):
Press this button to switch the mode to Hz/DUTY
measurement. Each time this button is pressed when the ACV
or ACA function is selected, the mode switches in the order of
the arrows (J) as shown below.
ACV or ACA measurement J Hz measurement J DUTY
measurement J ACV or ACA measurement.
Test pins
Clamp
sensor
(when stored)
Data hold operation
MAX/MIN
button
DC/AC 100 A
Voltage input
prohibited
5-6 Testing Diodes (
Test Leads
3-2 Display
[2] APPLICATION AND FEATURES
− 5 −
①
2-2 Features
• The instrument is compact and lightweight and has been
designed in accordance with the safety standard IEC 61010-1.
• Provided with a current clamp sensor that can measure up to 100
A DC/AC.
• The clamp sensor has a thin U-shaped sensor design that is 7 mm
thick. Also because the inclination angle of the sensor is variable
between 0° and 180°, the display section of the main unit can be
adjusted to an easy-to-view angle.
• Provided with RANGE hold, MAX/MIN hold, REL/ZERO and DATA
HOLD functions that are convenient for measurement.
• When the Hz/DUTY measurement function is used during the
activation of the ACV/ACA function, the frequency and duty ratio
of the signals that are being measured can also be measured.
• Provided with an Auto Power Off function (approx. 30 min.), which
can also be canceled.
• The storable sections of the test leads and test probes use an
elastomeric material that is easy to wind and store.
Voltage and current
input prohibited
Note: AC voltage is regulated by rms, values of sinusoidal wave.
− 1 −
Function
DCV
ACV
Input
terminals
additional functions, as well as enabling measurement of small type
communication equipment, electrical home appliances, lighting
voltage and batteries of various types.
A current clamp sensor is also provided that can measure up to 100
A DC/AC, allowing measurement of the electric consumption of
equipment that uses an automotive battery or AC power supply. This
can be done by simply clamping a single line of electrical wiring in
the device being measured.
− 24 −
© Copyright 2026 Paperzz