3.照明器具の設置
SOLAR-Ⅰ STAND・SOLAR-Ⅱ STAND
ソーラーⅠ専用スタンド ・ソーラーⅡ専用スタンド
※設置の前にソーラーⅠまたはソーラーⅡの使用説明書をよくお読みください。
⃝スタンドにつり下げるため、照明器具のスチールワイヤーに輪
をつくります。輪の位置は、照明ユニットをつり下げる高さに応
じて調節してください。リング固定クランプのナットは、ラジオ
■ 背面から見た図(ソーラーⅠの場合)
コードクリップ(小)
ペンチなどでしっかりと締め込んでください。
●安全上の注意
※必ずよくお読みください。
⃝この製品は、ソーラーⅠまたはソーラーⅡをつり下げるためのスタンドです。これ以外の目的には使用しないでください。
⃝固定金具を固定する水槽台や壁などの強度が十分であることを事前に確認してください。スタンドを設置した水槽台や壁など
の強度不足が原因で発生した事故などに関して、当社は一切責任を負いません。
⃝スタンドに照明器具をつり下げます。スチールワイヤーの輪を
スタンドに通し、適切な位置に掛けます。この時、照明器具を落
としたり、水槽などにぶつけないように注意してください。
※地震のゆれなどによる落下を防ぐため、照明器具の位置を決め
照明器具
た後、ワイヤーの輪をしっかりと締めてください。
⃝固定金具や木ねじ、コードクリップなどの鋭利な部分でけがをしないように、取り扱いには十分注意してください。
⃝ソーラーⅠまたはソーラーⅡの使用説明書も必ずよくお読みください。
⃝照明器具のコードをコードクリップで固定します。コードクリッ
プには大と小があります(大小各2個ずつ付属)
。専用スタンド
コードクリップ
の縦の太い部分には大を、横の細い部分には小を使用します。
1.ソーラーⅠ専用・ソーラーⅡ専用スタンドの特徴
スチールワイヤーの輪を
専用スタンドに通します。
⃝ソーラーⅠまたはソーラーⅡをつり下げることができるスマートなスタンドです。共通ではありませんので、それぞれの製品に
適合するスタンドをご使用ください。
⃝付属の固定金具は、ウッドキャビネットなどの木製水槽台に固定することができます。また、素材の強度や構造上の問題で水
コードクリップ(大)
槽台に固定金具が固定できない場合、壁などに取り付け金具を固定して設置することもできます。
⃝別売のガーデンスタンド用取付金具を使用すると、ガーデンスタンドに設置することができます。
2.スタンドの設置
固定金具
⃝水槽台に固定金具を木ねじで固定します。固定金具は、水槽台の背面の上下に一つずつ固定してください。
⃝固定金具を壁などに固定する場合、上下の金具を60cmほど離して固定してください。上下の金具が近すぎると、スタンドが
不安定になります。また、下の固定金具は、できるだけ床の近くに固定してください。
⃝固定金具には、上用(穴が完全に開いている)と下用(穴が完全に開いていない)があります。上用は横から見てΓになるように、
ウッドキャビネット
背面
下用は横から見てLになるように、上下の向きも確認してください。また、スタンドが垂直に立つように、上下の取り付け金具の
位置が左右にずれないよう注意してください。
⃝木ねじは適したサイズのプラスドライバーを用い、しっかりとねじ込んでください。一つの固定金具に対して必ず3本の木ねじ
を使って、しっかりと固定してください。
安定器
⃝固定金具の外側の穴に、スタンドを差し込みます。スタンドの向きを合わせ、ボルトで固定します。ボルトは、適したサイズのス
電源へ
パナかレンチを用いて締め込んでください。
固定金具
※ソーラーⅡの場合、安定器はセパレートタイプではありません。
※ソーラーⅠの安定器は、ウッドキャビネット内にも設置できます。
固定金具
固定金具
4.使用上の注意
⃝錆などの原因になるので、専用スタンドや固定金具に水が掛かった場合にはすぐに乾いた布で拭き取ってください。特に海水
が掛かった場合には、錆などが発生しやすいので念入りに塩分を拭き取ってください。
水槽台の場合は上下の端、
スタンドを差し込み、向きを合
壁 な どの 場 合 は、60cm
わせてから、ボルトをスパナか
ほど離して固定します。
レンチを用いて固定します。
お問い合わせ先:ADAサービスセンター
0256 -72 -1994(平日10:30∼17:30)
E - mail/[email protected]
発売元:
新潟県新潟市西蒲区漆山8554-1 〒953 -0054
MADE IN JAPAN
408051S14COPYJE23F13
SOLAR-Ⅰ STAND・SOLAR-Ⅱ STAND
● Important Safety Instructions
※Please read carefully
○This product is designed specifically for hanging a SOLAR-Ⅰand SOLAR-Ⅱ. Do not use this product for other purposes.
○Make sure that the aquarium stand to which brackets are installed is sturdy enough. ADA will not be responsible for any
accident caused by insufficient strength of the aquarium stand to which Stand is installed.
○Handle brackets, wood screws, and cord clips carefully to avoid injury caused by sharp edges.
○We recommend reading SOLAR-Ⅰand SOLAR-Ⅱ installation manual thoroughly as well.
1. Features of SOLAR-ⅠSTAND・SOLAR-Ⅱ STAND
3. Installing a Light Fixture
Read SOLAR-Ⅰor SOLAR-Ⅱ installation manual thoroughly before this step.
○Make a loop with each of the two steel wires of the Light
fixture to mount the Light fixture. Adjust the location of the
loop to the proper height for the Light fixture. Tighten the
clamp nut with a pair of needle-nose pliers.
○Hang the Light fixture on the stand. Place the loops over
the arm of the stand and position the Light fixture. Take
care not to drop the Light fixture or bump it against the
aquarium.
○Tighten the loops after placing the Light fixture in order to
avoid falling by an earthquake.
○Secure the cords of the Light fixture with Cord clips. Two
different sized Cord clips are provided with the stand (two
each of large and small clips). Use smaller Cord clips on
the horizontal arm of the stand and larger ones on the vertical section of the stand.
○These stylish stands are designed for supporting SOLAR-Ⅰ and SOLAR-Ⅱ Light fixtures. Select the proper stand for its
appropriate light fixture since the stands are not interchangeable.
○Each of the SOLAR-Ⅰ and SOLAR-Ⅱ Stands is designed to be attached to a wooden aquarium stand, such as WOOD
CABINET, with the provided Mounting brackets. If these stands cannot be installed on an aquarium stand due to the
insufficient strength of the aquarium stand material or for a structural reason, they can be attached to an adjoining wall
using the mounting brackets.
○These stands can be installed on GARDEN STANDS with a GARDEN STAND FITTING PART sold separately.
■ View from the back
(SOLAR-Ⅰ)
Cord clip (small)
Light fixture
Cord clip
Place the steel wire loops
over the arm of the stand.
Cord clip (large)
2. Installation
○Install the Mounting brackets on an aquarium stand using Wood screws. Attach the brackets at the top and bottom of
the rear of the aquarium stand.
○In the case of mounting the brackets to a wall, install the top and bottom brackets approximately 60cm apart. If the
brackets are installed too close together, the stand will be unstable. The bottom bracket should be installed close to the
floor surface.
○Top and bottom brackets are not identical. The top bracket has completely penetrated holes. The bottom bracket has
circular depressions to accept the vertical part of the stand. When viewed from the side, the top bracket should look like
an upside down L and the bottom bracket should appear L-shaped when installed. Make sure that the top and bottom
brackets are properly aligned so that the upright part of the stand is absolutely vertical.
○Tighten Wood screws with a properly sized Phillips-head screw driver. Install each bracket securely with three Wood
screws.
○Insert the stand into the outside hole of the brackets. Properly orient the stand and secure the stand with a bolt. Use a
spanner or a crescent wrench to tighten the bolt.
Mounting bracket
WOOD CABINET
Rear side
Ballast
To power supply
Mounting bracket
※The ballast of SOLAR-Ⅱ is equipped inside the Lights fixture.
※The ballast can be installed inside WOOD CABINET.
Mounting bracket
Mounting bracket
The brackets are installed at the top
and bottom edges of an aquarium
stand. If the stand is to be installed
on a wall, space the brackets 60cm
away from each other.
3. Caution
⃝Wipe off any water splashed on the stand or Mounting brackets with dry cloth since water can cause the stand to rust. If
salt water splashes on the stand, remove any salt water and salt deposit thoroughly since salt water causes the stand to
rust easily.
Insert the stand into the brackets
and orient the stand properly.
Then, secure the bolts with an
appropriately sized wrench.
8554-1 Urushiyama, Nishikan-ku, Niigata 953-0054, Japan
MADE IN JAPAN
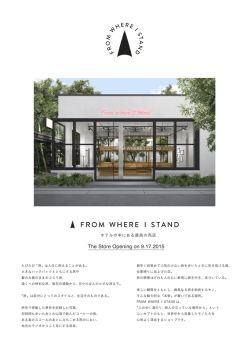
© Copyright 2026 Paperzz