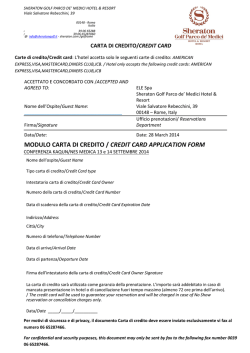
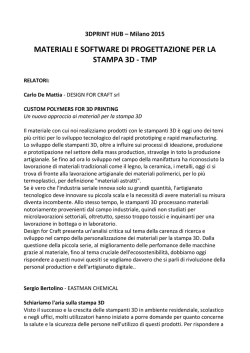
myPrint Help Introduction myPrint website Home Printing by loading a file on the website (Webprint) Printing using the email (EmailPrint) Printing using the printer driver (Virtual printing) Activating your ID myPrint Purchasing printing credit Cashing a voucher My profile Printing preferences Activate/Change your ID myPrint Change User-ID Manage email addresses Change alerts iOS Apps Selecting myPrint server Login Printing using the App 2 My profile Purchasing printing credits Manage email addresses Cashing a voucher App Android Selecting myPrint server Login Printing using the App My profile Purchasing printing credit Manage email addresses Cashing a voucher Appendix Appendix A: supported documents Back to Index Vs Unimi / 23.03.2016 Introduction Ricoh myPrint allows users to release print jobs from PCs or other mobile devices to one of the Ricoh devices installed in a myPrint environment. In this manual, you will find the answers to all the frequently asked questions about myPrint. You can easily navigate this guide from the index. For details about Università degli Studi di Milano’s myPrint environment, see also the faq section on the University library system (Sistema Bibliotecario di Ateneo) portal: http://www.sba.unimi.it/Strumenti/10594.html Alcune funzioni descritte in questo manuale si applicano solo quando myPrint è configurato con un 'flusso di lavoro a pagamento'. Esse sono contrassegnate dal myPrint website segno In order to load jobs (WebPrint) manage (ilyour profile, needditoraccogliere login to myPrint Le opzioni che print dipendono dal sistema or Follow-You sistema cheyou consente website; this requires the creation of a myPrint account. le stampe da una stampante di vostra scelta) sono contrassegnati con il segno . To create the account, you need to go to the website https://myprint.unimi.it/ and follow the instructions. UNIMI Users: click on “Unimi users login” and use your University username and password. External Users: click on “External users login” and follow the instructions. Along with a confirmation email, you will receive your User-ID, an 8-digit number that is necessary to activate your red card the first time you use a Ricoh multifunction printer. Back to Index Vs Unimi / 23.03.2016 3 Home From this page, you can manage your myPrint portal account. 4 From this page, users can do the following: See myPrint account name. See myPrint printing credit. See supported languages. After selecting a language, this will be saved as favourite in the user’s profile. See the online guide of myPrint website. Access the page containing the user’s myPrint profile details and settings. Access myPrint website Home page. Access the Terms and Conditions document of myPrint website. Logout from myPrint website. Please note that the user will be automatically logged out from the profile after 15 minutes of idleness. Quickly navigate through myPrint website Back to Index Vs Unimi / 23.03.2016 Printing by loading a file on the website (WebPrint) The ‘WebPrint’ section on the website Home page allows the user to print a document on myPrint. Proceed as follows: Login to myPrint website. Select the document by clicking on 'Scegli file' (Choose file), then click on “Print”. You will receive a notification as soon as the file is loaded and ready to be printed Access a Ricoh device and place the card on the reader The printer will display the loaded print jobs, and the user will be able to select and print them. Notes In order to print the loaded documents, you must have sufficient credit. myPrint supports several types of documents (see Appendix A: supported documents). If you try to load a document of an unsupported format, myPrint displays the following error message: If the file exceeds the maximum size, myPrint displays the following error message: Back to Index Vs Unimi / 23.03.2016 5 Printing using the email (EmailPrint) The ‘EmailPrint’ function allows the user to print a document by attaching it to an email addressed to [email protected] Proceed as follows: Set an email and attach the document(s) you need to print to it. Send the email to [email protected]. myPrint will release the print job to a multifunction printer. Login to any Ricoh multifunction printer and collect the print. 6 Notes The file will be printed according to the print settings configured on the user’s myPrint profile. You can recognise the email on the multifunction device by the word “Email” followed by the subject of the email. It is possible to recognise the attachments by the names that displayed on the multifunction screen. If you do not want to print the body of the email, you can delete it from the multifunction, as the attachments are saved as independent print jobs and can be printed singularly. Do not exceed the maximum email size set by the email provider when using large-size attachments. In some cases, according to the settings of the print environment in which myPrint is installed, email printing is off by default. Only files attached will be printed. The loaded files will have to be printed within 72 hours. After this period expires, print jobs will be deleted. Back to Index Vs Unimi / 23.03.2016 Printing using the printer driver (Virtual printer) With myPrint, you can print from any application of a Windows© PC. However, this requires the installation of ‘myPrint’ printer driver. PLEASE NOTES: There is no driver available for MAC and LINUX OS The printer works only in combination with Internet Explorer (any version). Internet Explorer security level cannot be over Medium. (Internet options > Security > Security Level > Medium). It is necessary to set https://myprint.unimi.it as a reliable website in Internet Explorer security settings and in the local intranet. (Internet options > Security > Local Intranet > Sites > Advanced > add https://myprint.unimi.it). In order to add the printer driver, you need to have administrator privileges for your own Windows account on a Windows© system. Installing the printer through “Printer Installation” Login to myPrint website. Click on the “Printer installation” button. Windows will ask to confirm whether you want to add a web link to the printer: Click “Yes”. After a short waiting time, myPrint will confirm the installation of the printer. Do not forget to activate your ID myPrint. This procedure will be explained in the next chapter. Suggestion: If you have problems installing the printer, read the notes in the following page Back to Index Vs Unimi / 23.03.2016 7 Notes If you install a myPrint printer on a Windows 8 © OS, you need to execute Internet Explorer in 'desktop' mode, not from Windows© start screen (UI mode). You can set Internet Explorer in 'desktop’ mode from Internet Explorer Home page. Right click on the key symbol at the bottom of the screen. Select 'Mostra nel desktop'. If you install the printer using Internet Explorer 11, it is necessary to execute Internet Explorer 11 in compatibility view settings, otherwise it will not be installed. You can set Internet Explorer in compatibility view settings by selecting the ‘Strumenti’ (Tools) icon on the upper right corner of the screen (or by pressing Alt + x) and selecting compatibility view settings. Then add the site myprint.unimi.it to the list by pressing Add. If you install a myPrint printer on a Windows©XP OS, it might be necessary to install an Internet Explorer plug-in (OLEprn.Dll) before completing the procedure. A yellow bar will appear on the top of the browser screen to remind you to complete this operation. Right click on it to allow the installation of the plug-in. You will not be able to complete the printer installation unless this operation is done. You can install the printer on any personal computer and print directly from your device. It is recommended not to install the printer on a public computer because it might be used improperly. Prints can be collected on any Ricoh multifunction device only after having logged in by placing the card on the reader. This prevents the unauthorised usage of the printer and the documents. If you suspect someone is abusing your account, you can ask a new ID myPrint on myPrint website. Back to Index Vs Unimi / 23.03.2016 8 Activating your myPrint ID To make sure that the print jobs are released to the right account, you need to insert your personal ID myPrint in the printer driver. You can find your ID myPrint by clicking on the Post-it (sample image shown at right) on the 'Home' page of myPrint website. 9 Open the Windows PC Control Panel, then select Devices and Printers. Right click on the printer https://myprint.unimi.it, then select 'Printing preferences'. The following screen will be displayed: click on ‘Details...’. Windows will open a dialog box aside: Insert (or paste) your myPrint ID, then click on 'OK' twice. Your myPrint will be activated, and the printer will be ready for use. Notes It is necessary to proceed as explained every single time, otherwise it will not be possible to release the print jobs.. Always check your credit before printing. Back to Index Vs Unimi / 23.03.2016 Purchasing printing credit You need to have enough printing credit in order to print. You can purchase it using myPrint and pay using several payment methods. Proceed as follows: Login to myPrint website. Click on the ‘Purchase printing credit’ button. myPrint will display four options: 10 Click on the desired amount myPrint will launch the payment form to elaborate your online banking payment. Please complete this procedure; once the payment is submitted you will be automatically redirected to myPrint website. You will be able to check if the operation was successfully completed by checking your printing credit. Notes If the cost of a print job exceeds your residual credit, it will not be released. The amount of doable copies depends on the cost per page due. For further information, see the Listino prezzi function. You can verify your remaining printing credit at the top of the page. Your printing credit is updated every time a print job is released on a multifunction printer. The maximum myPrinting credit allowed is 60 €. According to the amount charged, it will possible to disable one or more purchasing options. The transaction screen allows the user to monitor the payments and transactions history. On this screen, also not successful transactions will be displayed. The user will be notified via email if credit goes below a certain threshold. It is possible to adjust such threshold using the Change alerts function on myPrint website. Back to Index Vs Unimi / 23.03.2016 Cashing a voucher With vouchers it is possible to purchase printing credit, an alternative to the purchase of printing credit through online banking. Proceed as follows: 11 Login to myPrint website. After purchasing a voucher, click on “Voucher exchange” on the ‘Home’ page. Insert the voucher code and click on “Voucher to cash”. Your credit will be increased with the corresponding amount. Price list The price list contains an overview of the costs for each available print size. Click on “Price list”. myPrint will display Università degli Studi di Milano’s price list for copies and prints. Back to Index Vs Unimi / 23.03.2016 My profile On this page, users will be able to manage their own myPrint account. 12 Printing preferences WebPrint (available from the home page) allows users to choose between colours or black and white printing or single page or duplex printing. On the printing preferences page, it is possible to save such options as default, and they will be applied also to the print jobs released via email. Back to Index Vs Unimi / 23.03.2016 Activate/change your ID myPrint If you suspect someone is using your account without any permission, you can modify your ID myPrint. You need to modify it even in the printer driver of your PC: Proceed as follows to activate your user ID in the printer driver 13 Note After setting your new ID myPrint, the previous one expires. It will not be possible to release any print jobs using the old code. Change User-ID If you forget your User ID, this myPrint function allows you to create a new one. Proceed as follows: Login to myPrint website. Select “My profile” and click su “Change User ID”. The following screen will be displayed: Click on the “Send me a new User-ID” button; myPrint will send a new user ID to the main email address of your myPrint profile. Notes The old user ID will become invalid after creating the new one. If you have requested a new user ID, you need to reactivate your card by placing it on the multifunction card reader and inserting your new user ID. Back to Index Vs Unimi / 23.03.2016 Manage email addresses Nowadays, people are likely to have several smart devices (desktops, laptops, smartphones, tablets...) and several email addresses. myPrint allows you to link these addresses to your main myPrint account to print from any device. Proceed as follows: 14 Login to myPrint website. Select “My profile”, then click on “Manage email addresses”. The following page will be displayed: Insert the additional email addresses and click on the “Save” button. myPrint will verify the authenticity of such addresses by sending an email with a confirmation link in each. Please note: myPrint will indicate whether each email address is verified or not. Open myPrint email in your inbox, then click on the confirmation link. myPrint will register the email address as additional. From that moment it will be possible to release print jobs using that address Please note: myPrint verified email addresses are marked with the symbol Notes If the address status is still to be confirmed, it is not associated to your myPrint account yet. You can delete an email address by clicking on the bin icon next to it Back to Index . Vs Unimi / 23.03.2016 Change alerts This page displays all of the configurable alerts, such as the one concerning the credit threshold. The user will be notified via email if your myPrinting credit goes below a certain threshold; this way you will never get the unpleasant surprise of not being able to collect prints because of your insufficient credit. 15 Proceed as follows: Login to myPrint website. Select ‘My profile’ and click on ‘Change alerts. The following page will be displayed: Insert the desired threshold and click on “Save”' to save changes Note If you don’t want to receive any notification, you can set the threshold to € 0,00.. Back to Index Vs Unimi / 23.03.2016 iOS App The main myPrint functions are also available with Android and iOS Apps from Apple and Windows. These are also available for smartphone and tablet. This section describes the iOS version. 16 CAUTION: You need to have a myPrint account to use the Apps Selecting myPrint server The application must be connected to the server: https://myprint.unimi.it. The server address is published also as a QR code on the University red card and on the communication material of myPrint service: you can insert it through the QR-code scanning app by selecting the QR-code button Login You need to login to use the app. USER: the email used to create your account PASSWORD: your ID myPrint. (you can display your own ID myPrint by clicking on the Post-It on myPrint website ‘Home’ page). Back to Index Vs Unimi / 23.03.2016 Printing using the App Printing a picture Using this function you can select images from your pictures or camera library. Using this function you can print photos taken with your camera. Take a picture and press the "Print" button. Stampare un file myPrint allows users to print a document attached to an email In order to print a document, you need to share the document you want to print with myPrint application. Then, click on the “Apri in myPrint” icon. myPrint application will start, which means the document has been loaded on the App and the print can be released. Back to Index Vs Unimi / 23.03.2016 17 Purchasing printing credit You need to have enough credit to print. You can purchase credit using myPrint and pay using several payment methods. Proceed as follows: Select “My profile” , click on “Purchase printing credit” and login to myPrint website. 18 Click on the ‘Purchase printing credit’ button . myPrint will display four options: Click on the desired amount. myPrint will launch the payment form to elaborate your online banking payment. Please complete this procedure; once the payment is submitted, you will be automatically redirected to myPrint website. You will be able to check if the operation was successfully completed by checking your printing credit. Notes Vouchers are an alternative to the purchase of credit (see the Cashing a voucher section). If the cost of a print job exceeds your residual credit, it will not be released. The amount of doable copies depends on the cost per page. For further information, see the Price list function. Your printing credit is updated every time a print job is released on a multifunction printer. The maximum myPrinting credit allowed is 60 €. According to the charged amount, it will possible to disable one or more purchasing options. The user will be notified via email if credit goes below a certain threshold. It is possible to adjust such threshold through the Change alerts function on myPrint website. Back to Index Vs Unimi / 23.03.2016 Manage email addresses Nowadays, people are likely to have more smart devices (desktops, laptops, smartphones, tablets...) and several email addresses. myPrint allows you to link these addresses to your main myPrint account to print from any device. 19 Proceed as follows: Select “My profile” , then click on “Manage email addresses” Insert the additional email addresses and click on the “Save” button. myPrint will verify the authenticity of such addresses by sending an email with a confirmation link in each. Open the email sent from myPrint in your inbox, then click on the confirmation link to authenticate the address. You can now release print jobs using these email addresses. Please note: myPrint will indicate whether each email address is verified or not. myPrint verified email addresses are marked with the symbol indicates that the address is still to be confirmed. . A clock icon Notes If the address status is still to be confirmed, it cannot be used for printing. You can delete an email by clicking on the icon. Cashing a voucher Vouchers allows users to purchase printing credit, an alternative to the purchase of printing credit through online banking. Proceed as follows: Select “My , then “Cashing a voucher”. Insert the voucher code and click on “Send”. Your credit will be increased with the corresponding amount. Back to Index Vs Unimi / 23.03.2016 App Android This section describes Android App, available on Google Play store. CAUTION: You need to have a myPrint account in order to use the Apps Selecting myPrint server The application must be connected to the server: https://myprint.unimi.it. The server address is published also as a QR code on the University red card and on the communication material of myPrint service: you can insert it through the QR-code scanning app by selecting the QR-code button. Login You need to login to use the app. USER: the email used to create your account PASSWORD: your ID myPrint. (you can display your own ID myPrint by clicking on the Post-It on myPrint website ‘Home’ page). Back to Index Vs Unimi / 23.03.2016 20 Printing using the App Selecting a file With this function, you can select images from your personal gallery or camera pictures. Take a picture or select a picture from the gallery, then push the “Print” button. Taking a picture With this function you can take and print a picture. Pushing the button will cause the camera software of your Android device to open. Take a picture with the camera and push “ready” or “save”. myPrint will display a preview of the photo. Press the “Print” button to release the print. Printing a file You can print a document attached to an email. In order to release a document for printing, you need to share it using myPrint application. After clicking on the sharing icon, it will be sufficient to click on the “Apri in myPrint” icon to load the document on myPrint app. myPrint application will start: the file is loaded on the app and ready to be printed. Back to Index Vs Unimi / 23.03.2016 21 My profile In your profile page you can check your credit, set your default language, require a new password, manage your email addresses and cash vouchers. Purchasing printing credit 22 You need to have enough credit to print. You can purchase credit using myPrint, and pay with iDEAL or Credit Card. Proceed as follows: Select “My ”, click on “Purchase printing credit” and login to myPrint website. Click on “Purchase printing credit”. myPrint will display four options: Click on the desired amount. myPrint will launch the payment form to elaborate your online banking payment. Please complete this procedure, once the payment is submitted you will be automatically redirected to myPrint website. Notes Vouchers are an alternative to the purchase of credit (see the Cashing a voucher section). If the cost of a print job exceeds your residual credit, it will not be released. The amount of copies depends on the cost per page. For further information, see the Price list function. Your printing credit is updated every time a print job is released on a multifunction printer. The maximum myPrinting credit allowed is 60 €. According to the charged amount, it will possible to disable one or more purchasing options. The user will be notified via email if credit goes below a certain threshold. It is possible to adjust such threshold through the Change alerts function on myPrint website. Back to Index Vs Unimi / 23.03.2016 Manage email addresses Nowadays people are likely to have more smart devices (desktops, laptops, smartphones, tablets...) and several email addresses. myPrint allows you to link these addresses to your main myPrint account to print from any device. Proceed as follows: Select “My ”, then “Manage email addresses”. 23 Insert the additional email addresses and click on the 'Save' button. myPrint will verify the authenticity of such addresses by sending an email with a confirmation link in each. Open the email sent from myPrint in your inbox, then click on the confirmation link to authenticate the address. You can now release prints using these email addresses. Please note: myPrint will indicate whether each email address is verified or not. myPrint verified email addresses are marked with the symbol. A clock icon the address is still to be confirmed. indicates that Notes If the address status is still to be confirmed, it cannot be used for printing. You can delete an email by clicking on the icon. Cashing a voucher Vouchers allows users to purchase printing credit, an alternative to the purchase of printing credit through online banking. Proceed as follows: Select “My ”, then “Cashing a voucher”. Insert the voucher code and click on ‘Send’. Your credit will be increased with the corresponding amount. Notes Vouchers can be used exclusively in myPrint environments Back to Index Vs Unimi / 23.03.2016 Appendix Appendix A: supported documents The following chart shows all the file types that myPrint supports. 24 Extension Description doc, docx, rtf Word processors (es. MS Word) xls, xlsx Spreadsheets (es. MS Excel) ppt, pptx Presentations (es. MS PowerPoint) pdf Portable Document Format xps XPS, alternative to PDFs bmp, gif, jpg, jpeg, png, tif Image files txt Text files (for example Notespad files) Back to Index Vs Unimi / 23.03.2016
© Copyright 2026 Paperzz