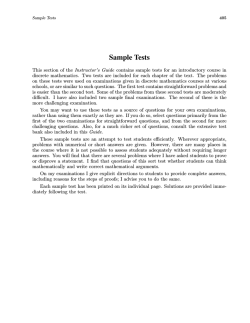
Spooky2 User Manual/15 Jan 2014 © John White 2014 Table of contents Spooky2: the beginning................................................................................................................ 1 System requirements.................................................................................................................... 2 What you get................................................................................................................................ 3 How to install................................................................................................................................3 Beginner screen.......................................................................................................................... 18 Expert screen.............................................................................................................................. 20 Control Panel.............................................................................................................................. 29 Advanced Menu..........................................................................................................................33 Manual Entry.............................................................................................................................. 38 Quick start.................................................................................................................................. 52 Biofeedback scanning.................................................................................................................44 Super setups................................................................................................................................46 Feather & wobble....................................................................................................................... 49 Making waves............................................................................................................................ 51 Windows warnings..................................................................................................................... 58 Frequently Asked Questions.......................................................................................................59 Generators & accessories........................................................................................................... 61 Software license......................................................................................................................... 63 Precautions for users.................................................................................................................. 64 Legal Notice & Disclaimer.........................................................................................................65 (Click on chapter title to go there – click on “Table of Contents” at the bottom of each page to return here) Spooky2: the beginning In early 2012, a quiet and unassuming South African man named Johann Stegmann lit a match that started a global revolution. During the course of some ground-breaking research into Rife technology, Johann, an experienced user and experimenter, realised that most people could never afford to buy their own machines in today’s savage economic jungle. These machines can cost many thousands of dollars, and price is not always an indicator of efficacy. Together with technical designer Hank Gigandet, Johann set out to find an alternative device that would be much more affordable – without sacrificing effectiveness or cutting corners. Johann’s daughter, Tania, is profoundly energy-sensitive, so the three of them started to test many different Rife machines and devices. They discovered that the energy transmitted by many of them was harsh, unpleasant, and ineffective. But they also found some that emitted a gentle, pleasant energy that not only made the test subjects feel good, but worked just as well as the very best commercial Rife machines. The device they settled on was the UDB1108S DDS frequency generator. These are pretty inexpensive, but the software to run them was written in Chinese and not really suitable for the specialised job of rifing. So Johann and Hank wrote their own software – RideUSB – that would do what they wanted. It had one limitation, however – it could only run one frequency generator per computer. Which is where electronics engineer, Rife designer, and software programmer John White entered the picture. The result was Spooky, a software powerhouse capable of driving 127 separate DDS devices from one cheap netbook PC. On Easter Monday, 2013, Spooky was launched, with no fanfares, and no publicity. As 2013 passed, update followed update, making Spooky more and more powerful, versatile, and effective. Word of mouth spread, and thousands of people the world over downloaded the software, and used it to make a positive difference in their lives. Without breaking the bank. Table of contents 1 But the Spooky team were not content to rest on their laurels, and John White knew he could do better. A whole lot better. Enter Spooky2 – the world’s most powerful and flexible Rife machine. Offering features you won’t find on any commercial unit, this is, quite simply, the Rife machine par excellence. For less than the cost of a mid-range zapper. Having owned three of the world’s top-selling commercial Rife machines, I personally stand in awe of what John White and the Spooky team have done. Over the past three years, they have given unstintingly of their time and energy, and have each spent many thousands of dollars of their own money in their quest to make one very important man’s dream come true. The man who invented the Rife machine was Dr. Royal Raymond Rife. His lifelong ideal was to see an effective and inexpensive Rife machine in every home on the planet. Spooky2 is our homage to a man of genius, vision, courage, and integrity. It’s our hope and belief that Spooky2 will enable the good doctor’s dream to be realised at last. Today, the match lit by Johann Stegmann almost two years ago is about to set the world on fire. David Bourke, January 2014 System requirements PC: Spooky2 was designed for use with Windows XP, but it also runs perfectly on Windows 7 and Windows 8. USB 2.0 or greater is required for frequency generator connectivity. Mac: Regretfully, here’s no Mac version. We recommend you pick up a pre-owned Windows PC and dedicate it to running Spooky2. These can usually be bought for a very modest price. Since many of you will wish to try experiments with long run times, this may be a good idea anyway. Alternatively, you can use BootCamp to create a Windows partition, or purchase virtualization software. You will need a good knowledge of Mac OS X and Windows to troubleshoot any issues. Table of contents 2 What you get New Spooky2–XM generators built from high quality components and optimized for Spooky2. Two damped waveforms (square and sinusoidal) with configurable decay oscillations. Brand new H-Bomb waveform (both square and sinusoidal). Enhanced signal gate control. Software amplitude, offset, and phase angle control. Auto-calibration – no adjustment necessary. Configurable amplitude and frequency wobble. Selectable wobble function. Octal and scalar frequency reduction if generator limit exceeded. Direct entry of light wavelength in the database. Randomized gate. Global controls for multi-generator rigs. Global scheduling. Beginner and Expert modes. Windows 32 and 64 bit support with auto-detection for driver installation. Internet controls to update the database online. Database editor. Improved multiple subject handling Auto-resizing supports all screen sizes. Biofeedback (Spooky Pulse accessory) to detect MORs. How to install Spooky2 has been designed for maximum ease of use, with tooltips that appear when you hover your mouse over almost anything. Installation is straightforward, too – just double-click the Spooky2 Installer file, and the following screens will appear in succession: Table of contents 3 The installer is unpacking its files. Next, you’ll see this language selection dialog. Choose your installation language from the list, then click OK. Table of contents 4 The installer program starts. Click Next> Table of contents 5 The License Agreement. Choose “YES – I Accept the terms of the License Agreement!” Then click Next> Table of contents 6 Destination location – accept the default or click Browse to select another. Then click Next> Table of contents 7 The installer adds a shortcut to your Windows Start Menu. Click Next> Table of contents 8 The Spooky2 directory is created and the installer asks you to confirm your settings. Click Next> Table of contents 9 Spooky2’s files are copied to your hard drive. Click Next> Table of contents 10 Your Spooky2 software has been installed. Click Finish. Table of contents 11 The driver installer for the Spooky2-XM range of generators launches. Click Next> Table of contents 12 The License Agreement – select “I accept this agreement.” Then Click Next> Table of contents 13 The driver installation completes. Click Finish. Table of contents 14 Now the USB1108S driver installer opens. Click Next> Table of contents 15 The installer configures your installation. When done, the following screen appears: Table of contents 16 Spooky2 has now been installed along with all of its drivers. Click Finish. Now launch Spooky2 and the following screen will appear: Table of contents 17 Beginner screen d The first time you launch it, Spooky2 opens its Beginner screen. Your screen choices are remembered between launches. Table of contents 18 First, choose the interface language you want from the menu on the right. Then enter the condition/pathogen you want to experiment with in the Search Box (left) and the results will appear in the Conditions List below: Double click the frequency sets you want to load into your Program and you’ll see that each one is added to your Selections Box. If you change your mind or make a mistake, double click the set in the white Selections Box to remove it, or click the – Button at the top right to remove all the sets you’ve loaded. Now click a red Channel Button to load the Program into that channel. A red Channel Control Panel (described later) will open. Click the Start Button – the Channel Control Panel and its associated Channel Button will turn green. Now you’re rifing! In its default configuration, this screen will transmit in Remote Mode using a square wave. Frequency wobble (explained later) is set to +- .02% Feathering. However, you can set up your own options in the Expert screen, and Spooky2 will remember them. Table of contents 19 Expert screen d Click the Expert Button and this is what you see. NB: Red text denotes features only available on Spooky2–XM generators. Table of contents 20 The first thing you’ll notice is that a lot of controls are now displayed, including two new buttons in the Toolbar. The Add Custom Frequency Button opens a screen that allows you to input your own custom frequency sets into Spooky2’s database. The Advanced Button opens a large menu that gives access to many powerful and important functions. The Manual Program Entry and Advanced screens will be fully explained later. The Subject Data Panel allows you to enter name, notes, email address, and messages, making it easy to keep track of multiple subjects. The sets loaded in the Selections Box are also included as part of your messages. There’s one User Data Panel for every Channel in your Spooky2 rig. You can also save and name multi-set Programs loaded in the Selections Box by clicking the Save As Button. This saves your list of frequencies under a new name to your custom database. This can save a lot of time when setting up multiple Channels. Table of contents 21 This area of Spooky2’s main screen gets you onto the web. From the top, the buttons are: Purchase Equipment: this button opens your browser and brings you to a webpage where you can buy accessories that will extend and enhance your Spooky2 rig. These include Spooky Pulse, Spooky Remote, and Spooky Tube. All are sold at cost price. Upgrade Database: brings you to our downloads web-page where you can get the latest Spooky2 database. Instructional Videos: opens Spooky2’s YouTube channel. Visit Us: brings you to the official Spooky2 website and forum. Facebook: brings you to our Spooky2 Facebook page. Spooky2’s main database is made up of 10 sub-databases. To include them all in your searches, simply click the + Button. You can also just check all those you want included. To deselect all, click the – Button. PROVEN has produced consistent results in every subject it was used on. BIO and VEGA are both excellent, based on Russian frequency research. CAFL is the Consolidated Annotated Frequency List, amassed from the experience of Rife experimenters over many years. XTRA is a collection of sets from various sources, all chosen for their reputation for effectiveness. CUSTOM is your own personal database. RIFE is a collection of Dr. Royal Raymond Rife’s original frequencies. HULDA is Dr. Hulda Clark’s database. KHZ is a collection of higher frequencies. ALT consists of sets based on Ayurvedic knowledge and practise, solfeggios, and planetary frequencies. Table of contents 22 The Program Options Pane is Spooky2’s dashboard, providing complete control over almost every aspect of its operation. From here on every Channel, you can: ‣ Multiply frequencies transmitted, transposing a whole set. ‣ Enter frequency and set repeats, and loop the entire Program. ‣ Set waveform Duty Cycle for both Channel Outputs. ‣ Set Amplitude and Offset (Spooky2–5M/10M/20M only). ‣ Set the waveform’s Phase Angle for both Outputs. ‣ Optimise settings for Contact, Plasma, and Remote Modes. ‣ Enable and configure Amplitude and Frequency Wobbles. ‣ Configure action for out-of-range frequencies. ‣ Enable a Gate – rate is set in the Advanced Menu. ‣ Randomize application of the Gate. ‣ Prevent transmission of duplicates on multiple generators. ‣ Stop duplicates in a single set transmitting. ‣ Override the Global Pause Schedule for this Channel. ‣ Choose from a huge list of frequency modulations. ‣ Sort frequencies ascending or descending, or leave as listed. ‣ Assign, configure, and view Waveforms for each Output. ‣ Control frequency/voltage relationships between Outputs. (NB: four waves in red box with Spooky2–5M/10M/20M only). Table of contents 23 This is a lot of information to try to take in at once, so let’s break the Program Options Pane down into its component parts: What you enter here will be used to multiply all the frequencies in your set. Example: if you enter 8, the frequencies 20, 100, 5000 will be transmitted as 160, 800, 40000. Decimals without limit can be input. This is an easy way to convert a set to octal or scalar harmonics without having to calculate values or edit the set. This is where you enter the number of frequency, set, and Program repeats you want. A value of 0 for Repeat Complete Program will loop the Program until you manually stop it. These values change to recommended defaults depending on the transmission mode chosen. The Duty Cycle of a waveform dictates its on/off status – 50% means it’s “on” for half its cycle. This changes the wave’s energy content by blocking or allowing some of its harmonics. Table of contents Amplitude and Offset: this is where you enter calibration values for a Spooky2–5M/10M/20M. Offset should be 0 for Remote and Contact, and 100 for Plasma. The UDB1108S generator must be manually calibrated using its front panel controls. Phase Angle: requires both OUTs. Useful when driving an external device that can mix both signals – the difference between two 180 degrees out-of-phase waves can create harmonics that hit Mortal Oscillatory Rates. The Contact, Plasma, and Remote Buttons load optimum default settings into various fields – Repeat Each Frequency Set, Amplitude, Offset, Gate, Skip Concurrent Duplicate Frequencies, Delete Duplicate Frequencies, and Apply. You are free to change these suggested values to whatever makes the most sense for you. Heal Selector: This loads the standard Square Wave which is more useful for organ and system condition experiments. Kill Selector: This loads the Damped Square Wave which is designed to kill pathogens. In Plasma Mode, it also adds a high frequency limiter (400,000Hz) to protect your gear. 24 Some pathogens can adapt to frequency bombardment. Occasionally, you may come across very high frequencies that your generator might not be able to transmit. The answer is to apply Amplitude and/or Frequency Wobbles to rapidly change the signal strength and frequency. When set here, wobbles apply constantly once the Channel is running. The UDB1108S has a top limit of 8MHz, and some cancer frequencies are most effective at their high fundamentals. Amplitude and Frequency Wobble controls are also found in the Advanced Menu. Settings made here will only apply to the toggle buttons for these functions you’ll find in each Channel’s Control Panel. Any time you feel a definite reaction from a frequency, it can be good to apply one or both wobbles – 1% is a good value for Frequency Wobble. The menu choices are Disabled, Sawtooth, Inverted Sawtooth, and Triangle. These waveforms describe the shape of the wobble’s progress. Example: triangle starts with no wobble, ramps up to full wobble at the percentage chosen in the number of steps specified, then ramps back down to zero wobble, and repeats. Percentage is the amount of wobble you wish to apply, and Steps specifies the number of discrete “jumps” in a single cycle – 16 is a good value. More than this increases the resolution of the sweep, but also increases the time taken. Table of contents This controls what will happen if your generator meets any frequency that’s too high. Enter the top limit your unit can handle, then choose a Scalar or Octal Subharmonic option. Spooky2 will then automatically transpose the out-of-range frequency to the closest subharmonic for your generator. Check this box to prevent low frequencies from causing discomfort in Contact Mode. Gate: this is a control signal which turns the main signal on and off very rapidly – 4Hz equals four times a second. This speed (or, more accurately, rate) is set in the Advanced Menu. Its application to the main signal can be randomized. This helps to prevent any pathogen adaptation. Gate is normally only used in Plasma Mode, but it can be very useful in the other modes, too, because it provides an additional “hammering” effect to keep pathogens off-balance. 25 If you’re running multiple generators, it’s possible that identical frequencies used in different sets may coincidentally be transmitted at the same time. This uncontrolled frequency duplication can cause unwanted phase problems, and even wave cancellation (where two waves cancel each other out completely). With this box checked, Spooky2 will never allow duplicates to be transmitted simultaneously. Some frequency sets, particularly those developed on older machines, contain duplicate frequencies. In some cases, this may be what you want (some Frequency Foundation sets). In others, it serves no useful purpose. Checking this box stops single-set duplicates from being output. This will not alter the database – it’s runtime only. The Advanced Menu features a control which allows you to schedule a pause of any length at a set time daily. This pause will apply to all generators in your rig – thus it’s called a “global” control. Checking the box here enables this Channel to “opt out” of your global pause. Table of contents The Advanced Menu contains a set of Start, Pause, and Stop buttons. These are global controls, and will start, pause, and stop all generators in your rig at the same time. The checkbox here allows you to keep this Channel’s transmission independent of global control. The Apply Menu allows you to apply a constant rapid change to each frequency in a set. The speed of this change is set in the Advanced Menu. The menu contains a huge number of different modulations to choose from, as well as the ability to disable the function. The choices will be explained in their own section later. Note that this modulation option is different, and in addition, to the already-described configurable Frequency Wobble feature. Both can be used at the same time. Some developers maintain that running a set of frequencies in ascending order will produce different results from running them in descending order. This menu allows you to choose frequencies Ascending, Descending, or Do NOT Sort. 26 Waveform Display: the top pane shows a single cycle of the waveform for F1 – the lower pane shows F2. This is a sine with 1 entered in the X Box to the right of the Waveform Selectors. Here’s what you get if you select a square and enter 10 in the X Box. Even though it looks like there are 10 cycles here, this is still one single cycle with 10 “wavelets.” This is enabled by a Spooky2 exclusive we call Wave Dividers. What it means is that Spooky2 can transcend the limits of your generator – a Spooky2-5M (5MHz) can output 50MHz if desired. F2 Multiplier: this is where you can alter Frequency 2 based on the value of Frequency 1. Example: if you enter 3, F2 will be the third harmonic of F1. If you enter 11, it’s the 11th harmonic. Dr. Anthony Holland recently found that adding an 11th harmonic to any frequency vastly increased its killing power. This can be used with any wave. Table of contents F2 Modulation Menu & Checkbox: this is where you decide how F2 interacts with F1. To activate, check the box to the left. Your menu choices are: Add F1 to F2, Modulate F2 Using F1 (AM Double Sideband), and Modulate F2 Using F1 (AM Single Sideband). The resultant wave will be transmitted from Output 1. Waveform Selectors: from the top down, these are: Sine, Square, Sawtooth, Inverted Sawtooth, Triangle, Damped Sinusoidal, Damped Square, H-Bomb Sinusoidal, and HBomb Square (waves in red text are only available on the Spooky2 generators). The Damped Sinusoidal wave was used by Dr. Royal Raymond Rife in his documented cure of 14 terminal cancer and two terminal TB cases in 1932. The Damped Square and 27 both H-Bomb waves are extrapolations of the principles involved in this wave. All four are orders of magnitude more powerful that the first five waveforms in the list. We recommend the square versions for your experiments, and the sinusoidal ones for biofeedback scanning with Spooky Pulse. X Box Controls: the X column of controls to the right of the waveforms turns Spooky2 into something very special indeed. Spooky2 now creates each frequency as what’s known as an arbitrary waveform. This allows all of its frequencies to be constructed from multiple copies of the waves. This is extremely important for the Damped and H-Bomb waves because the number of decay frequencies in each must be set correctly. However, this can also be applied to the other waveforms, too. Example: a plain Square Wave with X Box set to 10 will be able to reach frequencies of up to 50MHz. 1, 2 and the Follow Out1 Button: if you’re using both OUTs, these controls allow you to make independent waveform selections for each one, or to have Out2 mirror Out1’s settings. Table of contents Out2 Control: When using both OUTs, this is where you configure the settings for Out2, unsurprisingly. Here, you can specify a constant frequency multiplier and a constant frequency addition to apply to your Out1 frequencies You can also set a constant voltage multiplier and addition, and choose to copy your Out1 Gate settings. Copying the Gate is mainly useful for Plasma Mode. Out 2 can be used to provide contact mode to a second subject using the same frequencies as Out 1. It’s more commonly used for out-of-phase or harmonically-related signals and mixed with Out 1. Example: an external AM modulator where Out 1 is modulated by Out 2. Out 2 would provide either a fixed or harmonically-related carrier for a plasma system using an RF transformer without a resonant balun. NB: This tech-speak is provided for the techies among you. Ordinary mortals who just need to know how to use this stuff productively should click here for the Super Setups section. 28 Control Panel The Control Panel on the left is not transmitting – indicated by its red colour. The first frequency in its list is selected and waiting to start, the Timer field reads 0 (seconds), and the Progress Bar is empty. The one on the right is transmitting its Program (indicated by the green colour), the Timer field reads 133, and the Progress Bar for the the current frequency is starting to fill. There’s a lot going on here, so let’s go through all the control and information elements in the panel one by one: On the left is the Channel number, generator Table of contents 29 model, date, and time. On the right you see your Program Run Time. Here, repeats are set to 4 for each set, and 35 for the complete Program. If the latter is set to 0 for indefinite looping, you’ll see the Program Run Time for one loop. Beneath this you can check how long your Program has been running for. The red X closes the Control Panel. Transmission Buttons: some are greyed out till the generator is running. Bold text on a button shows that it was clicked last. Pause, Hold, and the Wobble buttons are toggle controls that remain active till you click again. Start, Pause, and Stop are obvious. Hold remains on the current frequency until it’s clicked again. The Wobble buttons apply Amplitude and/or Frequency Wobbles as configured in the Advanced Menu – click to start, click again to stop. Two frequency sets that make up a Program are shown on the right, and on the left a list of their frequencies in running order, with the current frequency highlighted. To start with a frequency other than the first, double click it while Spooky2 is stopped, then click the Start Button. To jump immediately to a different frequency while the set is running, double click it. Progress Bar: this tracks progress through each frequency’s transmission – as time passes, the white bar fills up with blue segments. The number to the right (180) is the Dwell of each frequency in seconds. The grey field at the top shows the number of seconds elapsed. If you stop the Channel, you can edit the elapsed time, then restart. Table of contents 30 Output Pane: the two grey fields display all aspects of the signals being output by your generator from both OUTs – Frequency, Waveform, Duty Cycle, Amplitude, Offset, and Phase Angle. Greyed Out2 means the output is unused. The fields are not editable. Generator Image: Spooky2 shows you an image of whichever generator you’ve attached to each Channel. This is a UDB1108S. If you own a Spooky2-5M, 10M, or 20M, you’ll see it here if it’s attached to a Channel. Channel Erase Button: a Channel cannot be cleared of its sets if it’s running a Program. In this state, the button is greyed and unavailable (below left). The Channel Erase function only becomes available after you’ve stopped the Channel (below right). Table of contents 31 Biofeedback Scan: here is where you will configure all the parameters of Spooky2’s biofeedback accessory, Spooky Pulse. Biofeedback scanning will be dealt with in its own section later in this manual. Here’s the Biofeedback Report pane. This is explained later. Table of contents 32 Advanced Menu You’ll find all sorts of powerful and handy goodies tucked away in here: ‣ Global transmission controls. ‣ Global internet and sound controls. ‣ Global controls for Amplitude Wobble. ‣ Global controls for Frequency Wobble. ‣ Global Pause timing. ‣ Channel communications panes. ‣ Driver Install buttons. ‣ Gate Off voltage and frequency. ‣ Utility Buttons for important functions. ‣ USB bus report (COMM Ports). ‣ Frequency Blacklist Control. ‣ Blacklist sub-options for harmonics. ‣ Error report panes for troubleshooting. ‣ Useful information fields. ‣ And more… Table of contents 33 Once again, there’s a lot of information and controls here, so we’ll break it all down into more digestible bites: Global Transmission Buttons: clicking Start, Pause, Hold, or Stop will perform that action for all Channels in your rig – unless you’ve put a checkmark in any Channel’s Prevent Global Start box in its Program Options Pane. In such cases, exempted Channels will not respond to global transmission commands. Global transmission control can be a major timesaver when you’re running a lot of Channels, and it can enable you to keep your experiment timetables more orderly. Channel Commands: here you can see which Channel last sent a command to its generator, what the command was, and the response received. Very useful for troubleshooting. DDS Generators: by entering the number of generators in your rig here after first launch, you will 2 speed up all subsequent Spooky launches. Click in the box, enter your number, then press your keyboard’s Return key. Table of contents Refresh Rate: this controls the speed of the Gate and all of the frequency feathering and modulation options listed in Spooky2’s Apply menu. This speed will be half the number you enter here. Example: to make the Gate operate twice a second (2Hz), enter 4 here, or for frequency feathering working at 8Hz (eight times a second), enter 16. Amplitude & Frequency Wobbles: these prevent organisms from ever becoming adapted to frequencies. The settings you make here are separate from those in the Channel’s Program Options pane. These ones will only be applied when you click the Amplitude and Frequency Wobble toggle buttons in any Channel Control Panel. Gate Off: when the Gate closes, you would normally want the voltage to drop to zero and the frequency to be 0Hz. If you wish to change these values for Gate Off, you can so so here. 34 Utility Buttons: these do lots of handy and necessary things. Identify Ports: click to see the Channel number appear on the generator’s display thus: 0000.00005 (Channel 5). Channels must be stopped to see this. Identify Users: this brings up a list of subject names and their Channels. Rescan Devices: re-establishes PC-togenerator communication if lost. Edit Database Buttons: both these open an editing program to enable you to make changes easily. This program has its own built-in Help in its Toolbar, so please refer to it. Refresh Database: reloads the database file into memory after your edits. Pause Between: set a global pause for all Channels here. This can be defeated in individual Channels by checking Override Pause Schedule in each Progam Options pane. This computer has internet: this globally enables internet access. If checked, buttons that access the web work, and emails can be sent in all Channels – unless you remove the checkmark in any Channel’s Enable Emails box in its Control Panel. Enable Sounds: this function is reserved for future use. It is not currently enabled. Comm Ports Panel: this is where all your PC’s USB ports are listed along with which driver is using them. Select Database: opens a file selector to allow you to load a different database. Update Database: lets you overwrite the database in memory with a different one on disk. Undo Update: lets you undo the Update Database operation. Table of contents 35 Each USB communication (comm) port is used by one Channel to communicate with its frequency generator. Useful for troubleshooting possible USB issues. Frequency Blacklist Control: a very few frequencies are known to cause problems. Two which you should enter into this list are 1840Hz and 1910Hz – these can cause the growth of malignancies. You can, and should, opt to avoid octal and scalar harmonics of these by checking the boxes beneath. Now Spooky2 will no longer include them in transmissions. Occasionally, you may come across one frequency in a set that causes discomfort. To get around this, you can enter it temporarily here to allow you to use the rest of the set, then try re-enabling it when circumstances permit. To enter a blacklisted frequency, click in the top field and type it, then click the Add button. To remove all frequencies from your blacklist and start over, click the – Button top right. Table of contents Install Drivers: if you ever need to reinstall the UDB1108S or Spooky2 Generator software drivers, you can do it right here by clicking the button of your choice. Which of the Spooky2 32 bit and Spooky2 64 bit buttons will be available on your system will depend on whether your PC is 32 bit or 64 bit. Spooky2 will enable the button appropriate for your operating system. Errors Pane: this is where Spooky2 reports OS errors like: Timer Conflicts, Write Conflicts, and Missed Responses. These all give important clues to what’s going on in your operating 2 system’s interface with Spooky . You can also see which was the last Channel to produce such an error. These fields are not editable and are for display only. Ideally, all the readings should be zero, as above. If you’re having problems, you may need to include what your Errors Pane is reporting in your tech support request. 36 All error fields can be cleared by clicking the – Button at the top right. General Info Pane: this is where you can see the total number of frequency sets you have – it includes both the main and your own custom databases. It also shows the number of generators found by Spooky2 at launch, and the exact file path of the currently-loaded database. Table of contents 37 Manual Entry Clicking the Add Custom Frequency button in the Toolbar opens this screen: Table of contents 38 Spooky2 allows you to enter an unlimited number of your own frequency sets into a custom database. The Manual Program Entry screen contains comprehensive instructions. We’ve reproduced them here so you can appreciate fully how much power you have when you write your own frequency sets (and print them out if you wish). Program Name: click in the field and type your Program name. Give it a good descriptive one so you’ll be able to identify it in a search list. Something like “Cancer Throat Sweep XX” is good because it will show in searches for “cancer,” “throat,” and “sweep.” You can substitute XX with your own initials, a numeral, or leave it out entirely. It’s your choice. Frequencies: now we come to enter the frequencies. You can either type them in, or copy and paste them all at once from another document. In all cases, each frequency in the set must be separated by a comma – with NO spaces, otherwise Spooky2 will report an error (and name the offending frequency set) when your custom database is next loaded or you try to load the Program you’ve just entered. So please check all the information you’ve entered here very carefully before finalising your entry. You can also enter a plethora of very powerful commands in this field along with your frequencies. We’ll deal with entering these commands in a moment. Dwell: this is the amount of time in seconds you wish to transmit each frequency in your set for. If you’re unsure of what this should be, 180 seconds is a good default. Note that you can specify individual frequency deviations from this default by entering a simple command (shown later). Table of contents 39 Additional Notes: you can use field this to add notes to your Program for any purpose. The text you enter here will be included in all Spooky2 searches, and will appear in the text area beneath the Conditions List when you click on the set’s name. If you make a textual mistake when entering a set, don’t worry – you can edit it later by clicking the Edit Custom Database button in the Advanced Menu. The Commands List: The following commands are entered into the Frequencies field at the point in your frequency sequence where you want them to take effect. xxx-yyy: This is how you enter a sweep between two frequencies – xxx stands for one frequency, and yyy for the other. If you want an ascending sweep, enter the lower frequency first, then type a hyphen (the sweep command), followed by the higher frequency. For a downward sweep, enter the higher frequency first, then a hyphen, and then the lower one. =xxx: For any frequencies, you can specify different dwells from the default you want applied to the rest. Just type an equal sign (the dwell command) followed by the dwell in seconds. Table of contents Spooky2 allows you to select a different waveform for every frequency in your set if you wish. Wx: After the frequency for which you want to use a different wave, just type W followed by the number of the wave as shown in the list below. Sine wave: Square wave: Sawtooth wave: Inverted sawtooth: Triangle wave: Damped Sinusoidal: Damped Square: H-Bomb Sinusoidal: H-Bomb Square: 0 1 2 3 4 5 6 7 8 Waveforms shown in red above are only available on the new Spooky2 generator, not on the UDB1108S. 40 You can also change the Duty Cycle of the waveform. Spooky2 allows you to enter light wavelengths directly. Dx: After the frequency or waveform command for which you wish a new Duty Cycle to apply, type a D followed by the value you want. Lx: Type L followed by your wavelength in nanometers (nm). Spooky2 will automatically convert this to the highest subharmonic frequency your generator can transmit. If you wish to add a Gate for some frequencies, no problem. Example: you have six frequencies – 100, 200, 300, 400, 450, and 600. You want 100 and 200 to transmit for your default dwell of three minutes, and 300 to transmit for 10 minutes, all using a square wave set to a Duty Cycle of 66%. Gx: After the target frequency or command, type G followed by 1 to turn gating on, and G followed by 0 to turn it off. Enter: 100 W1 D66,200,300=600, Spooky2–XM With the new generators only, you can boost or cut the amplitude, or output voltage. Ax: After your target frequency or command, type A followed by the voltage you wish to use. With the new generators, you can also change the offset. Ox: After your target, type O followed by the offset value desired as a percentage of Amplitude rather than a voltage. You then want 400 to sweep up to 450 over a period of 30 minutes using a sine wave with Duty Cycle of 75%. Add: 400-450=1800 W0 D75, Finally, you want 600 to use a square wave again for your default dwell, with Duty Cycle of 50%. If you have the new generator, you also want to boost the amplitude to 5volts and set offset to 2.5volts (which is 50% of the Amplitude). Add: 600 W2 D50 A05 O50, You can also change the phase angle of the output. So here’s your entire string: Px: After your target, type P followed by the value you require. 100 W1 D66,200,300=600,400-450=1800 W0 D75,600 W1 D50 A05 O50, Table of contents 41 Text in red on the previous page denotes features that are only available on the new Spooky2 generators, not on the UDB1108S. When you’re happy with your newly-created Program, click the Save and Exit Button and it will be written into your custom database. And remember, you can always go back and edit your Programs in the database editor available from the Advanced Menu. If you wish to give back to the Spooky2 community, you can do so by ticking the box provided to email us your frequency set for inclusion in a database that will be freely provided to all who need it. Please do not send us any proprietorial sets for which you have paid a fee. Rife researchers work hard to develop these, and they deserve to be rewarded for it. Any such sets received will be deleted. If you change your mind for some reason, you can simply click the Cancel Button. The Manual Program Entry screen will close, leaving you back in Spooky2’s main screen. Table of contents 42 Quick start Here’s a quick guide on how to use each transmission mode in Spooky2 – Remote, Contact, and Plasma: General Effective rifing requires proper hydration of the body – we recommend drinking six to eight pints of pure water daily, half of it before noon. Distilled water to which a very tiny pinch of Himalayan pink salt has been added is best. Purified water comes next, followed by filtered. Avoid drinking large amounts of city tap water. Remote Mode: ‣ Search for and load the sets you want to run. Then either: ‣ click the Remote Button to load an endless loop and other default settings. ‣ OR make your own settings for repeats, waveform, amplitude/frequency modulation, Apply menu, etc. ‣ Spooky2–XM: DNA Holders need Amplitude set to 2.0. ‣ Click your Channel Button and hit Start. ‣ UDB1108S: check that your Spooky Remote LEDs are equally bright. If not, use the OFFSET knob to adjust. Contact Mode: ‣ Using the alligator clip cable that came with your generator, connect your Spooky Tube electrodes to: ‣ Spooky2–XM: OUT1 on the rear of the unit ‣ UDB1108S: OUT on the Spooky Power amplifier. ‣ Search for and load the sets you want to run. Table of contents ‣ Spooky2–XM: click the Contact button and either: ‣ choose “Heal” or “Kill. ‣ OR make your settings for waveform, amplitude/ frequency modulation, etc. ‣ UDB1108S: turn the generator’s AMPLITUDE knob fully clockwise and either: ‣ click the Contact Button (Kill/Heal not available). ‣ make your settings for waveform, amplitude/ frequency modulation, Apply menu, etc.. ‣ Click your Channel Button and hit Start. ‣ Grab your electrodes and sit back. For best results, wrap Tubes in tap water-dampened tissues. Plasma Mode: ‣ Turn off and unplug TVs, radios, or stereos (read a book). ‣ Connect your PA3 amplifier to the Spooky2–XM or UDB1108S TTL socket on the rear and turn it on. ‣ Search for and load the sets you want to run. ‣ Click the Plasma Button and either: ‣ Accept the default settings loaded. ‣ OR make your own settings for waveform, amplitude/frequency modulation, Apply menu, etc. ‣ Click your Channel Button and hit Start. ‣ Sit back and relax – but keep the plasma tube within 10cm of your body to receive the full power. 43 Biofeedback scanning By adding Spooky Pulse to your Spooky2–5M/10M/20M, you can scan the body for frequency anomalies – the UDB1108S needs the Spooky Power amplifier added. Biofeedback scanning is a technique where an ultrasound sweep is input into the body with electrodes. The Spooky Pulse clip is attached to the earlobe – this monitors blood flow using an infrared light detector. If any frequency in your sweep is also present in the body, it will cause a momentary stress due to sympathetic resonance (called a “hit”). This causes a minute change in pulse rate which is detected by Spooky Pulse, and the frequency which provoked it recorded by Spooky2. When the sweep is finished, Spooky2 will return to its list of hits and carefully sweep above and below each one until it has found the exact value that causes it. It will then present the list in a window as a custom frequency set which you can save to your own database and use to deal with the anomalies. You should always save this with a name like “Personal Hits 01.” As you do further scans, remember to increment the number so you don’t overwrite previous ones. To do a scan, make sure your body is properly hydrated. Connect a pair of electrodes to the output of your generator and plug Spooky Pulse into a USB port on your PC. Open the Control Panel for the Channel you want to use for the scan: Start and Finish Frequencies: enter these to define the range of your sweep. If you know the frequency bandwidth of the organisms you’re testing for, enter its lower and upper limits. If not, a reasonable sweep to try might be something like 0-10,000Hz. Initial Step Size: dictates how big the “jumps” in your sweep are. A value of 100Hz means that Spooky2 will input this sweep in discrete sub-ranges of 100Hz – a total of 100 jumps. Depending on the size of your range, good values would be 10, 100, 1,000, 10,000, or 100,000. Decimal Places: this tells Spooky2 the level of decimal place accuracy you require – a good value is 2. While searching for frequencies under 600Hz with the new Spooky2 generators, you can specify up to five decimal places, and two above 600Hz. Table of contents 44 Hits to Find: a reasonable value would be 10. If you enter 10, Spooky2 will select the best 10 hits after the scan. It will then go back and carefully sweep above and below each one to determine its exact value to the decimal precision you’ve specified. Resample Count: this tells Spooky2 how many heartbeats to resample below your found frequencies to home in on their exact values. Scan sweeps are always upward, so this ensures that ranges below hits are properly rescanned. A reasonable value is 1. Use RA/Use Peak Buttons: RA stands for Resting Average (pulse rate). It’s best used for longer scan sessions where the heart rate falls. The Peak option is for those who wish to run short scans where the average heart rate is not likely to change very much. Start Delay: sets the number of heartbeats before Spooky2 will start the frequency sweep, giving you a chance to get ready and to become accustomed to the frequency. Now click the Start Button in the Biofeedback Pane, grab Biofeedback Readout: your electrodes, lie down, and relax totally. This pane displays the following values during To detect heart rate changes due solely to frequency hits, you and after your scan: need to be relaxed. Meditation, breathing exercises, or even zoning out for five minutes works. Or play a sound file of BPM: the heart rate in continuous white noise and leave it running in the Beats Per Minute. background. You can find these on the web. HRV: Heart Rate Variability – low is good. Galv: how conductive the skin is. Hydration boosts this. Av. BPM: average heart rate over the entire session. Av. HRV: average Heart Rate Variability during the scan. Av. Galv: average session value of the skin’s conductivity. Table of contents Depending on the values you input, a reasonable biofeedback sweep can take from 20-60 minutes. A bigger sweep range, or smaller Initial Step Sizes, will take more time. You can do more sweeps on successive days with different ranges – but save results as “Personal Sweep 02,” etc. In this way, you can build a complete frequency profile and run chained sets in a single Program, or extract only the ones you want to build a new personal set. 45 Super setups Most Rife newbies find the technical aspects very confusing. Here’s a bunch of guides with settings and connections for some very powerful operations in Spooky2. Once you get the hang of the ideas behind them, you’ve got the power. How to set up the Holland 11th Harmonic Effect: Dr. Anthony Holland recently demonstrated that when the 11th harmonic of any frequency is applied simultaneously, its results are dramatically improved. There are two different ways to achieve this. The first uses frequency addition: Enter 11 in the Hz field. Check the box on the left and select Modulate F2 Using F1 (AM Double Sideband) from the menu. Spooky2 shows the new modulated wave in the Waveform Display. Damped waves have built-in gating – this makes them much better at dealing with viruses, pathogens, and cancer cells. For frequencies lower than about 1MHz (1,000,000Hz), a damped square wave format is best. This applies to most of the frequencies in Spooky2’s database. Check the box on the left and choose Add F1 to F2 from the menu. Spooky2 shows the new additive wave in the Waveform Display. Frequencies greater than about 1MHz are best used with the damped sinusoidal formats. This would include all the original Rife frequencies and some of Spooky2’s custom sets (CUST, XTRA). But Spooky2 can also be set up to use the higher harmonic as a variable carrier – a world-first. The carrier helps body penetration and also provides a powerful punch. Remote: connect Spooky Remote/DNA Holder to Out1. As before, enter 11 in the Hz field. Table of contents Contact: connect electrodes to Out1. Plasma: the PA3 is a digital device – it cannot transmit damped waves. So click the Plasma Button, ensure that a 46 plain square wave is selected, and make the settings as shown. Then connect the PA3 to Out1. How to use a carrier wave: Carrier waves allow frequencies to penetrate the body easier. However, they are not required for Remote Mode. In Contact Mode, you can use almost any carrier frequency. We recommend using the 11th harmonic as your contact carrier since it will not only carry the encoded fundamental frequencies, but also act as a powerful additional “left hook” in itself. For setup details, please see the preceding section. Most plasma systems have their own built-in hardware carrier waves. For those that do not, enter these settings: How to transmit over-limit frequencies: The Spooky2-XM generator models (5M, 10M, and 20M) have top frequency limits of 5MHz, 10MHz, and 20MHz respectively . Using its Wave Dividers technology, Spooky2 can transcend these hard limits radically. Example: you have a Spooky2– 5M (which has a top limit of 5MHz) and you wish to transmit a frequency up to 50MHz.Here’s how you do it: You can use any waveform you like. So choose the one you wish to use for Out 1. Make any settings necessary for Out2. Since 50 is 10 times the top limit of your 5M, enter 10 into your waveform’s X Box. Out2 = (Out1 x 0) + 3100000 Hz This will create a carrier of 3.1MHz on Out2. You can enter any carrier frequency you like, and you can copy Out1’s Gate settings to your carrier as well. Connect your plasma amplifier to the TTL socket. Table of contents This tells Spooky2 to create 10 sub-waves, or “wavelets,” inside one single wave cycle. It will then upload the appropriate waveform to the 5M generator and instruct it to run at 5MHz. The output frequency will actually be 50MHz. 47 Note that towards the top end of your overdriven frequency range, amplitude will tend to fall off, and the waveshapes will not be as accurately formed. Now go to Out2 Control and enter the following settings: But Spooky2 makes it possible to use your generator to output accurate and powerful frequencies far beyond its hardware design limits. Out2 - (Out1 x 1) + 0 Hz How to use electrodes with two subjects: Spooky2 allows two subjects with the same condition to receive frequencies using two pairs of contact electrodes. Here’s how to do it: Make all the settings you require for waveform, etc. Then click the Follow Out1 selector button at the bottom of the Waveform pane. You can also choose to copy any Gate settings, and even change the amplitude of Out2 if you wish. Connect one pair of electrodes to Out1, and another pair to Out2. Now both subjects will receive the same frequencies. How to use two Spooky Remotes with one Spooky2–XM: Out2 Control has been designed to allow complete freedom to use Out2 in any way you wish – you are limited only by your own imagination and ingenuity. With two Spooky Remotes connected to Out1 and Out2 and one subject, you can: ‣ ‣ ‣ Table of contents Use Out2 for harmonics (F2 = F1 control). Use Out1 for the Holland effect and reinforce the harmonic with Out2. Add 0.1Hz to F1 for the Scoon effect (check the box and choose Add F1 to F2 in the menu). 48 Feather & wobble Feather is a random delimited fluctuation around a frequency. Wobble is a rapid controlled sweep above and below it. Spooky2 offers the following powerful options – to our knowledge, it’s the only Rife system with these capabilities: Frequencies Directly Applies the frequencies directly with no changes. +- .02% Feathering Output will fluctuate rapidly by .02% above and below the set frequency randomly. Useful where the exact frequency of a pathogen may be uncertain. Excellent for remote treatment. +- .05% Feathering Same as .02% feathering but the variation is greater. Frequencies have mathematical “relatives” called harmonics. Higher harmonics can be very powerful. These options create the following continuous harmonic step sequences at a rate set in the Advanced Menu. The base frequency is “F”: .05% 8 Stage Wobble F, F+.025%, F+.05%, F+.025%, F, F-.025%, F-.05%, F-.025% Octal Harmonics 2 Stage Wobble F, F x 2 Octal Harmonics 4 Stage Wobble F, F x 2, F x 4, F x 2 Octal Harmonics 6 Stage Wobble F, F x 2, F x 4, F x 6, F x 4, F x 2 Octal Harmonics 8 Stage Wobble F, F x 2, F x 4, F x 6, F x 8, F x 6, F x 4, F x 2 .02% 4 Stage Wobble F, F+.02%, F, F-.02% Octal Harmonics 10 Stage Wobble F, F x 2, F x 4, F x 6, F x 8, F x 10, F x 8, F x 6, F x 4, F x 2 .02% 8 Stage Wobble F, F+.01%, F+.02%, F+.01%, F, F-.01%, F-.02%, F-.01% Octal Harmonics 12 Stage Wobble F, F x 2, F x 4, F x 6, F x 8, F x 10, F x 12, F x 10, F x 8, F x 6, F x 4, F x 2 .05% 4 Stage Wobble F, F+.05%, F, F-.05% Table of contents A perfect square wave is made up of odd harmonics. Spooky2 can force these to work harder by fluctuating to higher ones: 49 Odd Harmonics 2 Stage Wobble F, F x 3 Fibonacci Series 9 Stage Wobble F, F, F x 2, F x 3, F x 5, F x 8, F x 5, F x 3, F x 2 Odd Harmonics 4 Stage Wobble F, F x 3, F x 5, F x 3 Fibonacci Series 11 Stage Wobble F, F, F x 2, F x 3, F x 5, F x 8, F x 13, F x 8, F x 5, F x 3, Fx2 Odd Harmonics 6 Stage Wobble F, F x 3, F x 5, F x 7, F x 5, F x 3 Odd Harmonics 8 Stage Wobble F, F x 3, F x 5, F x 7, F x 9, F x 7, F x 5, F x 3 Fibonacci Series 13 Stage Wobble F, F, F x 2, F x 3, F x 5, F x 8, F x 13, F x 21, F x 13, F x 8, F x 5, F x 3, F x 2 Odd Harmonics 10 Stage Wobble F, F x 3, F x 5, F x 7, F x 9, F x 11, F x 9, F x 7, F x 5, F x 3 Fibonacci Series 15 Stage Wobble F, F, F x 2, F x 3, F x 5, F x 8, F x 13, F x 21, F x 34, F x 21, F x 13, F x 8, F x 5, F x 3, F x 2 Odd Harmonics 12 Stage Wobble F, F x 3, F x 5, F x 7, F x 9, F x 11, F x 13, F x 11, F x 9, F x 7, F x 5, F x 3 The natural logarithm, also called “exp(3),” is a mathematical way to describe universal growth in time. But it can also be used to calculate highly effective frequency harmonics. The Fibonacci Series of numbers can be seen everywhere in nature. It’s an excellent choice for good results: One highly-respected Rife developer recommends it exclusively to calculate the most accurate frequency harmonics (scalars): Fibonacci Series 3 Stage Wobble F, F, F x 2 Fibonacci Series 5 Stage Wobble F, F, F x 2, F x 3, F x 2 Fibonacci Series 7 Stage Wobble F, F, F x 2, F x 3, F x 5, F x 3, F x 2 Table of contents Natural Log 2 Step Wobble F, F x 20.0855369232 Natural Log 4 Step Wobble F, F x 20.0855369232, F x 403.4287934927, F x 20.0855369232 50 Making waves... Spooky2 generates nine different waveforms. Here’s what they are, and what they can do. First, the plain unaltered waves: Sine: very useful for experiments in healing with a gentle rise and fall in energy. Square: normally used in experiments to kill pathogens, with almost instant rises to full power. Sawtooth: useful where a smooth rise in power with a sharp drop-off is required. Mainly experimental. Inverse sawtooth: powerful pathogen killer, with an almost instant rise in power and a smooth drop-off. Triangle: smooth constant power rise and drop-off. Mainly experimental use. Damped sinusoidal: used by Dr. Rife in the 1930s. Very powerful with multiple tapering inner rises and falls. Damped square: world-first, extrapolation of Rife’s damped sinusoidal to a square wave. Very powerful. H-Bomb sinusoidal: world-first, a very powerful new sine with explosive leading and trailing edge spikes. H-Bomb square: world-first, square version of above. A killer new waveform! Table of contents 51 Now, here are the new waveforms generated by adding a second frequency that’s three times the first: Sine: Add F1 to F2 (F2 = 3xF1). Square: Add F1 to F2 (F2 = 3xF1). Sawtooth: Add F1 to F2 (F2 = 3xF1). Inverted sawtooth: Add F1 to F2 (F2 = 3xF1). Triangle: Add F1 to F2 (F2 = 3xF1). Damped sinusoidal: Add F1 to F2 (F2 = 3xF1). Damped square: Add F1 to F2 (F2 = 3xF1). H-Bomb sinusoidal: Add F1 to F2 (F2 = 3xF1). H-Bomb square: Add F1 to F2 (F2 = 3xF1). Table of contents 52 These are the waveforms that result from adding a frequency that’s 11 times the first (the Holland 11th Harmonic Effect): Sine: Add F1 to F2 (F2 = 11 x F1). Square: Add F1 to F2 (F2 = 11 x F1). Sawtooth: Add F1 to F2 (F2 = 11 x F1). Inverse sawtooth: Add F1 to F2 (F2 = 11 x F1). Triangle: Add F1 to F2 (F2 = 11 x F1). Damped sinusoidal: Add F1 to F2 (F2 = 11 x F1). Damped square: Add F1 to F2 (F2 = 11 x F1). H-Bomb sinusoidal: Add F1 to F2 (F2 = 11 x F1). H-Bomb square: Add F1 to F2 (F2 = 11 x F1). Table of contents 53 Double side band (DSB) amplitude modulation – this adds upper and lower harmonics. Frequency 2 is three times the first: Sine: Mod F2 using F1 (AM DSB, F2 = 3xF1). Square: Mod F2 with F1 (AM DSB, F2 = 3xF1). Sawtooth: Mod F2 with F1 (AM DSB, F2 = 3xF1). Inverse sawtooth: Mod F2 with F1 (AM DSB, F2 = 3xF1). Triangle: Mod F2 with F1 (AM DSB, F2 = 3xF1). Damped sinusoidal: Mod F2 w/F1 (AM DSB, F2 = 3xF1). Damped square: Mod F2 with F1 (AM DSB, F2 = 3xF1). H-Bomb sinusoidal: Mod F2 w/F1 (AM DSB, F2 = 3xF1). H-Bomb square: Mod F2 with F1 (AM DSB, F2 = 3xF1). Table of contents 54 DSB amplitude modulation again – this time Frequency 2 is Frequency 1’s 11th harmonic (the Holland Effect via DSB AM): Sine: Mod F2 using F1 (AM DSB, F2 = 11xF1). Square: Mod F2 with F1 (AM DSB, F2 = 11xF1). Sawtooth: Mod F2 with F1 (AM DSB, F2 = 11xF1). Inverse sawtooth: Mod F2 with F1 (AM DSB, F2 = 11xF1). Triangle: Mod F2 with F1 (AM DSB, F2 = 11xF1). Damped sinusoidal: Mod F2 w/F1 (AM DSB, F2 = 11xF1). Damped square: Mod F2 with F1 (AM DSB, F2 = 11xF1). H-Bomb sinusoidal: Mod F2 w/F1 (AM DSB, F2 = 11xF1). H-Bomb square: Mod F2 with F1 (AM DSB, F2 = 11xF1). Table of contents 55 Single side band (SSB) AM adds powerful upper harmonics – Frequency 1 is multiplied by Frequency 2’s third harmonic: Sine: Mod F2 using F1 (AM SSB, F2 = 3xF1). Square: Mod F2 with F1 (AM SSB, F2 = 3xF1). Sawtooth: Mod F2 with F1 (AM SSB, F2 = 3xF1). Inverse sawtooth: Mod F2 with F1 (AM SSB, F2 = 3xF1). Triangle: Mod F2 with F1 (AM SSB, F2 = 3xF1). Damped sinusoidal: Mod F2 w/F1 (AM SSB, F2 = 3xF1). Damped square: Mod F2 with F1 (AM SSB, F2 = 3xF1). H-Bomb sinusoidal: Mod F2 w/F1 (AM SSB, F2 = 3xF1). H-Bomb square: Mod F2 with F1 (AM SSB, F2 = 3xF1). Table of contents 56 Finally, SSB AM again with Frequency 2 multiplied by Frequency 1’s 11th harmonic (the Holland Effect via SSB AM): Sine: Mod F2 using F1 (AM SSB, F2 = 11xF1). Square: Mod F2 with F1 (AM SSB, F2 = 11xF1). Sawtooth: Mod F2 with F1 (AM SSB, F2 = 11xF1). Inverse sawtooth: Mod F2 with F1 (AM SSB, F2 = 11xF1). Triangle: Mod F2 with F1 (AM SSB, F2 = 11xF1). Damped sinusoidal: Mod F2 w/F1 (AM SSB, F2 = 11xF1). Damped square: Mod F2 with F1 (AM SSB, F2 = 11xF1). H-Bomb sinusoidal: Mod F2 w/F1 (AM SSB, F2 = 11xF1). H-Bomb square: Mod F2 with F1 (AM SSB, F2 = 11xF1). Table of contents 57 Windows warnings There are two very important settings in Windows that you need to be aware of when using Spooky2: PC Sleep Settings: If your computer is set to sleep or hibernate after a certain amount of time with no user activity, here’s what happens: The contents of your memory are temporarily written to a file on the hard drive. The drive then stops spinning – this means that nothing more can be read from it into memory. So when your PC sleeps or hibernates, it is effectively no longer working, much like a TV on standby. Consequently, Spooky2 will simply suspend transmission until you wake your PC again. To fix this, go to Control Panels > Power Options > Change when the computer sleeps, and set everything except the screen to Never. Alternatively, you can use a dark screen saver to extend display life (Control Panels > Personalization > Screen Saver). Windows Update Reboots: If your PC is also used for the internet, be aware that default system settings mean that Windows can download and install updates automatically. It can then quit Spooky2, install the updates, and restart your PC – ending your entire Spooky2 session unbeknownst to you. To fix this, go to Control Panels > Windows Update > Change settings and choose anything other than Install updates automatically. If you don’t want to lose this auto-install functionality, you can simply switch off your modem/wi-fi router before going to sleep or leaving your home. But do remember to keep an eye on things while you’re at home but away from the computer. If you don’t use a wi-fi system, your computer is connected to the internet with an ethernet cable plugged into a modem or switcher. If you unplug this cable, Windows can’t go looking for updates, so your Spooky2 session can’t be interrupted. Table of contents 58 Frequently Asked Questions Q: My Spooky software doesn’t work with Windows 8. Does this mean I can’t use Spooky? A: The UDB drivers don’t work with Windows 8. Either use Windows 7/XP or upgrade your generator(s) to Spooky2–XM models. Q: Having to search for and reload all my frequency sets every time I turn Spooky2 on is a pain. Is there an easier way? A: Indeed there is! Spooky2 remembers all your settings and the frequencies that you used the last time you ran it. So there’s no need to search and reload – simply click the red button and you’ll see all your previous sets in the Channel Control Panel. Q: Isn’t an AC calibration setting of two volts very low for a Rife machine (UDB1108S)? A: No. You can even go lower if you wish and it will still work. However, two volts was found to be the optimum setting during Spooky’s original development phase – it provides effective results without provoking a Herxheimer reaction in the subject. Q: My father has a pacemaker. I’ve been told that Rife machines shouldn’t be used in these cases. A: This is true of Rife machines that only use electrodes, and the danger arises because the electrical energy entering the body can interfere with the pacemaker’s electronics. Remote use doesn’t transmit electricity – so it’s quite safe for everyone. Q: In my household, we all seem to get colds and �flu at the same time. Is it possible to use Spooky2 with everyone at once? A: As long as everyone has the same problem, up to six different DNA samples can be inserted in Spooky Remote. But cut each fingernail in three and only use one part for each subject. Wrap each part separately in paper masking tape, write each subject’s initials on them, and insert them carefully. Q: Why can’t I change my Repeat settings in Spooky2? Each time I enter the numbers I want, they change back to what they were before. Table of contents 59 A: Settings cannot be altered in Spooky2 if the Channel Control Panel is open, or if a program is actually running. You should always enter the settings you desire before clicking any red button to open its Channel Control Panel. Q: How should I set the buttons and the Adjust knob on the UDB1108S? A: Spooky2 has been designed for complete software control of the UDB1108S. The only physical controls you ever need to touch are the power button, the -32dB button (this should always be disengaged), and the Amplitude and Offset knobs. Q: Does Spooky2 work like a zapper? A: Most zappers work by mixing together a number of set frequencies that can’t be changed by the user. As a result, a very large range of harmonics is produced, not all of them good for you. Long-term use of a zapper can damage the beneficial flora in the skin, just as a broad-spectrum antibiotic kills all bacteria – friendly ones included. Like all Rife machines, Spooky2 allows exact selection of the frequencies required. You could say it’s like a sniper’s rifle compared to a blunderbuss. Q: My UDB1108S came with a two-pin power plug. What do I use this for? A: This plug is included for standalone use in laboratory and engineering scenarios. It’s not needed for use with Spooky2 because your PC powers the generator through its USB cable. Don’t discard it – it may come in handy for something else. Q: I notice that the UDB1108S has an upper frequency limit of 8MHz. Is this range big enough? A: There are no Rife frequencies over 4MHz. Approximate ranges are: moulds and mycotoxins 75–215KHz; bacteria and most viruses 275–450KHz; protozoa, roundworm, and flatworm 325–480KHz; warts 400–475KHz; tapeworms 425–515KHz, and mites 675-880KHz. There are only a very few viruses – mostly �flu – which exist up around the 3KHz-plus range. So 8MHz is fine. Q: I have a lot of problems I want to experiment with. Can I use two frequency generators running at the same time on myself? A: Yes, you can use multiple generators. But make sure to check the Skip Concurrent Duplicate Frequencies box on all channels. Table of contents 60 Generators & accessories t Spooky2–XM generators: Spooky Pulse: These come in three configurations. The 5M has a top limit of 5MHz, the 10M peaks at 10MHz, and the 20M at 20MHz. Prices are $104.95, $135, and $178 respectively. Buy here. This brand new website has no checkout in place yet. To order, send an email to Echo Lee ([email protected]) stating what you wish to buy and you’ll quickly get a reply. Echo heads up the Spooky2 extension supplier network. She's been working closely with the Spooky team since the original Spooky system was launched in April 2013, and she'll lead you through the process painlessly. Table of contents Turns Spooky2 into a powerful biofeedback scanner, using an earclip to record pulse rate while inputting a sweep with handheld electrodes. Price is $45 and you can get it here. 61 Spooky Remote: This scalar DNA transmitter is used in Spooky2’s remote mode. It uses a twin dual planar coil “sandwich” and replaces the DNA Holder introduced with the original Spooky system, taking frequency transmission to the next level. Spooky Remote comes with twin LED indicators which make generator adjustments simple. Spooky2–XM: Clicking the Contact Button sets the default calibration values. Then adjust other settings as desired. UDB1108S: turn the AMPLITUDE knob fully clockwise. The unit comes fully assembled with the cable required. Price is $22.50 and you can get it here. Table of contents Spooky Tube: Unlike most, these electrodes are fabricated from the surgical steel that’s used to make body implants. This protects your health and well-being because any metal ion transfer to the skin will be much safer than with other metals. Spooky Tube electrodes can be used with any of the Spooky2–XM generators. The UDB1108S doesn’t output enough voltage in Contact Mode for deep body penetration. Adding an inexpensive Spooky Power amplifier solves this problem (coming soon). Price per pair is $18 and you can get them here. 62 DNA Holders: If you wish to use the home-made DNA Holder introduced with the original Spooky instead of Spooky Remote, you’ll find detailed instructions for making two different models on the Spooky2 website here. Calibration is done manually, and you’ll find directions on the Calibration page of the website. Note that you will need a multimeter for calibration. Multimeters that measure AC and DC voltage range in price from $5 to $200. We suggest spending $10 to $20 for a decent one to ensure your system is accurately calibrated. You can buy your multimeter at any good electronics or electrical supplies store, or click to buy online from: eBay (global) Amazon (US) Amazon (UK) Spooky2 Software License Although the source code is © John White, this software is free, and has been written for the greater benefit and knowledge of all humanity. You are actively encouraged to pass it on freely to everyone you know, as long as it’s accompanied by this manual. Table of contents 63 Precautions for users If you suffer from impaired liver or kidney functions, please use caution when using Spooky2. Frequency generation systems should never be used while pregnant. Please do not operate the Spooky2 frequency generation system while driving or using dangerous machinery. Please keep your Spooky2 frequency generation system out of the reach of children. If you feel nauseous, faint, dizzy, or have �flu-like symptoms or headaches after exposures to Spooky2’s frequencies, please drink lots of pure water and shorten your future Spooky2 session times appropriately. Because no electricity is passed into the body when using the Spooky2 frequency generation system to broadcast frequencies via nonlocal space (Remote Mode), this system should have no ill effect on the electrical or mechanical components of cardiac pacemakers or internal defibrillators. But, as always when using frequencies, please proceed with care and caution. If you do suffer with heart problems, or wear a pacemaker or other electrical implant, you should NEVER attach electrodes to the Spooky2 system. Please use Spooky2’s Remote Mode ONLY. In general, it’s best to experiment with Spooky2 before about 5pm because the excitation effects of frequencies on human cells can affect sleep. However, depending on the nature of your experimentation, Spooky2 can be run overnight if desired. Finally, when experimenting with Spooky2 or any other frequency generation system, proper hydration will produce better results. As a general rule, it’s best to drink 4-8 pints of pure water daily, half of it before noon. On behalf of my associates and all the people who assisted in the development of Spooky2, I wish you all a long and healthy life. – John White, January 2014. Table of contents 64 Legal Notice & Disclaimer The Spooky2 software and frequency generation system is not approved by the FDA as a medical device. It is intended for use as an experimental electronic device only. It is not intended for the diagnosis, prevention, cure, treatment, or mitigation of any disease or illness in human beings. Neither is it designed or intended to affect the function or structure of any human body system. I, John White, make no medical claims whatsoever for the Spooky2 frequency generation system. If you have a problem with your health, please consult a licensed healthcare professional. In the US, you can legally use frequency systems like Spooky2 for testing, energy balancing, life extension, and relaxation. You can experiment using frequencies on bacterial cultures, laboratory animals, and yourself. For what it’s worth, you still have a legal right to self-medicate under the Ninth Amendment of the United States Constitution. In Germany and South Africa, as well as some other nations, frequency devices are legally licensed as medical instruments. Please note that neither I, John White, nor any of my associates involved in the design and development of this system, are responsible whatsoever for the use, abuse, or misuse, intentionally or unintentionally, of the Spooky2 frequency generation system or any of its component parts due to any circumstances beyond our reasonable control. In any case, I, John White, or any of my associates, shall have no other liability. By using the Spooky2 frequency generation system, you, the user, understand and accept that you have no expectation of curing any ailment. You also understand that possible negative physical and/or mental effects, unknown to John White or his associates, might result from the use of the Spooky2 frequency generation system. Moreover, you intend to undertake only responsible experimentation, and you voluntarily accept all responsibility for the use and application of all frequencies generated by the Spooky2 system. Furthermore, you agree that you will not hold John White or associates responsible for any consequences, whether harmful or otherwise, that may occur as a result of using the Spooky2 frequency generation system. Table of contents 65
© Copyright 2026 Paperzz