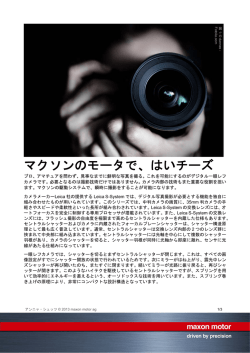
LEICA M -A
取扱説明書 | Instructions
6
7
20
5
4
3
3
8
2
1
22
14
13
12
11
10a
10b
10
10c
9
19 19b 19a
18
17
16 16a
15
21
23
26
24
27
25
LEICA M-A
取扱説明書
はじめに
JP
2
はじめに
お客様へ
このたびは、本製品をお買い上げいただき、誠にありがと
うございます。本製品は、独特の機能・性能を備えたフィ
ルムレンジファインダーカメラです。
正しくご使用いただくために、ご使用前にこの取扱説明書
をよくお読みください。
目次
JP
目次
はじめに.............................................................. 2
各部の名称........................................................... 4
ファインダー内の表示............................................. 5
キャリングストラップの取り付け方............................ 6
シャッターレリーズボタン....................................... 7
シャッタースピードダイヤル.................................... 7
巻き上げレバー..................................................... 7
フィルムの交換 .................................................... 8
フィルム感度の設定 ............................................. 12
レンズの取り付け/取り外し.................................... 13
ブライトフレームファインダー............................... 14
フレームセレクター........................................... 14
ピント合わせ.................................................... 16
露出(シャッタースピードと絞り値)の設定.............. 17
フラッシュを使って撮影する.................................. 18
対応フラッシュユニット..................................... 18
フラッシュユニットの取り付けと接続.................... 18
アクセサリー...................................................... 20
スペア用アクセサリー........................................... 23
お手入れ............................................................ 24
索引.................................................................. 25
テクニカルデータ................................................. 26
ライカ プロダクトサポート.................................... 28
ライカ カスタマーケア.......................................... 28
3
各部の名称
JP
各部の名称
正面
1.
2.
3.
4.
5.
6.
7.
8.
ベースプレート固定ピン
レンズ着脱ボタン
キャリングストラップ吊り環
巻戻し解除レバー
距離計窓
ブライトフレーム採光窓
ファインダー窓
フレームセレクター
上面
9. 巻き戻しノブ
10.固定リング
a.距離指標
b.被写界深度目盛
c.レンズ着脱指標
11.フォーカスリング
12.絞りリング
13.絞り指標
14.レンズフード
15.フィルムカウンター
16.シャッターレリーズボタン
a.ケーブルレリーズ用ねじ穴
4
17.巻き上げレバー(フィルム巻き上げとシャッターチャ
ージ用)
18.シャッタースピードダイヤル(クリックストップ式)
• マニュアル設定 1秒~1/1000秒
• フラッシュ同調速度 1/50秒
• 長時間露出/露出系OFF B/OFF
19.ホットシュー
a.フラッシュ撮影用中央接点(シンクロ接点)
b.ロックピン用の穴
背面
20.アイピース
21.裏カバー
22.フィルム感度指標
ベースプレートと裏カバーを開けた状態
23.三脚ねじ穴 A 1/4(1/4インチ、DIN 4503に準拠)
24.ベースプレート
25.ベースプレート固定トグル
ベースプレートと裏カバーを開けた状態
26.巻き取りスプール
27.モータードライブ連結軸
ファインダー内の表示
a.
b.
ファインダー内の表示
a.
a.ブライトフレーム(50mmと75mmの例)
b.フォーカシング測距枠
JP
5
キャリングストラップの取り付け方
JP
6
キャリングストラップの取り付け方
a
b
シャッターレリーズボタン
シャッタースピードダイヤル
メモ
18
16
16a
15
17
シャッターレリーズボタンの作動ポイントは2段階(最初
の作動ポイントまで軽く押す=半押し、深く押し込む=全
押し)です。全押しすると撮影できます。
撮影するときは、シャッターが切れる小さな音がするま
で、一定の力でそっとシャッターレリーズボタンを押し込
んでください。
シャッターレリーズボタンには、標準的なケーブルレリー
ズ用のねじ穴が付いています。
• シャッタースピードの中間速度(クリックストップで止
まる位置の中間)には設定できません。
• 「1000」から「B」または「B」から「1000」に回すこ
とはできません。「1000」から他の速度に切り替える
にはダイヤルを左に、「B」から他の速度に切り替える
には右に回してください。
巻き上げレバー
フィルムの巻き上げは巻き上げレバーを使って行います。
巻き上げレバーを回すと、フィルムが1コマ送られて、シ
ャッターがチャージされ、フィルムカウンターが自動的に
1目盛進みます。フィルムを巻き上げるときは、巻き上げ
レバーを右にいっぱいまで回します。小刻み巻き上げも可
能です。巻き上げレバーを予備位置まで引き出しておく
と、フィルムを素早く巻き上げることができます。
シャッターレリーズボタン / シャッタースピードダイヤル / 巻き上げレバー
シャッタースピードダイヤルを用いて、シャッタースピー
ドを1/1000秒~1秒に切り替えることができます。オレン
ジまたは赤で印された「B」はフラッシュ同調速度の1/50
秒を示します。また、同じくオレンジまたは赤で印された
「B」に設定すると、シャッターレリーズボタンを押し続
けている間はシャッターが開いた状態になります。(長時
間露出)シャッタースピードダイヤルはクリックストップ
式です。どの位置でもロックされません。
JP
7
フィルムの交換
JP
フィルムの交換
フィルムを入れる
フィルムを交換するときは、必ず巻き戻しノブを矢印の方
向へ静かに回して、フィルムが入っていないことを確認し
てください。巻き戻しノブを回して抵抗を感じた場合はフ
ィルムが入っていますので、「フィルムを巻き戻す/取り
出す」の手順に従ってフィルムを取り出してください。
フィルムが入っていないことを確認したら、ベースプレー
トを上にして本製品を持ちます。
カメラの開け方
3.
1.
2.
5. フィルムカートリッジを右手に持ち、フィルム室にカ
ートリッジを半分ほど入れます。
6. 本製品に描かれた「フィルムの入れかたの説明図」に
従って、フィルムの先端部を巻き取りスプールに差し
込みます。
7. フィルムカートリッジと先端部を、指先でカメラ内へ
慎重に押し込みます。
8
1.
2.
3.
4.
ベースプレート固定トグルを引き出します。
ベースプレート固定トグルを左に回します。
ベースプレートを持ち上げて取り外します。
裏カバーを開けます。
重要
ベースプレートは、カメラに取り付けられた状態で、フィ
ルムを正しい位置に装填するように設計されています。カ
メラを開けた状態で、フィルム送りを確認しないでくださ
い。
カメラを閉じる
8. 裏カバーを閉じます。
9. ベースプレートを本製品の側面にある固定ピンに掛け
ます。
10.ベースプレートを本製品に取り付けます。裏カバーが
しっかり閉じられていることを確認してから、ベース
プレートを正しく取り付けてください。
11.ベースプレート固定トグルを締めてベースプレートを
固定します。
JP
フィルムの交換
メモ
• 既製品のフィルムは必ず先端部が細くなっています。
• フィルムの先端部を引き出しすぎた場合でも、巻き取り
スプールから多少はみ出した程度であれば、カメラに支
障をきたすことはありません。ただし、気温が0°Cを下
回るような状況では、フィルムの先端が巻き取りスプー
ルからはみ出てしまうと、その部分が凍って折れてしま
うおそれがありますので、「フィルムの入れかたの説明
図」に従って正しくフィルムを入れてください。
フィルムを1コマ目まで送る
12.巻き上げレバーを回してフィルムを1コマ分送り、シャ
ッターを切ります。
13.巻き戻しノブを矢印の方向にゆっくり回してフィルム
のたるみを取り、巻き上げレバーをもう一度回しま
す。巻き戻しノブが矢印と反対の方向に回れば、フィ
ルムは正しく送られています。
14.もう一度シャッターを切り、さらにもう一度巻き上げ
レバーを回します。これで、フィルムカウンターが「1
」になります。フィルム感度を設定・確認すれば、撮
影の準備は完了です。
9
フィルムの交換
JP
10
フィルムを巻き戻す/取り出す
最後のコマまで撮影すると、巻き上げレバーが動かなくな
ります。この状態になったら、フィルムを巻き戻して取り
出します。
1. 巻き戻し解除レバーを「R」の位置に合わせます。
2. 巻き戻しノブを引き上げます(最大11mm引き上げる
ことができます)。
3. 巻き戻しノブを右(矢印の方向)に回します。途中で
軽く抵抗を感じますが、そのままさらに回すと、フィ
ルムが巻き取りスプールから外れます。
4. ベースプレートを取り外します。
5. 裏カバーを開けます。
6. フィルムカートリッジを取り出します。
1. 光を完全に遮断した部屋でベースプレートを取り外し
ます。
2. 底面を下にして本製品「を持ちます。
3. 巻き上げレバーをゆっくりと数回回します。フィルム
のパトローネが出てきたら、手でつまんで取り出して
ください。必要に応じて、本製品を手で軽く叩いて取
り出しやすくしてください。
JP
フィルムの交換
長尺フィルムを使用したときなどに、フィルムがフィルム
カートリッジのスプールに上手く付着していないと、フィ
ルムの先端がスプールから外れてしまう恐れがあります。
このような場合は、巻き戻しノブを回してもフィルムが空
回りして巻き戻せませんので、次の手順でフィルムを取り
出してください。
11
フィルム感度を設定する
JP
12
フィルム感度を設定する
フィルム感度の設定はフィルム感度ダイヤルを使って行い
ます。本製品で設定できるフィルム感度はISO 6~6400で
す(ISOはフィルム感度を表す国際単位です)。
フィルム感度を設定するには、フィルム感度ダイヤルを回
して希望の数値をフィルム感度指標(白い指標)に合わせ
ます。
JP
レンズの取り付け/取り外し
取り外しかた
1. 固定リングに指をそえてレンズを持ちます。
2. レンズ着脱用の赤い指標と本製品のレンズ取り外しボ
タンの位置を合わせます。
3. レンズをまっすぐはめ込みます。
4. 「カチッ」と音がするまでレンズを右に回します。
1. 固定リングに指をそえてレンズを持ちます。
2. レンズ取り外しボタンを押します。
3. レンズ着脱用の赤い指標とレンズ取り外しボタンの位
置が合うまでレンズを左に回します。
4. レンズをまっすぐ取り外します。
レンズの取り付け/取り外し
取り付けかた
メモ
フィルムが入っている状態でレンズを交換するときは、本
製品に直射日光が当たると、光がシャッターから入り込ん
でフィルムが感光するおそれがあります。体で直射日光を
遮るなどしてレンズを交換してください。
13
ブライトフレームファインダー
JP
14
ブライトフレームファインダー
本製品のブライトフレームファインダーは、明るく鮮やか
な表示の高性能な大型ファインダーで、レンズに合わせて
高精度の距離計が機能する距離計連動式です。
ブライトフレームのサイズは、各焦点距離におい
て、35×23mm(スライドフォーマット)の画面サイズに
一致します。撮影距離が長くなると、撮影される範囲はブ
ライトフレーム内に見える範囲よりも広くなります。
ブライトフレームはフォーカシング機構と連動しており、
パララックス(レンズとファインダー軸のズレ)は自動的
に補正されます。ブライトフレーム内に見える範囲
は、0.7mから無限遠までの撮影範囲で実際に撮影される
範囲とほぼ一致します。
ファインダー倍率は0.72倍です。ブライトフレームに対応
するレンズは、焦点距離28mm(シリアルナンバー2 411
001以降のエルマリート)
、35mm、50mm、75mm、90mm、135mmのレンズ
です。これらのレンズを装着する
と、28mm+90mm、35mm+135mm、50mm+75mm
のブライトフレームの組み合わせの中から焦点距離に対応
した1組が自動的にファインダーに表示されます。
ファインダーの中央には、ピント合わせ用の四角い測距枠
が周辺よりも明るく表示されます。距離計と連動するレン
ズは、焦点距離が16~135mmの全レンズです。
フレームセレクター
フレームセレクターを使うと、使用レンズ以外のブライト
フレームの組でも自由に表示することができます。ブライ
トフレームを切り換えることで、使用レンズの構図(撮影
範囲)とその他の焦点距離のレンズの構図を簡単に比較で
きるので便利です。
フレームセレクターを外側(レンズの反対方向)にセット
すると、35mmと135mm用のブライトフレームが表示さ
れます。垂直の位置にセットすると、50mmと75mm用の
ブライトフレームが表示されます。内側(レンズに近い方
向)にセットすると、28mmと90mm用のブライトフレー
ムが表示されます
A
ブライトフレーム
B
撮影範囲(拡大図)
撮影距離
撮影範囲
0.7m
ブライトフレームの幅で約1つ分狭い範
囲
2m
ブライトフレームの内側の辺で示される
範囲
無限遠
ブライトフレームの幅で縦に約1つ分、
横に約4つ分広い範囲
JP
B
50 mm + 75 mm
28 mm + 90 mm
35mm + 135 mm
Der Leuchtrahmen-Messsucher
A
15
ピント合わせ
JP
ピント合わせ
本製品の距離計は有効基線長が長いため、高精度にピント
を合わせることができます。特に広角レンズを使って深め
の被写界深度で撮影するときに効果的です。
ファインダーの中央には、フォーカシング測距枠が明るく
はっきりとした長方形で表示されます。ファインダー窓が
覆われても、フォーカシング測距枠とブライトフレームは
表示されたままになります。
ピント合わせは、このフォーカシング測距枠を用いて、二
重像合致式またはスプリットイメージ式で行います。
二重像合致式
例えばポートレート撮影では、被写体の目にフォーカシン
グ測距枠を合わせ、目の輪郭が重なるようにフォーカスリ
ングを回します。重なったら構図を決めてください。
二重線=ピントが外れている
16
像の合致=ピントが合っている
スプリットイメージ式
線のズレ=ピントが外れている
線の合致=ピントが合っている
露出(シャッタースピードと絞り値)を設定する
本製品では、シャッタースピードと絞り値を手動で設定し
て露出を決めます。露出を決めるには、単体の露出計を使
うか、ご自分で状況を判断します。
JP
露出(シャッタースピードと絞り値)を設定する
建築撮影などでは、建物の縁などの垂直な線にフォーカシ
ング測距枠を合わせ、枠内と枠外の境界線で線が一直線に
なるようにフォーカスリングを回します。一直線になった
ら構図を決めてください。
実際の撮影では、どちらの方法もそれほど大きな違いはあ
りません。2つの方法を組み合わせて使えば、より効果的
にピントを合わせることができます。
17
フラッシュを使って撮影する
JP
フラッシュを使って撮影する
本製品にはフラッシュ制御機能はありません。フラッシュ
撮影するときは、フラッシュユニットの外部調光オート機
能を使うか、ガイドナンバー計算で露出を決めてくださ
い。フラッシュユニットの外部調光オート機能を使うと、
被写体までの距離が外部フラッシュユニットの調光範囲内
であれば、絞り値を一定にしても発光量が自動調整されま
す。ガイドナンバー計算を用いるときは、撮影ごとに被写
体までの距離に応じて絞り値を算出する必要があります。
フラッシュ同調速度(フラッシュ撮影時に設定できる最高
シャッタースピード)は1/50秒です。シャッタースピード
ダイヤルには「 」と表記されています。特殊な効果を表
現するために、1/50秒より遅いシャッタースピード(B/
OFF=バルブ撮影を含む)も使用できます。
重要:
ホットシューに装着されたフラッシュはメカ的なトリガー
によって発光するため、シャッターボタンが押されると、
撮影しない場合でも発光することがあります。
18
対応フラッシュユニット
SF 26は、コンパクトなサイズと本製品にマッチするデザ
インで、本製品での使用に最適です。電子制御式の自動調
光などの便利な機能が充実しており、手軽にフラッシュ撮
影を楽しめます。
サイリスタ制御式のフラッシュユニットの使用をおすすめ
します。
重要
フラッシュユニットを取り付けるときは、取り付け脚をホ
ットシューの奥まで確実に差し込み、ロックナットが付い
ている場合はしっかり締めて、フラッシュユニットが外れ
てしまうことのないようにしてください。フラッシュユニ
ットの接点とホットシューの接点の位置がずれてしまうと
発光されないことがありますので、取り付けには特に注意
してください。
メモ
JP
フラッシュを使って撮影する
• フラッシュユニットを取り付けるときは、必ずフラッシ
ュユニットの電源を切ってください。
• フラッシュユニットの使用方法やフラッシュ機能につい
ては、各フラッシュユニットの取扱説明書をご覧くださ
い。
19
アクセサリー
JP
アクセサリー
交換レンズ
Mシステムは、シャッターチャンスを逃さない素早い撮影
や、被写体にカメラを過度に意識させない撮影に理想的な
システムです。交換式のMレンズには、焦点距離が16
~135mm、開放F 値が最大でF0.95と、幅広いラインアッ
プがそろっています。
フィルター
現行のMレンズは標準的なフィルターねじを備えてお
り、UVaフィルターやユニバーサル偏光フィルターを取り
付けることができます。
20
ユニバーサル広角ビューファインダー M
焦点距離が16mm、18mm、21mm、24mm、
28mmの超広角レンズを装着したときに、本製品のファイ
ンダーと同様に各レンズ用のブライトフレームを表示す
る、便利な外付けファインダーです。本製品を含むデジタ
ルとフィルムのMカメラ全機種で使用できます。
パララックス補正機能と、カメラを水平に保つための水準
器を装備しています。
(商品コード 12011)
ビューファインダー M
広角レンズ用の外付けファインダーで、18mmレンズ
用、21mmレンズ用、24mmレンズ用の3種類をラインア
ップしています。コンパクトなデザインと鮮やかなファイ
ンダー像が特長です。本製品のファインダーと同様にブラ
イトフレームも表示されるので、正確にフレーミングでき
ます。
(商品コード 18mm用/ブラック:12022、/シルバー:12023、
21mm用/ブラック:12024、/シルバー:12025、
24mm用/ブラック:12026、/シルバー:12027)
フラッシュユニット
ファインダーに映る被写体を1.25倍または1.4倍に拡大す
るアクセサリーです。焦点距離が35mm以上のレンズを使
うときに効果的で、構図を簡単に決めることができるよう
になります。Mカメラ全機種で使用できます。本製品に装
着したときは、ファインダー倍率が0.72倍×1.25=0.9倍
または0.72倍×1.4=等倍になります。
紛失防止のためにフック付きの真鍮チェーンが付いてお
り、キャリングストラップのリングに取り付けておくこと
ができます。また、ループ付きのレザーケースも付属して
います。ケースに収納してループにキャリングストラップ
を通しておけば、キズや汚れから保護できるだけでなく、
必要なときに素早く取り出せます。
(商品コード 1.25倍:12004、1.4倍:12006)
SF 58は、汎用性の高い高性能フラッシュユニットです。
最大でガイドナンバー58(照射角105mm)の大光量、照
射角を調整できるメイン発光部、サブ発光部など、多彩な
機能を搭載しています。
SF 26は、非常に使いやすいフラッシュユニットです。コ
ンパクトなサイズとデザインが本製品にマッチしており、
本製品での使用に最適です。
(商品コード SF 58:14488、SF 26:14622)
JP
アクセサリー
ビューファインダー・マグニファイアー M 1.25 倍/1.4 倍
21
アクセサリー
JP
レンズキャリアー M
ライカモーター M
レンズキャリアー Mを三脚ねじ穴に取り付けると、2本目
のレンズをカメラの底面に取り付けて携帯できるので便利
です。レンズをカメラの底面にしっかりと固定でき、必要
なときには素早く取り外して撮影に使えます。取り付けた
レンズをハンドグリップ代わりにしてカメラを構えること
もできます。
(商品コード 14404)
フィルムの巻き上げとシャッターチャージを自動で行うモ
ータードライブです。1コマ撮影のほか、毎秒1.5コマまた
は3コマの連続撮影も可能です。ベースプレートを取り外
して底面に取り付けます。
本製品で設定できるシャッタースピードの全速度(1
~1/1000秒、「B」)で使用できます。
ライカモーター Mの電源を切った状態や電池が切れた状態
では、手動でのフィルム巻き上げとシャッターチャージが
可能です。ケーブルレリーズを使った撮影も可能です。
(商品コード 14408)
視度補正レンズ
視度を調整してファインダー表示を見やすくするレンズ(
球状レンズ)です。+0.5、+1、+1.5、+2、+3、-0.5
、-1、-1.5、-2、-3 の10種類があります。
ライカビット M
静かに素早くスムーズにフィルムを巻き上げることができ
る手動式ワインダーです。レバーを引き下げて左にスライ
ドするだけで、ファインダーから目を離さずにフィルムを
巻き上げることができます。小刻み巻き上げも可能です。
撮影は通常どおりシャッターレリーズボタンを押して行い
ます。ライカビット Mを装着した状態でも、巻き上げレバ
ーを使ってフィルムを巻き上げることができます。ベース
プレートを取り外して底面に取り付けます。カラーはシル
バークローム、ブラッククローム、ブラックペイントの3
種類です。
(商品コード シルバー・クローム:14008、
ブラック・クローム:14450、ブラック・ペイン
ト:14009)
22
スペア用アクセサリー
専用ケースとして、レンズを装着したままカメラ本体を収
納できるネオプレーンケース(装着レンズの長さ別にショ
ートノーズとロングノーズの2種類)、レザー製のクラシ
ックな速写ケース、速写ケースのベース部分に似たデザイ
ンのカメラプロテクターをラインアップしています。カメ
ラプロテクターは、装着したままでも撮影が可能で、撮影
時もカメラ本体をしっかり保護します。
キャリングストラップ..................................... 14 312
ボディキャップ ............................................ 14 195
(商品コード ネオプレーンケース/ショートノー
ズ:14867、ネオプレーンケース/ロングノーズ:14868
、速写ケース:14872、カメラプロテクター:14869)
また、撮影機材をまとめて収納できる、クラシックなデザ
インのビリンガム コンビネーションバッグも用意していま
す。カメラ2台とレンズ2本またはカメラ1台とレンズ3本
を収納できるほか、ハンドグリップ Mを装着したカメラや
大型レンズも収納できる、大容量のバッグです。SF 26 フ
ラッシュユニットなどのアクセサリーを収納できるジッパ
ー式のポケットも付いています。素材には防水性のある生
地を使用しています。
製品コード
JP
スペア用アクセサリー
ケース
(商品コード ブラック:14854、カーキ:14855)
23
お手入れ
JP
24
お手入れ
• 本製品を長期間使用しない場合は、カメラケースから出
して、風通しのよい乾いた場所で保管してください。
• 収納しているケースが湿った場合は、湿気や湿気によっ
て染み出てくるなめし剤によって本製品が故障するのを
防ぐために、本製品をケースから取り出してください。
• 高温・多湿の熱帯地域で使用するときは、カビが発生す
るのを防ぐために、できるだけ多く日光や風に当ててく
ださい。密封ケースに保管するときは、シリカゲルなど
の乾燥剤を入れてください。
• 汚れはカビや細菌などの繁殖の原因となりますので、本
製品は清潔に保ってください。
• 機械的に動作するベアリングやスライド部には潤滑油を
使用しています。長期間使用しない場合は、動作が鈍く
なるのを防ぐために、フィルムを入れずにシャッターを
チャージして、すべてのシャッタースピードに設定して
シャッターを数回切るという動作を約3ヶ月ごとに行っ
てください。また、フレームセレクターなどのその他の
操作部もすべて定期的に動かすことをおすすめします。
• 本製品の正面に強い太陽光が当たると、レンズがルーペ
と同じ作用をします。太陽光とレンズの作用により本製
品の内部が破損しますので、レンズを保護せずに本製品
を強い太陽光に向けたまま放置しないでください。レン
ズキャップを取り付けて、日陰に置いたりケースに収納
したりして、強い太陽光が当たらないようにしてくださ
い。
• 指紋などの汚れは、柔らかい清潔な布で拭き取ってくだ
さい。布では拭き取りにくい隅の汚れには、小さなブラ
シをお使いください。
• 本製品の表面をお手入れする際は、液体のクリーナーは
使わないでください。内部(フィルムガイドなど)に付
着したごみやほこりは、エーテルでよく洗浄して乾かし
た柔らかいブラシを使って落としてください。ブラシの
柄でシャッター幕を傷つけないようにご注意ください。
• 本製品のシリアルナンバー(ホットシューに刻印されて
います)とレンズのシリアルナンバーは、紛失・盗難の
際に重要となりますので、書き写して保管してくださ
い。
索引
JP
索引
アクセサリー...................................................... 20
キャリングストラップの取り付け方............................ 6
ケース............................................................... 23
視度補正レンズ................................................... 22
シャッター........................................................... 7
テクニカルデータ................................................. 26
ピント合わせ...................................................... 16
フィルム
入れる................................................................. 8
巻き戻す/取り出す............................................... 10
フィルム感度ダイヤル........................................... 12
フィルター......................................................... 20
フラッシュを使って撮影する.................................. 18
ブライトフレームファインダー............................... 14
レンズの取り付け/取り外し.................................... 13
露出(シャッタースピードと絞り値)を設定する........ 17
25
14
JP
15
テクニカルデータ
ファインダー
型式 大型ブライトフレームファインダー パララックス
自動補正機能付き
型式 LEICA M-A (Typ 127) 35mmフィルムレンジファ
アイピース 視度:-0.5 dpt. 視度補正レンズ(-3~+3
17
インダーカメラ 機械制御式シャッター搭載
dpt.)を装着可能
17a
レンズマウント ライカ Mバヨネットマウント方式
フレーミング 2フレーム1組(28mm用と90mm
11a
使用レンズ ライカ Mレンズ(焦点距離16~135mm)18
用、35mm用と135mm用、50mm用と75mm用)で表示
10a
されるブライトフレームを使用 装着したレンズの焦点距
露出制御 マニュアル露出(単体の露出計または撮影者の
離に合わせて自動表示
状況判断に基づき、シャッタースピードおよび絞り値を手
フレームセレクター 任意のブライトフレームの組を手動
動で設定)
で表示可能(焦点距離の異なるレンズの撮影範囲の確認な
どに使用)
20b
20a 20 19
フラッシュ制御
パララックス補正 ファインダーの視野とレンズにおける
フラッシュユニットの接続 ホットシュー(中央接点を装
上下および左右の差異をピント調整に応じて自動補正、ブ
ziehbarer Rückspulknopf*
16. Zeit-Einstellrad mit rastenden Einstellungen
für:
備)
klappbare Rückspulkurbel*
Manuell einstellbare Verschlusszeitenライトフレームの表示範囲と撮影範囲が自動的に一致
von 1s bis
1/1000 s
hender Ring mit フラッシュ発光のタイミング 先幕シンクロ
für die Synchronzeit 1/50 s für Blitzbetrieb
フラッシュ同調速度 1/50秒( )これより遅いシャッタ
ex für Entfernungseinstellung,
ブライトフレームと撮影範囲 使用レンズの最短撮影距離
B/OFF für Langzeit-Belichtungen und Abschalärfentiefe-Skala ースピードでのフラッシュ撮影も可能
のときにフィルム(約35×23mm)で撮影される範囲を表
tung
der
Belichtungsmessung
m Indexknopf für Objektivwechsel
調光方式 接続したフラッシュユニットによる外部自動調
示 無限遠のときは、使用レンズの焦点距離に応じて、ブ
17. Auslöseknopf mit
ungs-Einstellring mit
光またはガイドナンバー計算による絞り値の手動設定
ライトフレームの表示よりも約9%(28mmレンズ)~23
a.
Gewinde
für
Drahtauslöser
fmulde
%(135mmレンズ)広い範囲を撮影
n-Einstellring
18. Automatisches Bildzählwerk
unkt für Blendeneinstellung
19. Schnellschalthebel für Verschlussaufzugファインダー倍率 0.72倍(すべてのレンズ)
und Filmピント合わせ フォーカシング測距枠(ファインダーの中
transport
ichtblende
央に明るい領域として表示)を使用 二重像合致式または
20. Zubehör-/Blitzschuh mit
n des Leica à la carte-Programms kann die Bea. Mittenkontakt für Blitzauslösung
スプリットイメージ式
er LEICA MP wahlweise mit einem der beiden Varib. Bohrung für Sicherungsstift
有効基線長 49.9mm(基線長69.25mm×ファインダー倍
gen (s. dazu auch S.18-19).
率0.72倍)
12a
11c
テクニカルデータ
13
12
11b
11
5
26
16
20b
20a 20
19
JP
テクニカルデータ
本体
シャッターとシャッターレリーズ
材質 開閉式裏カバー付きフルメタルボディ、真鍮製トッ
シャッター 水平走行式ゴム引き布幕フォーカルプレーン
Ausziehbarer Rückspulknopf*
16. Zeit-Einstellrad mit rastenden Einstellungen
für:
ププレートとベースプレート、ブラックペイント/シルバ
シャッター、極めて静かな作動音、メカニカル制御式
Ausklappbare Rückspulkurbel*
Manuell einstellbare Verschlusszeiten
von 1s bis
ークローム/ブラッククローム仕上げ
1/1000 s
ststehender Ringシャッタースピード 1秒~1/1000秒(中間速度不可)、
mit
für die Synchronzeit 1/50 s für Blitzbetrieb
「B」:バルブ撮影、長時間露出、「 」:フラッシュ同
Index für Entfernungseinstellung,
B/OFF für Langzeit-Belichtungen
und AbschalSchärfentiefe-Skala
三脚ねじ穴 A1/4(1/4インチ) DINに準拠 ベースプ
調速度 1/50秒
tung der Belichtungsmessung レートに配置
rotem Indexknopf
für Objektivwechsel
シャッターレリーズボタン 標準ケーブルレリーズ用のね
17. Auslöseknopf mit
ntfernungs-Einstellring
mit
裏カバー フィルム感度ダイヤルを装備
じ穴付き
a. Gewinde für Drahtauslöser
Griffmulde
寸法 約138×77×38mm(幅×高さ×奥行)
enden-Einstellring
18. Automatisches Bildzählwerk
質量 約578g
フィルム
dexpunkt für Blendeneinstellung
19. Schnellschalthebel für Verschlussaufzug und Film付属品 ボディキャップ、キャリングストラップ
装填 ベースプレートと裏カバーを開けて手動で装填
transport
egenlichtblende
巻き上げ 巻き上げレバーまたはライカビットM(別売)に
20.
Zubehör-/Blitzschuh
mit
ahmen des Leica よる手動巻き上げ、ライカモーターM(別売)による自動
à la carte-Programms kann die Bea. Mittenkontakt für Blitzauslösung
ung der LEICA MP wahlweise mit einem der beiden Vari巻き上げ
b. Bohrung für Sicherungsstift
n erfolgen (s. dazu auch
S.18-19).
巻き戻し 巻き戻しノブによる手動巻き戻し 巻き戻しク
5
ランク(別売)を取り付け可能
フィルムカウンター 本体上面に装備 ベースプレート取
り外し後に自動的にリセット
27
JP
28
ライカデジタルサポートセンター
ライカカスタマーケア
<技術的なお問合せ窓口>
Tel: 0120-03-5508
受付時間:
月曜日 - 金曜日 9:30 – 18:00
祝祭日は受け付けておりません。
お手持ちの製品のメンテナンスや修理が必要な場合は、下
記のカスタマーケア、またはお近くのライカ正規販売店ま
でご相談ください。
ライカカメラジャパン株式会社
カスタマーケア
東京都中央区銀座6-4-1 ライカ銀座店内
Tel: 03-6215-7072
Fax: 03-6215-7073
E-mail: [email protected]
LEICA M-A
Instructions
Foreword
EN
30
FOREWORD
Dear Customer,
Leica would like to thank you for purchasing the LEICA M-A and
congratulate you on your choice. With this unique view and
rangefinder camera, you have made an excellent selection.
We wish you a great deal of pleasure and success using your new
Leica.
In order to make best use of all the opportunities offered by this
high performance camera, we recommend that you first of all read
these instructions.
CONTENTS
EN
Contents
Foreword....................................................................................30
Designation of parts....................................................................32
Viewfinder displays.....................................................................33
Attaching the carrying strap........................................................34
Shutter release button................................................................35
Shutter speed dial.......................................................................35
Quick wind lever.........................................................................35
Changing the film........................................................................36
Film sensitivity indicator..............................................................40
Fitting and removing a lens.........................................................41
Bright line view and range finder..................................................42
Image field selector..................................................................42
Distance metering....................................................................44
Exposure control.........................................................................45
Flash mode.................................................................................46
Compatible flash units...............................................................46
Attaching and connecting the flash unit.....................................46
System accessories....................................................................48
Spare parts.................................................................................51
Care tips.....................................................................................52
Index .........................................................................................53
Technical data ...........................................................................54
Leica Product Support................................................................56
Leica Customer Care .................................................................56
31
EN
DESIGNATION OF PARTS
Designation of parts
Front view
1.
2.
3.
4.
5.
6.
7.
8.
Bottom cover locking pin
Lens release button
Eyes for carrying strap
Rewind release lever
Distance meter viewing window
Illumination window for the bright-line frames
Viewfinder viewing window with silvering
Image field selector
Top view
9. Pull-out rewind button
10. Fixed ring with
a.Index for focusing
b.Depth of field scale
c.Index button for changing lenses
11. Distance setting ring
12. Aperture setting ring
13. Index point for aperture setting
14. Lens hood
15. Automatic exposure counter
16. Shutter release
a.Thread for cable release
32
17. Rapid action lever for cocking the shutter and advancing the
film
18. Shutter speed dial with locking settings for:
•Manually adjustable shutter speeds from 1s to 1/1000s
•Sync time 1/50s for flash mode
• B for long exposures
19. Accessory/flash shoe with
a.Center contact
b.Hole for retaining pin
Rear view
20. Viewfinder window
21. Rear panel
22. Film sensitivity indicator
Bottom view
23. Tripod thread A 1/4, DIN 4503 (1/4“)
24. Bottom cover
25. Locking toggle for bottom cover
View with bottom cover removed and rear panel open
26. Take-up spool
27. Coupling for motorized or external mechanical film winding
VIEWFINDER DISPLAYS
a.
b.
Viewfinder displays
a.
a.Bright line frame for 50 mm and 75 mm (example)
b.Metering field for distance setting
EN
33
ATTACHING THE CARRYING STRAP
Attaching the carrying strap
EN
a
34
b
SHUTTER RELEASE BUTTON
SHUTTER SPEED DIAL
Notes:
18
16
16a
15
17
The shutter release button has a pressure point. Pressing past the
pressure point releases the shutter.
The shutter release button should be pressed gently – not jerkily until the shutter is released with a soft click.
The shutter release button has a standard thread for a cable
release.
• Intermediate values may not be used.
• Between the 1000 and B positions there is a stop so that other
settings are only possible by turning the dial anticlockwise from
the 1000 position, or clockwise from the B position.
QUICK WIND LEVER
The quick wind lever is used to wind the film, cock the shutter and
automatically advance the exposure counter. The film can be
wound either by pressing the lever as far as it will go or by pressing
the quick wind lever several times. It can be folded out and left in
its “ready position” for quick access.
Shutter release button / Shutter speed dial / Quick wind lever
The shutter speed dial on the Leica M-A can be used to select
shutter speeds from 1/1000s to 1s, or for the sync time 1/50s for flash
mode. In the B position, the shutter remains open for long
exposures as long as the shutter release is pressed. All positions
can be felt click into place, none of them are locked.
EN
35
Changing the film
EN
CHANGING THE FILM
LOADING A FILM
First of all, always check that a film is not already loaded by turning
the pull-out rewind button in the direction of the arrow. If you feel
resistance, continue as described in the “Rewinding and removing
the film” section.
Take the camera in your left hand, so that the bottom cover is
facing upwards.
OPENING THE CAMERA
3.
1.
2.
5. Take the film cartridge in the right hand and insert it around
halfway into the appropriate cavity in the camera.
6. Take hold of the film leader and, as shown in the schematic
diagram inside the housing, insert it into the take up spool.
7. Then carefully press the film cartridge and film leader into the
camera with the fingertips.
1.
2.
3.
4.
36
Fold up the toggle on the bottom cover.
Turn it to the left.
Lift off the bottom cover, and
Open the rear panel backwards.
Important:
The winding of the film should not be checked with the camera
open, as the bottom cover is designed in such a way that replacing
it on the camera brings the film into the correct position.
CLOSING THE CAMERA
8. C
lose the rear panel.
9. Lower the bottom cover onto the locking pin on the side of the
camera.
10. Close it, ensuring that the rear panel is completely pressed in
so that the bottom cover holds it in place.
11. Lock with the toggle.
EN
Changing the film
Notes:
•As with any ready to use film, the leader must be trimmed.
•If the leader is pulled out so far that it extends a little way out of
one of the slits on the opposite side of the take-up spool, this
does not interfere with the camera’s function. It is only in
conditions of frost that the film has to be loaded exactly in
accordance with the schematic diagram, i.e. the leader may only
be held by one slit on the take-up spool, so that the protruding
end of the films cannot snap off.
WINDING TO THE 1ST PICTURE
12. Wind the film forward one frame using the quick wind lever and
release the shutter.
13. Then tension the film by carefully turning the pull-out rewind
button in the direction of the arrow. The film is properly wound
if the rewind button turns in the opposite direction to the arrow
when the quick wind lever is operated again.
14. Finally, release the shutter again and cock the shutter a third
time. The frame counter now shows 1 and the camera is ready
to take a picture.
37
Changing the film
EN
38
REWINDING AND REMOVING THE FILM
If the film has been exposed up to the last frame, the quick wind
lever can no longer be operated. Before removing the film, it must
be rewound into the film cartridge.
To do this:
1. Move the rewind release lever to R.
2. Pull out the rewind button (max. 11mm) and
3. Turn it clockwise (arrow) until the film has been wound off the
take-up spool, after passing a slight resistance.
4. Open the bottom cover.
5. Open the rear panel.
6. Remove the film cartridge.
To do this:
1. Remove the camera’s bottom cover in a completely dark room.
2. Hold the camera so that the open bottom cover is facing
downwards.
3. Operate the quick wind lever slowly several times, until the film
comes out of the camera by itself so that you can take hold of
it and remove it. If necessary, lightly tap the camera on your
hand to assist you.
EN
Changing the film
If a film is not correctly attached to the cartridge spool, e.g. when
using film sold by length, it can happen that the end of the film will
be torn off and will have to be removed from the take-up spool.
39
Film sensitivity indicator
EN
40
FILM SENSITIVITY INDICATOR
The indicator is intended as an aid to memory. It can be used to
set the film sensitivity to a value in the range ISO 6 to 6400. (ISO
is the international designation for film speeds)
To do this, press the non-locking
1. disc, and
2. turn it so that one of the two triangles - black for B/W films or
red for color films - is pointing to the desired value.
FITTING AND REMOVING THE LENS
EN
REMOVING
1. Hold the lens by the fixed ring.
2. Align the red index button on the lens with the release button
on the camera body.
3. Then push the lens straight on in this position.
4. Turn the lens slightly to the right, and you will hear and feel it
click into place.
1. Hold the lens by the fixed ring.
2. Press down the release button on the camera body.
3. Turn the lens to the left until its red index button is aligned
with the release button.
4. Then pull the lens straight off.
Fitting and removing the lens
FITTING
Important:
With a film loaded, you should change the lens in the shadow of
your own body, as direct sunlight can result in light getting in
through the shutter.
41
Bright line view and range finder
EN
42
BRIGHT LINE VIEW AND RANGE FINDER
The LEICA M-A’s bright-line view and range finder is not only a very
high-quality, large, brilliant and bright viewfinder, it is also a highly
accurate range finder coupled to the lens.
The size of the bright-lines corresponds to an image size of 23 x
35mm (slide format) at the shortest setting distance for each focal
length. At longer distances, the camera records more of the
subject than can be seen in the bright-lines.
The bright line frame is linked to the distance setting to ensure that
parallax - the offset between the lens and the viewfinder axis - is
automatically compensated.
The Leica M-A is equipped with a 0.72x magnifying viewfinder. If
lenses with focal lengths of 28 mm (Elmarit from serial number
2411001 onwards), 35, 50, 75, 90 and 135mm are used, the
associated bright line frame is automatically displayed in the
combinations 28+90mm, 35+135mm, 50+75mm.
In the middle of the viewfinder image is the square distance
metering field, which is brighter than the surrounding image field.
All lenses with focal lengths from 16 to 135mm connect with the
range finder when used on the LEICA M-A.
IMAGE FIELD SELECTOR
The image field selector extends the possibilities of the Leica M-A
viewfinder. This built-in universal viewfinder allows you to display
the image frames that do not belong to the lens currently being
used at any time. You can then see immediately if, for
compositional reasons, it would be better to photograph the
relevant subject using a different focal length.
If the lever is rotated outwards, i.e. away from the lens, the image
field limits for 35 and 135mm focal length are shown.
If the lever is moved to its vertical central position, the image field
limits for the focal lengths 50 and 75mm are shown.
If the lever is moved inwards, i.e. towards the lens, the image field
limits for 28 and 90mm focal length are shown.
A
B
Set to 0.7m:
Set to 2m:
Set to infinity:
Bright line frame
Actual image field
The film captures approximately one
frame width less.
The film captures exactly the image field
shown by the inner edges of the bright
line frame.
The film captures around 1 and 4
(vertical and horizontal respectively)
frame widths more.
EN
B
50mm + 75mm
28mm + 90mm
35mm + 135mm
Bright line view and range finder
A
43
Distance metering
EN
DISTANCE METERING
SUPERIMPOSED IMAGE METHOD (DOUBLE IMAGE)
Due to its large effective metering basis, the range finder on the
Leica M-A is very precise. The benefits of this are particularly
noticeable when using wide-angle lenses with their relatively high
depth of field.
The range finder metering field is visible as a bright, sharply
defined rectangle in the center of the viewfinder. If you keep the
large viewfinder window closed, only the activated bright-line frame
and this metering field remain visible.
The focus can be set using either the superimposed image or split
image method:
In a portrait, for example, aim the metering field at the eye and turn
the distance setting dial on the lens until the contours in the
metering field are brought into line. Then choose the subject detail.
Out of focus
44
In focus
EXPOSURE CONTROL
When taking photographs of architecture, for example, aim the
range finder metering field at the vertical edge or another clearly
defined vertical line and turn the distance setting ring on the lens
until the contours of the edge or line can be seen at the limits of
the metering field with no misalignment. Then choose the subject
detail.
On the Leica M-A the exposure is set manually by selecting the
shutter speed and lens aperture combination specified by an
external exposure meter or based on your own assessment.
For further details of using and adjusting exposure meters, refer to
the manual for the device you are using.
In practice, there is often no clear distinction between the two
methods. The two criteria can be used to great effect in
combination.
Out of focus
EN
Exposure control
SPLIT IMAGE METHOD
In focus
45
Flash mode
EN
46
FLASH MODE
COMPATIBLE FLASH UNITS
The Leica M-A does not have its own flash metering and control
function. As a result, flash exposures must either be controlled by
an attached flash unit itself (computer control) or – using guide
number calculations – the aperture must be reset for each picture
according to the distance between the subject and the camera.
The fastest possible shutter speed for pictures using flash units,
the sync speed of 1/50s, is indicated by on the shutter speed
dial. For special effects, all slower shutter speeds including the B
setting can also be used.
With its compact dimensions and design tailored to this camera,
the Leica SF26 is particularly well suited. Thanks to its computercontrolled automatic flash exposure, it is very easy to operate and
furthermore offers a range of interesting additional functions.
Other commercially available flash attachments with standard flash
foot and positive center contact, and fired by the center contact
can also be used.
We recommend the use of modern thyristor-controlled electronic
flash units.
Important:
Flash units connected using the accessory shoe can still be fired
mechanically when the shutter is moving by pressing the shutter
release.
Important:
When attaching a flash unit to the Leica M-A’s flash shoe, you
should ensure that the foot of the flash unit is fully inserted and – if
present – prevented from accidentally falling out using the
tightening nut. This is important because changes in position in the
flash show can break the required contact, which means that the
attached flash unit would not be fired.
Notes:
EN
•Before attaching the flash, the camera and the flash unit must
be turned off.
•For more information about use of the flash and the various
modes offered by the flash units, refer to the relevant
instructions.
Flash mode
47
System accessories
EN
SYSTEM ACCESSORIES
Leica M lenses
The Leica M system provides a basis for optimum adaptation to
fast and unobtrusive photography. The range of lenses
incorporates focal lengths from 16 to 135mm and light intensities
up to 1:0.95.
Filters
UVa filters and a universal polarization filter M are available for
current Leica M lenses fitted with standard filter thread sizes.
48
Leica Universal Wide-Angle Viewfinder M
The Leica universal wide-angle viewfinder M is a thoroughly
practical accessory. It can be used without restriction on all analog
and digital Leica M models and – just like the viewfinder on the
camera – uses a reflected bright line frame to indicate the
trimming for wide-angle focal lengths 16, 18, 21, 24 and 28mm.
The viewfinder is equipped with parallax compensation and a vial
(spirit level) for exact leveling of the camera.
(Order no. 12 011)
Leica Angle Finder M
Mirror viewfinders are available for 18, 21, and 24mm lenses. They
feature an exceptionally compact design and a bright viewfinder
image. Bright line frames like those in the camera viewfinder are
used to select the trimming.
(Order no.
18mm: 12 022 black / 12 023 silver /
21mm: 12 024 black / 12 025 silver /
24mm: 12 026 black / 12 027 silver)
Flash units
The Leica M 1.25x and M 1.4x viewfinder magnifiers significantly
simplify picture composition when using focal lengths above
35mm. They can be used on all Leica M models and magnify the
central area of the viewfinder image. The 1.25x viewfinder
magnifier gives the 0.72x viewfinder on the Leica M-A a
magnification of 0.85x, while the 1.4x gives 0.95x magnification. A
security chain with snap fasteners prevents loss and can be used
to hang the viewfinder on the carrying strap’s fastening ring. The
viewfinder magnifiers are supplied in a leather bag. A loop on the
case allows the viewfinder magnifier to be stored on the camera’s
carrying strap, where it is protected and ready for use.
(Order no. 12 004 M 1.25x / 12 006 M 1.4x)
With a maximum guide number of 58 (in 105mm setting), a zoom
reflector, an optional second reflector and many other functions,
the Leica SF 58 system flash unit (order no. 14 488) is both
powerful and versatile.
With its compact dimensions and design that matches the camera,
the Leica SF 26 system flash unit (order no. 14 622) is the perfect
solution. Like the Leica SF 58, it is extremely easy to operate.
EN
System accessories
Leica Viewfinder magnifier M 1.25x and M 1.4x
49
System accessories
EN
Leica Lens Holder M
LEICA MOTOR M
A practical little accessory, which allows you to keep a second lens
to hand, held securely under the camera, with quick and easy
access at any time. The second lens can act as a comfortable
handle. The M lens holder is attached to the camera's tripod
thread.
(Order no. 14404)
The Leica Motor M for automatic shutter cocking and film winding
for single or series exposures of either 1.5 or 3 frames per second
can be connected to the Leica M-A. It is attached to the bottom of
the camera housing instead of the bottom cover. The Motor M is
suitable for all shutter speeds, i.e. from 1s to 1/1000s including the B
setting. When the Motor M is turned off or its batteries are flat, the
film can be wound and the shutter cocked manually.
(Order no. 14408)
Leica Corrective Lenses M
For optimum adaptation of the eye to the camera’s viewfinder, we
offer corrective lenses with the following positive or negative
diopter values (spherical): 0.5/1/1.5/2/3
50
LEICAVIT M
The Leicavit M is a smooth running and low-noise manual lever
wind for winding the film and cocking the shutter, and is attached
to the bottom of the camera instead of the bottom cover. Without
having to take the camera away from your eye, you can wind the
film by moving a swing-out winding lever to the left; partial steps
are also possible. The shutter is released using the camera’s
shutter release button. The camera’s quick wind lever can also be
used.
The Leicavit M is available in silver, black chrome finish or black
painted.
(Order no. 14008 / 14450 / 14009)
Spare parts
Two neoprene carrying cases are available for the Leica M-A with
different front sections for different lens lengths, as well as classic
leather carrying cases in various styles of leather and a range of
colors. (Order no. 14 867 short / 14 868 long / 14 875 / 14 876
/ 14 857 - 14 865 leather / 14 856 leather, for camera with
Leicavit attached).
For your full set of camera equipment, the classic Billingham
combination case made of waterproof fabric is also available. This
either holds two cameras and two lenses or one camera and three
lenses. It has enough space for even large lenses and a fitted M
hand grip. A zipped compartment also provides space for a Leica
SF 26 flash and for other accessories.
(Order no. 14 854 black / 14 855 khaki).
Carrying strap .....................................................................14 312
Housing bayonet cover.........................................................14 397
Order no.
EN
System accessories
Cases
51
Care tips
EN
52
CARE TIPS
If your Leica will not be used for a long period, ensure that it is
stored in a dry, well ventilated location.
Photo cases that became wet during use should be emptied to
prevent damage to your equipment caused by moisture and any
leather-tanning residue released. To prevent fungal growth during
use in hot, humid tropical climates, the camera equipment should
be exposed to the sun and air as much as possible. Storage in
airtight containers or cases is only recommended if a desiccant,
such as silica gel, is also used.
As any dirt may also be a breeding ground for micro-organisms, the
equipment should be carefully kept clean.
All mechanically operated bearings and sliding surfaces on your
Leica are lubricated. Please remember this if you will not be using
the camera for a long period of time. To prevent the lubrication
points from becoming gummy, the camera should be wound on
several times and released with every shutter speed with no film
loaded every three months. It is also recommended that you
repeatedly move and use all other controls, such as the image field
selector.
A lens works like a magnifying glass if bright sunlight shines on the
front of the camera. The camera should therefore never be set
aside without protection against strong sunlight. Fitting the lens
cover and keeping the camera in the shade (or directly in the case)
help to prevent damage to the interior of the camera. To remove
stains and fingerprints, the camera should be wiped with a clean
lint-free cloth. Tougher dirt in hard to reach corners of the camera
body can be removed with a small brush.
Do not use liquid cleaning agents to clean the housing. Dust and
lint inside the camera (e.g. on the film guides) are best removed
carefully with a soft hair brush that has been repeatedly degreased
in alcohol and then dried. Be careful not to damage the shutter
curtain with the shaft of the brush.
Note the serial number of your Leica M-A (engraved on the
accessory shoe), as it is extremely important in case of loss.
INDEX
EN
Index
Accessories................................................................................48
Attaching and removing lenses....................................................41
Bright-line / View and range finder..............................................42
Care tips.....................................................................................52
Carrying strap.............................................................................34
Cases.........................................................................................51
Corrective lenses........................................................................50
Distance setting..........................................................................44
Split image method..................................................................45
Superimposed image method...................................................44
Exposure control.........................................................................45
B setting....................................................................................35
Film
Loading....................................................................................36
Rewinding and removing...........................................................38
Film indicator..............................................................................40
Filters.........................................................................................48
Flash mode.................................................................................46
Synchronization........................................................................46
Image field selector.....................................................................42
Lenses, Leica M..........................................................................48
Quick wind lever.........................................................................35
Repairs / Leica Customer Care...................................................56
Shutter release, see Technical data...................................... 35/54
Shutter speed setting dial...........................................................35
Shutter, see Shutter release and Technical Data................... 35/54
Technical data............................................................................54
Viewfinder...................................................................................42
Bright line frame................................................................ 42/43
Detachable viewfinder..............................................................48
53
TECHNICAL DATA
Technical data
15
EN
Camera type LEICA M-A (Typ 127) Compact 35mm range and
17
viewfinder system camera with mechanically controlled shutter
17a
Lens connection Leica M bayonet
Lens system Leica M lenses from 16–135mm18
16
12a
11c
Exposure control Manual shutter speed and aperture setting
based on readings from external exposure meter or operator
assessment
20b
20a 20
19
Flash exposure control
Flash unit connection Using
shoeEinstellungen
with center für:
kspulknopf*
16. Zeit-Einstellradaccessory
mit rastenden
contact
kspulkurbel*
Manuell einstellbare Verschlusszeiten von 1s bis
1/1000
s
Synchronization With
1st shutter
curtain
mit
Synchronzeit 1/50 s für Blitzbetrieb
ngseinstellung,
Flash sync speed für
=1/5die
0s; slower shutter speeds can be used
B/OFF für Langzeit-Belichtungen
undorAbschala
Flash exposure control Computer
control of flash unit
guide
tung der Belichtungsmessung
für Objektivwechselnumber calculation and
manual setting of required aperture
17. Auslöseknopf mit
a. Gewinde für Drahtauslöser
18. Automatisches Bildzählwerk
19. Schnellschalthebel für Verschlussaufzug und Filmtransport
20. Zubehör-/Blitzschuh mit
a. Mittenkontakt für Blitzauslösung
b. Bohrung für Sicherungsstift
ng mit
eneinstellung
la carte-Programms kann die Behlweise mit einem der beiden Varih S.18-19).
5
54
Viewfinder
Viewfinder principle Large, bright line frame viewfinder with
automatic parallax compensation
Eyepiece Calibrated to –0.5 dpt. Corrective lenses from –3 to
+3 diopter available
Image field limiter By activating two bright lines each: For 28
and 90mm or for 35 and 135mm, or for 50 and 75mm; automatic
activation when lens is fitted
Image field selector Allows the bright-line pairs to be manually
activated at any time (e.g. to compare detail)
Parallax compensation Horizontal and vertical offset between
viewfinder and lens axis is automatically compensated according to
the relevant distance setting
Correlation between viewfinder and film images At the
shortest possible distance setting for each focal length, the bright
line frame size corresponds to an image size of approx. 23 x
35mm. When set to infinity, depending on the focal length between
9% (28mm) and 23% (135mm) more is captured by the film than is
shown in the corresponding bright line frame
Magnification (For all lenses) 0.72x
Large basis range finder Split or superimposed image range
finder shown as a bright field in the center of the viewfinder image
Effective measurement basis 49.9mm (mechanical
measurement basis 69.25mm x viewfinder magnification 0.72x)
20b
20a 20
19
EN
Technical data
Camera body
Shutter and shutter release
all-metal body with hinged rear panel;
Shutter Rubber blanket16.
slotted
shutter with
rer Rückspulknopf*
Zeit-Einstellrad
mithorizontal
rastenden Einstellungen Material Enclosed
für:
movement; extremely low-noise;Manuell
mechanically
controlled
bare Rückspulkurbel*
einstellbare
Verschlusszeiten vonchromed
1s bis brass top and bottom cover
s
Shutter speeds From 1s to 1/11/1000
increments, B for
000s in whole
r Ring mit
Synchronzeit
1/50 s für Blitzbetrieb
Entfernungseinstellung,
Tripod thread A 1/4 DIN 4503 (1/4“)
long exposures of any duration, für
(1/50die
s) for
flash synchronization
B/OFF
für
Langzeit-Belichtungen
und
Abschalefe-Skala
Shutter release Standard thread for cable release integrated
Rear panel/equipment Indicator for film sensitivity
tung der Belichtungsmessung
exknopf für Objektivwechsel
Dimensions (Length x Depth x Height, in mm)
17. Auslöseknopf mit
Einstellring mit
Approx. 138 x 38 x 77
Film winding
a. Gewinde für Drahtauslöser
e
Weight Approx. 578g
Loading Manual
film
loading
after
opening
the
bottom
cover
and
tellring
18. Automatisches Bildzählwerk
Items
the rear panel
ür Blendeneinstellung
19. Schnellschalthebel für Verschlussaufzug und
Film-supplied Housing bayonet cover, carrying strap
Winding
forwards Manually
with
quick
wind
lever
or
Leicavit
M,
transport
ende
motorized using Leica Motor-M,
Leica Winder-M, Leica
20. Zubehör-/Blitzschuh
mit Winder
Leica à la carte-Programms kann die BeM4-P,
Leica
Winder
serial no. 10für350)
a. Mittenkontakt
Blitzauslösung
CA MP wahlweise mit
einemorder
beiden
Vari- M4-2 (from
b. Bohrung
für Sicherungsstift
rewind button,
after moving the R
dazu auch S.18-19).Rewind Manually with pull-out
lever on the front of the camera
5 of camera; automatic reset when bottom
Frame counter On top
cover is removed
55
Leica service addresses
EN
56
LEICA PRODUCT SUPPORT
LEICA CUSTOMER CARE
The Product Support department at Leica AG can provide you with
an answer to any technical questions relating to Leica products,
including software supplied, either in writing, on the telephone or
by e-mail.
They are also the contact point for purchasing advice and to order
instruction manuals. Alternatively, you can send us your questions
using the contact form on the Leica Camera AG homepage.
For servicing your Leica equipment or in the event of damage, the
Leica Camera AG Customer Care department or the repair service
provided by authorized Leica agents in your country are available
(see the Warranty Card for a list of addresses).
Leica Camera AG
Product Support / Software Support
Am Leitz-Park 5
D-35578 Wetzlar
Telephone: +49(0)6441-2080-111 /-108
Fax: +49(0)6441-2080-490
[email protected] / [email protected]
Leica Camera AG
Customer Care
Am Leitz-Park 5
D-35578 Wetzlar
Telephone: 06441 2080-189
Fax: 06441 2080-339
[email protected]
93 562 VII/14/ DW/ B
Leica Camera AG I Am Leitz-Park 5 I 35578 WETZLAR I DEUTSCHLAND
Telefon +49 (0) 6441-2080-0 I Telefax +49 (0) 6441-2080-333 I www.leica-camera.com
© Copyright 2026 Paperzz