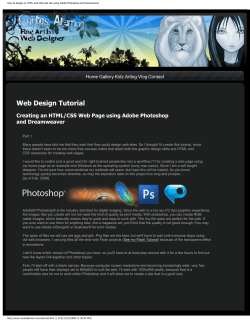
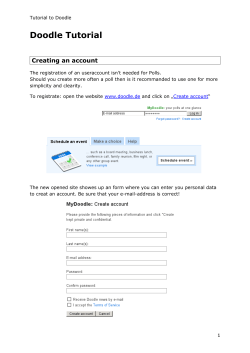
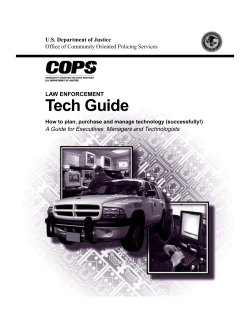
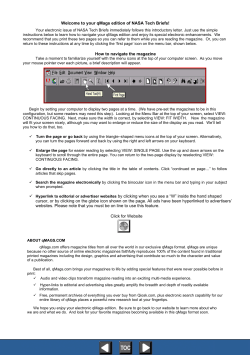
DIALux evo Tutorial 01
Ezzat Baroudi
DIALux evo Tutorials
Tutorial 1
How to create a cornice
In this tutorial you will learn the following commands.
1- Importing and managing a cad file.
2- Using extrusion volume.
3- Scaling an object.
4- Using copy and arrange tool.
5- Using subtract command.
This tutorial gives some tips on how you can create a cornice in DIALux; the
cornice could be normal like the one on the lift photo below or a cornice for cove
light like the one in the right photo below.
Standard cornice
Cornice for cove light
First let’s get the cad drawing which have the section of the cornice and
import it to DIALux evo
1
DIALux evo Tutorial 01
Ezzat Baroudi
Cad section for a cornice
Follow the step below to import the cad drawing
2
DIALux evo Tutorial 01
Ezzat Baroudi
1-
Make sure you are on
the construction
mode
2- Go to cad import
3- Click on import
DWG
4- Adjust the unit to
match the cad system
5- Move the cad to a
convent location
inside your space.
You can also check other
properties like changing the
color of the layer or embeding
the file in the project.
When you select the embed
the file you are actually saving
the cad inside your project so
you don’t need the external
cad reference any more
3
DIALux evo Tutorial 01
Ezzat Baroudi
Form display options make sure that DWG display is activated
Now the second step is to create a the object of the cornice
Go to furniture and select Extrusion volume
4
DIALux evo Tutorial 01
Ezzat Baroudi
After that click on draw extrusion volume
Follow the cad lines, when you finish all the points right click and select
close polygon.
5
DIALux evo Tutorial 01
Ezzat Baroudi
Now you have created the section of the cornice in the plan view of
DIALux, so the next step to rotate the object to be in the right position.
Select the object and go to the position and rotate 90 in x axis
Now you can see the object
6
DIALux evo Tutorial 01
Ezzat Baroudi
you can move the object to right location, let’s say for this example it is
the ceiling of a room.
You can move it easily in the side or front view
You can scale the object in the plan view to cover the required space
7
DIALux evo Tutorial 01
Ezzat Baroudi
Now you can copy and paste the object multiple times to cover all the
boundary of the room, then move rotate and scale according to the
required length, you can see form the plan view below
8
DIALux evo Tutorial 01
Ezzat Baroudi
While moving or rotating, if the any of objects moves in the z axis, you
can easily adjust that by the awesome align tool
Go to copy and arrange tool then select all the objects of cornice and click
on light align top z then all objects will follow the most top object.
9
DIALux evo Tutorial 01
Ezzat Baroudi
There is now one step left to refine the shape of all corners
There are two types of corners, inside and outside as you can see form
below photo
You don’t need to do anything about the inside corner, but the outside
corner will look weird as you can see below
Now let’s refine it and cut the extra shape.
10
DIALux evo Tutorial 01
Ezzat Baroudi
The hatched in red area has to be removed by subtraction
The object after subtraction
To cut the extra shape, follow the steps below
I.
II.
Zoom to the outside corner
Draw an extrusion volume covering the extra triangle area of one
object
11
DIALux evo Tutorial 01
III.
Ezzat Baroudi
Make sure the corner triangle covering the cornice, if not use copy and
arrange tool to align it to the top of the cornice
12
DIALux evo Tutorial 01
IV.
Ezzat Baroudi
Select both object and go to copy and arrange tool, then select subtract
tab as could be seen form below.
From copy and arrange
tool in the construction
mode.
1) Select subtract tab
2) Select the object to
remain
3) Make sure the object
to remain in red color
in 3d view
4) Click on subtract
button
V.
Repeat the same steps for the other object
13
DIALux evo Tutorial 01
Ezzat Baroudi
Now you should be having a perfect outside corner cornice
Before refining the outside
corner
After refining the outside corner!
14
© Copyright 2026 Paperzz