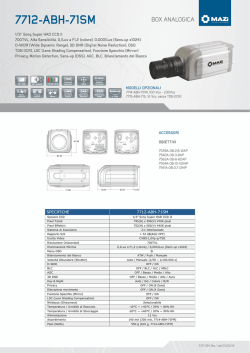
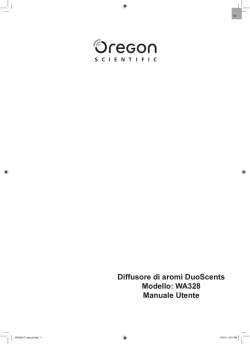
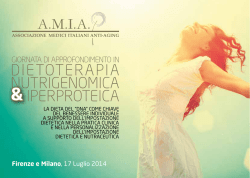
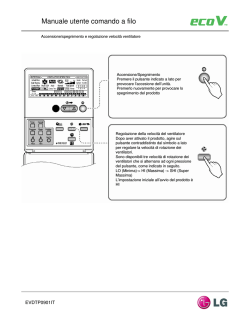
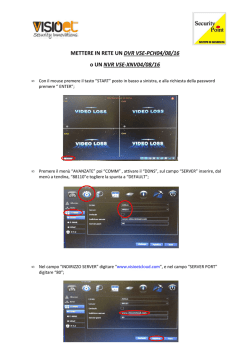
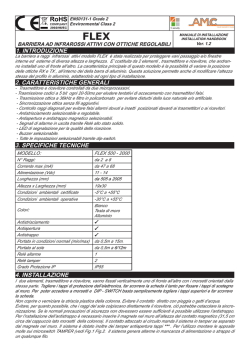
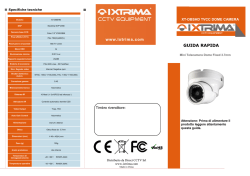
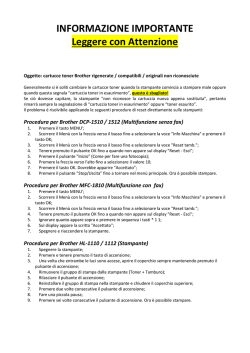
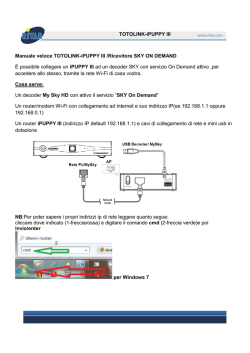
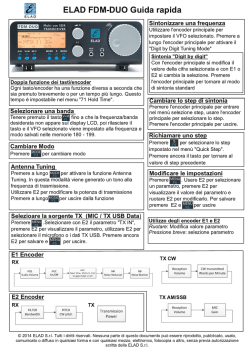
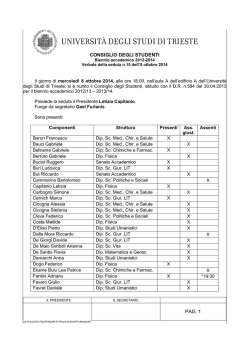
KaController Tipo 3210001, Tipo 3210002, Tipo 3210003, Tipo 3210004
Fig.1
Fig.2
Tipo 3210001 e Tipo 321003
1)
Brevi struzioni / Quick guide
KaController
KaController
KaController comanda l’ampia gamma di sistemi offerti da Kampmann. KaController è
dotato della più moderna tecnologia e offre all’utente la possibilità di climatizzare gli edifici
adattandoli alle esigenze.
The KaController controls the wide range of Kampmann systems. The KaController uses the
latest technology and offers users the possibility to adjust the air conditioning of buildings to
individual needs.
L’ampio Display e il comando con l’unica manopola assicurano a KaController il massimo
livello di comfort nei comandi.
The large display and the single button handling ensure a user-friendly navigation and
maximum comfort.
Tipo 3210002 e Tipo 321004
2)
Prescrizioni di sicurezza
Safety information
L’installazione e il montaggio così come le operazioni di manutenzione sugli
apparecchi elettrici, secondo le prescrizioni VDE, possono essere realizzati solo
da un elettricista. I collegamenti devono essere realizzati secondo le prescrizioni
VDE e quelle del fornitore di energia elettrica cogenti.
Installation, assembly and maintenance of electrical equipment should only be
conducted by a qualified electrician (Association of German Electriciansapproved or similar). Wiring should comply with the current Association of
German Electricians' (VDE) guidelines and regulations set out by the regional
energy supply companies (EVU).
In caso di mancato rispetto delle norme e prescrizioni indicate nel manuale
istruzioni possono verificarsi anomalie di funzionamento con conseguenti danni
materiali e pericoli per l’incolumità delle persone. In caso di collegamento
elettrico errato con l’inversione dei conduttori esiste il pericolo di elettrocuzione!
Non-observance of these guidelines and the operating manual can lead to
malfunctions with subsequent damage to the equipment and risk of personal
injury. Incorrect wiring can result in fatal injury owing to crossed wires!
Prima di procedere al collegamento oppure a qualsiasi operazione di
manutenzione togliere tensione a tutte le parti dell’impianto e assicurarsi che non
possa essere reinserita da terze persone!
3)
Scatola frutto da incasso
Flush-mounted back box
Per KaController deve essere installata una scatola di derivazione a incasso. (vedere fig. 4)).
The KaController has to be installed in a flush-mounted back box (see 4)).
Impostazione dei microinterruttori DIP
DIP switch settings
Attraverso i micro interruttori DIP presenti sulla scheda si imposta il protocollo di comunicazione.
By using the DIP switches on the circuit board you can select the communication protocol.
Per l’impostazione dei microinterruttori DIP è necessario separare la parte dei comandi dalla
base. I microinterruttori DIP si trovano sulla parte posteriore dei (vedere fig. 3).
To set the DIP switches you have to separate the control unit from the basic housing. You
will find the DIP switches on the back of the control unit (see fig.3).
Impostazione dei microinterruttori DIP
DIP switch settings
4)
DIP 1
DIP 2
Protocollo di comunicazione
OFF
OFF
Modbus
ON
OFF
t-LAN:
Venkon / Cassette acqua refrigerata
Katherm
PowerKon NT
Fig.3
Impostazioni di
fabbrica
Factory setting
Fig.4
Prior to all wiring and maintenance work, all parts of the system have to be made
voltage-free and prevented from being reconnected accidentally!
DIP 1
DIP 2
Communication protocol
OFF
OFF
Modbus
ON
OFF
t-LAN:
Venkon / chilled water cassette
Katherm
PowerKon NT
X
Factory setting
X
Ora corrente / Programmi orari
ON1
--:--
--:--
--:--
Martedì
--:--
--:--
--:--
Mercoledì
--:--
--:--
--:--
Giovedì
--:--
--:--
--:--
Venerdì
--:--
--:--
--:--
Sabato
--:--
--:--
--:--
--:--
Time / Timer switching programmes
OFF1 ON2 OFF2
Lunedì
Domenica
Fig.5
Impostazione di fabbrica
--:--
--:--
L’ora corrente compare nella
--:-- visualizzazione base solo dopo la sua
--:-- impostazione nel menu „Impostazione
ora corrente“ (vedere pagina sul retro).
--:-KaController può controllare ogni giorno
--:-2 orari di avviamento e 2 di spegnimento.
--:-La modalità d’impostazione degli orari di
--:-- avviamento e spegnimento è riportata nella
pagina retrostante.
--:--
ON1
OFF1 ON2
OFF2
Monday
--:--
--:--
--:--
Tuesday
--:--
--:--
--:--
Wednesday
--:--
--:--
--:--
Thursday
--:--
--:--
--:--
The time will only be shown on the
--:-- standard display after the current time has
--:-- been set in the menu "time setting" (see
reverse).
--:-The KaController can manage 2 turn-ON
--:-- times and 2 turn-OFF times per day.
Friday
--:--
--:--
--:--
--:--
Saturday
--:--
--:--
--:--
The setting of the turn-ON and turn-Off times
--:-- is shown on the reverse.
Sunday
--:--
--:--
--:--
--:--
Dati tecnici
Tensione di alimentazione
Tipo 3210001Tipo / Tipo 3210002
I385/02/10/1 IT
+0800016ED
Tipo 3210003 / Tipo 3210004
24V AC/DC per comando ambiente 24V Tipo 3210001 e Tipo 3210002
230V AC per comando ambiente 230V Tipo 3210003 e Tipo 3210004
Technical data
Voltage supply
24V AC/DC for operating unit 24V Type 3210001 and Type 3210002
230V AC for operating unit 230V Type 3210003 and Type 3210004
Screw terminals
cable cross-section: up to 1,5 mm
2
Morsetti a vite
Sezione conduttori: fino a 1,5 mm
Grado protezione
IP 30
Cond. di magazzinaggio
-20-70 °C, umidità 10-90 % UR senza formazione di condensa
Cond. di esercizio
0-60 °C, umidità 10-90 % UR senza formazione di condensa
Dimensioni A x L x P
85 x 85 x 29 mm altezza a parete (+30 mm profondità sotto traccia)
2
Protection class
IP30
Storage conditions
-20-70 °C, humidity 10-90% rel. humid. non-condensing
Operating conditions
0-60 °C, humidity 10-90% rel. humid. non-condensing
Dimensions HxWxD
85 x 85 x 29 mm surface-mounted height (+30 mm installation depth box)
KaController Tipo 3210001, Tipo 3210002, Tipo 3210003, Tipo 3210004
Vista
standard
Standard
display
Brevi struzioni / Quick guide
Accendere l’apparecchio
Opzione 1: premere il navigatore
Opzione 2: premere il tasto ON/OFF
Spegnere l’apparecchio
Opzione 1: premere il navigatore per 3 Sec.
Opzione 2: premere il tasto ON/OFF
Opzione 3: ruotare il navigatore verso sx
fino a quando appare OFF
Impostaz. valore consegna temperatura
Opzione 1: ruotare il navigatore
To switch unit ON
Option 1: Press the navigator
Option 2: Press the ON/OFF button
To switch unit OFF
Option 1: Press the navigator for 3 sec.
Option 2: Press the ON/OFF button
Option 3: Turn the navigator to the left
until the display shows OFF
Temperature setpoint setting
Option 1: Turn the navigator
Premere
1X
Impostazione del ventilatore
Opzione 1: ruotare il navigatore
Opzione 2: premere più volte il tasto VENTILATORE
Impostazione
ventilatore
Fan stage
setting
Fan stage setting
Option 1: Turn the navigator
Option 2: Press the FAN button repeatedly
Premere
3 Sec.
1x
In relazione all’applicazione sono possibili diversi
valori d’impostazione del ventilatore:
Venkon (ventilconvettore): valori d’imp.: 1, 2, 3, AUTO
PowerKon NT:
Valori d’impostazione: Stadio potenza, AUTO
Katherm (canali a pavimento):
Valori d’impostazione: 0, 1, 2, 3, 4, 5, AUTO
Cassette acqua refrigerata:
Valori d’impostazione: 1,2,3, AUTO
Impostazione ora corrente
Tramite la pressione e la rotazione del navigatore
s’imposta l’ora corrente.
Impostazione
ora corrente
Time setting
Time setting
Turn and press the navigator to set the current time
Premere
3 Sec.
2x
Depending on the application different fan
stage settings are possible:
Venkon (fan coil): Settings: 1, 2, 3, AUTO
PowerKon NT
Settings: Powerstufe, AUTO
Katherm (floor duct heater)
Settings: 0, 1, 2, 3, 4, 5, AUTO
Chilled water cassette
Settings: 1, 2, 3, AUTO
Sequenza inserimento programma orario
Programmi orari di funzionamento (POF)
Tramite la pressione e la rotazione del navigatore
s’impostano gli orari di funzionamento.
(POF)
Programmi
orari di funz.
Timer switching
programmes
Azione 2
Azione 1
Maschera
POF
Immissione
giorno sett.
Azione 3
Azione 4
Imm.
Ora avv. 1
Imm.
Ora spegn. 1
Main display
TSP
Imm.
N° POF
Timer switching programmes (TSP)
Press the navigator to set the switching times.
Setting timer switching programmes
action 1
action 2
set
weekday
set
TSP no.
action 3
action 4
set
turn-ON time
set
turn-OFF time
Imm.
Ora avv. 2
Imm.
Ora spegn 2
set
turn-ON time
set
turn-OFFtime
Azione 3
Azione 4
action 3
action 4
Premere
3 Sec.
Modi esercizio
Mode setting
1
Display
13
1
2
11
10
2
3
9
4
5
6
1
8
2
7
3
7
8
9
4
5
10
11
6
12
13
I385/02/10/1 IT
+0800016ED
Vis. valore cons. temp. ambiente
Display setpoint room temperature
Ora corrente
Time
Programma orario attivo
Timer switching programme active
Giorno della settimana
Weekday
Allarme
Alarm
Blocco tasti
Key lock
Esercizio Eco
Eco-mode
Inserimento valore consegna attivo
Setpoint setting is active
Impostazione velocità ventilatore
Setpoint fan stage
Modo esercizio ventilatore
Ventilation mode
Modo esercizio raffrescamento
Cooling mode
Modo esercizio riscaldamento
Heating mode
Modo esercizio Automatico (4 tubi)
Automatic mode (4-pipe)
Impostazione modi esercizio
Opzione 1: ruotare il navigatore
Opzione 2: premere più volte il tasto MODE
Per le applicazioni a 2 tubi il punto del menu
„Modi esercizio“ è bloccato, perciò non può essere
richiamato!
Mode setting
Option 1: Turn the navigator
Option 2: Press the MODE button repeatedly
For 2-pipe-applications the „mode“ menu is locked
and can not be selected!
Allarmi PowerKon NT, Katherm
Codice
A 11
A 12
A 13
A 14
A 15
A 16
A 17
A 18
A 19
Allarme
Sonda regolatore difettosa
Guasto motore
Antigelo
Allarme condensato
Allarme generale
Sonda A I1, AI2 o AI3 difettosa
Antigelo apparecchi
EEPROMdifettosa
Offline Slave nella rete CANbus
Alarms PowerKon NT, Katherm
Priorità
1
2
3
4
5
6
7
8
9
Code Alarms
Priority
A11
A12
Control sensor error
Fan error
1
2
A13
Room frost protection
3
A14
Condensate alarm
4
A15
A16
General alarm
Al1, Al2 or Al3 sensor error
5
6
A17
Unit frost protection
7
A18
EEPROM error
8
A19
Offline Slave in CANbus network
9
Allarmi Venkon, cassette acqua refr.
Codice Allarme
Priorità
A 01 EEPROM difettosa
1
A 03 Sonda ambiente difettosa
2
A 04 Sonda B2 o B3 difettosa
3
A 06 Allarme condensato
4
A 07 Guasto motore
5
Alarms Venkon, chilled water cassettes
Allarmi Elettronica KaController
Codice Allarme
tAL1 Sensoretemp. nel KaController difettoso
tAL3 Orologionel KaController difettoso
tAL4 EEPROMnel KaController difettosa
Cn
Comunicaz. con la scheda comando esterna
Alarms Electronic KaController
Code Alarms
A01 EEPROM error
Priority
1
A03 Control sensor error
2
A04 B1, B2 sensor error
A06 Condensate alarm
A07 Fan error
3
4
5
Code Alarms
tAL1 KaController Temperature sensor error
tAL3 KaController real time clock error
tAL4 KaController EEPROM error
Cn
Communication error
© Copyright 2026 Paperzz