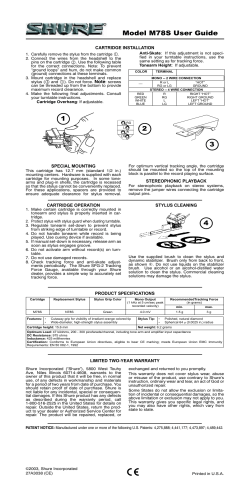
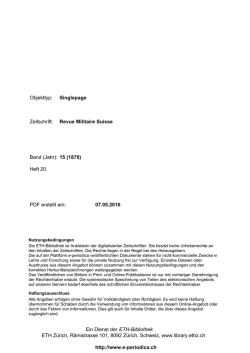
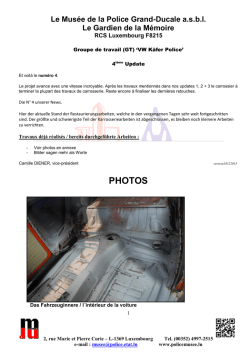
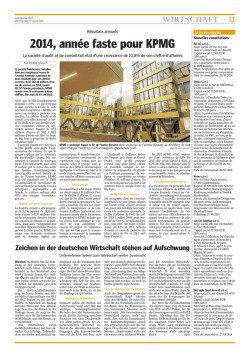
35 and 44 Series
Phono Cartridges
Shure cartridges can be used in DJ or Hi-Fi applications.
Note: The M70BX is not recommended for heavy scratching.
Install Your Cartridge
1. Carefully remove the stylus from the cartridge. See
Figure 1.
2. Use needle-nose pliers to connect the colored wires
from the tonearm headshell to the corresponding
pins on the cartridge. See Table 1 and Figure 2.
HEADSHELL WIRE
COLOR
PIN
RIGHT “HOT”
RED
R
RIGHT GROUND
GREEN
RG
LEFT “HOT”
WHITE
L
LEFT GROUND
BLUE
LG
Figure 1
Table 1. Cartridge Wiring
1. Attach the cartridge to the headshell using the screws
supplied. See Figure 3. Tighten the screws after
positioning the cartridge (and headshell weight, if
desired) according to one of the methods described
below.
2. Carefully insert the stylus into the cartridge.
Figure 2
Figure 3
Choose a Method for Cartridge Positioning
Hi-Fi Setup: For maximum fidelity and minimal record wear, position the cartridge using an alignment
protractor or the overhang gauge supplied with your turntable. Level your tonearm (See Figure 7). Use
Table 2 and “Setting a Precise Tracking Force”, below, to set the typical tracking force for your cartridge.
Set the anti-skate control to the same number as the tracking force.
Figure 4
Standard DJ Setup: Mount cartridge at rear of headshell. Set tonearm height to 4-5. Set tracking force
to 3 grams. Set anti-skate control to 0.
3 grams
4-5
Figure 5
Unorthodox DJ Setup: Reverse the counterweight and mount it flush with the end of the tonearm.
Mount cartridge (with headshell weight) flush with the front edge of the headshell. Set anti-skate
control to 0.
4-5
0
Figure 6
Level Your Tonearm
Extra Skip Resistance for DJ’s:
Mount the cartridge at a 23 degree angle as
shown, so that the cartridge points to the tonearm
pivot. Set anti-skate to 0.
23O
0
Figure 7
©2011 Shure Incorporated
27C3116 (Rev. 5)
Printed in U.S.A.
Setting a Precise Tracking Force
1. After mounting the cartridge on the tonearm,
rotate the circular weight at the back of the
tonearm until the needle floats evenly above
the record.
2. Hold the circular weight in place and rotate
the calibration ring to read zero. The tonearm
should still float evenly above the record.
3. Rotate the weight until the calibration ring
indicates the desired tracking force.
• Clean the stylus with the supplied cleaning
brush. Important: brush from the back to the front
only, as shown in Figure 9.
Care and cleaning
• DJs: Don’t use more tracking force than
necessary to prevent skipping. Excess force will
burn records, damage needles, and reduce sound
quality.
Figure 9
Cartridge
Replacement
Stylus
Stylus Color
Stereo Output (1
KHz at 5 cm/sec
peak recorded
velocity)
Frequency
Response
in Hz
Tracking
force range
(grams)
Typical
Tracking
Force
(grams)
M44-7
N44-7
White
9.5 mV
20 to 20,000
1-3
3
M44G
N44G
Gray
6.2 mV
20 to 20,000
.75-1.5
1.5
M35S
N35S
Chartreuse
5.0mV
20 to 20,000
3-5
4
35X
N35X
White
6.0 mV
20 to 20,000
1.5-3
3
M70BX
N70BX
Beige
.0 mV
20 to 18,000
1.5-3
3
SC35C
SS35S
Light Blue
5.0 mV
20 to 20,000
4-5
4.5
Table 2. Cartridge Specifications
All Cartridges and Styli
• Standard 1/2 Inch mount for DJ turntables
• Wide diameter styli for reduced record wear
Optimum Load: 47 K Ohms, M44: 400-500 pF
M35, M70BX, SC35C: 200-300 pF
Inductance
M44: 720 mH,M35,
SC35C: 425 mH
M70BX: 600 mH
Channel Separation 20 dB at 1KHz
Certification
Conforms to European Union Directives, eligible to bear
CE marking; meets European Union EMC Immunity
requirements: EN 50 082-1, 1992.
Full Two-Years Warranty
Shure Incorporated (“Shure”), 5800 W. Touhy Avenue,
Niles, Illinois 60714-4608, warrants to the owner of this
product that it will be free in normal use of any defects
in workmanship and materials for a period of two years
from date of purchase. You should retain proof of date
of purchase. Shure is not liable for any consequential
damages. If this Shure product has any defects as
described above, carefully repack it and send it prepaid to:
Shure Incorporated, Attention: Service Department, 5800
W. Touhy Avenue, Niles, Illinois 60714-4608. Outside
the United States, return the product to your dealer or
Authorized Service Center for repair. The product will be
repaired or replaced and returned to you promptly. If it
cannot be repaired or replaced, you may elect to receive a
refund. This warranty does not include stylus wear.
Instalación de la cápsula
Las cápsulas Shure pueden utilizarse con equipos
de locutor o de alta fidelidad. Nota: La M70BX no
se recomienda para “rasguñado” intensivo.
1. Quite cuidadosamente la aguja de la cápsula. Vea la
Figura 1.
2. Use alicates de punta para conectar los alambres
del cabezal del brazo con las clavijas de la cápsula,
conforme a la Tabla 1 Vea la Figura 2.
3. Acople la cápsula al cabezal con los tornillos que
se suministran. Vea la Figura 3. Apriete los tornillos
tras colocar la cápsula (y el peso del cabezal, si lo
desea) aplicando uno de los métodos que se indican
a continuación.
4. Introduzca la aguja en la cápsula.
Elección de un método para colocar la cápsula
•Configuración para alta fidelidad (Figura 4):
Para lograr la máxima fidelidad con el mínimo desgaste
del disco, coloque la cápsula con un transportador de
alineación o un medidor de proyección que se suministra
con el tocadiscos. Nivele el brazo (vea la Figura 7).
Consulte la Tabla 2 y el apartado “Ajuste de la fuerza
de seguimiento precisa”, que figura más adelante, para
ajustar la fuerza de seguimiento normal correspondiente
a la cápsula. Ajuste el control antipatinaje a la misma
cifra que la fuerza de seguimiento.
•Configuración estándar para locutores (Figura 5):
Coloque la cápsula en la parte posterior del cabezal.
Ajuste la altura del brazo a 4-5. Ajuste la fuerza de
seguimiento a 3 gramos. Ajuste el control antipatinaje
a 0.
•Configuración no ortodoxa para locutores (Figura
6):Invierta el contrapeso y colóquelo a ras con el
extremo del brazo. Coloque la cápsula (con el peso del
cabezal) a ras con el borde delantero del cabezal. Ajuste
el control antipatinaje a 0.
Nivele el brazo: Vea la Figura 7
Ajuste de una fuerza de seguimiento precisa
1. Tras colocar la cápsula en el brazo, gire el peso
circular situado en la parte posterior del brazo hasta
que la aguja flote uniformemente por encima del disco.
2. Sujete en su sitio el peso circular y gire el anillo
graduador hasta que indique el valor cero. El brazo
deberá seguir flotando uniformemente por encima del
disco.
3. Gire el peso hasta que el anillo graduador indique la
fuerza de seguimiento deseada.
Resistencia adicional al patinaje para locutores
Coloque la cápsula a un ángulo de 23 grados, como se
indica, de modo que la cápsula apunte al pivote del brazo.
Ajuste el control antipatinaje a 0. Vea la
Figura 8.
Cuidado y limpieza
1. Locutores: No emplee una fuerza de seguimiento
superior a la necesaria para evitar el patinaje. Una
fuerza excesiva quema los discos, daña las agujas y
reduce la calidad del sonido.
2. Limpie la aguja con el cepillo que se suministra.
Importante: Cepille únicamente de atrás hacia
adelante. Vea la Figura 9
Certificaciones
Cumple las directrices de European Union, califica para
llevar las marcas CE; cumple los requisitos de inmunidad
y compatibilidad electromagnética de European Union: EN
50 082-1, 1992.
Garantía de dos años
Shure Incorporated (“Shure”), 5800 W. Touhy Avenue,
Niles, Illinois 60714-4608, EE.UU., garantiza al propietario
de este producto que el mismo estará libre de defectos de
fabricación y materiales cuando se utiliza de modo normal
por un plazo de dos años a partir de la fecha de compra.
Conserve el comprobante de compra. Shure no se hace
responsable por daños consecuentes. Si este producto
Shure tiene defectos dentro de las condiciones arriba
descritas, embale cuidadosamente la unidad y envíela
porte pagado a: Shure Incorporated, Attention: Service
Department, 5800 W. Touhy Avenue, Niles, Illinois 607144608, EE.UU. Fuera de los EE.UU., devuelva la unidad al
distribuidor más cercano o al centro de servicio autorizado
de productos Shure para su reparación. La unidad se
reparará o sustituirá y se le devolverá oportunamente. En
caso de no poder repararse ni sustituirse, puede solicitar
la devolución del importe de compra. Esta garantía no
cubre el desgaste de la aguja.
Installation des Tonabnehmers
Shure-Tonabnehmer können für DJ- oder Hi-FiAnwendungen verwendet werden. Hinweis: Der M70BX
wird nicht für starkes „Scratching“ empfohlen.
1. Die Abtastnadel vorsichtig aus dem Tonabnehmer
entfernen. Siehe Abbildung 1.
2. Mit einer Nadelzange wie in Tabelle 1 angeführt
die Drähte vom Tonarmkopf an den Stiften auf dem
Tonabnehmer anschließen. Siehe Abbildung 2.
3. Den Tonabnehmer mit den mitgelieferten Schrauben
am Tonarmkopf befestigen. Siehe Abbildung 3. Die
Schrauben nach dem Ausrichten des Tonabnehmers
(und ggf. des Tonarmkopfgewichts) anhand einer der
unten beschriebenen Methoden festziehen.
4. Die Abtastnadel in den Tonabnehmer einführen.
Auswahl einer Methode zur Plazierung des
Tonabnehmers
•Hi-Fi-Einrichtung (Abbildung 4): Für höchste
Klangtreue und minimalen Verschleiß der Schallplatte
den Tonabnehmer mit einer Überhangmeßschablone
oder einer Überhangjustierlehre (im Lieferumfang
des Plattenspielers enthalten) plazieren. Den Tonarm
nivellieren (siehe Abbildung 7)Die für den Tonabnehmer
übliche Auflagekraft anhand von Tabelle 2 und
„Einstellung einer genauen Auflagekraft“ weiter unten
einstellen. Den Antiskating-Regler auf den gleichen Wert
wie die Auflagekraft einstellen.
•Standardmäßige DJ-Einrichtung (Abbildung 5):
Den Tonabnehmer an der Rückseite des Tonarmkopfs
befestigen. Die Tonarmhöhe auf 4-5 einstellen. Die
Auflagekraft auf 3 g einstellen. Den Antiskating-Wert auf
0 einstellen.
•Unkonventionelle DJ-Einrichtung (Abbildung 6):
Das Gegengewicht umdrehen und bündig mit dem
Ende des Tonarms anbringen. Den Tonabnehmer (mit
dem Tonarmkopf) bündig mit der Vorderkante des
Tonarmkopfs anbringen. Den Antiskating-Wert auf 0
einstellen.
Nivellierung des Tonarms: Siehe Abbildung 7.
Einstellung einer genauen Auflagekraft
1. Nach der Montage des Tonabnehmers auf dem
Tonarm das runde Gewicht an der Rückseite des
Tonarms solange drehen, bis die Nadel gleichmäßig
über der Schallplatte schwebt.
2. Das runde Gewicht festhalten, und den Eichring
auf Null drehen. Der Tonarm sollte immer noch
gleichmäßig über der Schallplatte schweben.
3. Das Gewicht solange drehen, bis der Eichring die
gewünschte Auflagekraft anzeigt.
Zusätzlicher Überspringwiderstand für DJs
Den Tonabnehmer wie dargestellt in einem Winkel
von 23 Grad montieren, damit der Tonabnehmer auf
das Tonarmgelenk zeigt. Den Antiskating-Wert auf 0
einstellen. Siehe Abbildung 8
Pflege und Reinigung
1. DJs: Nicht mehr Auflagekraft verwenden als
notwendig, um ein Überspringen der Nadel zu
vermeiden. Zu hohe Auflagekraft brennt Schallplatten,
beschädigt Nadeln und reduziert die Tonqualität.
2. Die Abtastnadel mit der mitgelieferten
Reinigungsbürste reinigen. Wichtig: Nur von hinten
nach vorne bürsten. Siehe Abbildung 9.
Zertifizierung
Entspricht den Richtlinien der Europäischen Union,
zum Tragen des CE-Zeichens berechtigt; erfüllt
die Anforderungen der Europäischen Union für
elektromagnetische Verträglichkeit: EN 50 082-1, 1992.
BEGRENZTE GEWÄHRLEISTUNG
Shure Incorporated („Shure“), 5800 W. Touhy Avenue,
Niles, Illinois 60714-4608, USA garantiert dem Besitzer
dieses Produkt für einen Zeitraum von zwei (2) Jahren
ab Kaufdatum, daß es bei sachgemäßem Gebrauch
frei von Material- und Herstellungsfehlern ist. Ein Beleg
des Kaufdatums sollte aufbewahrt werden. Shure haftet
nicht für Folgekosten. Wenn dieses Shure-Produkt
irgendwelche der oben genannten Mängel aufweist,
das Gerät wieder sorgfältig verpacken und portofrei
einsenden an: Shure Incorporated, Attention: Service
Department, 5800 W. Touhy Avenue, Niles, Illinois
60714-4608 Außerhalb der Vereinigten Staaten muß
das Produkt zur Reparatur an den Händler oder eine
Vertragskundendienstzentrale zurückgebracht werden.
Das Produkt wird repariert oder umgetauscht und Ihnen
umgehend zurückgesendet. Wenn es nicht repariert
oder umgetauscht werden kann, können Sie sich für
eine Rückerstattung des Kaufpreises entscheiden.
Diese Gewährleistung umfaßt nicht die Abnutzung der
Abtastnadel.
Installation de la cellule
Les cellules Shure peuvent être utilisées dans les
applications DJ ou Hi-Fi. Remarque : la M70BX n’est pas
recommandée en cas de scratching intensif.
1. Avec précaution, retirer la pointe de lecture de la
cellule. Voir Figure 1.
2. Utiliser une pince à bec fin pour brancher les fils de la
coquille du bras de lecture aux broches de la cellule
conformément au Tableau 1. Voir Figure 2.
3. Fixer la cellule à la coquille avec les vis fournies. Voir
Figure 3
4. Serrer les vis après avoir positionné la cellule (et la
masse de la coquille, le cas échéant) en appliquant
l’une des méthodes décrites ci-dessous. Insérer la
pointe de lecture dans la cellule.
Choix d’une méthode de positionnement de la cellule
•Configuration Hi-Fi (Figure 4) : Pour maximiser la
fidélité et minimiser l’usure des disques, positionner
la cellule à l’aide du rapporteur d’alignement ou de la
jauge de dépassement fourni(e) avec la platine. Mettre
le bras de lecture à niveau (voir figure 7). Se reporter au
tableau 2 et à la rubrique «Réglage d’une force d’appui
précise» ci-dessous pour régler la force d’appui type de
la cellule. Régler l’antiskating à la même valeur que la
force d’appui.
•Configuration DJ standard (Figure 5) : Monter la
cellule à l’arrière de la coquille. Régler la hauteur du bras
de lecture à 4-5 et la force d’appui à 3 grammes. Régler
l’antiskating à 0.
•Configuration DJ spéciale (Figure 6) : Retourner le
contrepoids et le monter à ras de l’extrémité du bras de
lecture. Monter la cellule (et la masse de la coquille) à
ras du bord avant de la coquille. Régler l’antiskating à 0.
Mise à niveau du bras de lecture : Voir figure 7.
Réglage d’une force d’appui précise
1. Après avoir monté la cellule sur le bras de lecture,
faire tourner la masse circulaire qui se trouve à l’arrière
de celui-ci jusqu’à ce que la pointe de lecture flotte
uniformément au-dessus du disque.
2. Maintenir la masse circulaire en place et tourner
l’anneau d’étalonnage jusqu’à ce qu’il indique zéro. Le
bras de lecture doit continuer à flotter uniformément
au-dessus du disque.
3. Tourner la masse jusqu’à ce que l’anneau
d’étalonnage indique la force d’appui désirée.
Résistance accrue au saut pour applications DJ
Monter la cellule à un angle de 23 degrés comme illustré
de façon à ce qu’elle soit orientée vers le pivot du bras de
lecture. Régler l’antiskating à 0. Voir Figure 8
Entretien et nettoyage
1. Applications DJ : Ne pas utiliser une force d’appui
supérieure à celle qui est nécessaire pour éviter à
la cellule de sauter. Une force excessive brûle les
disques, endommage les pointes de lecture et diminue
la qualité sonore.
2. Nettoyer la pointe de lecture avec la brosse fournie.
Important : brosser d’arrière en avant uniquement. Voir
Figure 9.
Homologation
Conforme aux directives de l’Union européenne, autorisé
à porter la marque CE ; conforme aux spécifications
d’immunité CEM de l’Union européenne : EN 50 082-1,
1992.
Garantie totale de deux (2) ans
Shure Incorporated («Shure»), 5800 W. Touhy Avenue,
Niles, Illinois 60714-4608, États-Unis, garantit au
propriétaire de ce produit que, pour un usage normal,
ce produit est exempt de défauts de matériaux ou de
fabrication pour une période de deux ans, à compter de
la date d’achat. Conserver la preuve de la date d’achat.
Shure n’est pas responsable pour les dommages-intérêts
indirects. Si ce produit Shure présente un des défauts
décrits plus haut, le remballer soigneusement et le
retourner en port payé à : Shure Incorporated, Attention:
Service Department, 5800 W. Touhy Avenue, Niles, Illinois
60714-4608 U.S.A. A l’extérieur des États-Unis, renvoyer
le produit à réparer à un distributeur local ou à un centre
de réparation agréé. Le produit sera réparé ou remplacé
et sera retourné au plus tôt. S’il ne peut être ni réparé ni
remplacé, le propriétaire pourra choisir de recevoir un
remboursement. Cette garantie ne couvre pas l’usure
de la pointe de lecture. Shure Incorporated http://www.
shure.com
カートリッジの取付け方
DJ用のスキップ防止の特別取付け
ShureカートリッジはDJまたはHi-Fi用に使用できます。
メモ: M25Cは、ヘビー・スクラッチにはお勧めできません。
1. スタイラスをカートリッジから注意して取外します。
図1を参照。
2. 先の細いペンチを使用し、表1に従ってフイヤをトー
ンアーム・ヘッドシェルからカートリッジのピンに
接続します。図2を参照。
3.
付属のねじを使用してカートリッジをヘッドシェルに
取付けます。図3を参照。以下に説明のいずれかの
方法で、カートリッジ(希望する場合はヘッドシェ
ル・ウェイトも含む)を所定の位置に設定してから
ねじで締めます。
4. スタイラスをカートリッジに差し込みます。
カートリッジは図のように23度の角度で取付け、トーンア
ームのピボッド部分に向くようにします。アンチスケーテ
ィングは0に設定します。図8を参照。
取扱いとクリーニング
1. DJ: 針がとばないよう、必要以上のトラッキング・フ
ォースは使用しないでください。力を入れすぎると
レコードが焼けて針が傷み、音質が劣化します。
2. スタイラスは付属のクリーニング・ブラシできれい
にします。重要: 必ず、後から前に向かってブラシを
かけます。図9を参照。
認証
カートリッジの位置設定方法の選択
•
Hi-Fi設定(図4): 最高の忠実度を再現し、レコ
ードの損傷を最小限にするため、アライメント分度器ま
たはターンテーブル付属のオーバーハング計器を使用し
てカートリッジの位置を設定します。トーンアームは水
平にしてください(図7参照)。下の表2および「正確なト
ラッキング・フォースの設定」を参照し、カートリッジの
典型的なトラッキング・フォースを設定します。アンチ
スケーティング制御の数値はトラッキング・フォースと
同じ数値にします。
•
標準的なDJ設定(図5): カートリッジをヘッド
シェルの裏に取付けます。トーンアームの高さは4~5、
トラッキング・フォースは3グラム、アンチスケーティン
グは0に設定します。
•
特殊なDJ設定(図6): カウンターウェイトを逆
にし、トーンアームの端に揃えて取付けます。カートリ
ッジ(ヘッドシェル・ウェイトを含む)をヘッドシェル
の前方の端に揃えて取付けます。アンチスケーティング
制御は0に設定します。
トーンアームを水平にする: 図7を参照
欧州連合指令に適合、CEマークに適格、欧州連合EMC免除
要件対応:EN50 082-1,1992年。
2年間完全保証
Shureは、本製品は通常の使用において材質・製造ともに
欠陥がないことを購入日から2年間保証いたします。保証
期間中に製品が破損した場合、修理や交換、払い戻しなど
の詳細について、米国のお客様は1-800-516-2525までお
電話でお問い合わせください。ヨーロッパのお客様は、
Shure Incorporated Europe GMBH、+49 (7131)7214-0ま
たは+49 (7131)7214-30(サービスホットライン)までお
電話で、またはShure認可代理店までお問い合せくださ
い。本保証は、製品の濫用や誤用、またはShureの使用説
明書に反する使用、自然の消耗、天災、不正修理には適
用されません。
正確なトラッキング・フォースの設定
1. カートリッジをトーンアームに取付けたら、トーン
アームの後のサーキュラ・ウェイトを回転させ、針
がレコード上で均等に浮動するようにします。
2. サーキュラ・ウェイトを所定の位置に維持し、較正
リングを回転して0にします。この時もトーンアーム
は、レコード上で均等に浮動していなければなりま
せん。
3. ウェイトを回転させ、較正リングを理想のトラッキ
ング・フォースにします。
拾音头安装说明
舒尔的拾音头可以用于DJ或Hi-Fi音效场合。
注:M25C不建议使用于重沙音磁迹。
1. 将唱针从拾音头小心地取出。见图1。
2. 依照表1,利用针头型钳子,把电线从磁头壳唱
臂连接到拾音头的枢轴上。见图2。
3. 用所附螺钉将拾音头安装到磁头壳。见图3。利
用以下说明的方法之一使拾音头定位之后(若
需要,也定好磁头壳配重),再拴紧螺钉。
4. 将唱针插入拾音头。
选择定位拾音头的方法
•
Hi-Fi设定(图4):为了达到最高的原
音重现度和最低的唱片磨损度,用准直分度
器或随转盘所附外伸量规,将拾音头定位(
见图7)。利用表2和以下的“设定精确的针
压”说明内容,为拾音头设定常用的针压。
防滑控制数值设在与针压相同的值。
•
标准DJ设定(图5):拾音头安装到磁
头壳的后侧。唱臂高度设到4-5。针压设定为
3公克,防滑值设定为0。
•
特殊DJ设定(图6):把配重反转,并
将其对齐唱臂末端安装。把拾音头(包括磁
头壳配重)对齐磁头壳前端安装。防滑值设
定为0。
唱臂放平:见图7。
设定精确的针压
1. 拾音头安装到唱臂之后,旋转唱臂后方的圆形
配重,直至唱针在唱片上方维持均匀的间隙。
2. 将圆形配重保持在一定位置,然后旋转校准
环,使读值为0。此时,唱臂仍应在唱片上方维
持均匀的间隙。
3. 旋转配重,直至校准环显示所要的针压。
DJ用特别防滑安装
如图所示,将拾音头以23度角安装,使拾音头指向
唱臂的支点。防滑值设定为0。见图8。
维护与清洁
1. DJ:为了防止跳针,针压不要超过必要
值。过高的针压会烧坏唱片,使唱针受损,
也使音效降低。
2. 用所附清洁刷清洁唱针。重要:只能从
背面向正面轻轻地刷。见图9。
鉴定认准
符合欧盟指令,可贴CE标记,符合欧盟EMC豁免条
件:EN 50 082-1, 1992。
全面两年保修
Shure(舒尔公司)谨保证此产品自购买之
日起两(2)年内在材料和制作方面均无瑕
疵。如果您购买的舒尔产品在保修有限期内
发生故障,在美国境内请拨 1–800–516–
2525,了解关于修理、更换或退款的详细说
明。在欧洲,请联系 Shure Incorporated
Europe GMBH,电话号码是 +49 (7131)
7214–0 或 +49 (7131) 7214–30(服务热
线),或联系舒尔授权的经销商。此保修不
包括滥用或误用 产品、违反舒尔的产品使用
说明、正常磨损和损坏、天灾损坏或未获授
权的擅自修理等情况。
United States, Canada, Latin America, Caribbean:
5800 W. Touhy Avenue, Niles, IL 60714-4608, U.S.A.
Phone: 847-600-2000 U.S. Fax: 847-600-1212 Int’l Fax: 847-600-6446
Europe, Middle East, Africa:
Shure Europe GmbH, Phone: 49-7131-72140 Fax: 49-7131-721414
Asia, Pacific:
Shure Asia Limited, Phone: 852-2893-4290 Fax: 852-2893-4055
© Copyright 2026 Paperzz